
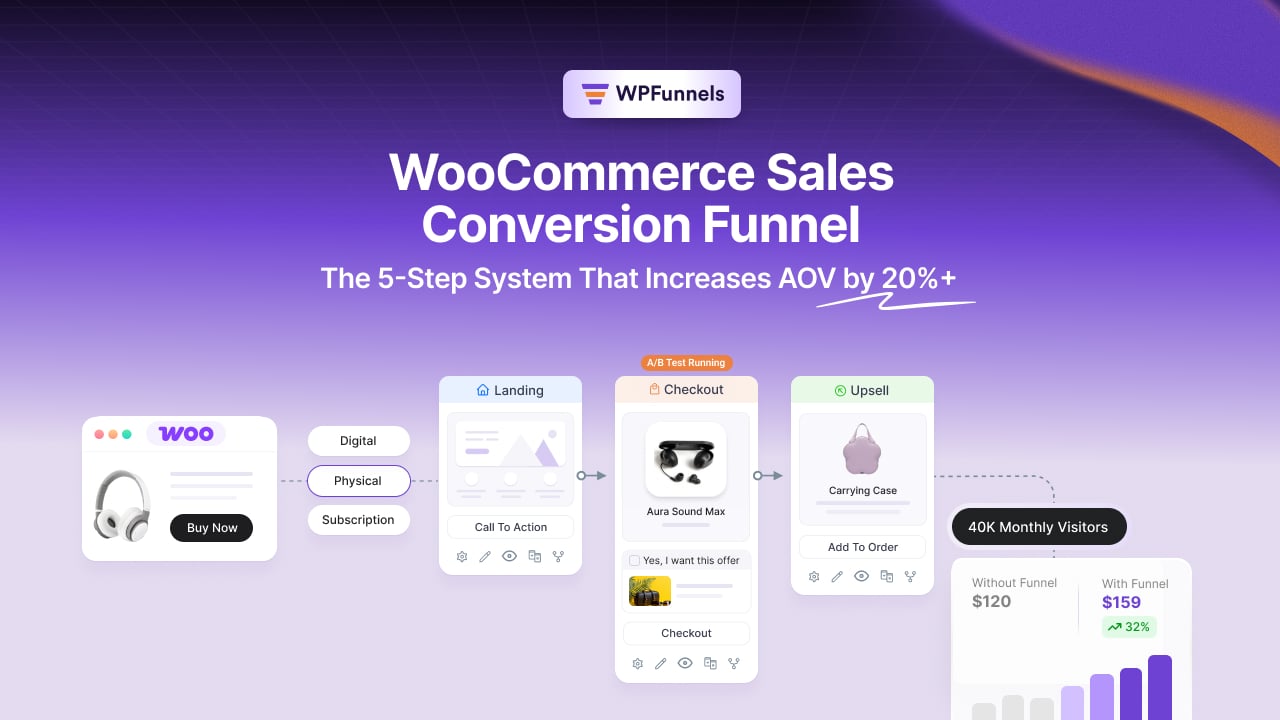

Did you know you could increase your WooCommerce store’s average order value by 20% or more without touching ads or increasing traffic?
As a WooCommerce store owner, you’d think you could grow revenue by doubling down on traffic, right? WRONG!
More visitors don’t automatically mean more revenue!
You could run more ads, invest in SEO, or spend more time bringing people to your WooCommerce store. But that doesn’t guarantee more revenue. In fact, if people are dropping off before or during checkout, you’re simply sending more traffic into the same leaks.
But then, how are successful WooCommerce stores getting more from every customer?
Is it because they have more traffic and bigger ad budgets? NO.
The answer is hiding inside the buying journey you already have.
And it’s so simple that once you see how it works, you’ll probably ask yourself, “Why wasn’t I doing this already?”
But before we get into that, let me show you where your WooCommerce store could be losing revenue right now.
Quick Answer
A sales conversion funnel for a WooCommerce store is the exact path a buyer takes from product page to thank-you page: product page framing, an order bump, frictionless checkout, a one-click upsell, and post-purchase nurture. Stack just the order bump and the upsell, and you can realistically lift average order value by 20% or more.
TL;DR – WooCommerce Sales Conversion Funnel
- Your funnel already exists. It’s your product page, cart, checkout, and thank-you page. Not a separate marketing system you build from scratch.
- 70% of carts get abandoned before checkout finishes. That’s why fixing checkout beats adding more top-of-funnel content.
- Order bumps alone can lift AOV by 10-30%. And that’s before you touch the post-purchase upsell.
- Stack an order bump with a one-click upsell, and you land on the 20%+ number in this article’s title. I’ll show the math below.
- Two of these five steps matter far more than the other three, at least this week. There’s a real order of operations here.
- You can build all five steps inside WordPress, without hiring a developer, using a checkout-native funnel builder.
What a Sales Conversion Funnel Actually Means for a WooCommerce Store
For a WooCommerce store, a sales conversion funnel is simply the path someone takes from finding a product to completing a purchase.
That usually means the product page, cart, checkout, and thank-you page.
You can use labels like Awareness, Interest, Consideration, and Decision to describe that journey. But inside your store, those stages aren’t abstract marketing concepts. They’re actual pages where people either keep moving forward or leave.
Key Takeaway: Your sales conversion funnel isn’t something separate you build alongside your WooCommerce store. It’s the buying journey already happening inside it.
And when that journey isn’t converting, the problem usually isn’t “more content.”
It’s figuring out where people are dropping off and what that specific page is missing.
Why WooCommerce Carts Actually Get Abandoned, and Which Step Fixes Each Reason
Put that 70% together with the average ecommerce conversion rate, which sits around 2.5-3% globally right now, according to Red Stag Fulfillment’s 2025 numbers.
Out of 100 people who add something to their cart, about 70 never finish. Out of 100 people who just visit your site, maybe 2 or 3 ever buy anything at all.
The usual response to a flat revenue chart is more ad spend, more content, more traffic.
That’s the expensive fix…
The cheaper one sits right between “added to cart” and “order confirmed.” You don’t need more visitors if you can get more revenue out of the ones you already have.
Good to Know I’ve gone deeper on why traffic alone won’t fix a stalled WooCommerce store, if you want the full breakdown: Why More Traffic Won’t Fix Your WooCommerce Revenue.
Baymard has actually broken that 70% down by reason, and it’s worth a look, because it tells you exactly which step below to fix first.
People can name more than one reason on their way out, so don’t expect these to add up to 100%.
The single biggest one is unexpected costs. Shipping, tax, some fee that shows up out of nowhere at checkout. 48% of US shoppers name that as their main reason for bailing.
A checkout that’s too long or too complicated costs you another 22%. A missing payment method costs 13%. And flat-out errors, a page that just breaks, account for 17%.
| Abandonment Reason | Share of Shoppers | Step That Fixes It |
|---|---|---|
| Unexpected extra costs at checkout | 48% | Step 1 (price honestly up front) and Step 2 (position the order bump as an add-on, not a surprise) |
| Checkout too long or complicated | 22% | Step 3 (cut unnecessary form fields) |
| Preferred payment method missing | 13% | Step 3 (add another payment option) |
| Website errors or crashes | 17% | Worth a technical audit alongside these five steps, even though it sits outside this article’s scope |
The gap gets even wider on mobile, where abandonment runs closer to 80% against roughly 70% on desktop.
A lot of your traffic is arriving on a phone whether you’ve designed for that or not, so the checkout fixes in Step 3 carry more weight than they used to.
“Conversion funnel optimization” sounds like some vague, never-ending project.
It isn’t…
It’s five specific points in your store, each needing one specific fix. The table above tells you which one to start with, if you already know why people are leaving.
The Order That Actually Works if You Don’t Have Abandonment Data Yet
Not all five steps deserve your attention this week, especially if you’re the one building this around everything else you already do.
If you don’t have your own abandonment data yet, here’s the order I’d build in, ranked by setup time against how much it actually moves revenue.
The order bump goes first. It’s the fastest thing to set up, it works on almost any product, and the revenue lands within days, not after some multi-week traffic experiment.
The one-click upsell is second. Same idea, checkout-adjacent, high margin, doesn’t take long, but the lift is smaller and it needs its own page.
Checkout cleanup comes third. It won’t make you a dollar on its own.
What it does is stop the money the first two steps already made from leaking back out the door.
A full visual funnel, with its own landing pages and conditional logic, is fourth. It costs more time, and it pays off more once the easier wins are already live.
Templates are the shortcut if you want that structure without spending a weekend designing it.
For example, let’s actually run the numbers instead of just asserting them. Say your store does 200 orders a month at a $60 average order value, a fair baseline if you’re in the $20-$150 range. That’s $12,000 a month before any of this.
That’s a conservative order bump number, not the top of the published range, plus an average 4% upsell take rate. It still clears 20%.
Pro Tip Better yet, run this on your own numbers instead of mine. Take your monthly orders, multiply by your actual AOV, and that’s your baseline.
Add 15-25% to your AOV for the order bump, since the published range runs 10-30%. Then add another 2-5% for the upsell, based on its usual 4% take rate.
Whatever that new AOV comes out to, run it through your real order count. That’s your number, not a hypothetical one.
Bottom Line: Two of the five steps do almost all the work here. Build the order bump first, the upsell second, and you’re already past the 20% this article is named for.
Remember, this table is a model, not a promise. Your real lift depends on your price point, your traffic, and whether the offer actually fits what someone just bought.
Track your own before-and-after once it’s live. That’s the number that actually matters.
Good to know: If AOV as a metric is new to you, I’ve covered what it measures and why it matters more than raw traffic for most WooCommerce stores here: What Is AOV And Why It’s Crucial for WooCommerce Revenue Growth?
That’s the order, and why. Now let’s get into what each of these five steps actually looks like once you build it.
The 5-Step Sales Conversion Funnel System for WooCommerce Stores
Now that we’ve covered the reasoning behind the order, let’s look at what each of these five steps actually looks like inside a WooCommerce store.
Step 1: Product Page Framing That Sets Up the Order Bump and Upsell to Come
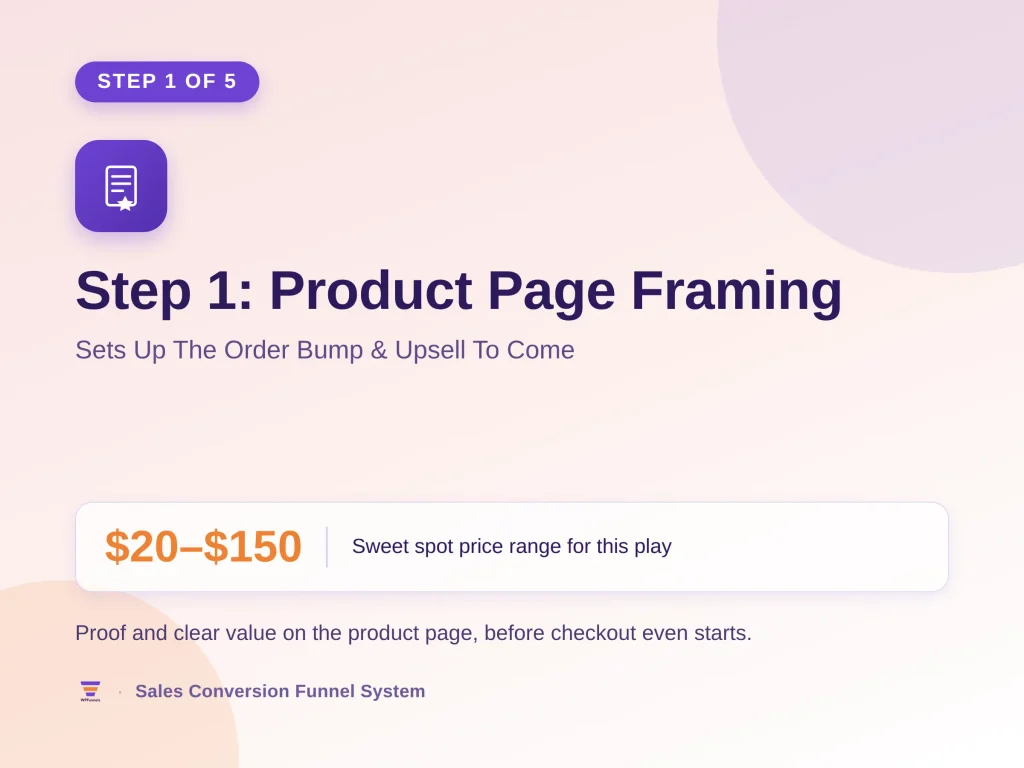
A blog post from three weeks ago isn’t what sells your product. For a WooCommerce shopper, the actual selling happens on the product page itself, in the two or three seconds before they hit “Add to Cart.”
And what convinces them there isn’t more copy.
It’s proof. A real review, a clear description of what the thing actually does for them, a price that makes sense next to whatever they’re comparing it to.
If you’re selling somewhere in the $20-$150 range, which covers most of you reading this, the product page is also where you quietly plant the order bump and upsell that show up later.
A “frequently bought together” line, or a hint that a bundle exists at checkout, does that job. You’re not selling the add-on yet.
You’re just making sure it doesn’t feel like a surprise two steps from now.
Once the product page has done its job, checkout is next. And that’s where the order bump lives.
Step 2: The Order Bump That Lifts AOV by 10-30% at Checkout
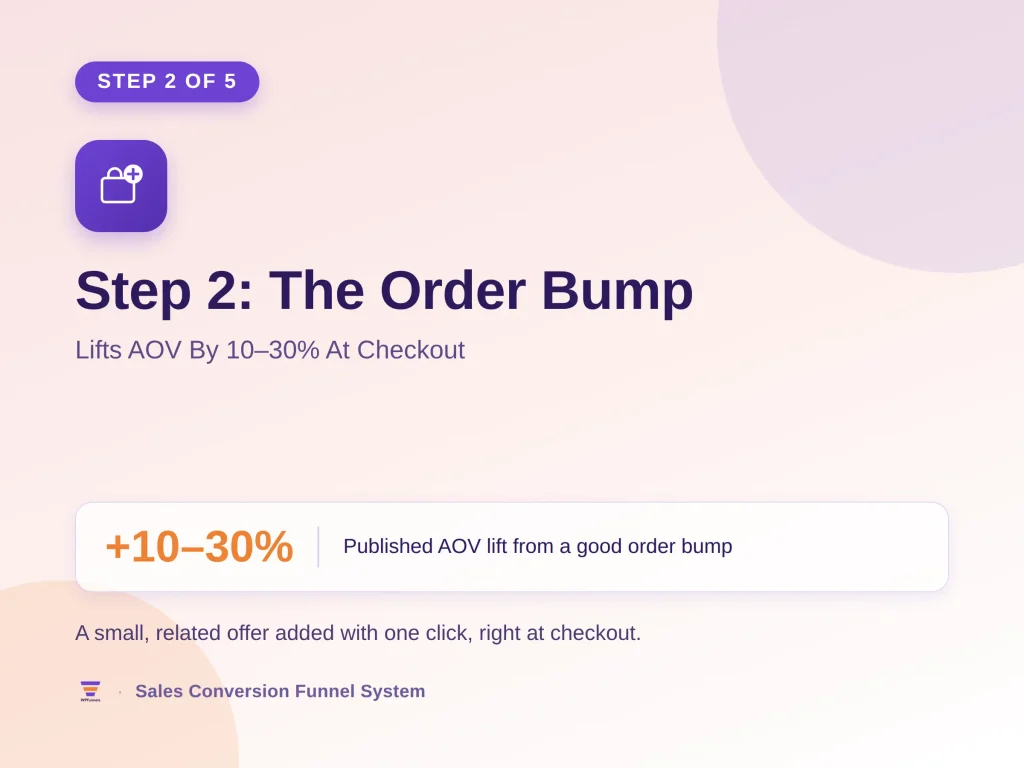
If I had to pick one change from this entire system, it’d be the order bump. Highest leverage, lowest effort, full stop.
It’s the small, related offer that shows up right on the checkout page, a complementary product, a warranty, a bigger size, something a buyer can add with one click without ever leaving checkout.
Published numbers put the AOV impact of a good order bump at 10-30%. It works for a simple reason: timing.
The buyer has already decided to pay you, so adding $8 to a $60 order they’re already completing is a much smaller ask than convincing a stranger to buy in the first place.
If you’ve never built any of this before, start here. It’s the least work, and it shows up in your numbers the fastest.
Good to Know: Order bump performance swings a lot by type and pricing. I’ve broken down the specific types that convert best, with pricing guidance: What Types of Order Bump Increase AOV in eCommerce
An order bump only works if people actually make it to checkout in the first place, which is the next problem.
Step 3: Frictionless Checkout That Protects the Revenue From Steps 1 and 2
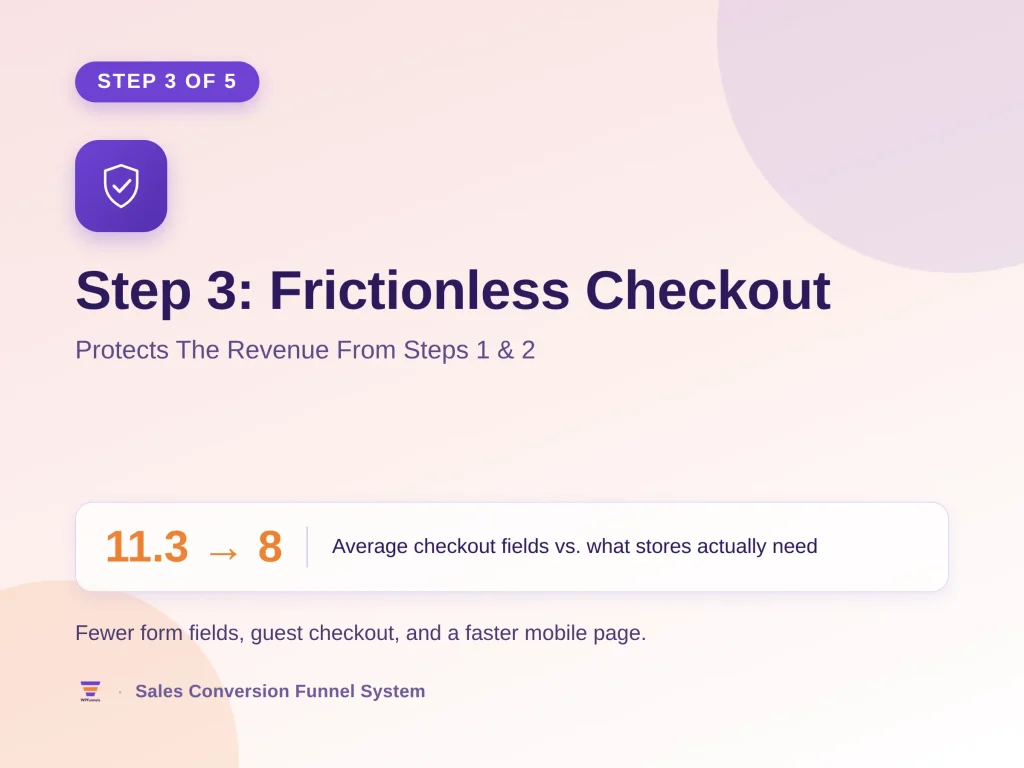
Every field on your checkout form gives someone a reason to stop and reconsider. Baymard’s research puts the average checkout at 11.3 form fields, when most stores only need around 8 to actually get the order through.
Here’s what actually fixes it:
- Cut fields you don’t strictly need. Every field past that roughly 8 is one more chance for a shopper to hesitate.
- Offer guest checkout, since forcing account creation is one of the more common reasons people list for walking away mid-checkout.
- Add a second payment option if you only offer one right now. Baymard found 13% of abandonments happen specifically because a shopper’s preferred method wasn’t there.
- Make sure the page loads fast on mobile. Abandonment there runs closer to 80% against roughly 70% on desktop, so speed matters more here than almost anywhere else in your funnel.
This step won’t add revenue the way an order bump does. What it does is protect the revenue the first two steps already made, by keeping more people from bailing before they finish.
Good to Know: I’ve laid out a full checkout audit checklist here: 10 WooCommerce Checkout Optimization Strategies
Once checkout’s clean, the next opportunity shows up right after the sale closes, not before it.
Step 4: The One-Click Upsell That Turns One Sale Into Two
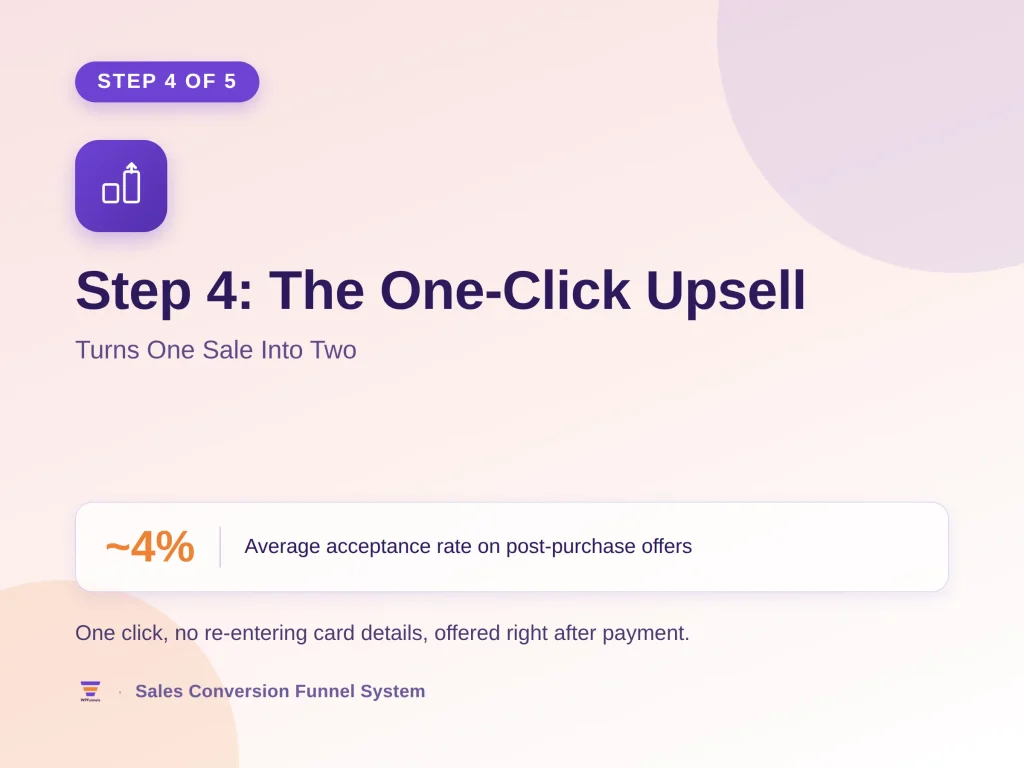
This is the offer that appears after payment is confirmed, on its own page between checkout and the thank-you page.
A complementary product, a bigger quantity, a premium version, added with one click and no re-entering card details.
It’s the same mechanic that made Amazon’s post-purchase upsell famous, and it works for the same reason the order bump does: the buyer already said yes once. One-click upsells convert at a lower rate than order bumps, though.
Published figures put the average acceptance rate around 4%, with stronger offers reaching into the double digits. Since there’s no cart friction involved, no re-typing card numbers, it’s close to pure margin on every order that takes it.
For layout inspiration on the offer page itself, this roundup of post-purchase upsell page examples is worth a look.
Good to Know I’ve written a full setup walkthrough for this exact step: Guide To Creating WooCommerce One Click Upsell For Increased AOV
The sale’s closed, the upsell’s offered. What happens in the days after is what turns a one-time buyer into a repeat one.
Step 5: Post-Purchase Nurture That Turns One-Time Buyers Into Repeat Customers
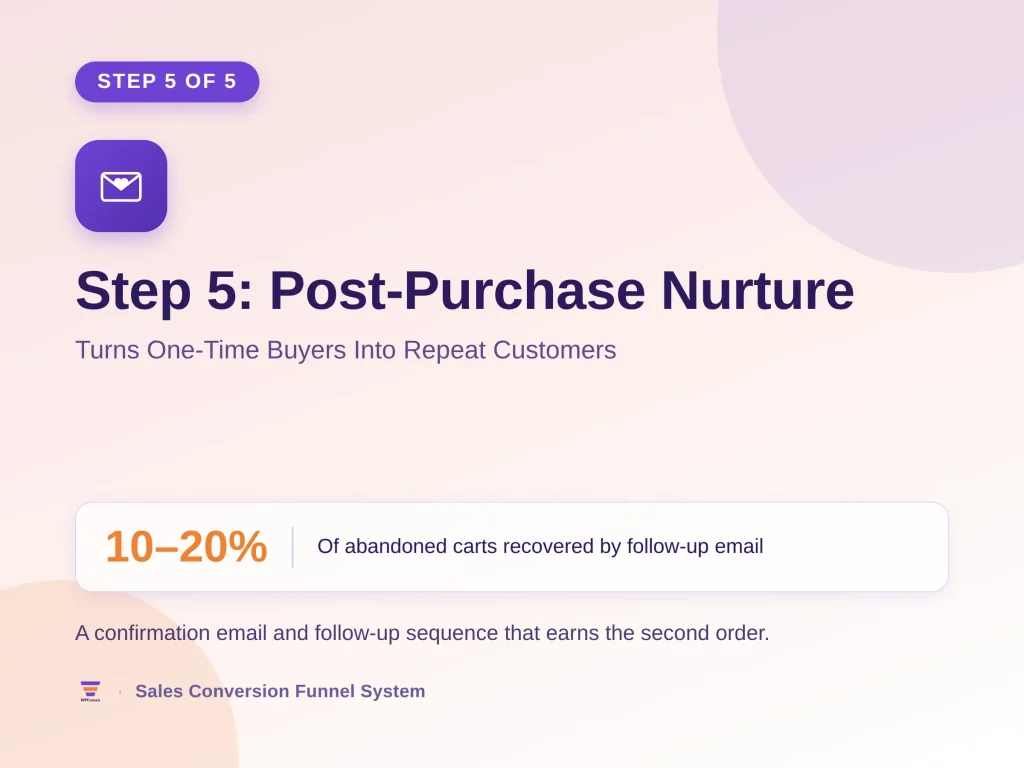
The funnel doesn’t end at the thank-you page. A confirmation email, a follow-up sequence that’s actually useful, a light nudge toward a second purchase, all of that feeds straight into repeat orders and customer lifetime value.
That matters more the tighter your acquisition costs get. This is where you start optimizing for someone’s second and third order, not only their first.
The same automation that runs this nurture sequence can also catch people who abandoned before finishing checkout at all.
Recovery email conversion estimates vary depending on who you ask, somewhere between 10% and 20% of abandoned carts, but that’s still worth automating once the five steps above are live.
Good to Know Automated follow-up sequences are their own topic worth getting right: Automated Follow-Up Email Automation
All five steps live on pages you already own. So the next question is how you actually build them without hiring a developer.
Building the Full 5-Step Funnel Inside WordPress With WPFunnels, Step by Step
Everything above can be built without writing a line of code, using WPFunnels, a WordPress funnel builder made specifically for WooCommerce checkouts rather than a general page builder with funnel features bolted on. Here’s exactly how, one click at a time.
Build Step 1. Create the Funnel
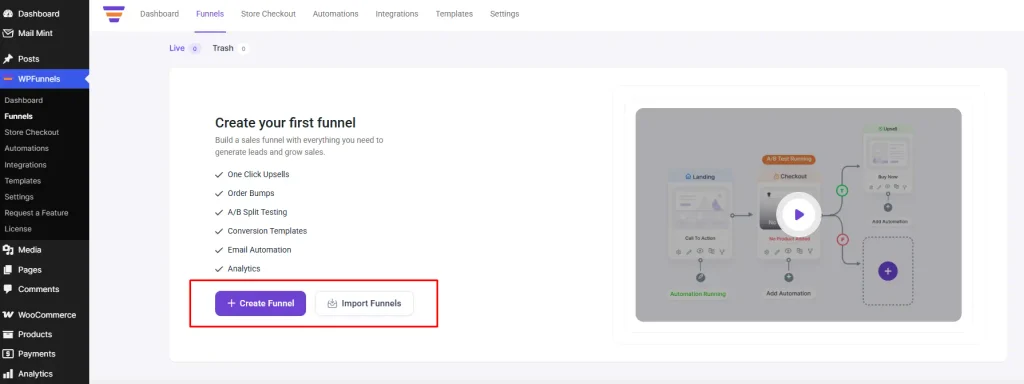
Go to WordPress Admin → WPFunnels → Funnels. If this is your first funnel, click Create Your First Funnel.
If you already have others, look for Add New Funnel in the top-right corner instead.
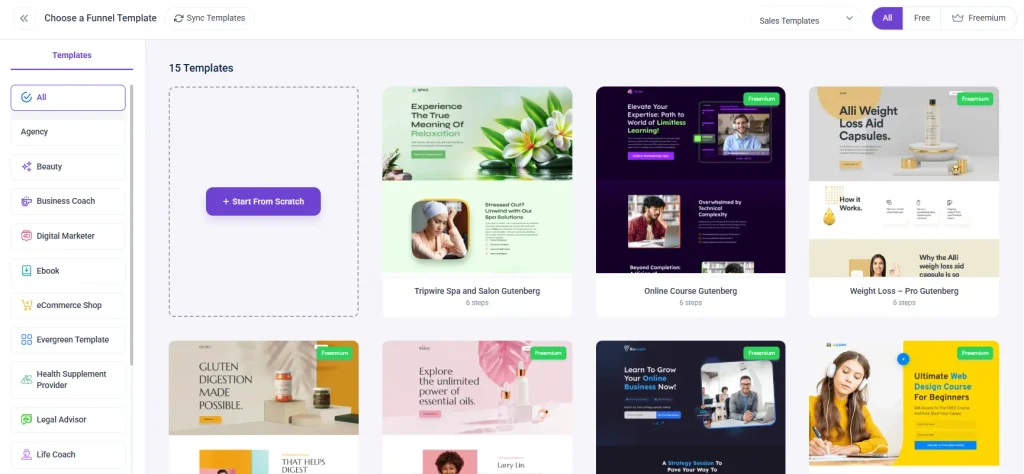
Pick a template close to what you’re selling, or start from scratch, then give the funnel a name. Either way, you’ll land on the visual canvas with your funnel steps laid out in front of you.
Build Step 2. Build Your Product Page
This is where Step 1 of the AOV system, product page framing, actually gets built.
On the canvas, click the Landing step (or whichever step holds your product page), then click Edit to open it in your page builder of choice: Elementor, Gutenberg, Divi, Oxygen, or Bricks all work.
Add your headline, your proof (a review, a star rating, a product photo), and a clear path to “Add to Cart.” User-focused content design can also help make sure the information and layout guide shoppers toward the next step. Save the page once it looks right.
Build Step 3. Add Your Product to the Checkout Page
Click the Checkout step on the canvas, then open its settings. You’ll land on the Products tab.
Search for your product by name, select it, and click Add Product. Save your changes, and that product is now what people actually pay for on this page.
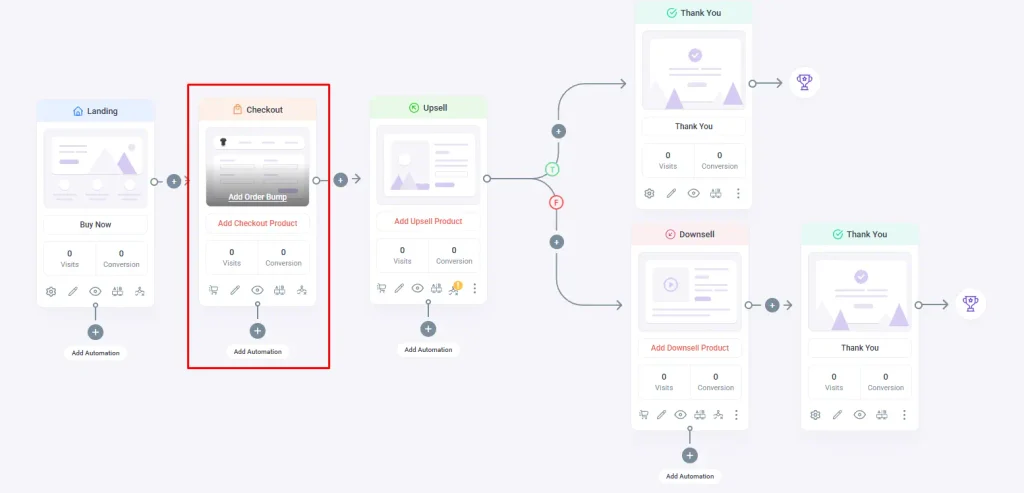
Build Step 4. Add the Order Bump
Still inside the Checkout step’s settings, click over to the Order Bump tab and click Add Order Bump.
Pick a smaller, related product, then write the offer in the buyer’s own voice, something like “Yes, add [Product] to my order for just $[X].”
Set the discount type (Original, Percentage, or Flat Amount) and choose where the offer sits on the page. Save it, and this is the mechanism the 10-30% AOV lift in this article comes from.
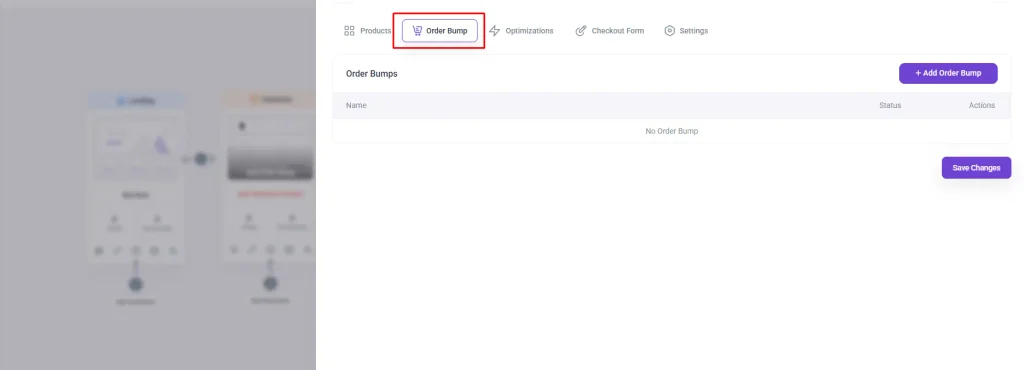
Build Step 5. Clean Up the Checkout Fields
From the same checkout settings, click the Checkout Form tab. You’ll see three sections: Billing Fields, Shipping Fields, and Additional Fields.
For anything you don’t strictly need, like a shipping address on a digital product, switch its status toggle off or click the trash icon to remove it completely.
This is the lever that pulls your checkout down from the 11.3-field average toward the roughly 8 fields most orders actually require.
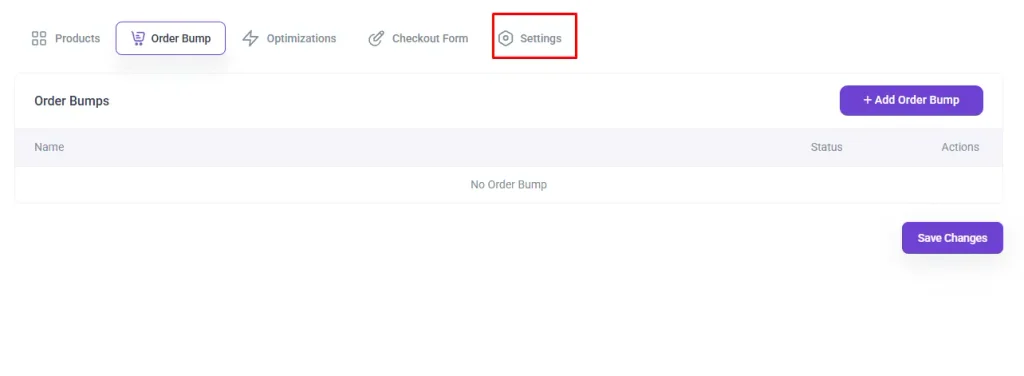
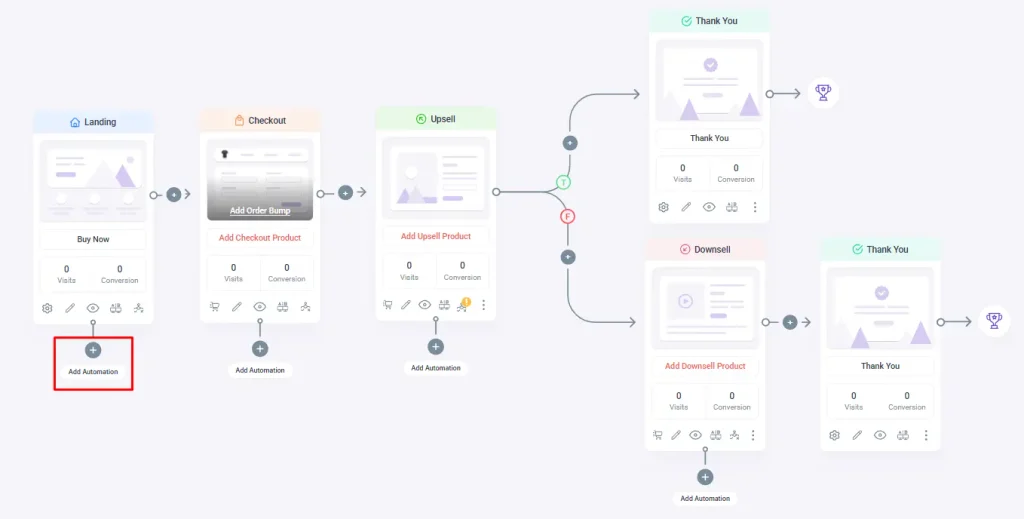
Build Step 6. Add the One-Click Upsell Step
On the canvas, click the step icon right after Checkout, then choose Upsell (or Downsell for a cheaper fallback offer).
Assign the offer product and set its price the same way you set up the order bump. This is what turns Step 4 of the AOV system, the post-purchase upsell, from an idea into a live page.
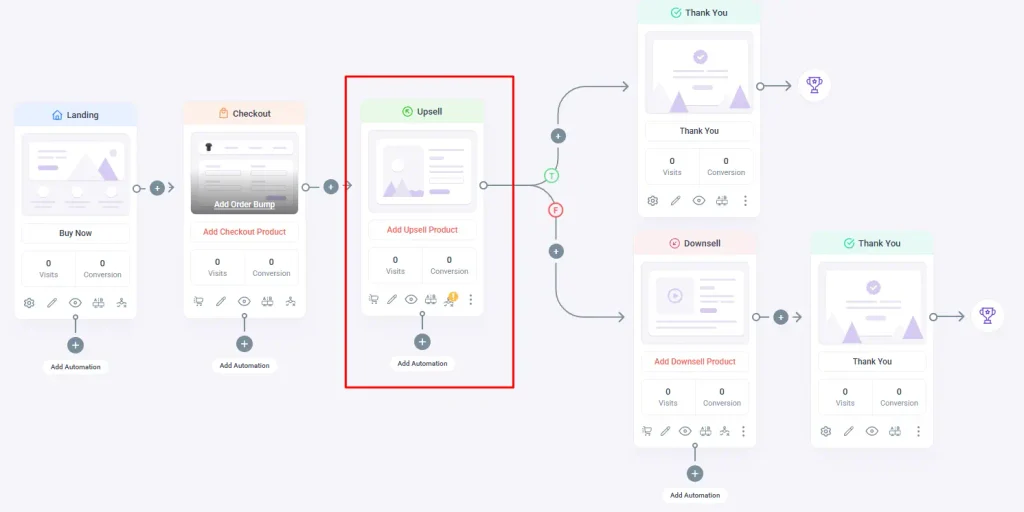
Build Step 7. Connect Mail Mint for Post-Purchase Nurture
On the canvas, click the plus icon below the step where the purchase completes, then choose CTA Triggered as the trigger. This fires the moment someone finishes checkout.
Add an Email Sequence action and search for the nurture campaign you’ve already built in Mail Mint.
Once you save, you’ll see Automation Running on that step, confirming Step 5 of the system is live.
Build Step 8. Check Your Numbers in Funnel Analytics
Once your funnel is live, open its analytics from the WPFunnels dashboard. You’ll see Gross Sales, Average Order Value, Order Bump Revenue, Upsell Sales, and Conversion Rate at every individual step.
Compare your own AOV before and after against the worked example earlier in this article, using your real numbers instead of the modeled $60 baseline.
That comparison, not the model, is what actually tells you whether this is working for your store.
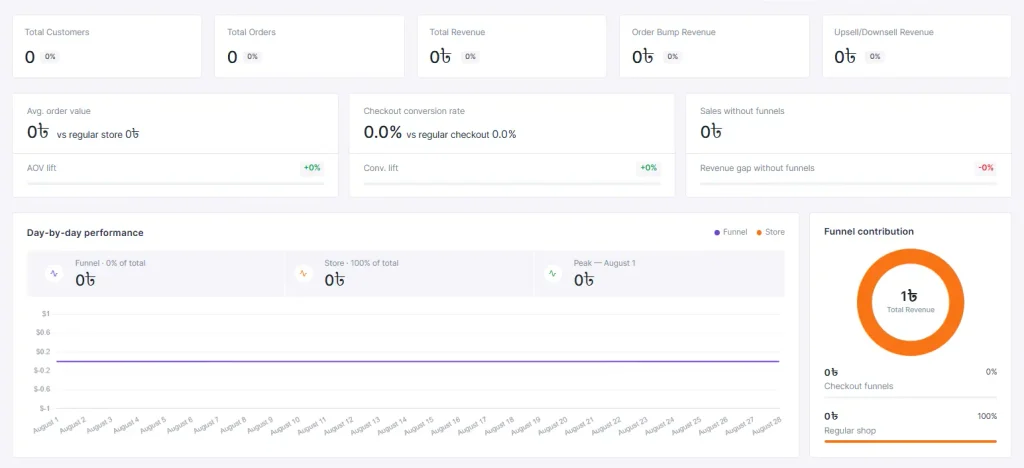
Good to Know: Every one of these steps has its own walkthrough with screenshots in the docs, starting here: Create Your First Sales Funnel and Detailed Analytics Within WPFunnels.
WPFunnels has a free version on the WordPress plugin repository if you want to test the order bump and basic funnel builder first. The Pro version adds the one-click upsell, A/B testing, and conditional funnel logic once you’re ready to build the complete five-step system.
Final Thoughts: Where to Start Building This Week
The fastest path to more revenue from a WooCommerce store that already has decent traffic isn’t a new marketing channel. It’s making sure the checkout you already have is actually doing its job.
Start with the order bump this week. It’s the smallest amount of setup on this whole list, and the clearest line from “I built this” to “revenue went up.”
Add the one-click upsell once the bump is live and you’ve got a baseline AOV to measure against. Checkout cleanup, a full visual funnel, templates, all of that is worth doing after, as polish on top of a foundation that’s already working.
Bottom Line: If you only do one thing after reading this, build the order bump. Everything else in this system compounds on top of it.
Frequently Asked Questions
What’s the fastest way to increase funnel conversions without more traffic?
Fix what happens after someone’s already added something to their cart. An order bump and a one-click upsell both turn existing checkout traffic into higher-value orders without needing a single additional visitor, which is why they’re the first two steps here rather than the last two.
What software tools are recommended for managing a sales conversion funnel?
For a WooCommerce store, you want a funnel builder that handles order bumps, one-click upsells, and funnel analytics natively. WPFunnels covers all three, and Mail Mint handles the post-purchase nurture emails.
General page builders can build individual pages fine, but they don’t usually track conversion rate stage by stage the way a purpose-built funnel tool does.
Where can I find templates for building an effective sales conversion funnel?
Most dedicated WordPress funnel builders, WPFunnels included, ship with pre-built funnel templates you can import and customize instead of designing from a blank page. These are worth using for the visual funnel step specifically.
The order bump and upsell offers themselves still need to reflect your actual product catalog. No template can do that part for you.
How do I calculate my sales conversion funnel rate?
Track the number of visitors who complete each step against the number who entered it: conversion rate = (conversions divided by visitors at that stage) times 100. Do this per stage, product page to cart, cart to checkout, checkout to completed order, since one blended number hides which stage is actually leaking revenue.
Pro Tip: Skip the manual math: the Free eCommerce Conversion Rate Calculator does this per stage automatically.
What’s the difference between a sales funnel and a marketing funnel for a WooCommerce store?
A marketing funnel covers how someone finds out about you at all, through ads, content, social, before they ever land on your site. A sales conversion funnel starts once they’re on your site with buying intent, from product page through order confirmation.
Every AOV gain in this article comes from the sales conversion funnel side, since that’s where a buyer is already reaching for their wallet.
What should I look for in a WordPress funnel builder?
Native order bump and one-click upsell support, a visual view of your whole funnel path, per-stage analytics so you can actually see where drop-off happens, and WooCommerce compatibility specifically rather than a generic funnel tool retrofitted onto it. If it can’t show you conversion rate at each individual step, you’re optimizing blind.

Comments are closed.



Comments (1)
Solid insights here.