You can create Monthly Recurring Email Campaigns in Mail Mint very easily.
By leveraging the power of recurring campaigns, you can effectively engage with your subscribers over time and send them the latest newsletters, blog posts, new product arrivals, etc.
In this guide, we’ll walk you through the simple steps to create and send Monthly Recurring Email Campaigns.
Step 1: Create A Regular Email Campaign
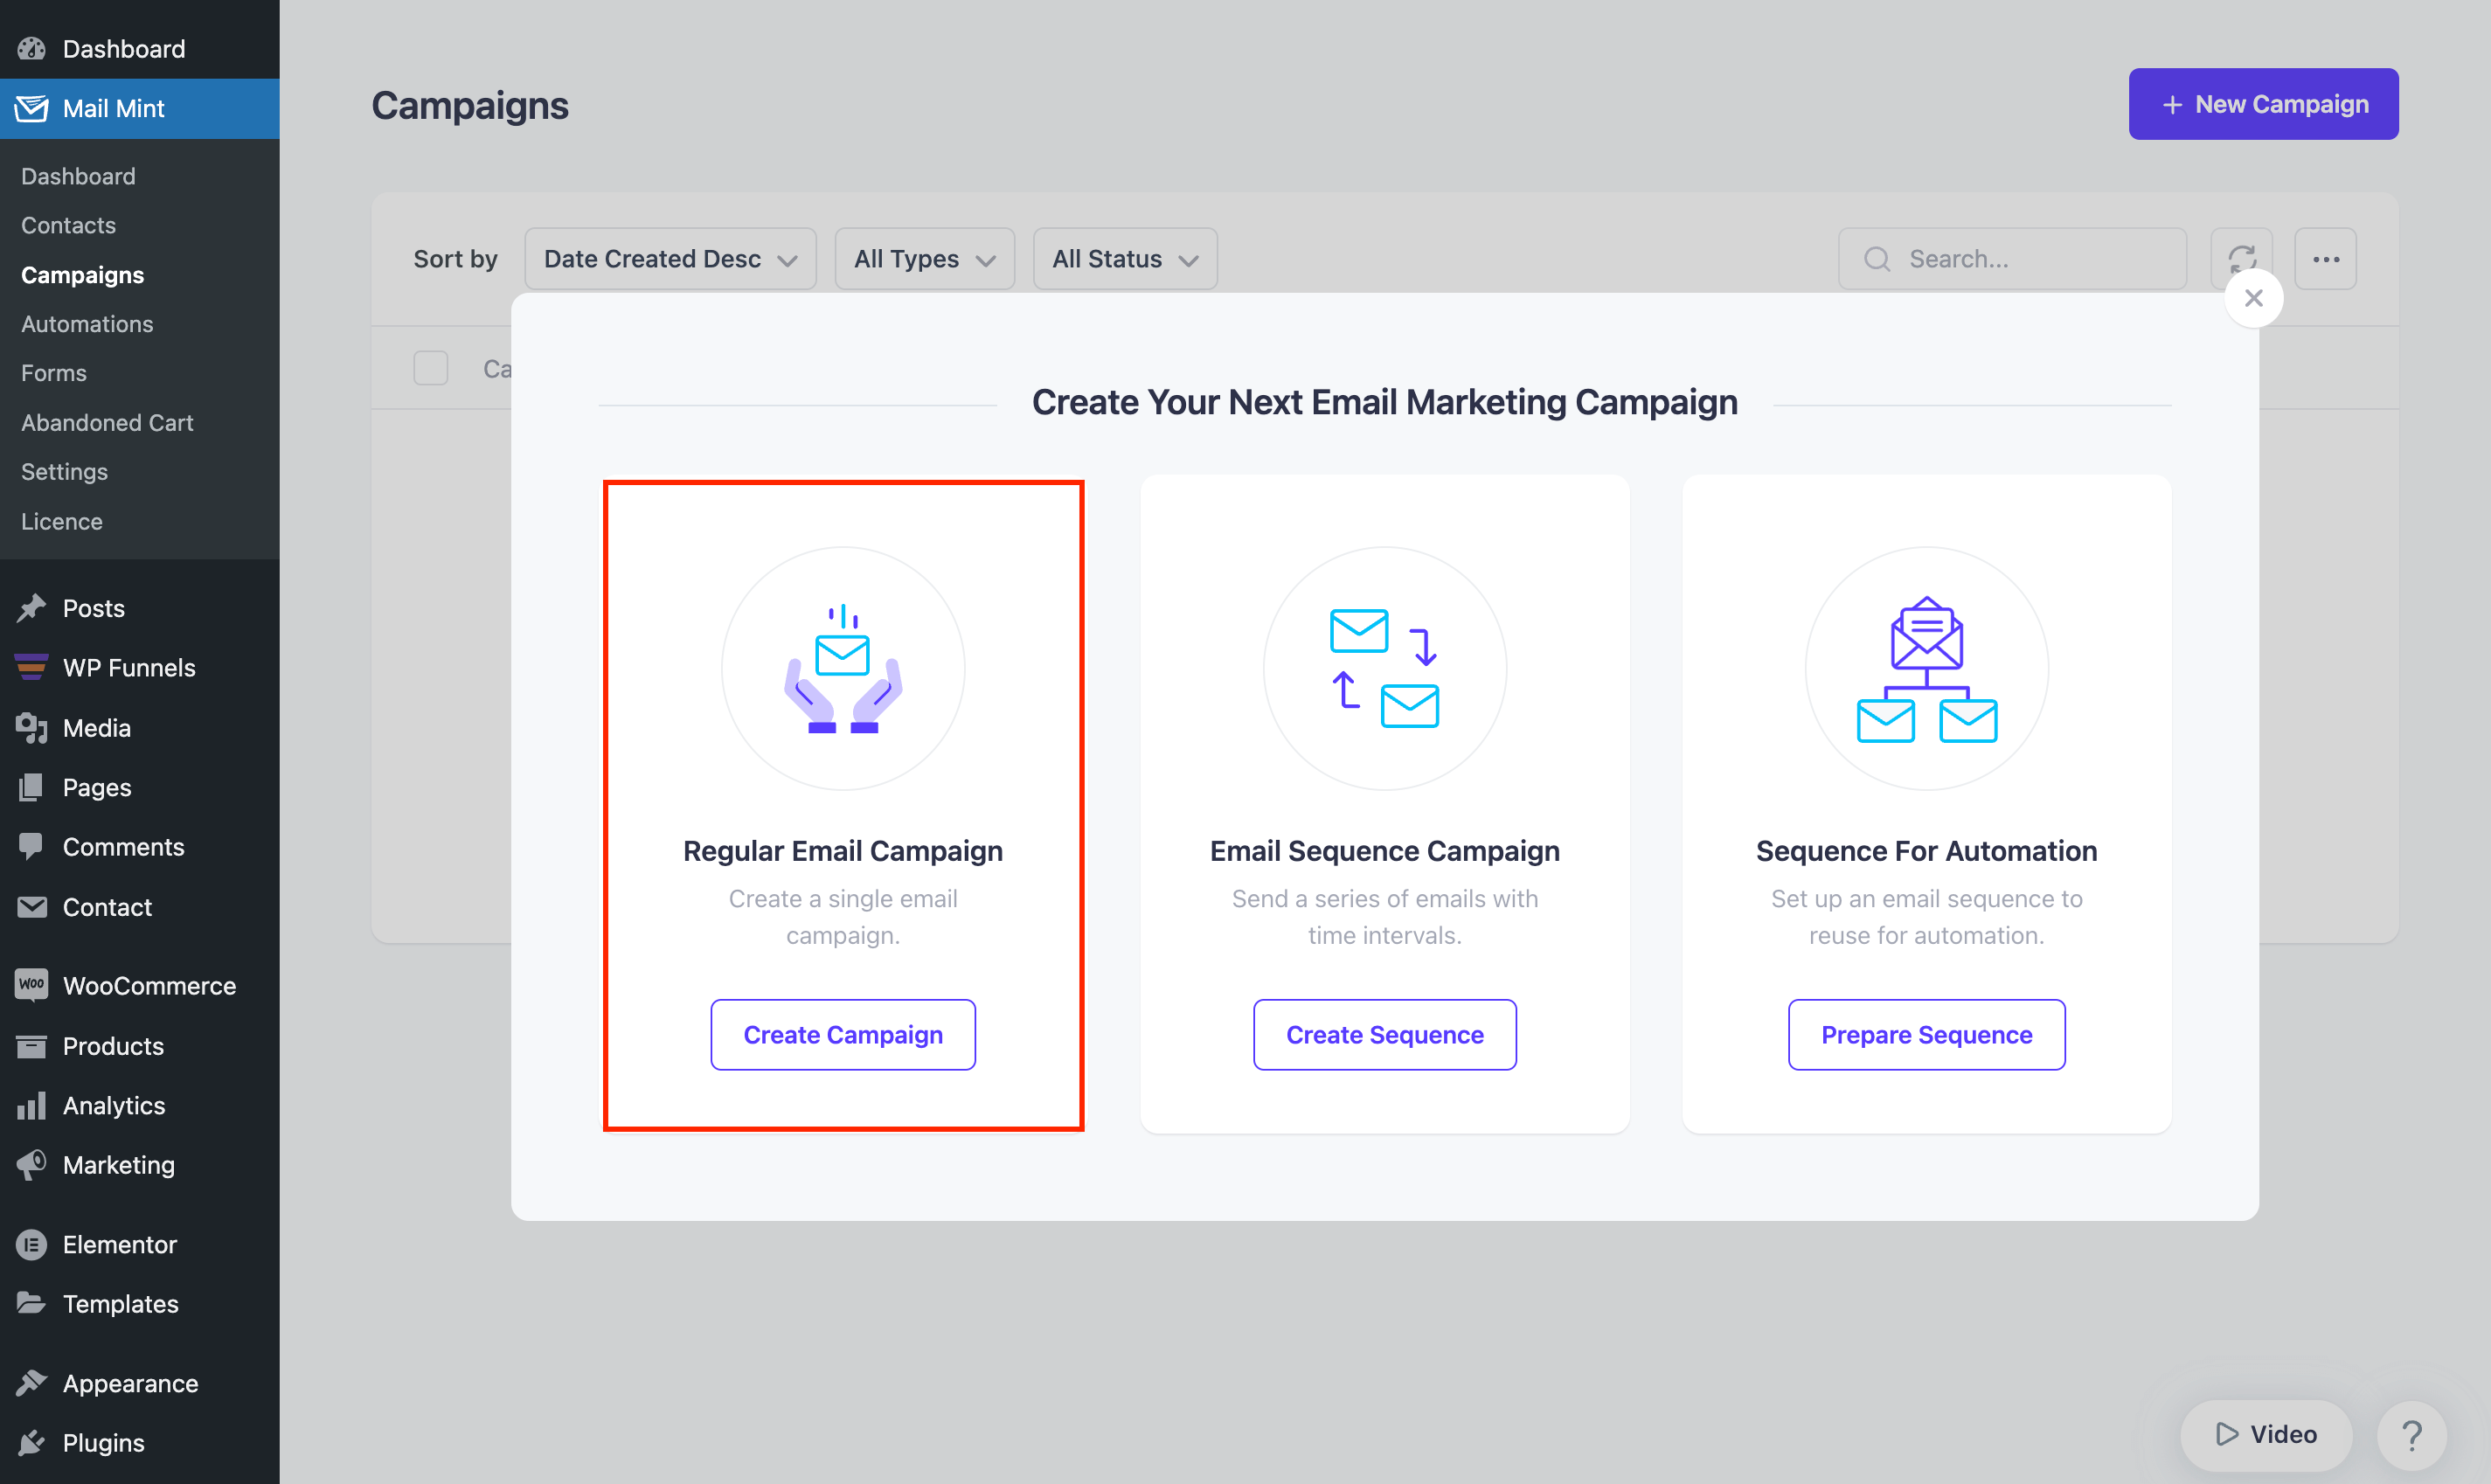
1. First, go to Mail Mint > Campaigns module and select “+ New Campaign“.

Once you click on this, a popup will appear. You’ll find three options there –
- Regular Email Campaign
- Email Sequence Campaign
- Sequence For Automation
2. On the campaign creation window, select the “Regular Email Campaign“. This will allow you to send recurring emails over a predefined period.

Step 2: Set Up the Campaign Details
1. Provide a name for your campaign to help you identify it later. And then add the necessary information for your campaign.

3. Now, click on “Edit Your Template” to finalize the email design. You can either create an email design from scratch or use a pre-made template.

Step 3: Design Your Recurring Email
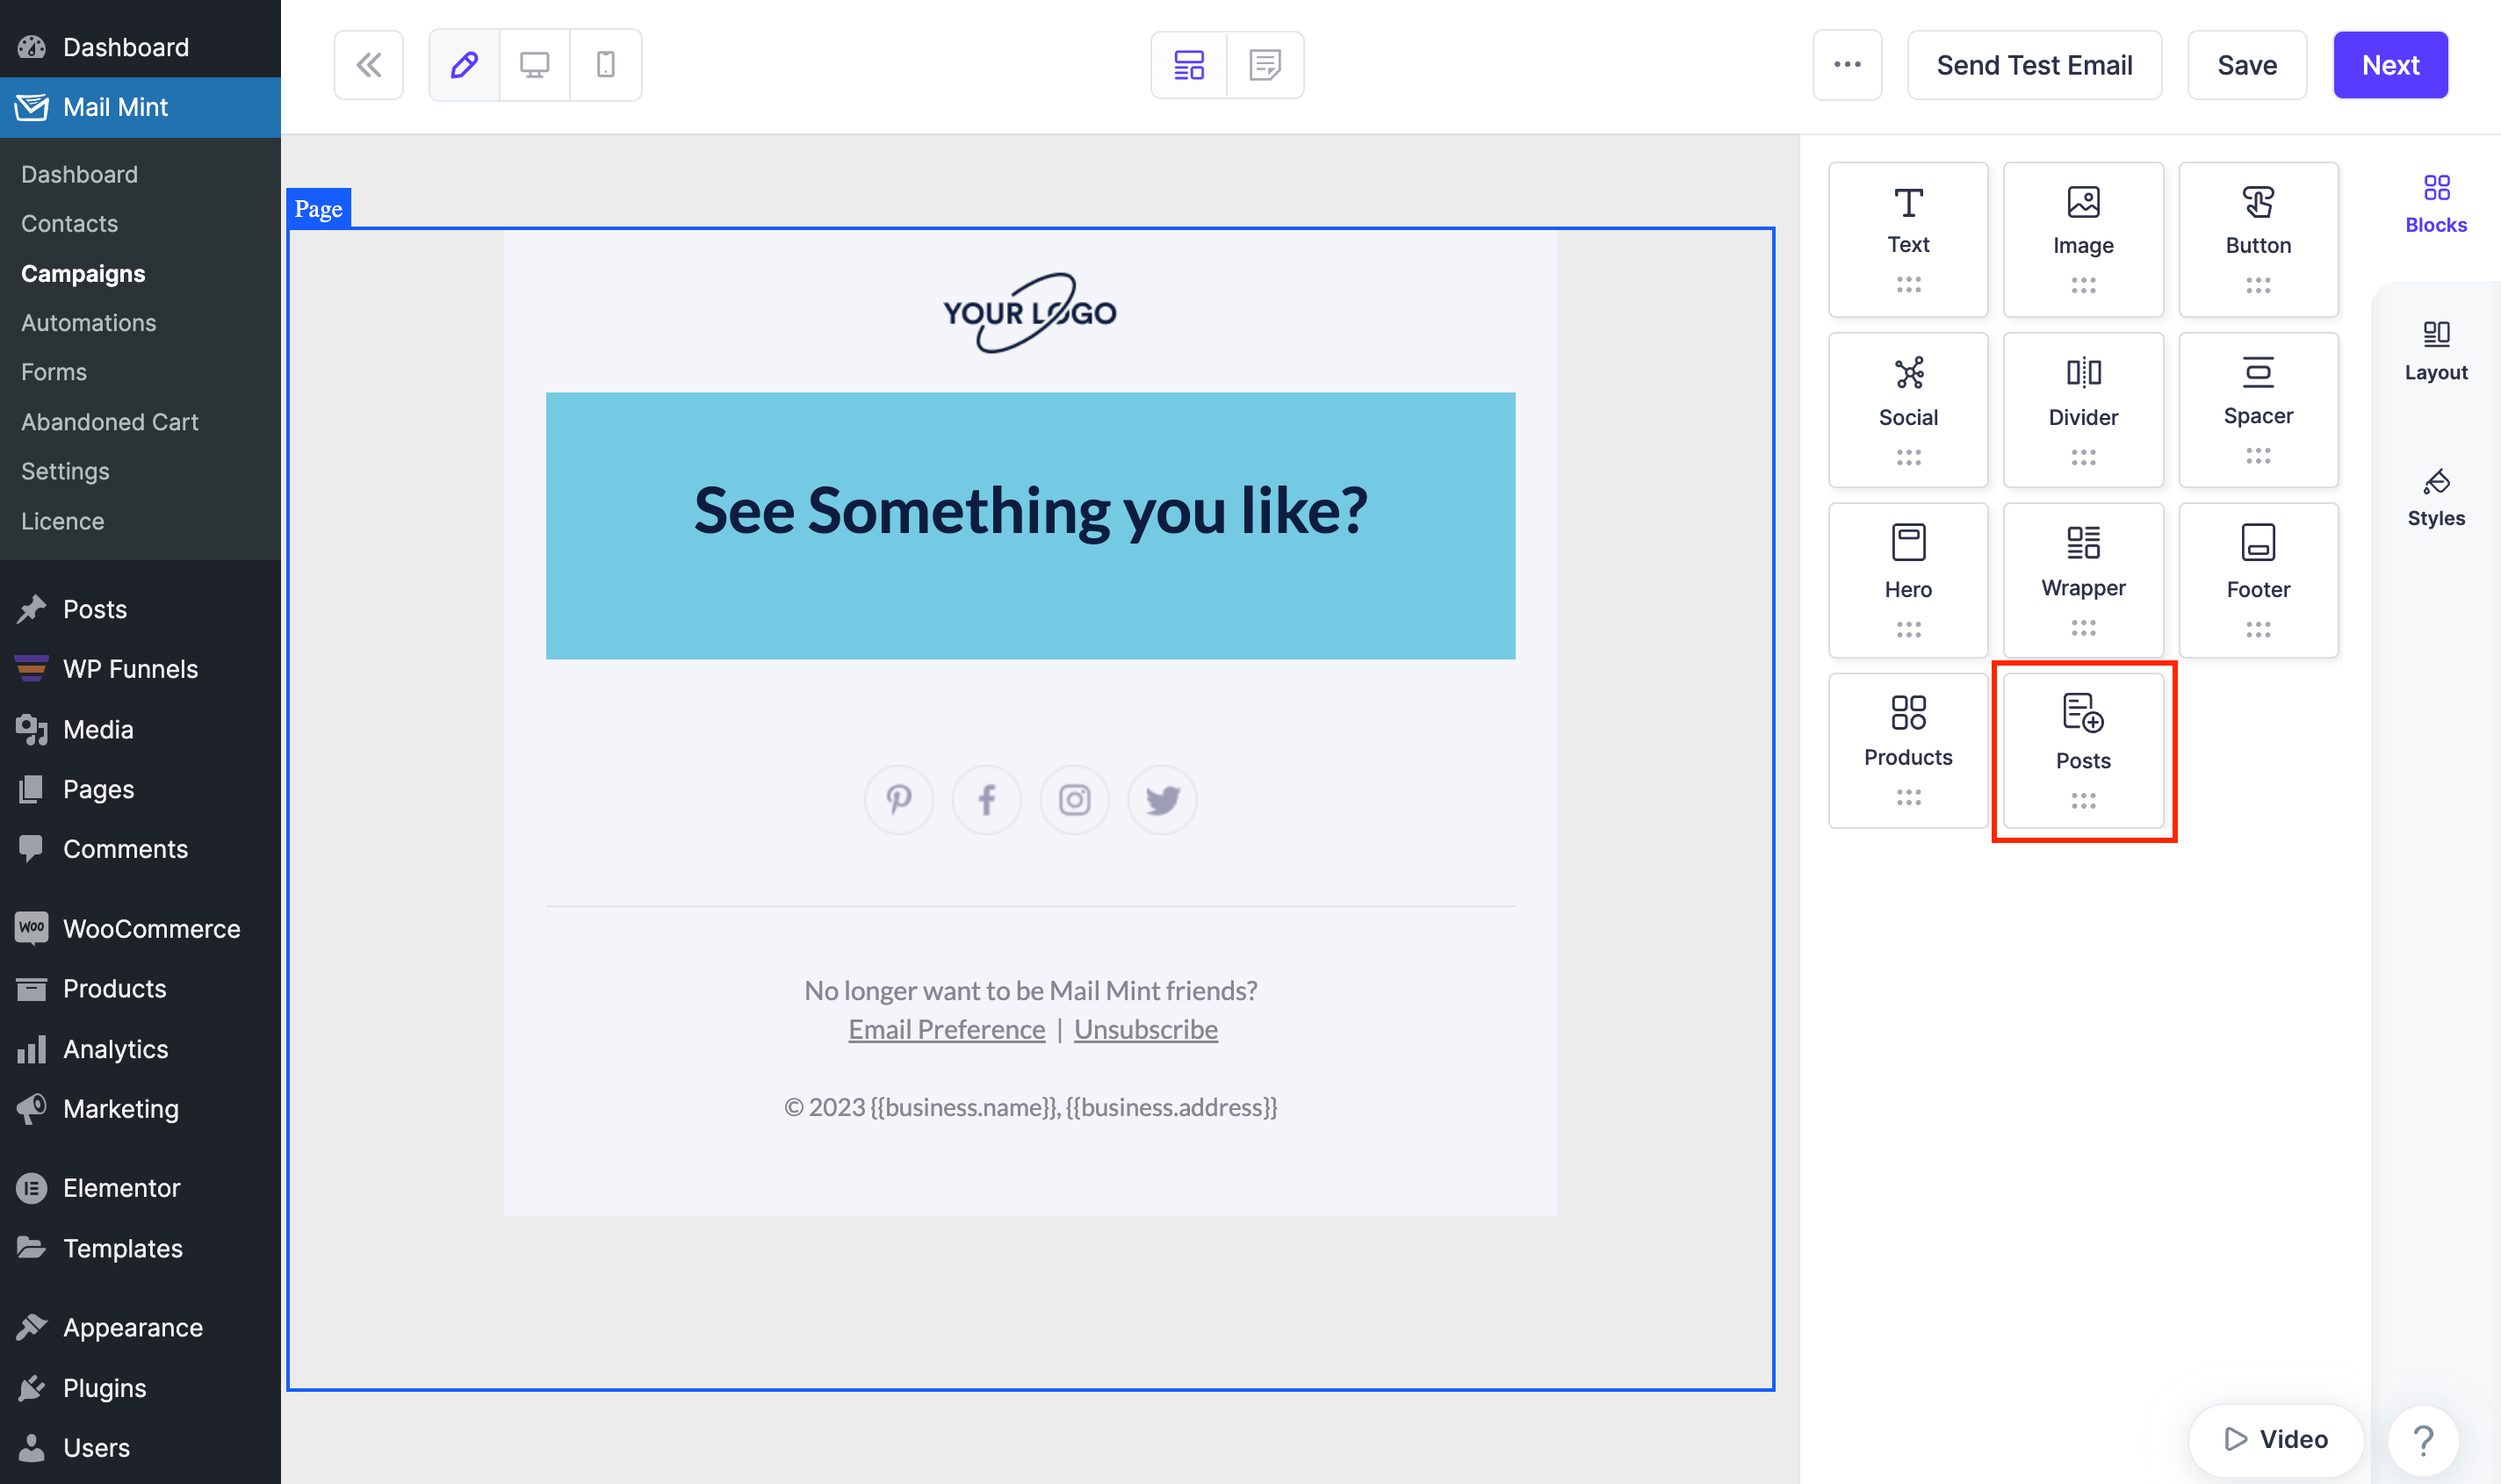
1. On the Email Builder, add “Posts” block if you want to send the latest posts to your subscribers. You may also choose the “Products” block to send the latest products via email.

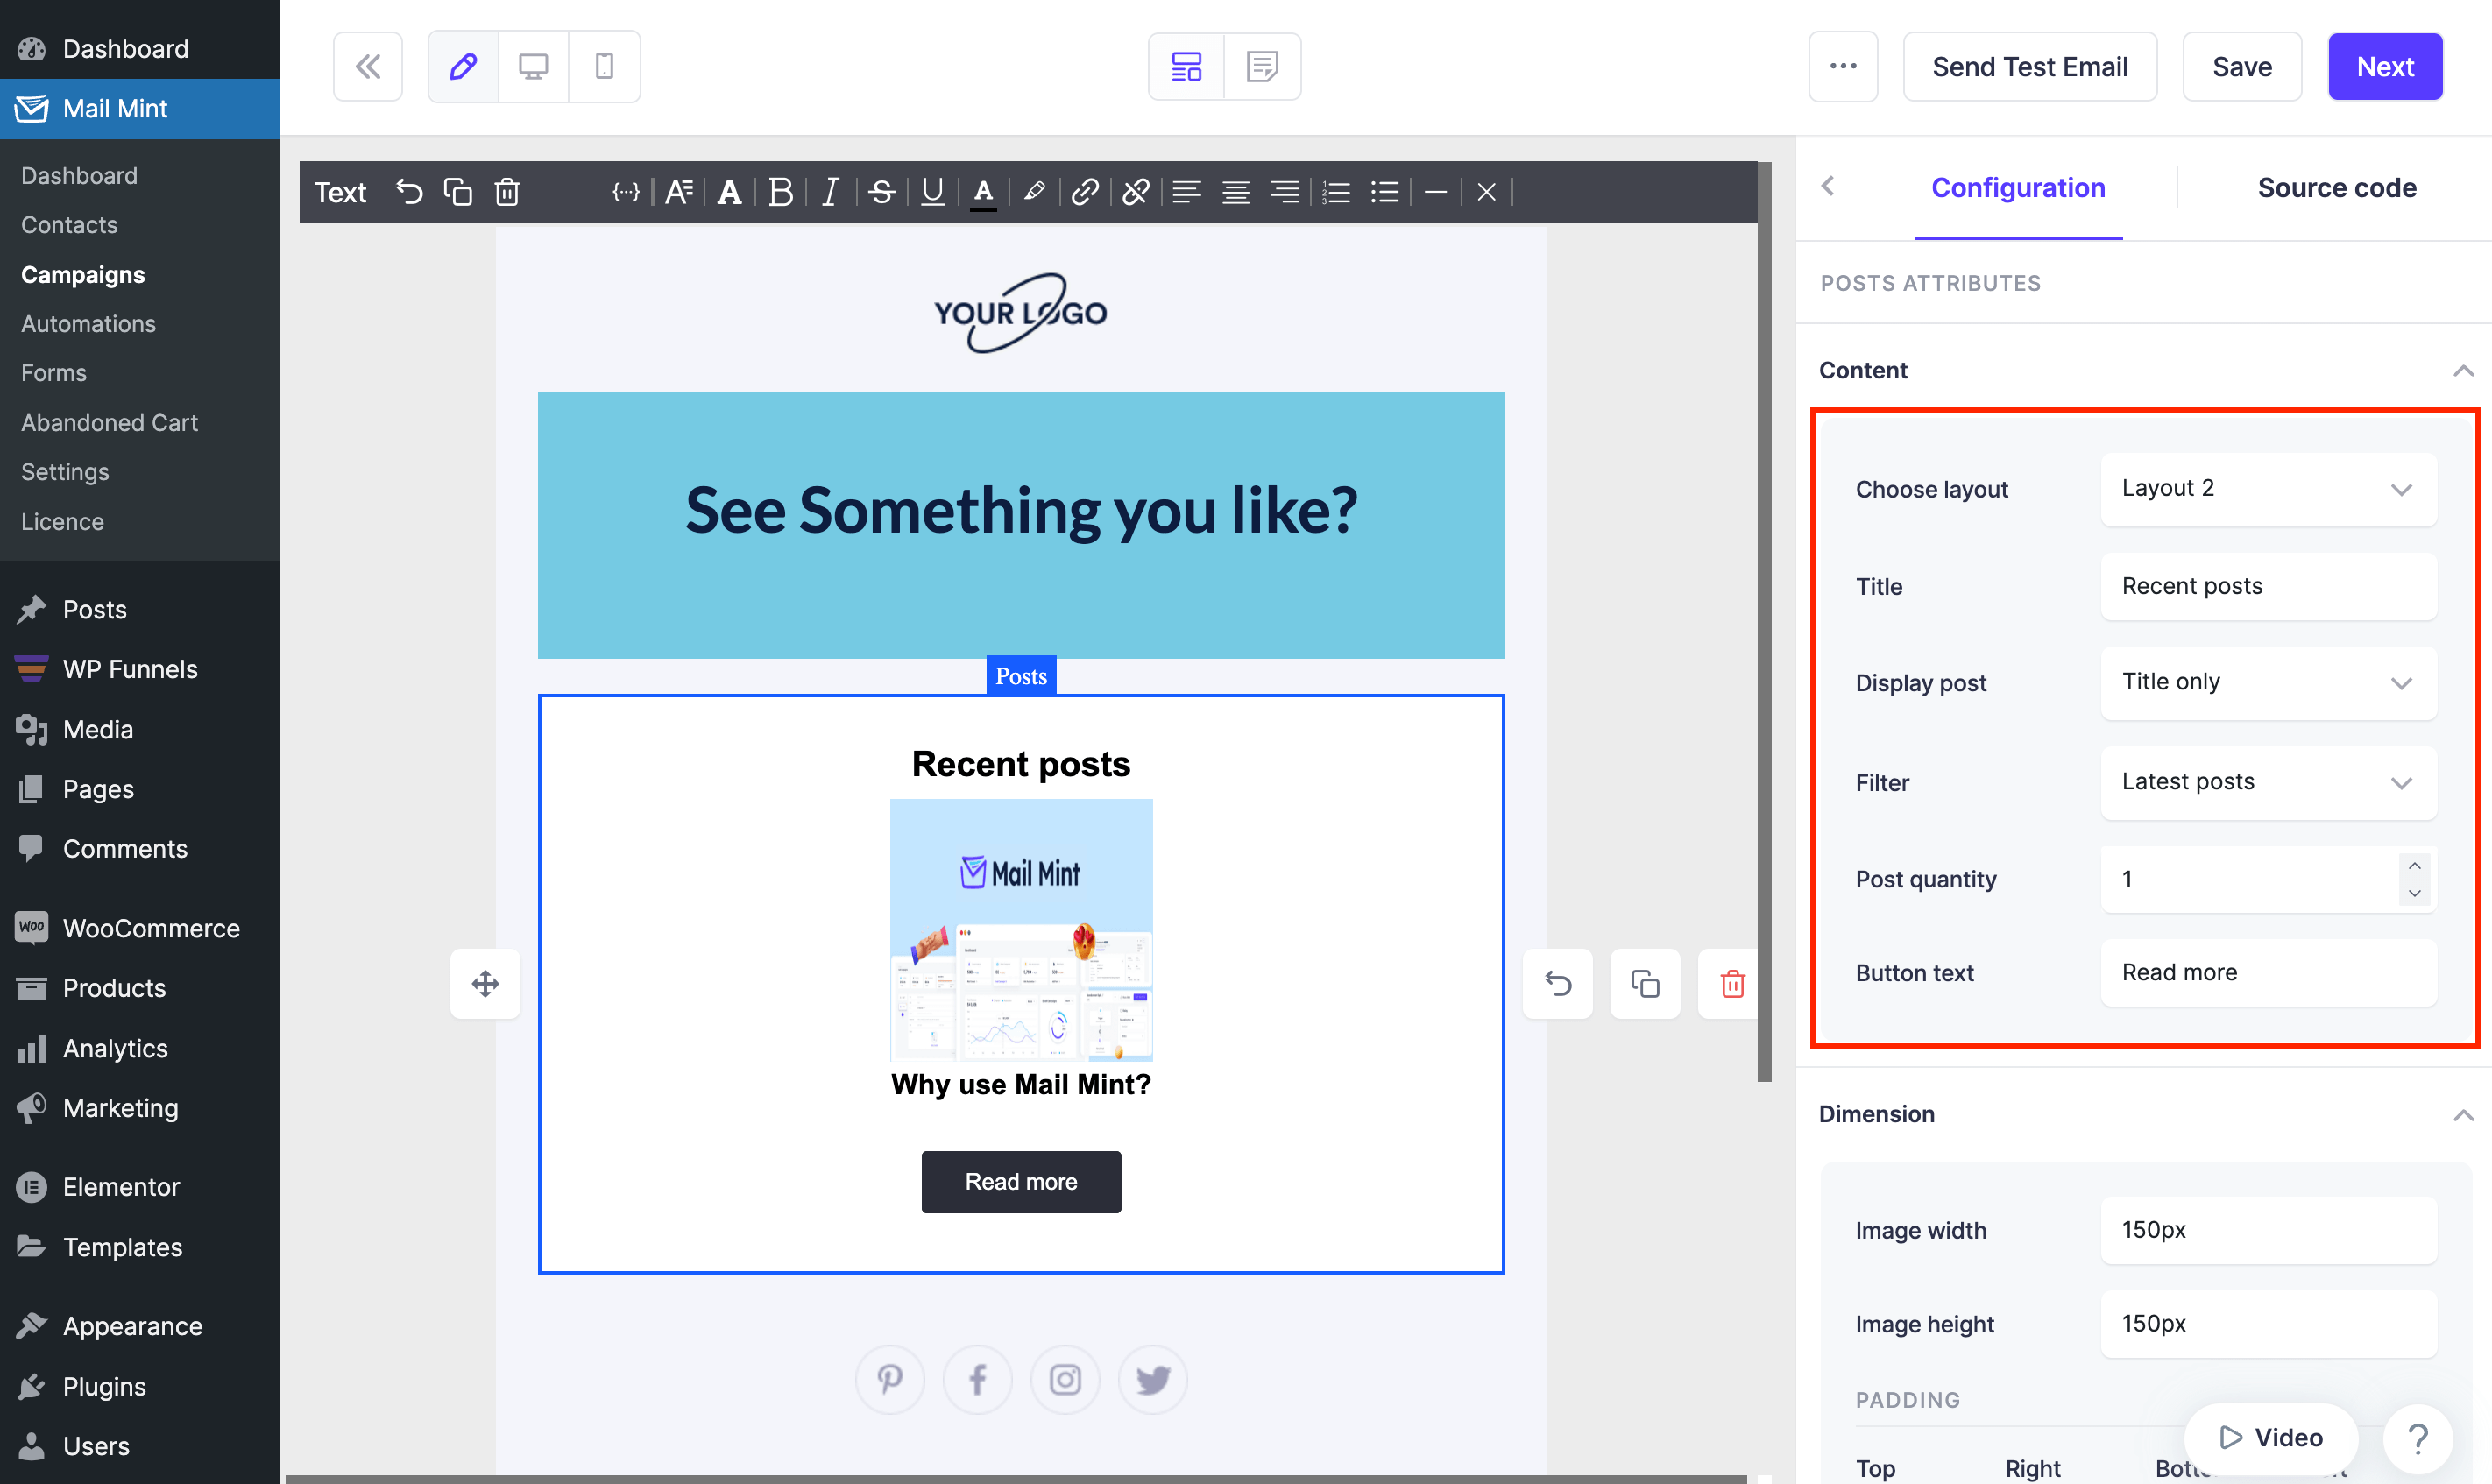
2. Configure the “Posts” or “Products” block. Here, we’ve added the post block, so you need to configure the following things –
- Choose layout: choose from any layout available
- Title: customize as you need
- Display post: customize as you need
- Filter: select “Latest posts”
- Post quantity: set 1 if you want to send the latest post
- Button text: customize as you need

3. After designing your email according to your needs, click on “Next“.

Step 4: Configure Recurring Options
1. Once you are satisfied with the content, review everything one final time and click on “Send“.

2. Select “Recurring” and choose “Monthly” under the Repeat option. Now set how you want to repeat by specifying the day and time.
For example, you can choose to repeat every 1 month (which means every month) at 1 AM.

After that, select days to repeat. You need to select at least one date.

Then configure –
- Start Date: select a specific start date
- End Date: you can set “Never End” or set “Till” a specific date
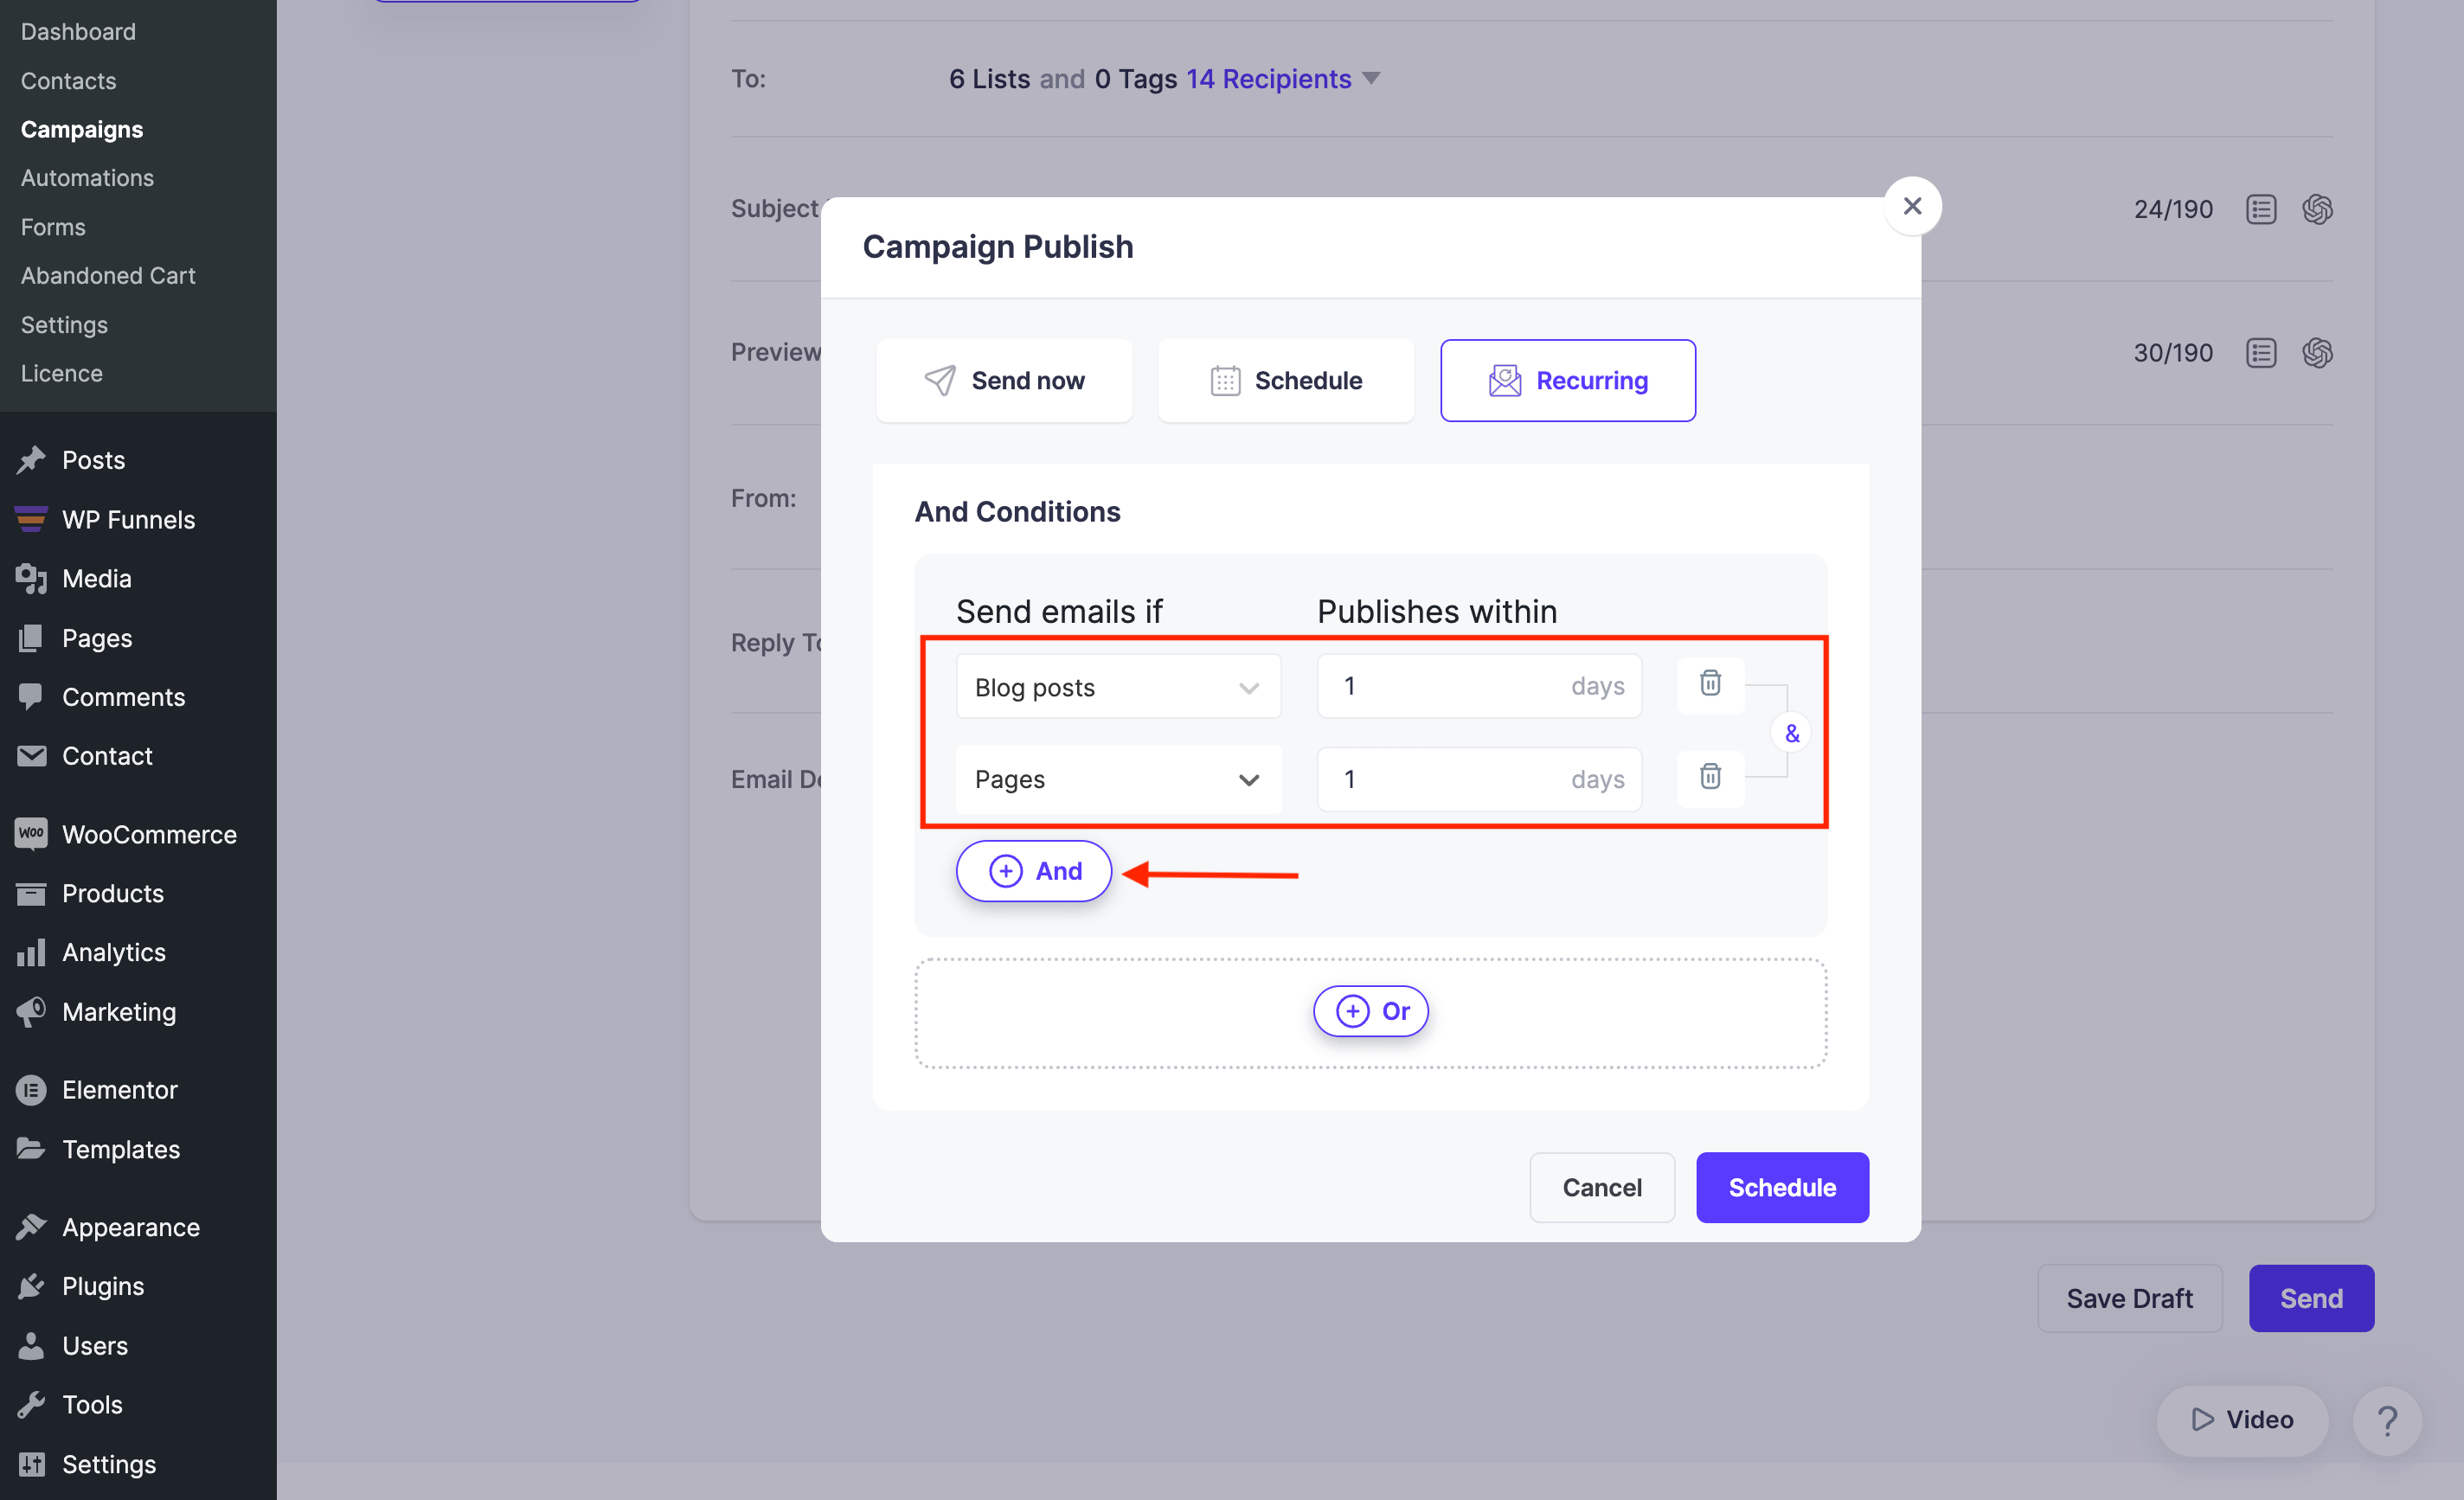
3. Define conditions such as, Send emails if Blog posts / Pages / Products publishes within “x” days.

4. You may add multiple conditions using “And” if needed.

5. You may also add multiple conditions using “Or” if needed.

6. Now that you’ve defined the conditions, your subscribers will receive emails automatically when the conditions are met.

That’s it! You have successfully created a Monthly Recurring Email Campaign in Mail Mint.
