WPFunnels is currently the most user-friendly sales funnel builder for WooCommerce and WordPress, designed to help you boost your online sales effortlessly.
Let’s walk through a basic overview of WPFunnels so you can quickly get acquainted with the plugin and start building high-converting sales funnels.
Watch the video below or continue reading the written overview to quickly understand the plugin’s key features and functionality.
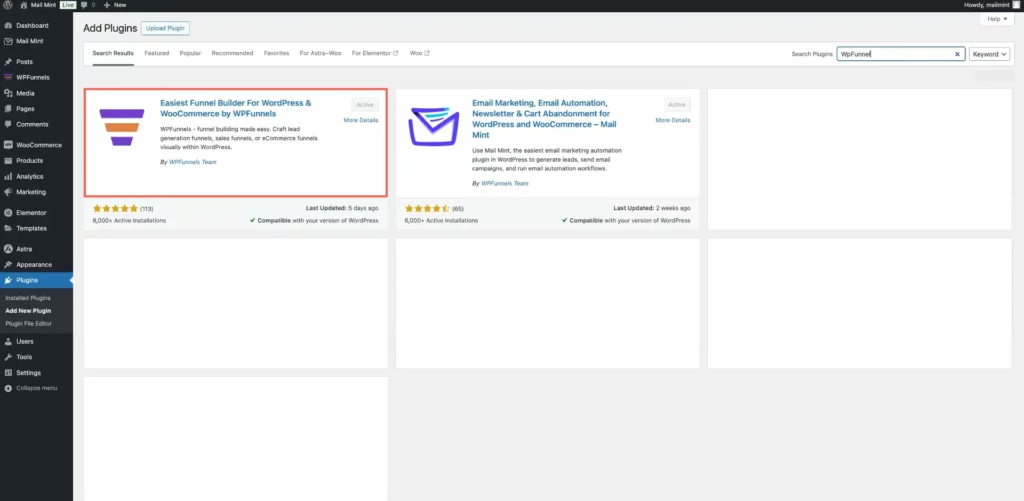
First, make sure you have installed and activated the WPFunnels, which you can download from the WordPress repository. Or, you may go to the Dashboard > Plugins > Add New, and search for WPFunnels. Then install and activate it, which will take you through a quick setup wizard.

Once you have completed the setup wizard, you are ready to use WPFunnels.
You will find the WPFunnels menu on your dashboard menus. Click on WPFunnels to go to the plugin dashboard

Let us get a basic overview of the whole plugin, and then you can go ahead and look at each feature in detail.
This guide will cover the following:
- Plugin Settings
- Funnel Dashboard
- Funnel Creation
- Funnel Steps
- Assigning Funnel Product
- Using The Order Bump
1. Plugin Settings
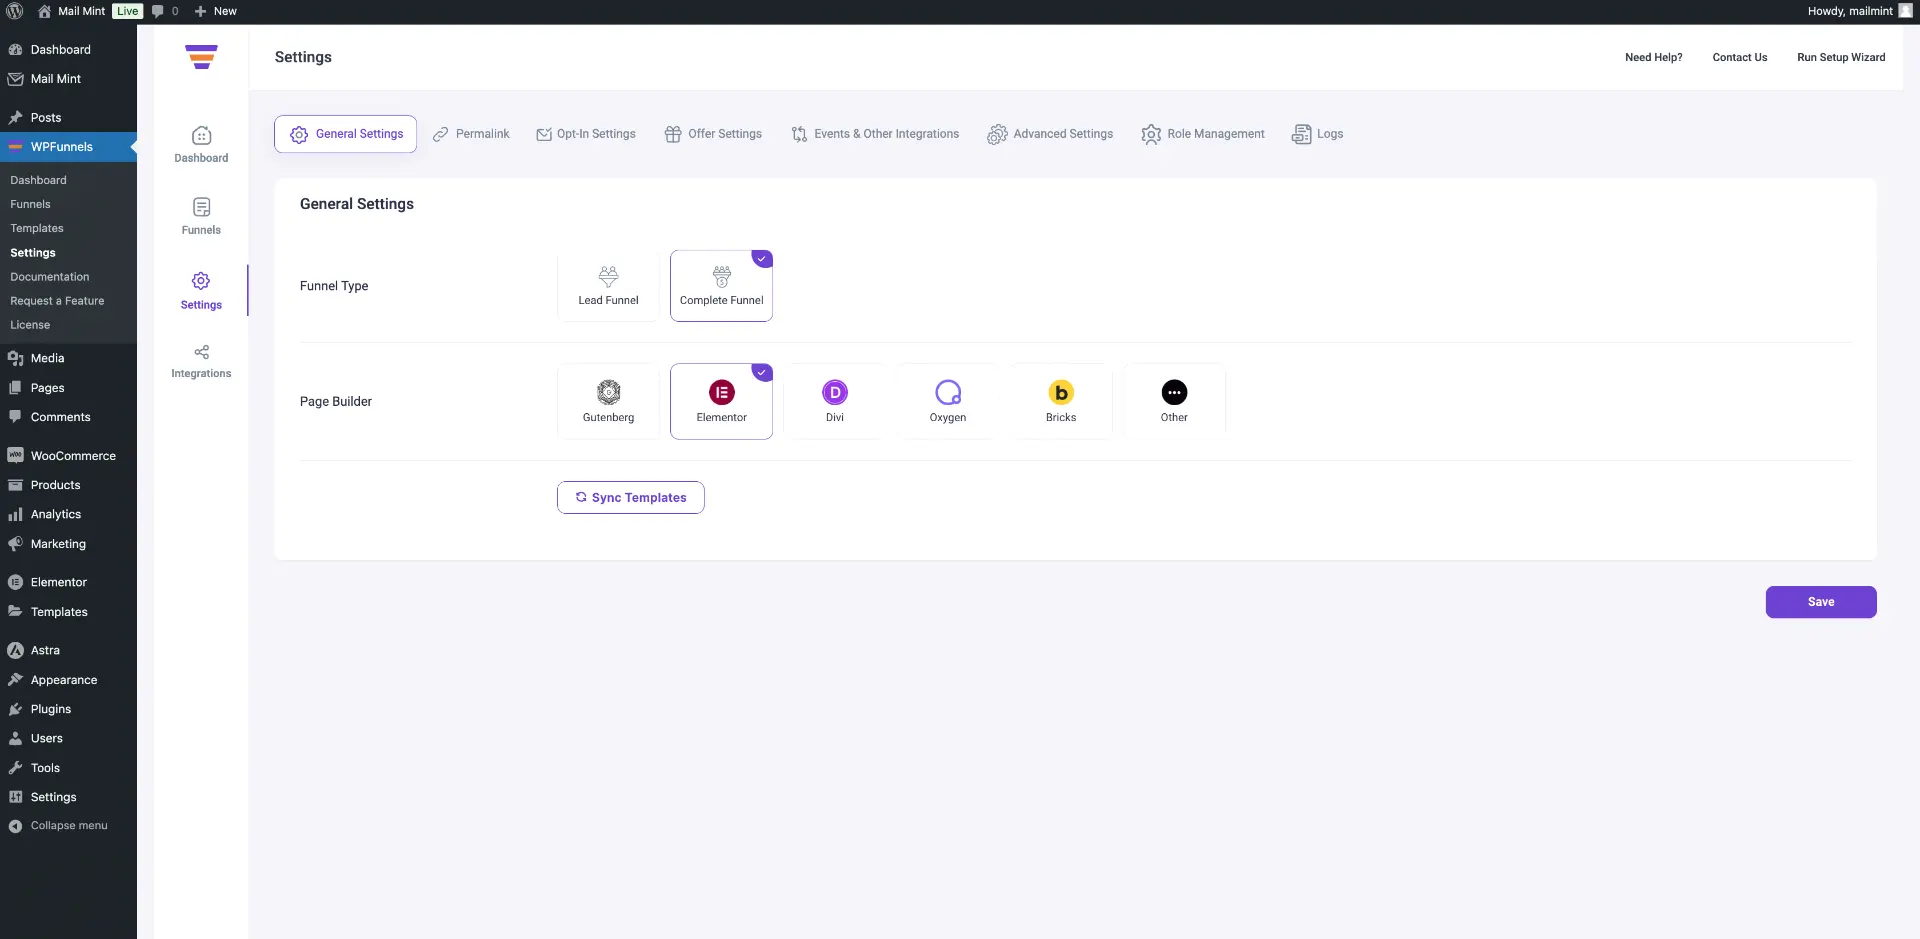
Once you are on the plugin dashboard, go to the Settings tab on the left.
The settings menu has different options to configure the plugin properly (which you initially set up through the setup wizard).
**If you have completed the Setup wizard, these should already be configured as per your preferences. In case you skipped the setup wizard and want to run it again, you can click on the “Run Setup Wizard” button on the top right side of the Settings page.

Under the Settings tab, you will find eight(8) more tabs:
- General Settings
- Permalink
- Opt-in Settings
- Offer Settings [Pro]
- Event & Other Integrations [Pro]
- Advanced Settings
- Role Management
- Logs
Here’s the full overview.
Now let us go back to the overview tab and find out the available options there.
2. Funnel Dashboard
If you go to the overview tab for the first time, you will initially get the button ‘Create Your First Funnel’.

Let’s check it in detail.
3. Funnel Creation
On the overview tab, click on the Create Your First Funnel. Then you have two ways to create a funnel
(i) Create A Funnel From Scratch

(ii) Import A Pre-made Funnel Template

Let’s have a look in detail.
The Drag And Drop Funnel Building Canvas
The drag-and-drop funnel-building canvas is really special. This canvas will act as both a funnel planner and the funnel dashboard where you configure, organize, initiate design, and execute the funnel.
Watch this video to get a good understanding of the drag-and-drop canvas.
4. Funnels Steps Basic Overview
Once you are on the Funnel Planning Canvas, you can now plan your funnel steps easily.
Let us look at the basics you need to know about funnel steps. We will cover the following:
- Adding and Removing a funnel step
- Mapping funnel steps
- All funnel steps and their options
– Landing
– Checkout
– Thank You
– Custom [Pro]
– Upsell [Pro]
– Downsell [Pro]

Let’s get into the details.
5. Assigning Funnel Product
To assign the main product(s) that you want to sell using this funnel, you need to edit the Checkout Step and add the funnel product.

Let’s go through the full process.
6. Using Order Bump
In the checkout Configure drawer, you will see there is a tab called “Order Bump”. You’ll configure the order bump on this tab.

Let’s go through the full guide.
Now that you are quite familiar with the plugin’s interface, let’s go ahead and create your first sales funnel real quick.


