You can now send data to major automation tools such as Zapier and most email clients based on user actions in your sales funnel with WPFunnels using the WPFunnels Webhooks.
In this guide, you will learn how to use the WPFunnels Webhooks.
So, let’s get started.
First, you need to install and activate WPFunnels & WPFunnels Pro.
Step 1 – Create Your Sales Funnel
Create a sales funnel.
If you haven’t created a funnel yet, the documentation below will help you.
Once your funnel is up and running follow the next few steps to understand how to assign webhooks.
Step 2 – Go to Webhooks Option
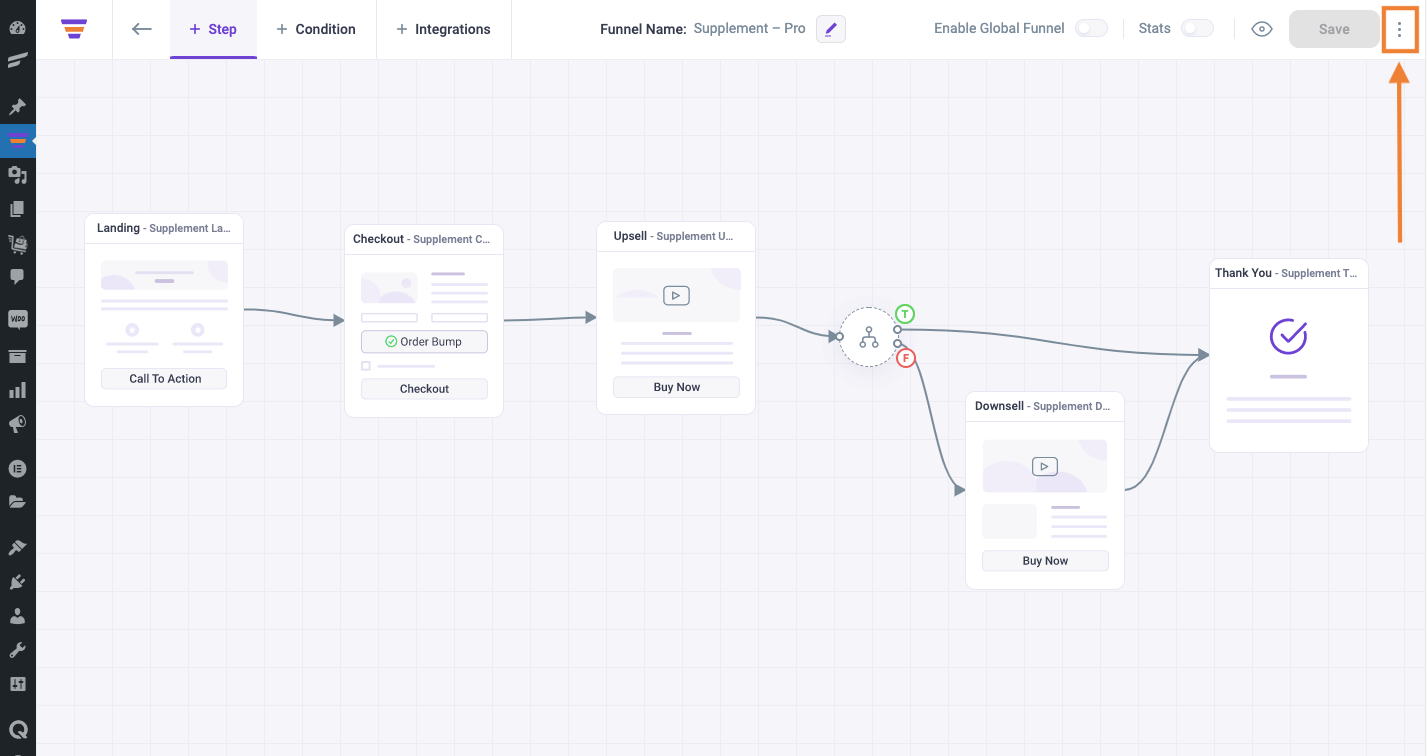
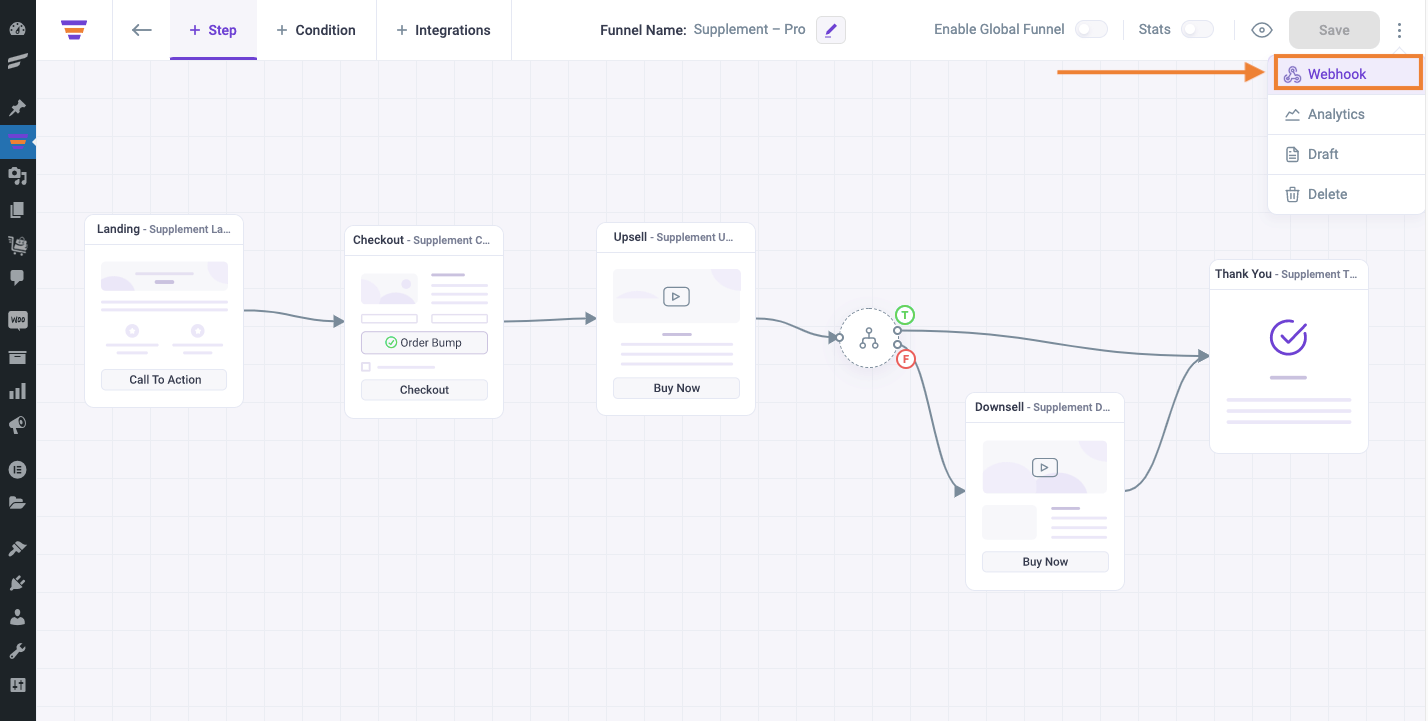
On the top right corner of your funnel canvas, you will see the 3 dots. Click on it and you will see four options.
Click on the Webhook option to set up webhooks for this funnel. It will take you to the Webhooks drawer.
Step 3 – Add A Webhook To Your Funnel
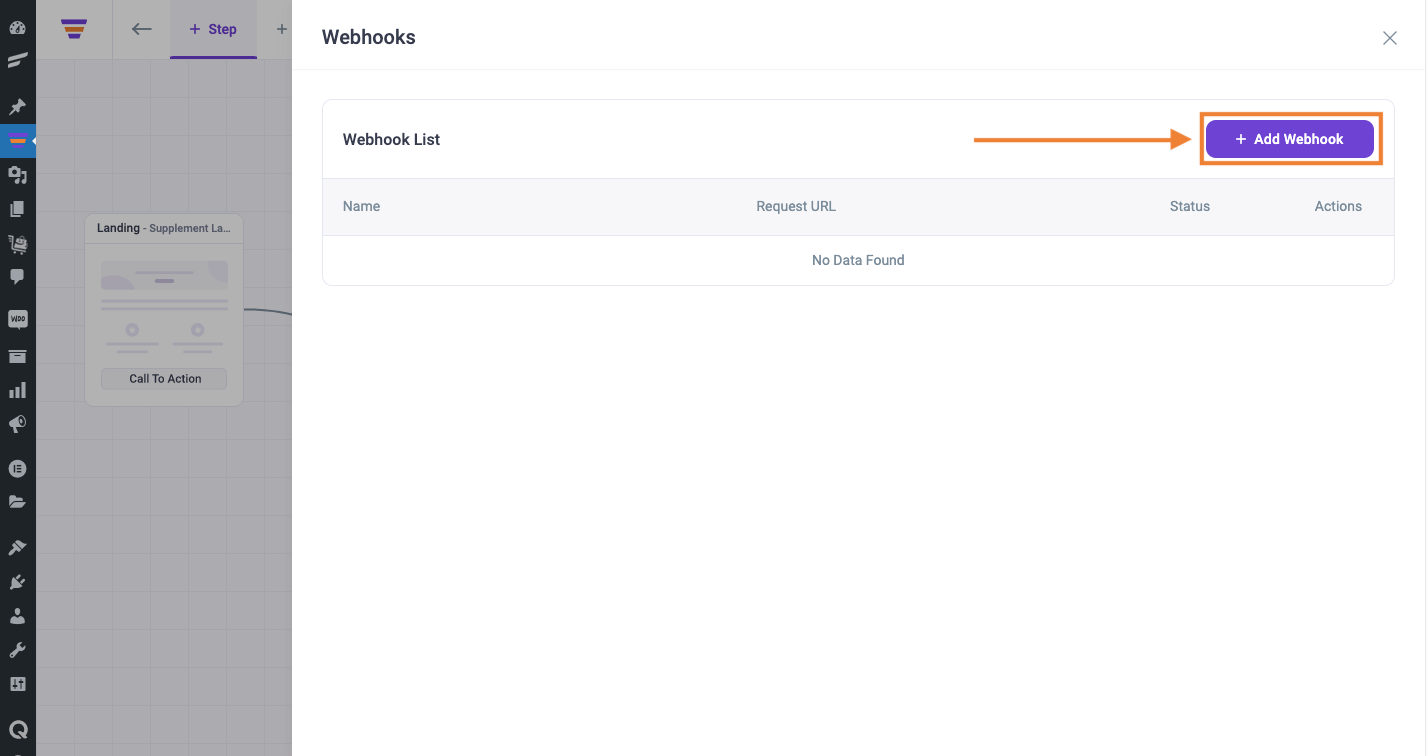
On the Webhooks drawer, click on the Add Webhook button and it will open the Webhook Settings for you.
Step 4 – Configure Your Webhook
On the Webhook Settings drawer, you will see the necessary fields to set up the webhook.
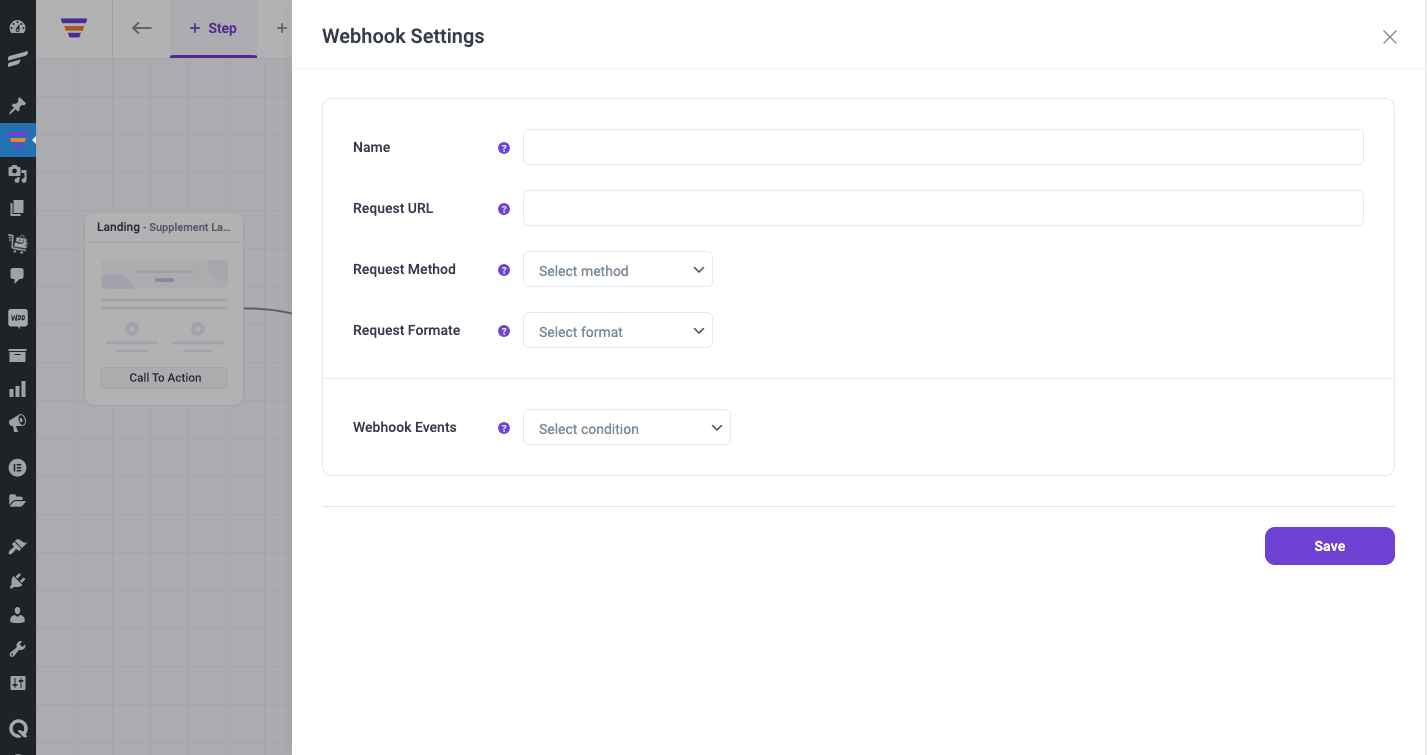
Set the Name, Request URL, Request Method, Request Format, and Webhook Event.
Step 5 – Choose Your Request Body
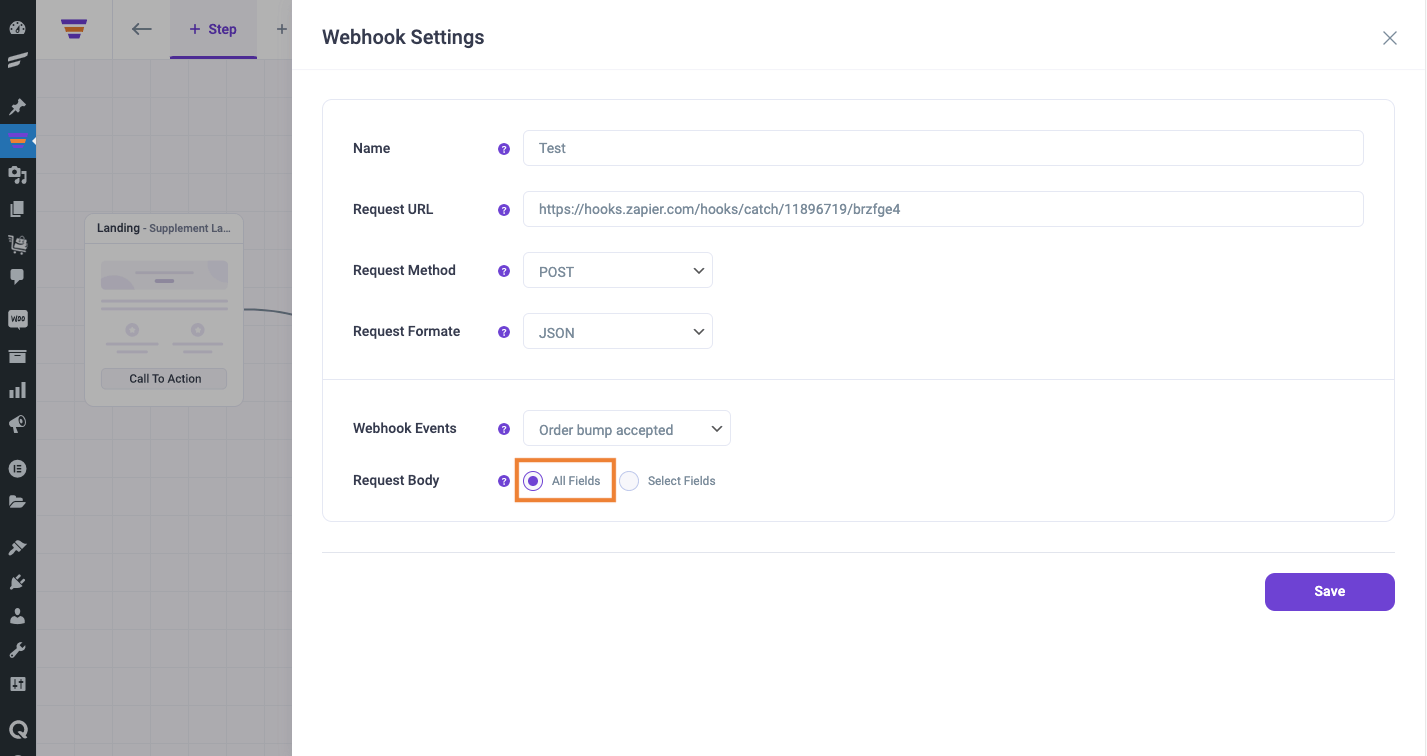
You may choose ‘All Fields’ or ‘Select Fields’ depending on your need.
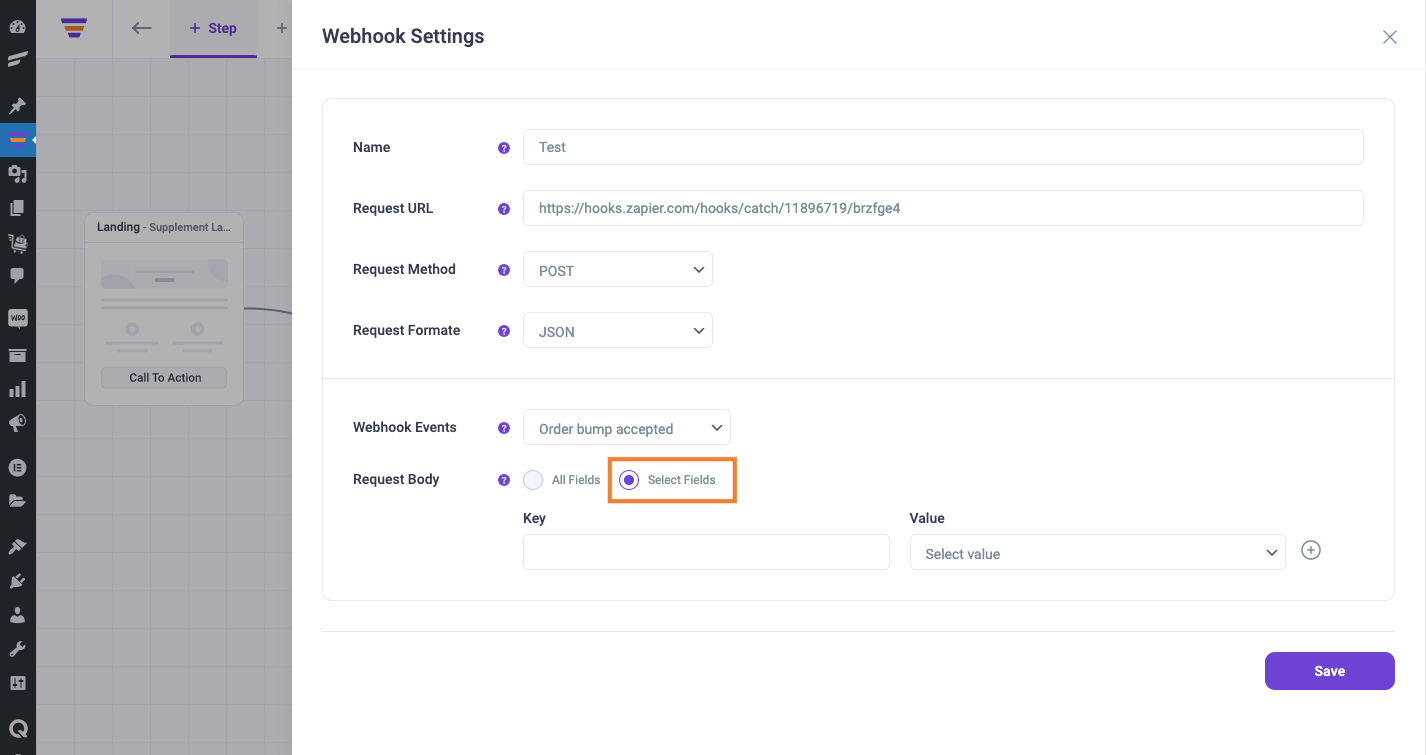
After you configure everything, click on the Save button to add this Webhook.
If you go back to the Webhooks drawer, you can see the newly added Webhook under Webhook List.
You can turn off the Status, Edit, or Delete your existing Webhook from this Webhook List.
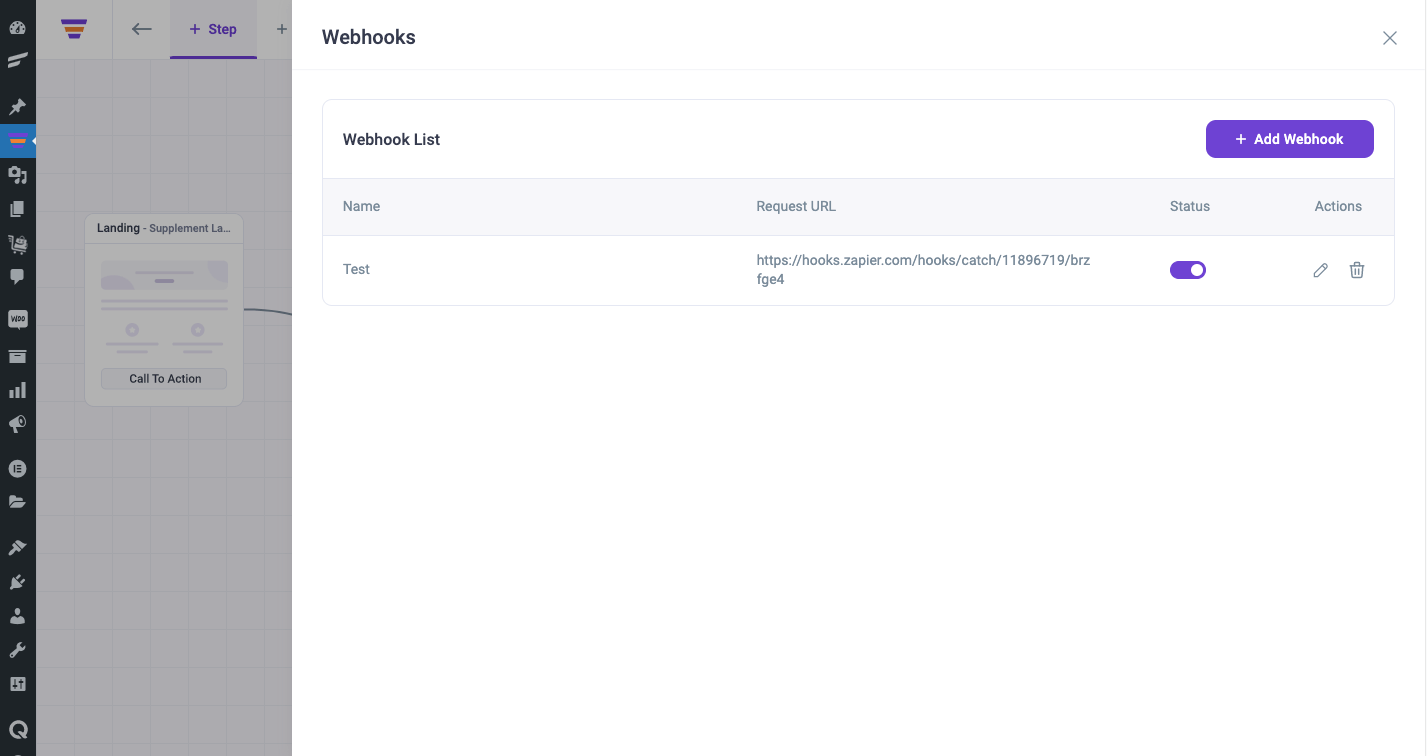
That’s it, now you can add as many Webhooks as you want for this specific funnel here.
Or you can go to another funnel and follow the same steps to add Webhooks for that funnel.
