In this guide, I will show you how you can integrate Google Tag Manager with WPFunnels to track your WPFunnels conversions.
Step 1: Create an account on Google Tag Manager
1. To integrate WPFunnels with Google Tag Manager, first, you will have to create an account on Google Tag Manager.
Go to Google Tag Manager.
Click on the Create Account button.

2. Here,
- Give a name to your new Account.
- Enter a container name
- Select target platform
- Click on the Create button

3. Once you click on the Google Tag Manager Terms of Service Agreement form will appear.
Click on the Accept button, and your account will be created.

Step 2: Configure Data Layer Variables Implementation
After the Container is created, we’ve to implement dataLayer variables.
At first, go to the Variable section >> click on the Configure button on the Built-In Variables.

Once you click on the Configure option, a drawer will slide in from the right side of the window.
Check the “Click Element” option which you will find under the Clicks section.

Now, you will have to configure the following user-defined variables:
Ecommerce
Variable Configuration
Variable Type: Data Layer Variable
Data Layer Variable Name: ecommerce
Data Layer Version: Version 2

Ecommerce Affiliation
Variable Configuration
Variable Type: Data Layer Variable
Data Layer Variable Name: ecommerce.affiliation
Data Layer Version: Version 2

Ecommerce Coupon
Variable Configuration
Variable Type: Data Layer Variable
Data Layer Variable Name: ecommerce.coupon
Data Layer Version: Version 2

Ecommerce Currency
Variable Configuration
Variable Type: Data Layer Variable
Data Layer Variable Name: ecommerce.currency
Data Layer Version: Version 2

Ecommerce Items
Name: Ecommerce Items
Variable Configuration
Variable Type: Custom JavaScript

Custom JavaScript:

function() {
  var ecom = {{Ecommerce}};
  if ( ecom && ecom.items ) {
    return ecom.items;
  } else {
    return undefined;
  }
}

Ecommerce Payment Type
Variable Configuration
Variable Type: Data Layer Variable
Data Layer Variable Name: ecommerce.payment_type
Data Layer Version: Version 2

Ecommerce Shipping
Variable Configuration
Variable Type: Data Layer Variable
Data Layer Variable Name: ecommerce.shipping
Data Layer Version: Version 2

Ecommerce Shipping Tier
Variable Configuration
Variable Type: Data Layer Variable
Data Layer Variable Name: ecommerce.shipping_tier
Data Layer Version: Version 2

Ecommerce Tax
Variable Configuration
Variable Type: Data Layer Variable
Data Layer Variable Name: ecommerce.tax
Data Layer Version: Version 2

Ecommerce Transaction ID
Variable Configuration
Variable Type: Data Layer Variable
Data Layer Variable
Name: ecommerce.transaction_id
Data Layer Version: Version 2

Ecommerce Value
Variable Configuration
Variable Type: Data Layer Variable
Data Layer Variable Name: ecommerce.value
Data Layer Version: Version 2
Here, I will show you how to configure the first variable, and you will have to follow the same process for the rest of the variables.
Here’s the first variable:
Ecommerce
Variable Configuration
Variable Type: Data Layer Variable
Data Layer Variable Name: ecommerce
Data Layer Version: Version 2
1. Click on the Variables option from the Dashboard menu on the left.
The variables section will be loaded.
Click on the New button from the User-Defined Variables section.

2. Once you click on the New button, the Variable Configuration section will slide in from the right side of the window.

3. At first, change the name to “Ecommerce”.

Now, click on the Variable Configuration Section and another drawer will slide in from the right side of the window.
Select “Data Layer Variable” from the drawer.
Once you select the option, another window will appear. Enter “ecommerce” as the Data Layer Variable Name.

Click on the Save button.
You will see that the “Ecommerce” variable is added to the list.

Now add the rest of the variables one by one, the same way you just added “ecommerce” variable.
This way you can configure the rest of the data layer variables, except for the Ecommerce Items:
Ecommerce Items
Name: Ecommerce Items
Variable Configuration
Variable Type: Custom JavaScript

Custom JavaScript code:

function() {
  var ecom = {{Ecommerce}};
  if ( ecom && ecom.items ) {
    return ecom.items;
  } else {
    return undefined;
  }
}
For this, you need to select Custom Javascript instead of Data Layer Variable and then paste the custom javascript code from above.
Step 3: Triggers Configuration
Now, you need to configure the triggers.
1. Click on the Triggers option from the left side of the dashboard.
Click on the New button.

The trigger configuration drawer will slide in from the right side of the window.
Click on the white background, and then the Trigger type drawer will slide in.
Here, set any name to your trigger and set the following Trigger: add_to_cart|begin_checkout|add_payment_info|add_shipping_info|purchase|orderbump_accept|upsell|downsell
Trigger Type: Custom Event

Event Name:
add_to_cart|begin_checkout|add_payment_info|add_shipping_info|purchase|orderbump_accept|upsell|downsell

Check Use regex matching
This trigger fires on: All Custom Events
Click on the Save button, and your trigger configuration will be saved.
Step 4: Tag Configuration
Click on the Tag option from the left side of the dashboard.
Click on the New button.

We need to create and configure the following two tags:
- GA4 Configuration Tag
- Event Configuration Tag
Tag Configuration
1. Click on the New button to start configuring Tags.
2. At first, click on the Tag Configuration to Configure GA4 Tags
3. Now, here set the name to GA4 Configuration, set the Tag Type as Google Analytics GA4 Configuration, and enter your measurement ID in the Measurement ID field which you will get from Google Analytics.

4. Click on the Save button.
5. Now, click on the Triggering section below the tag configuration section.
6. Select All Pages and click on the Save button.
GA4 Tag Configuration
Please go to Tags from Workspace and Click New.
Tag Type
Google Analytics: GA4 Configuration
Measurement ID
Enter Measurement ID. You’ll get it from Google Analytics.
Check  Send a page view event when this configuration loads

Triggering
All Pages
Event Configuration
1. Now, click on the New button from the Tags homepage again.
2. Select Google Analytics: “GA4 Event” as the Tag Type.
3. Select Google Analytics GA4 Configuration from the Configuration Tag
4. Set the Event Name as: {{Event}}
GA4 Event Configuration Tag
Please go to Tags from Workspace and Click New.
Tag type
Google Analytics: GA4 Event
Configuration Tag
Select GA4 Configuration Tag
Event Name
{{Event}}

Event Parameters
(name - value)
5. Click on the Event Parameters accordion and click on the Add Row button, and set the following triggers:
items - {{Ecommerce Items}}
transaction_id - {{Ecommerce Transaction ID}}
affiliation - {{Ecommerce Affiliation}}
value - {{Ecommerce Value}}
tax - {{Ecommerce Tax}}
shipping - {{Ecommerce Shipping}}
currency - {{Ecommerce Currency}}
coupon - {{Ecommerce Coupon}}
shipping_tier - {{Ecommerce Shipping Tier}}
payment_type - {{Ecommerce Payment Type}}
6. Click on the Save button.
7. Now, Click on the Triggering section below. It will open another tab.

8. Create a Custom Event here and configure as shown.

9. Your Custom Event is ready for the Custom Trigger.

That’s it, you have now configured Google Tag Manager.
Step 5: Connect Google Tag Manager with WPFunnels
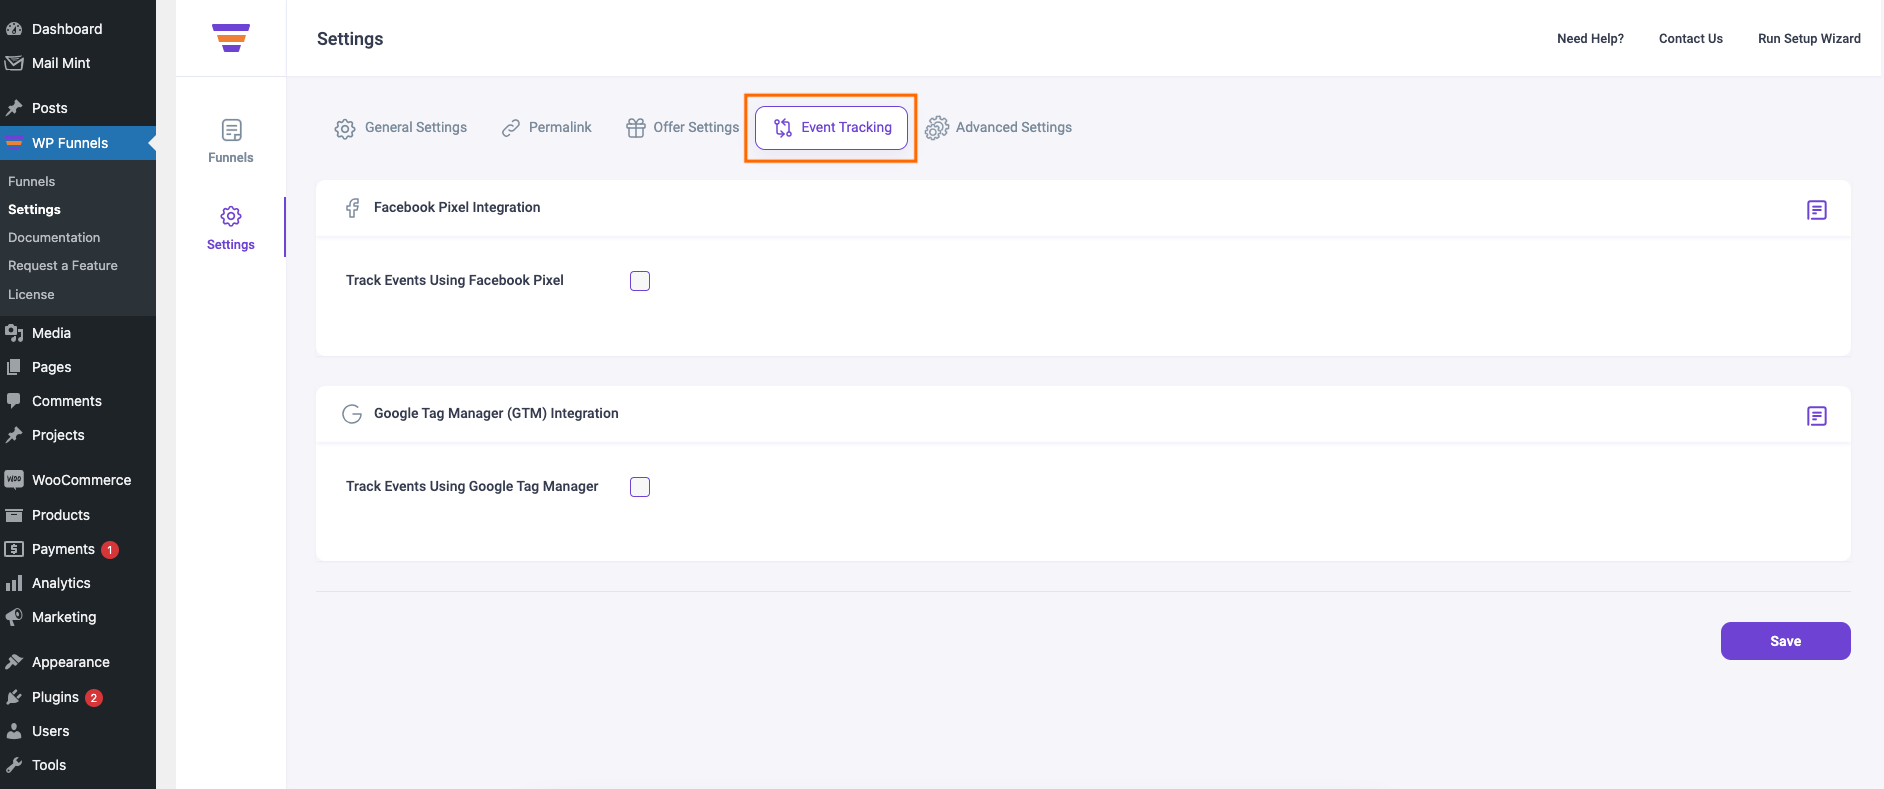
1. Go to WPFunnels > Settings and move to the Event Tracking tab.

2. Enable “Track Events Using Google Tag Manager” and it will expand to show some more options.

3. Here, Enter your GTM Container ID which you copied earlier.
**In your Google Tab Manager Workspace, near the top of the window, you will find your container ID, formatted as “GTM-XXXXXX“.

4. Select the desired GTM Events you want to track.

5. Click on the Save button. Your Google Tag Manager Integration is now completed.
Exclude Funnel From Google Tag Manager Tracking
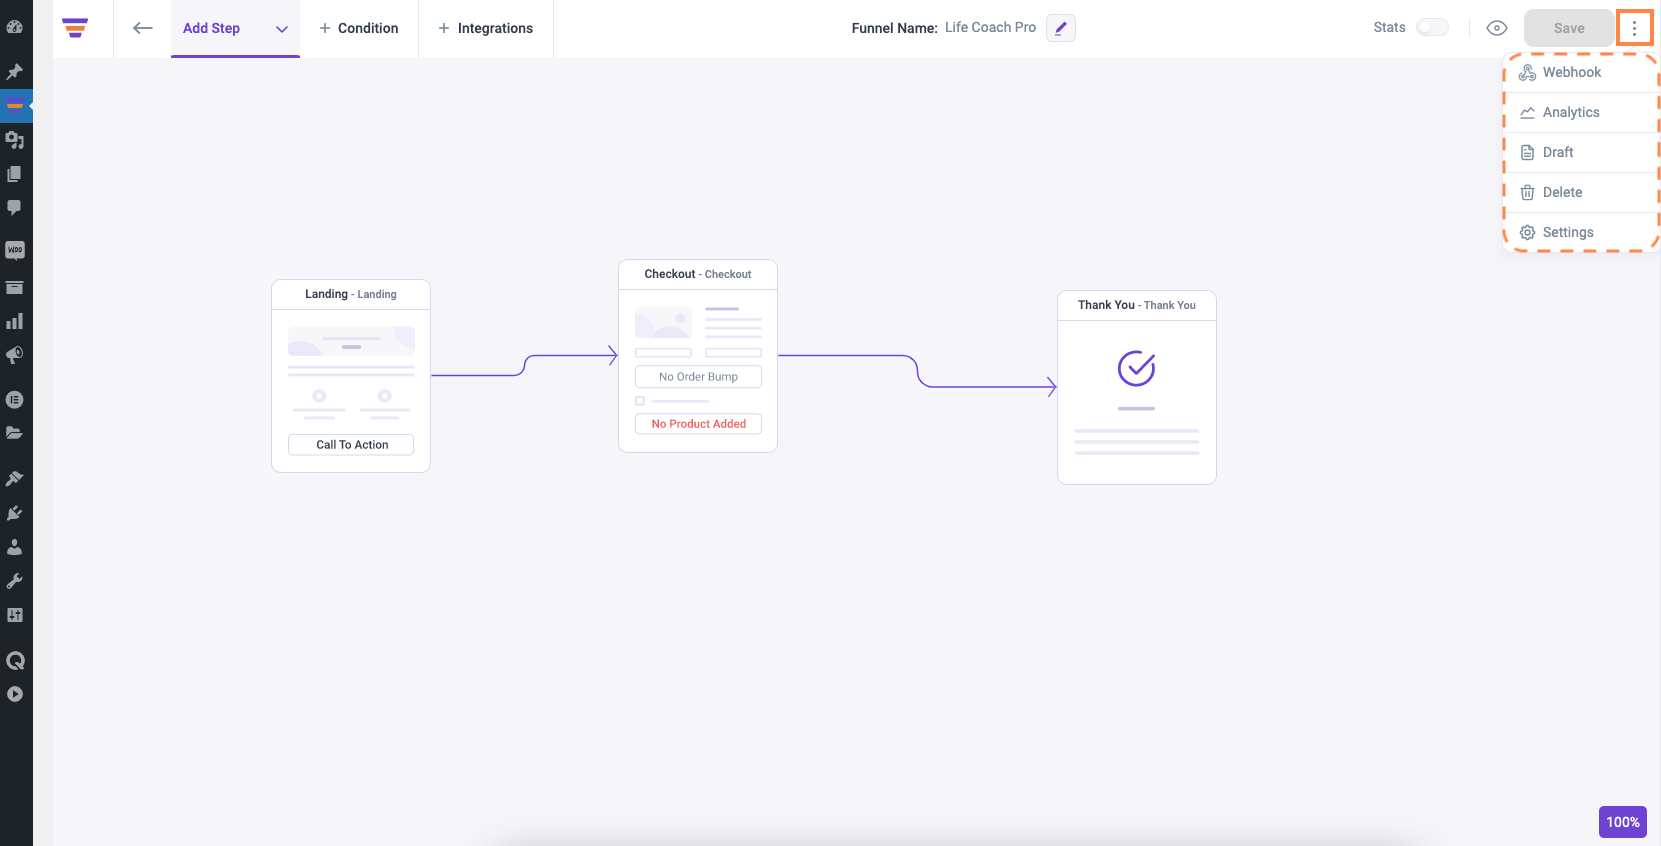
1. To exclude an individual funnel from the GTM tracking, edit that funnel and open the Settings option from the canvas.

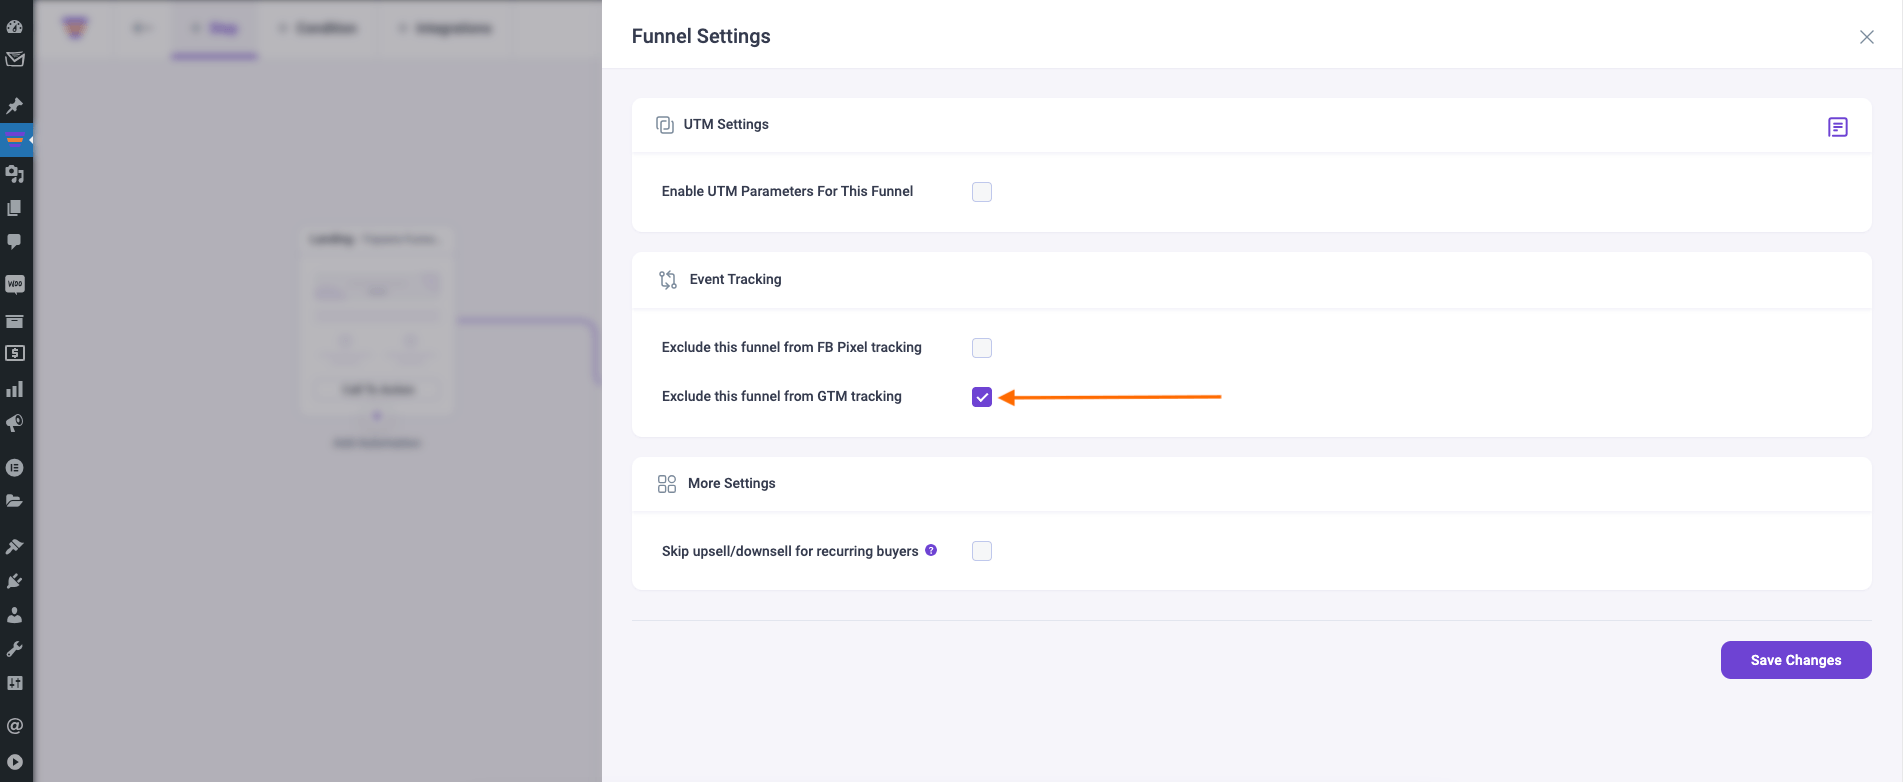
2. Enable the option “Exclude this funnel from GTM tracking” and click on Save Changes.

That’s how this funnel will not be included in the Google Tag Manager tracking.
