You can connect WPFunnels with AWeber to set up automation based on different triggers.
In this guide, you’ll learn how to create automated workflows by integrating WPFunnels with AWeber.
Step-1: Install WPFunnels Integration Add-on
To use AWeber with WPFunnels, at first you need to make sure that the following plugins are installed and activated on your sites:
- WPFunnels
- WPFunnels – Pro
- WPFunnels Integration Addon
Once the plugins are installed & activated, you can go to the next step.
Step-2: Authorize AWeber Integration
1. Go to WPFunnels > Integrations tab.
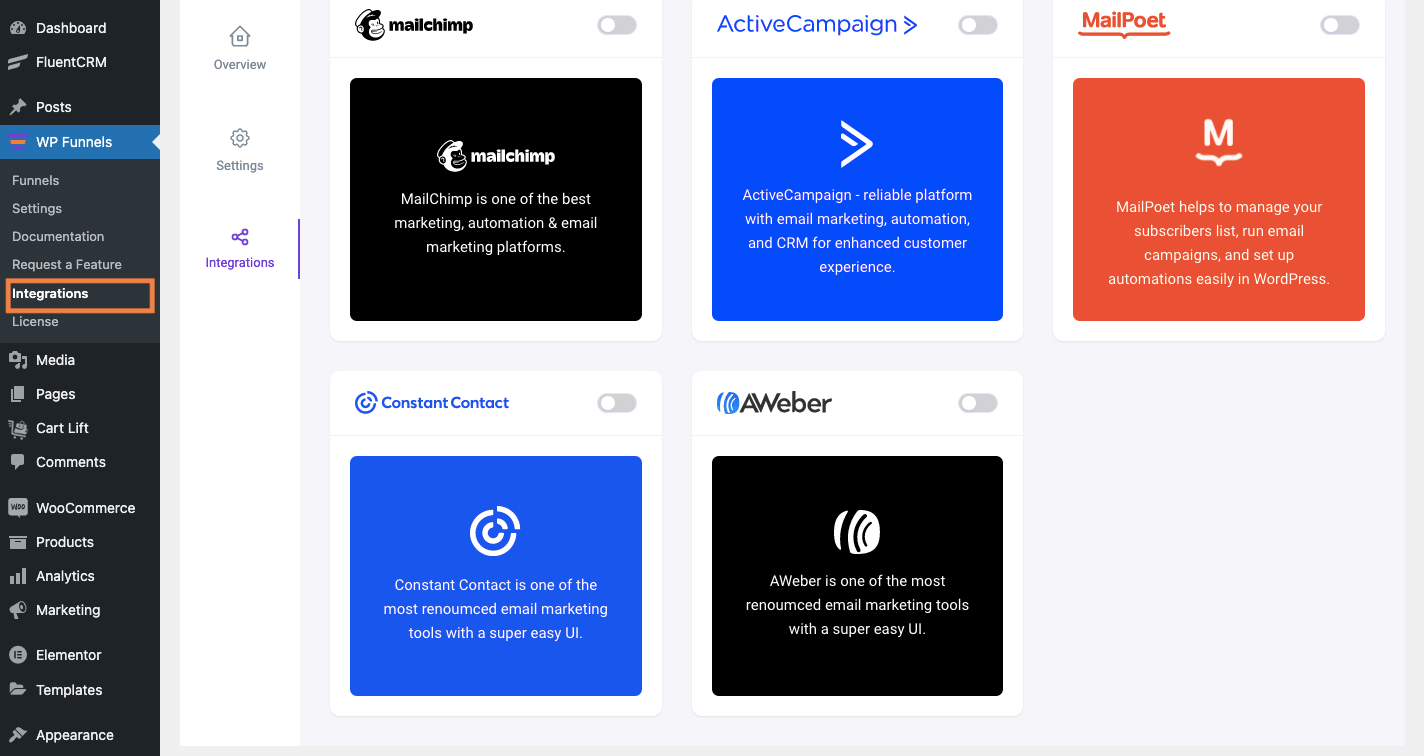
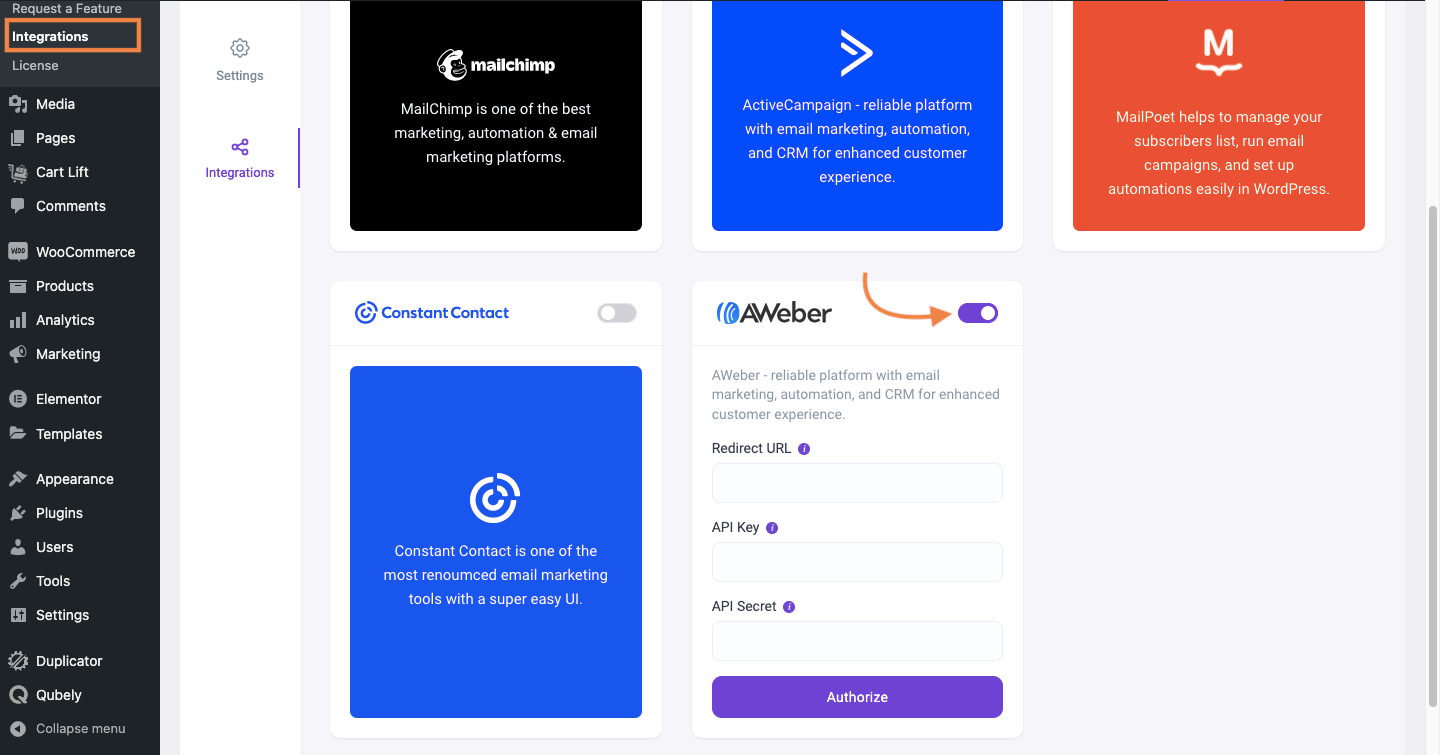
2. Enable AWeber on the Integrations dashboard.
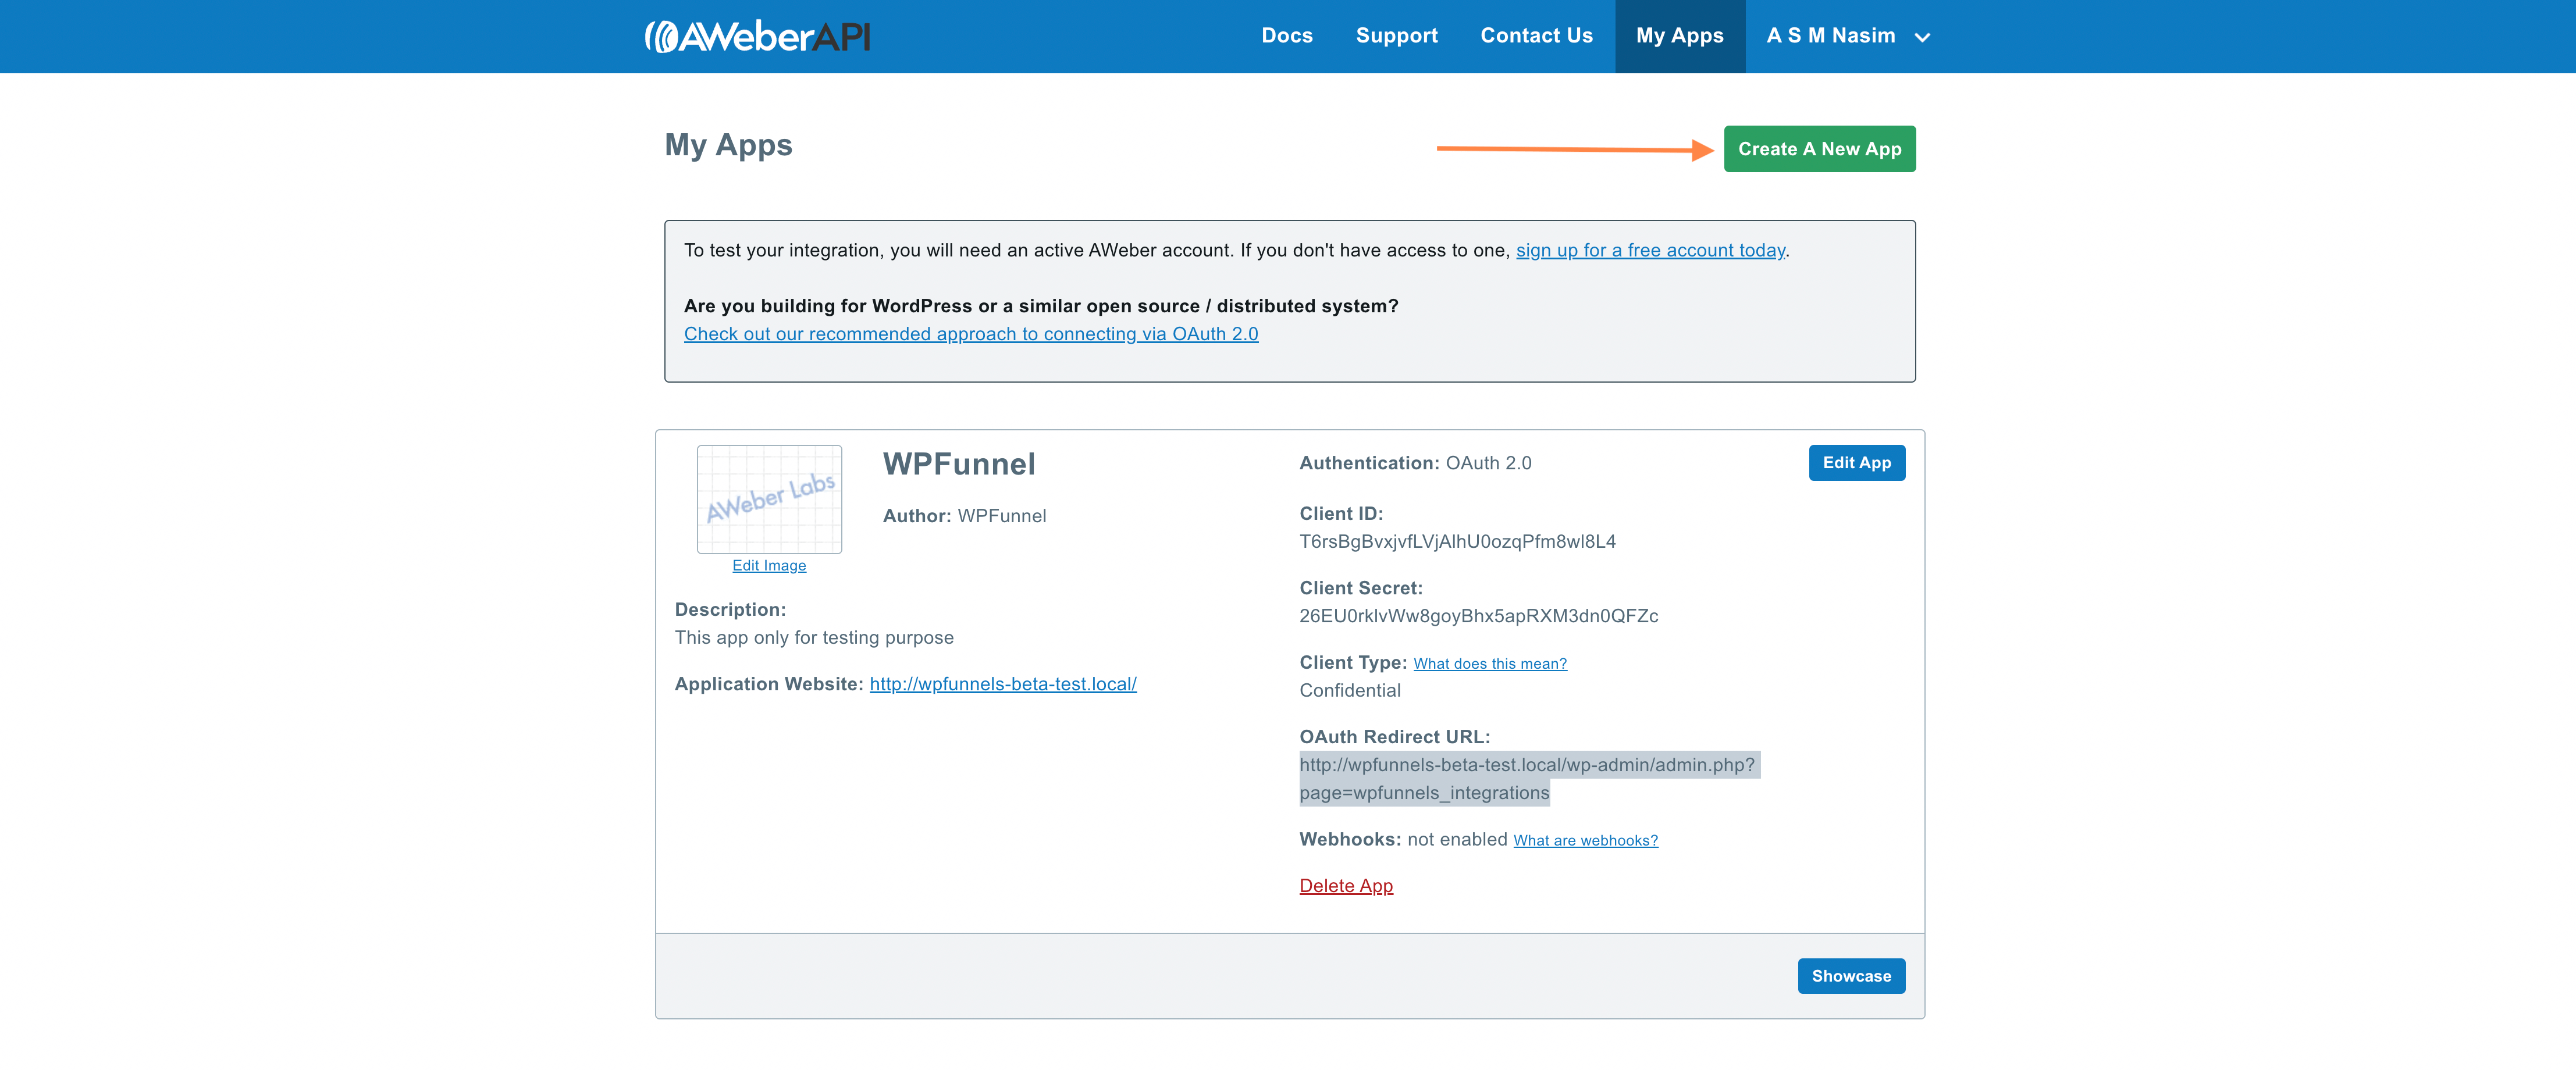
3. Log in to your AWeber Developer account. Go to the My Apps tab and click on Create A New App.
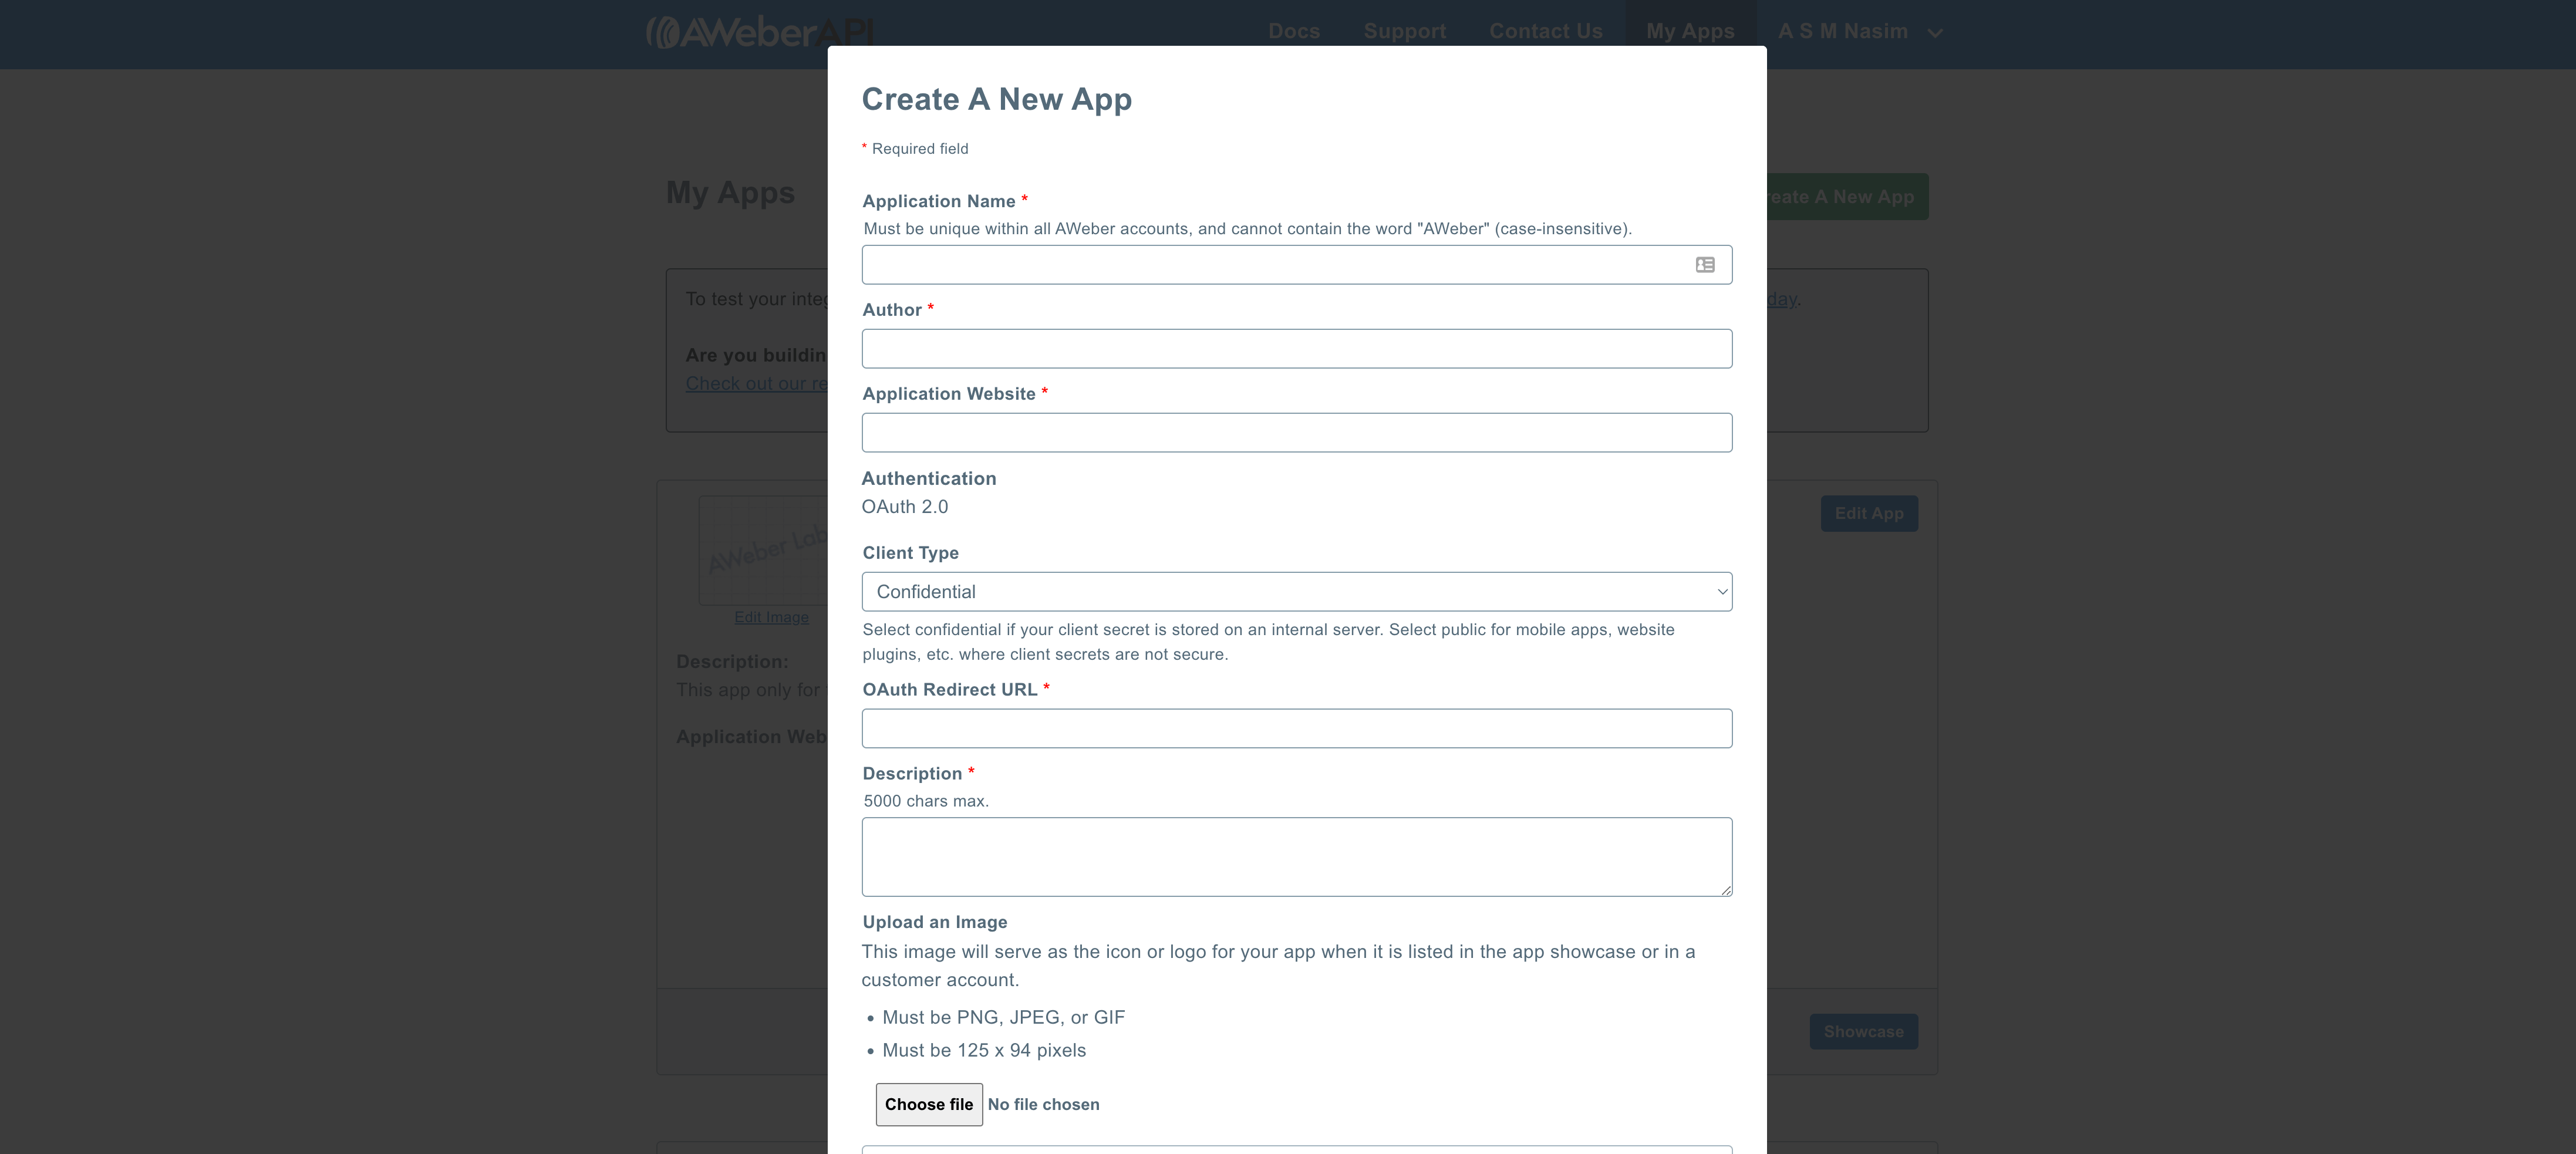
4. Set up the Name, Author & Application Website. Then go to WPFunnels to fetch the Redirect URL.
Redirect URL setup:
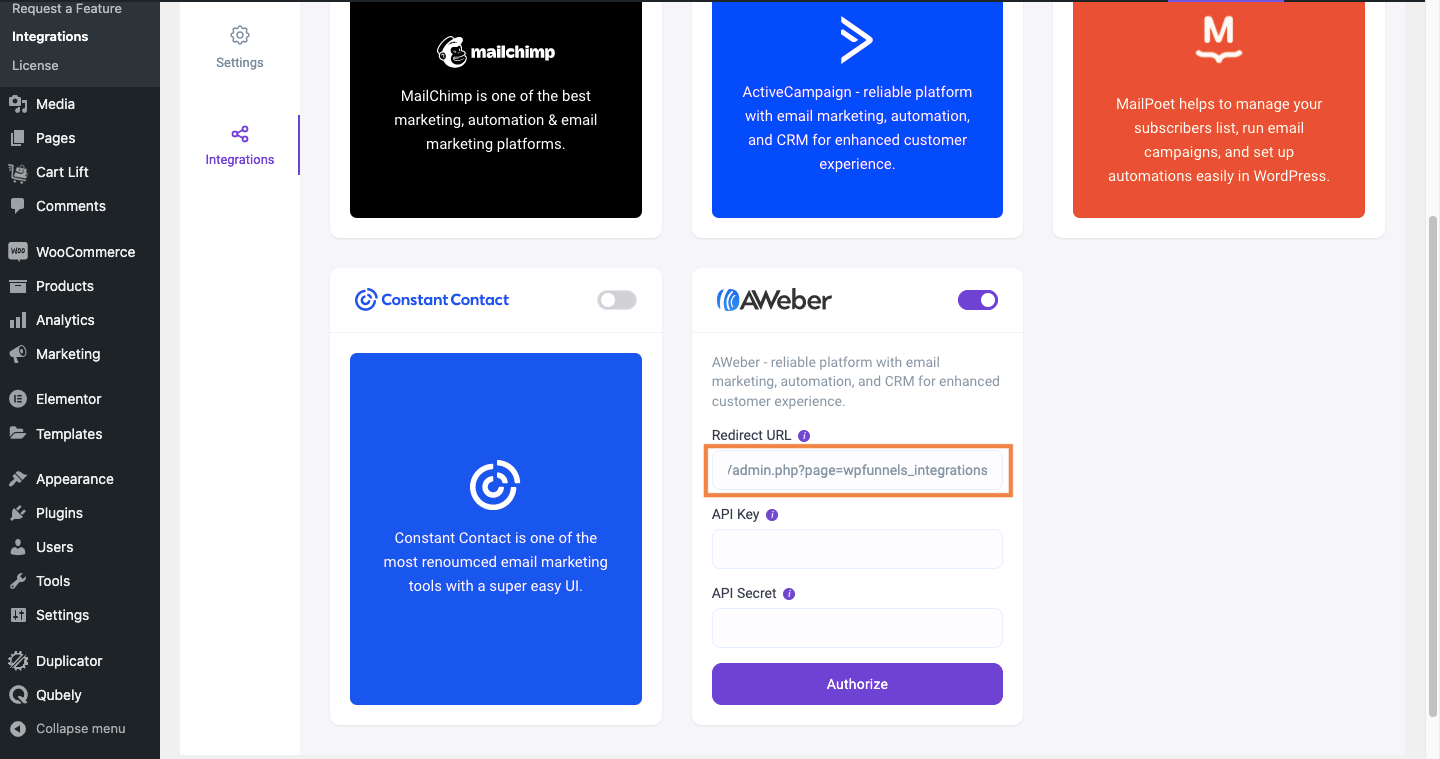
1. Go to WPFunnels > Integrations and copy the WPFunnels Integrations page URL.

2. Paste the URL to the Redirect URL field.
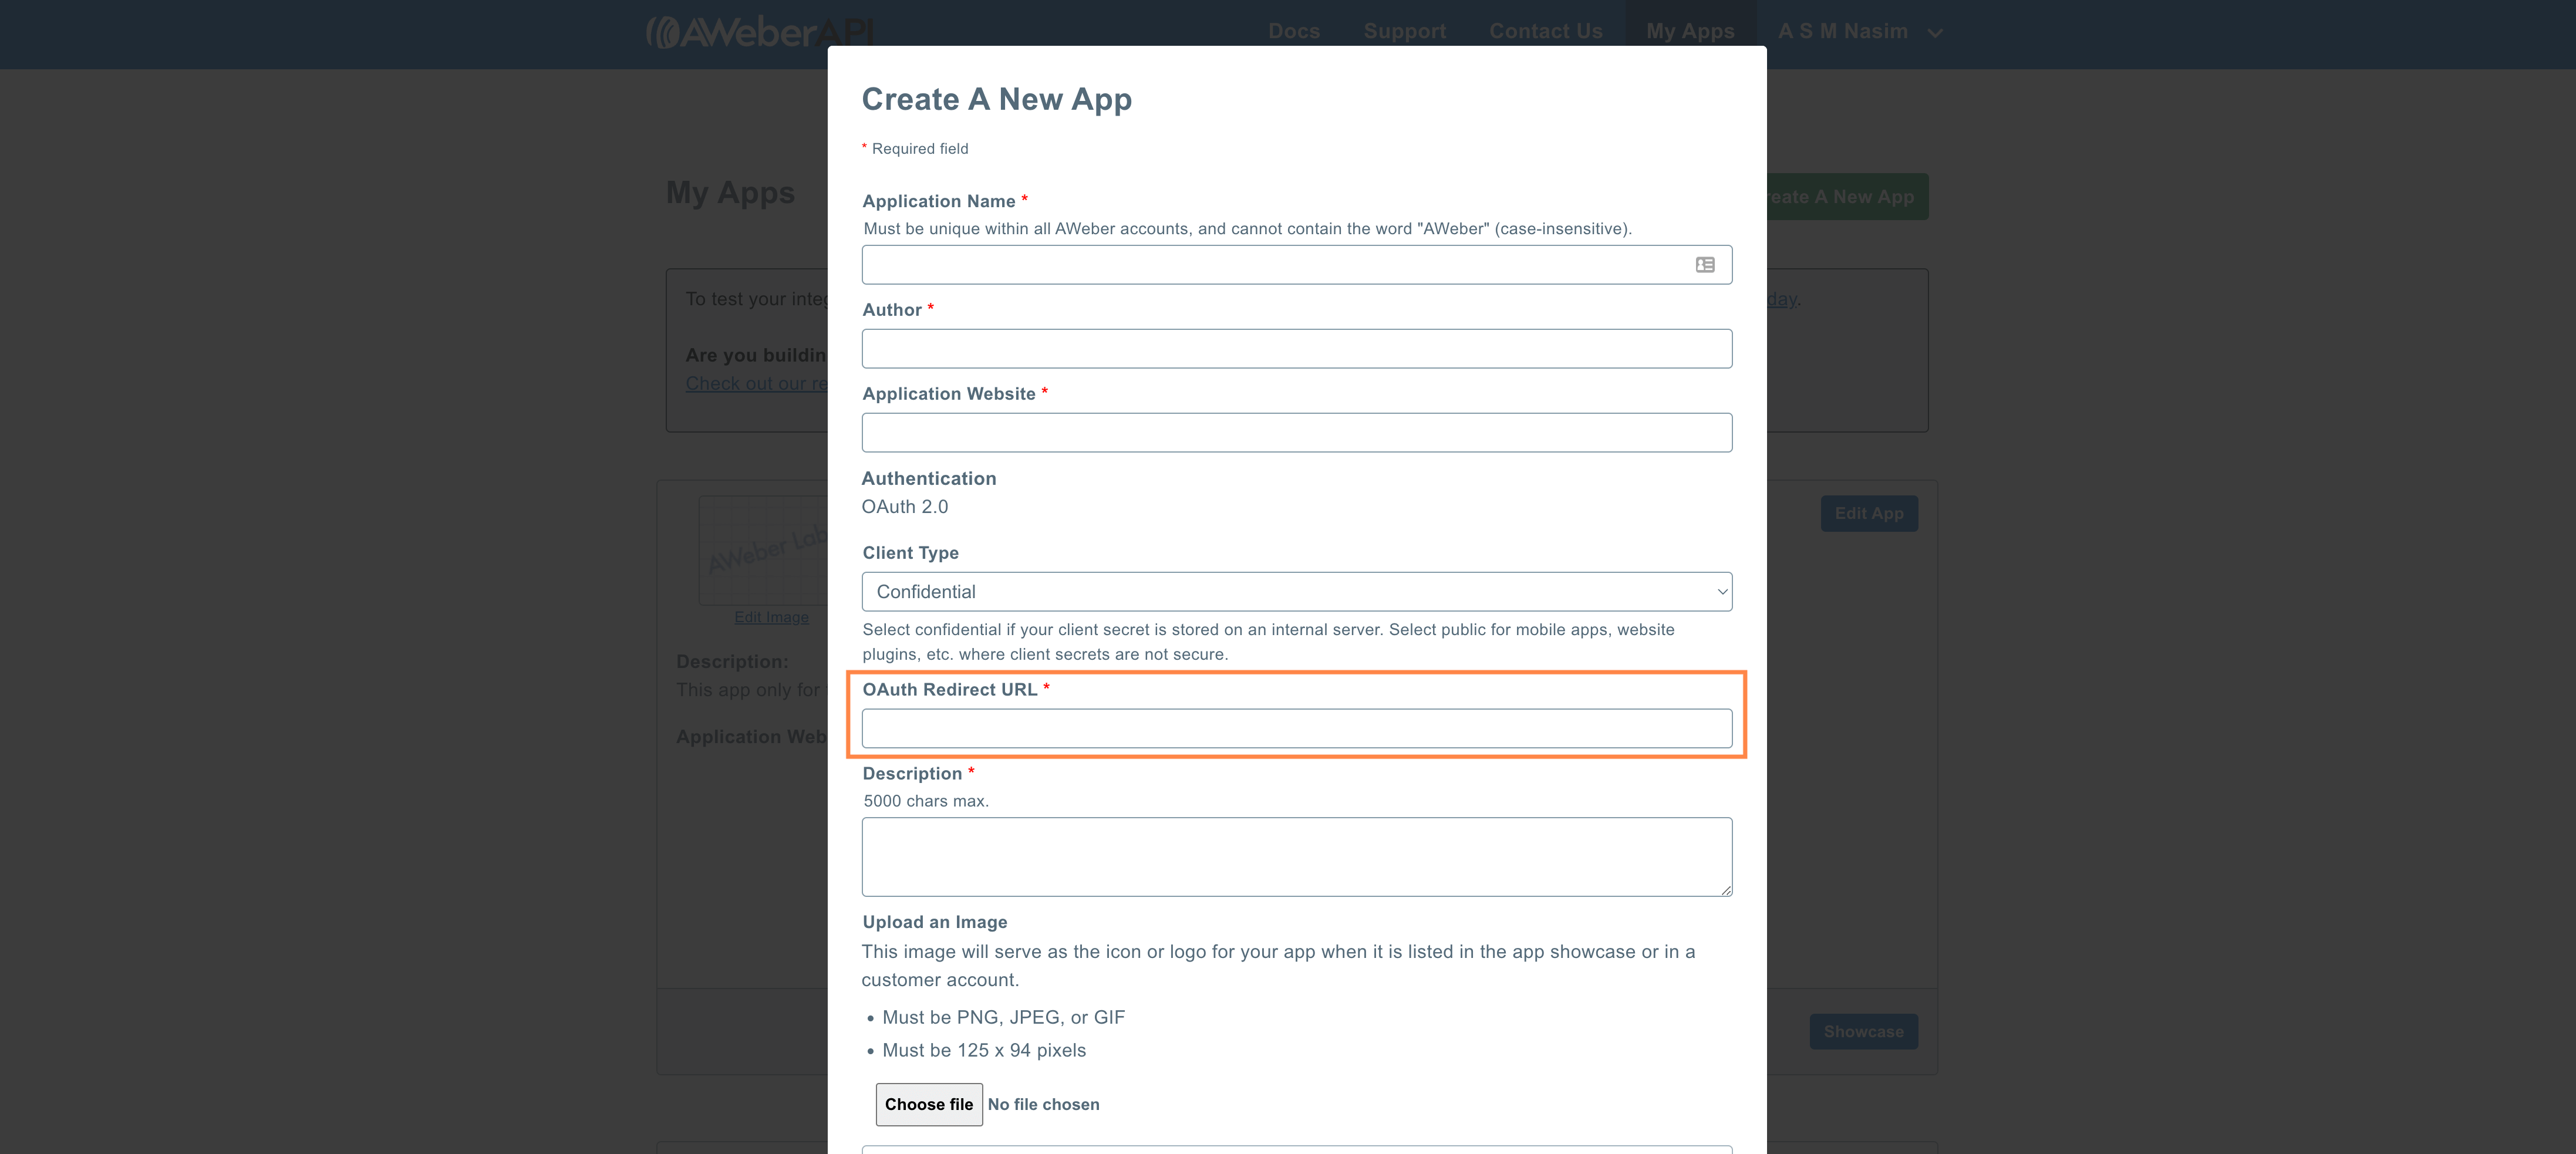
3. Then head back to your AWeber new app. Paste the Redirect URL to the OAuth Redirect URL field and finish creating the new app.
API Key setup:
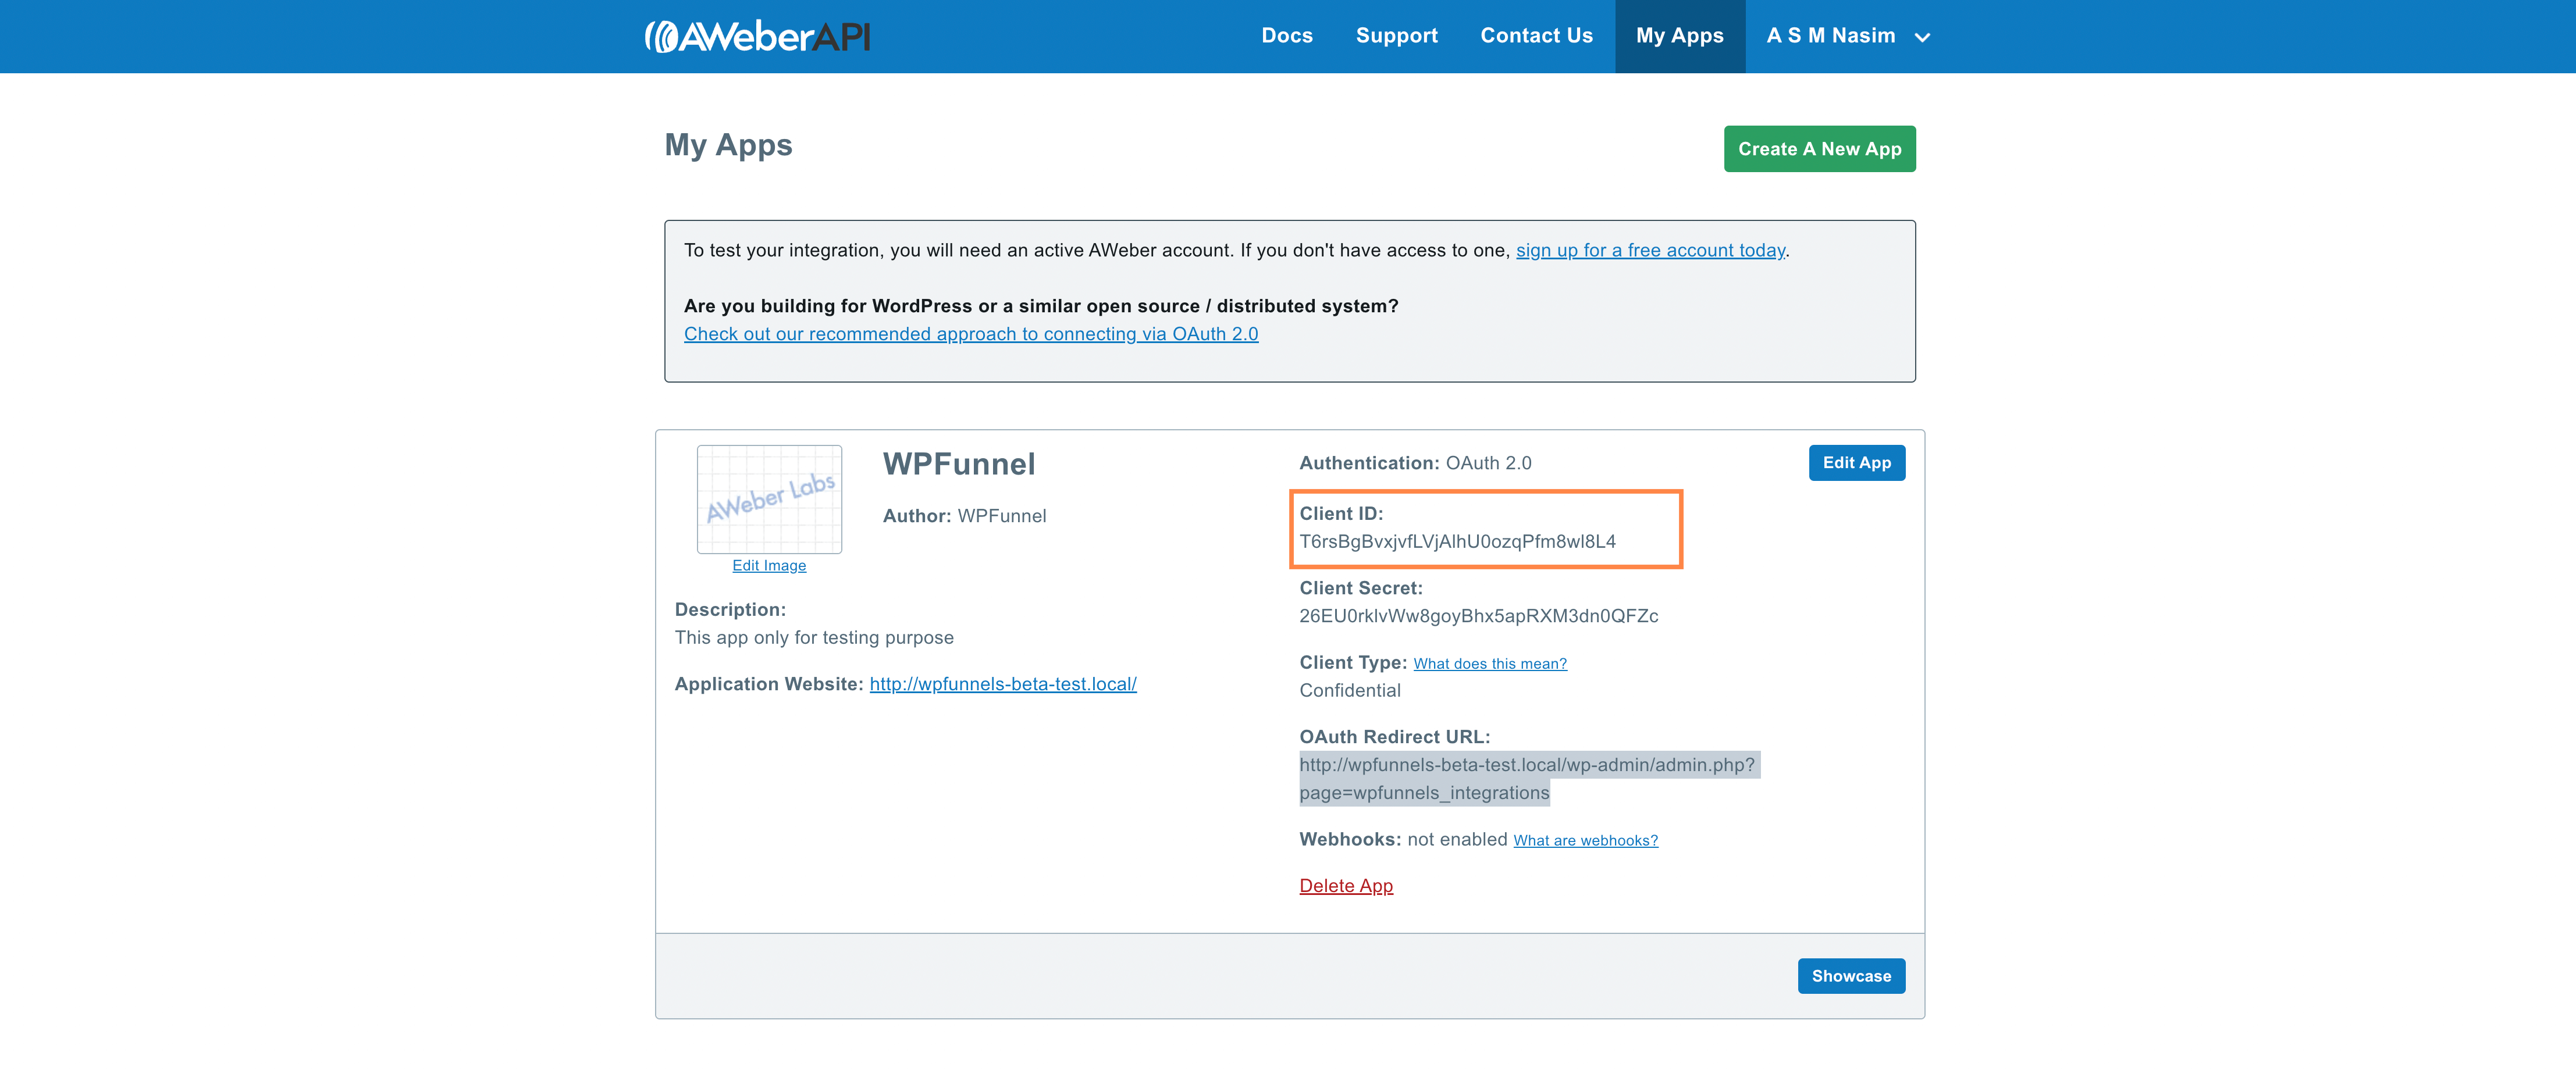
1. Once you complete creating the new app, you’ll see the API details.
Copy the Client ID and head back to the WPFunnels Integrations page.
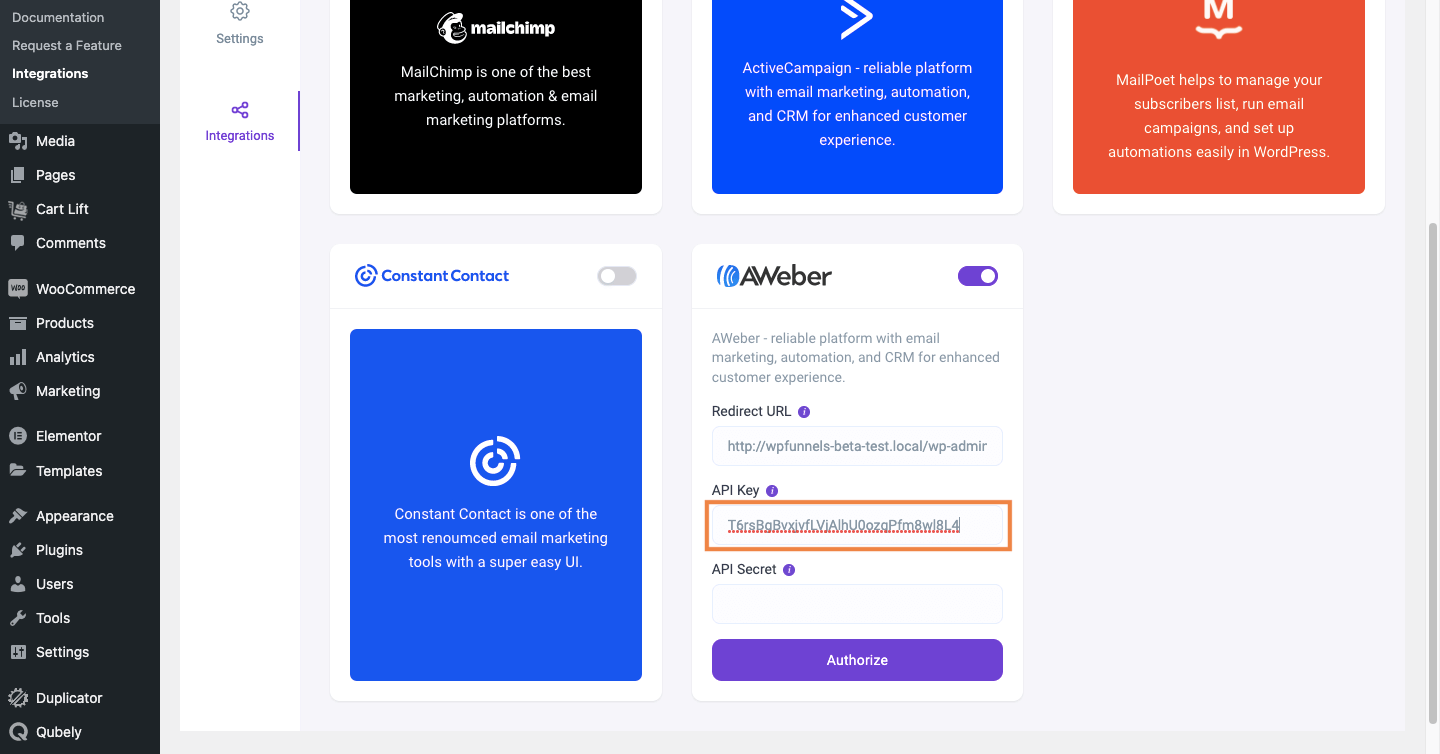
2. On WPFunnels > Integrations tab, paste the Client ID to AWeber API Key.
Secret Key setup:
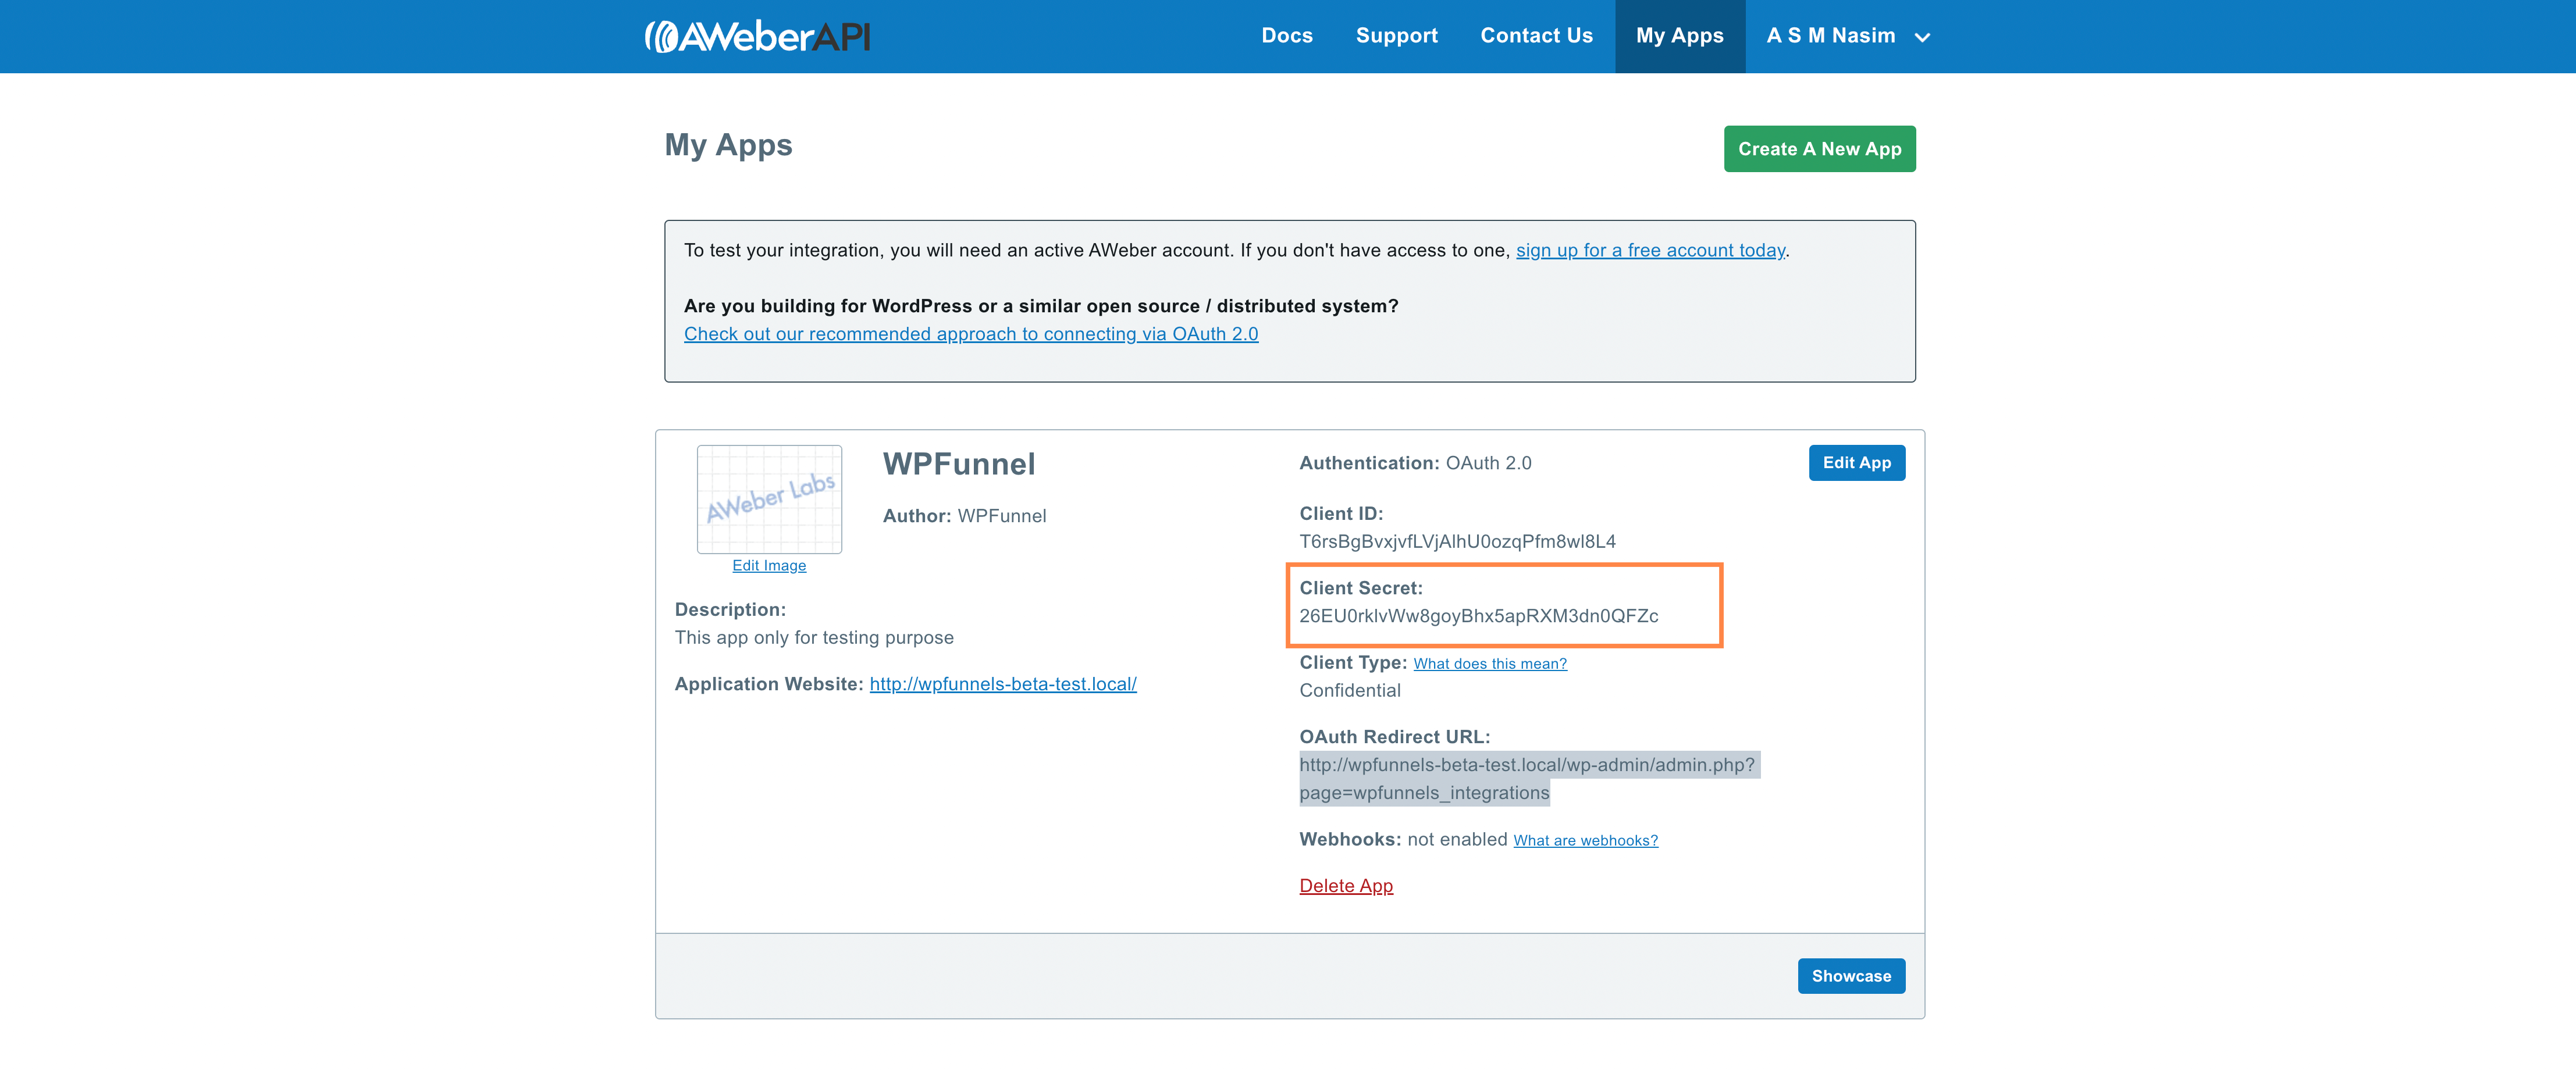
1. Again from your newly created app, copy the Client Secret and head back to the WPFunnels Integrations page.
2. On WPFunnels > Integrations tab, paste the Client Secret to AWeber API Secret.
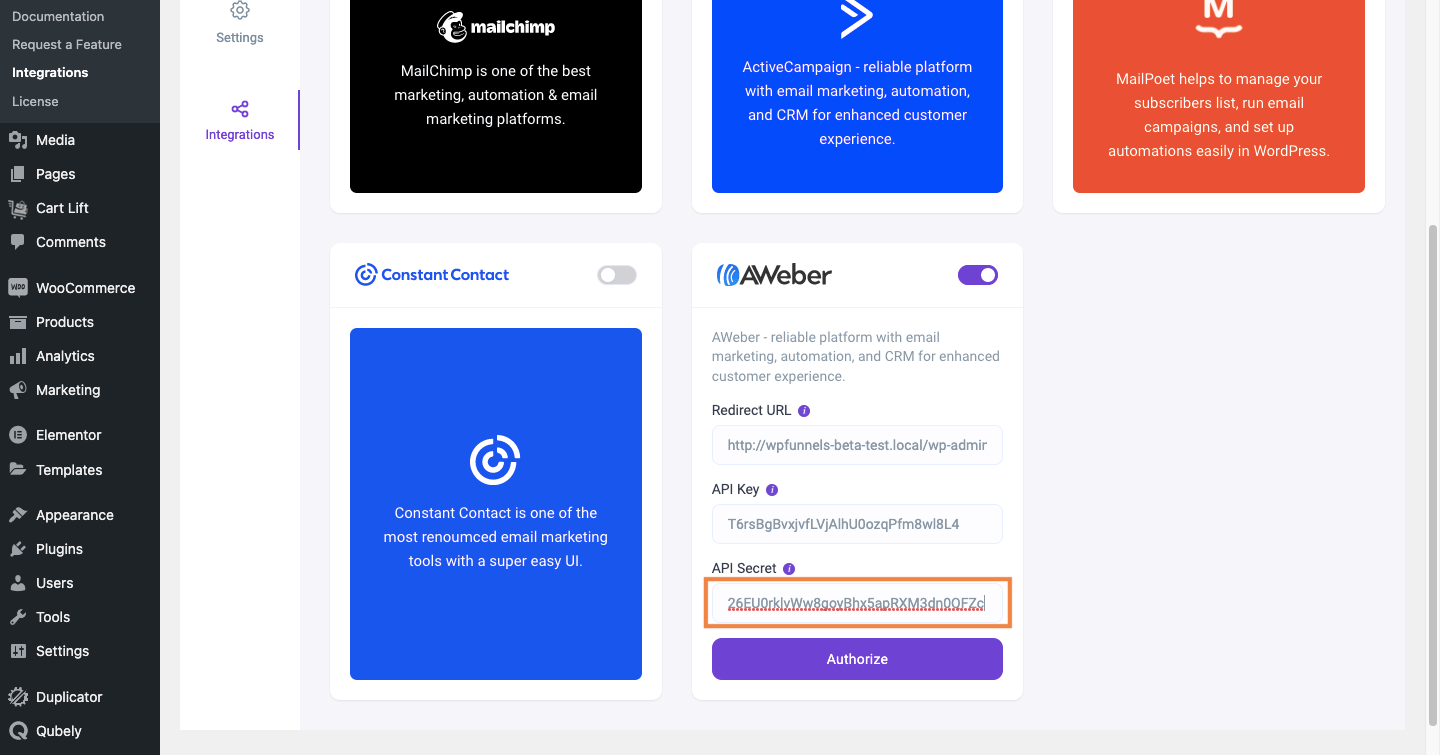
3. Click on the Authorize button for successful authorization.
Step-3: Enable & Add Integration in Funnel
1. Go to WPFunnels and create a new funnel or edit an existing one.
Now, Click on the settings icon on the top right corner (3 dots), and there, you will find the option called Integrations. Click on it and it will open an Integration drawer.

2. Here, select AWeber to connect with it. It will open the integration configurations for you.

Step-4: Configure User Events & Actions
1. Select a User Event, then select a List for adding the user to it and assign a Tag to the user.
For that, create a List & Tag in AWeber or use the existing ones.

There are several User Events you can choose from:
- CTA Triggered
- After Opt-in Form Submit
- Main Order Accepted
- Order Bump Accepted
- Order Bump Not Accepted
- Upsell Accepted
- Upsell Rejected
- Downsell Accepted
- Downsell Rejected
2. If you want you can add multiple user events for this funnel by clicking the (+) sign.

3. Then click Save to save the integration with AWeber for this funnel.
So, whenever a prospect takes a specific action, the user will be added to a specific AWeber list and a specific tag will be assigned. Then you’ll be able to run the required Automation in AWeber easily.
If you want to add AWeber integration to other funnels, just repeat Step 3 and Step 4.
That’s it! This is how easily you can integrate with AWeber and send data from WPFunnels to your lists automatically, based on user actions in the funnel.


