Mail Mint’s WooCommerce Automation feature offers a powerful way to automate email marketing and customer engagement based on specific events in your WooCommerce store.
This guide will walk you through how to set up WooCommerce automation triggers in Mail Mint. Each trigger serves a unique purpose and includes customizable settings, available on the right-hand side of the automation builder.
Step 1: Create An Automation
Go to the Automations Module and click on “New Automation”
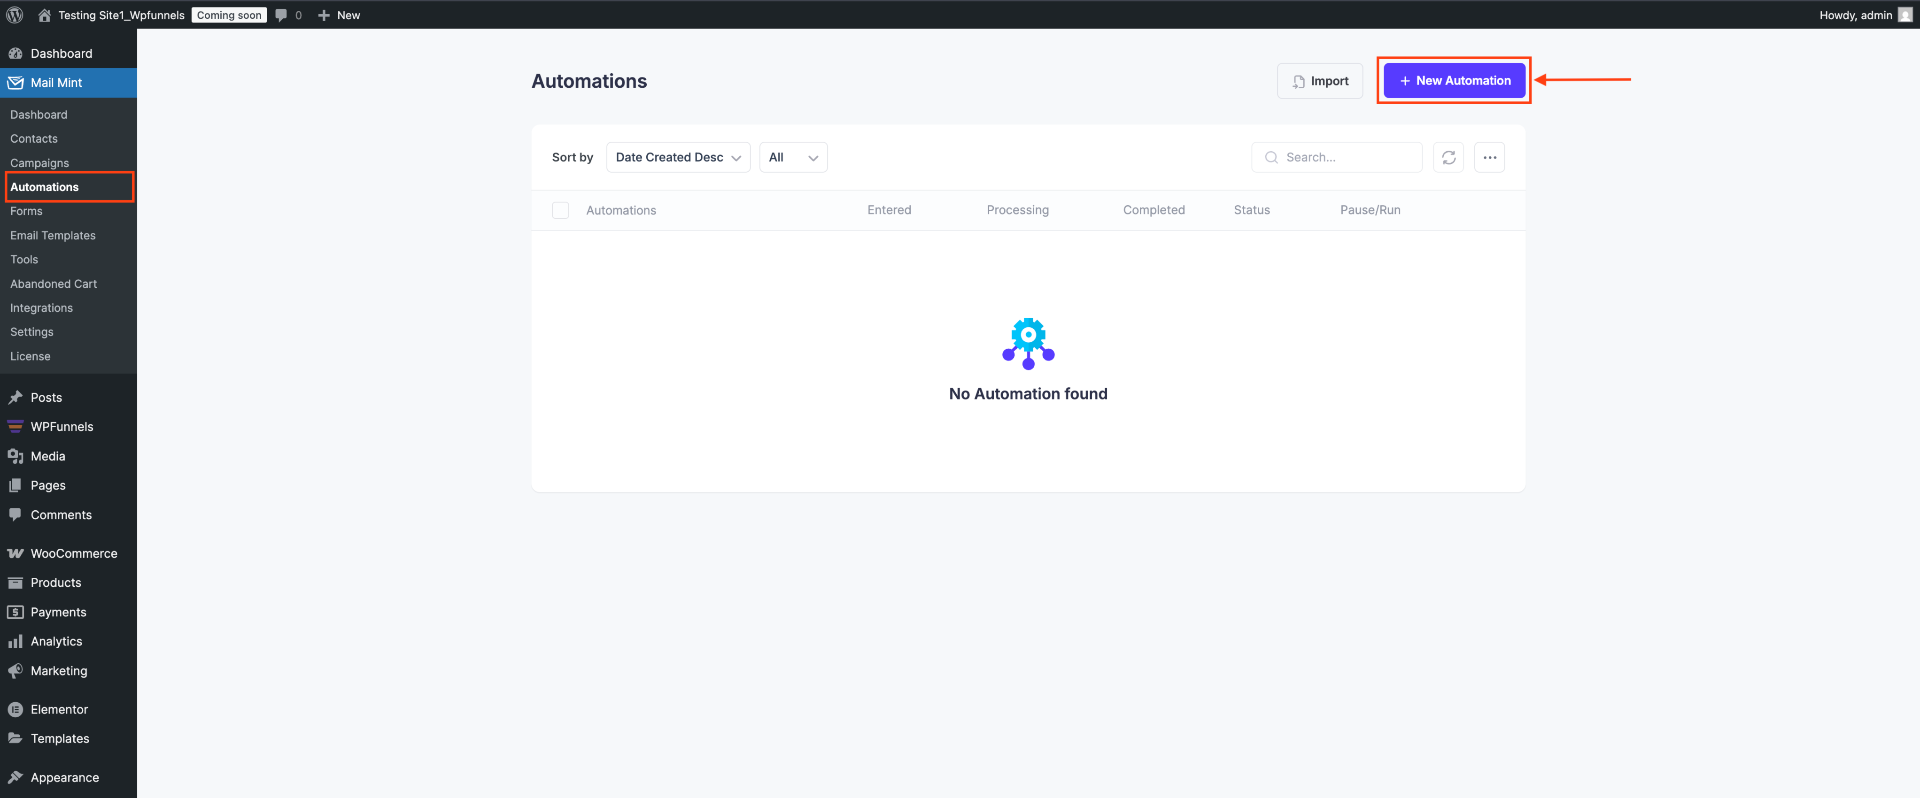
When you click it, a new module will open with several pre-built templates for automation. You can use the templates designed for WooCommerce in this case, or create one from scratch.
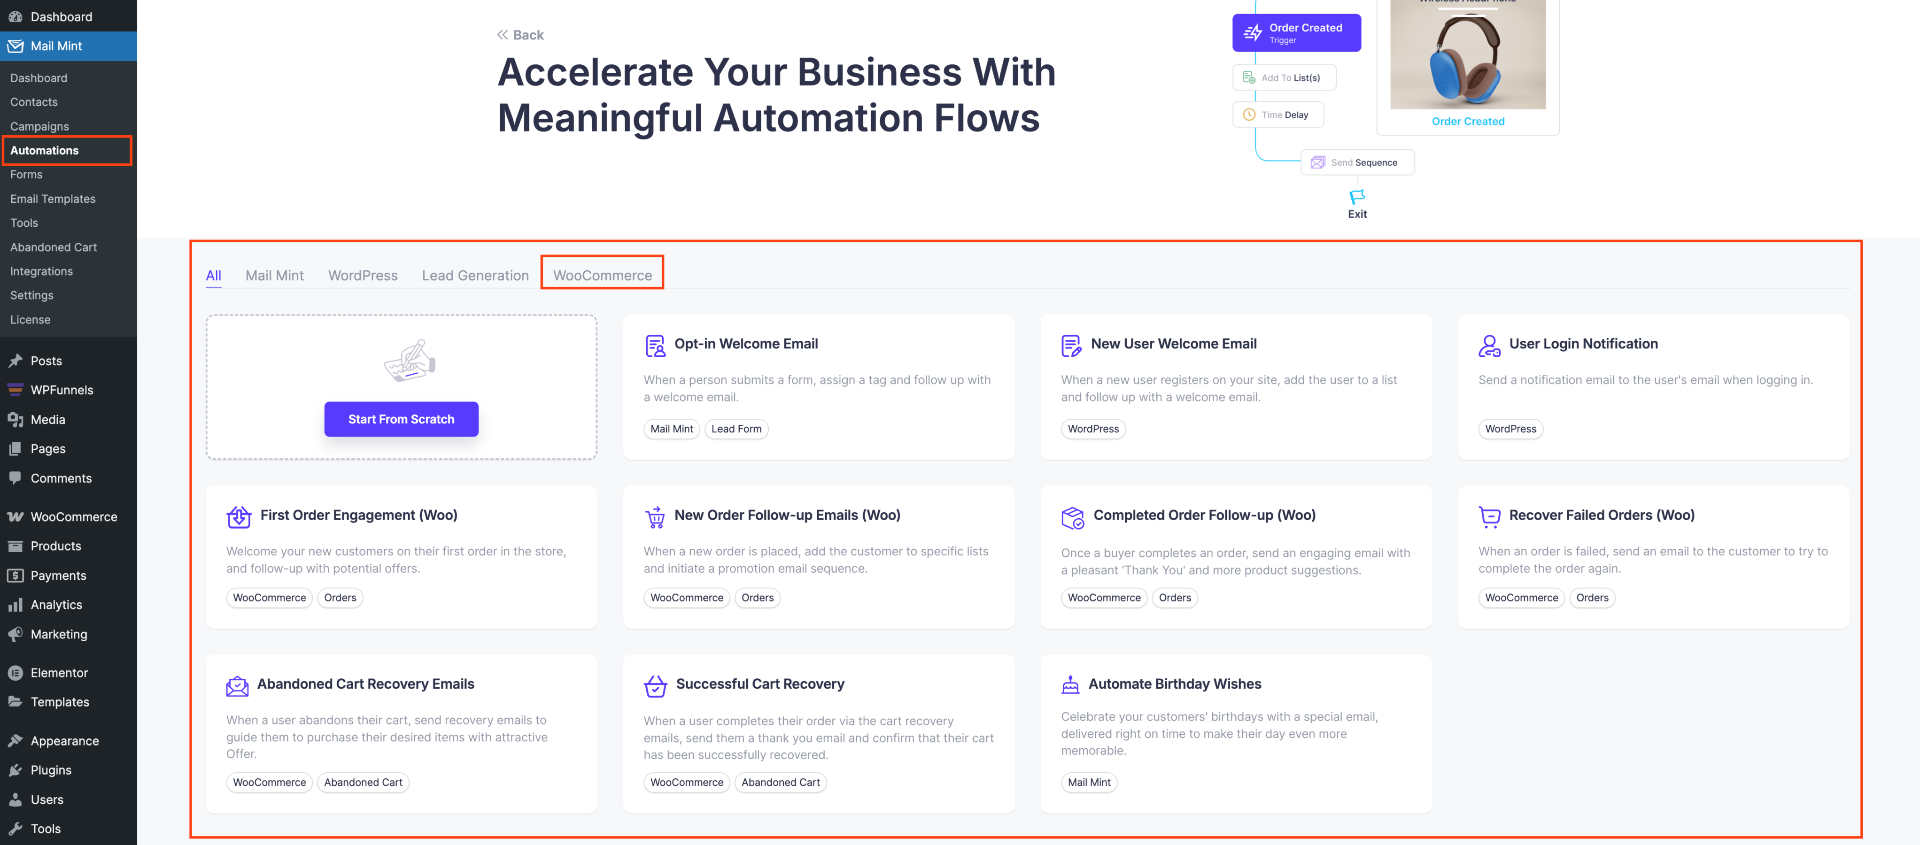
Step 2: Select The Type of Automation You Want To Create
You can find various types of triggers or events to create a WooCommerce-based automation workflow.

Let’s see one by one what these triggers do and how they work.
First Order In Store:
This trigger is activated when a customer makes their first purchase in your WooCommerce store.
Example:
You can use Welcome emails for your new customers to make them feel welcome in your store.

Product Ordered:
This trigger is activated when a product has been ordered in WooCommerce. When using this trigger, you must add a specific product.
Example:
You can use this trigger for creating upsell emails for defined products. Following is an example,

New Order Placed
This trigger is activated when a new order is placed in WooCommerce.
Example:
- You can send emails regarding their order, how you will ship the order, and how much time it might take for the order to be delivered.
- Also, you can send simple thank-you emails immediately after they have placed a new order.

Order Completed:
This trigger is activated when an order is marked as completed. When using this trigger, you must add a specific product.
Example:
You can use this trigger to thank your users for purchasing a product from your store, and you can even offer something special along with the email if you want.

Target Order Status
This trigger allows you to specify a particular order status and add actions in the automation workflow based on that status.
Status of Orders:
- Pending: The order has been received but has not yet been processed or confirmed due to payment issues.
- Processing: Payment was received by the admin and stock has been reduced; the order is now being prepared or processed.
- On Hold: This status is given when you are waiting for the payment, the stock has been reduced from your end, but you need to confirm payment from the customer.
- Completed: The order has been successfully processed and fulfilled.
- Cancelled: The order has been cancelled by the customer or the seller, and the stock of the product has been increased.
- Refunded: The payment for the order has been refunded to the customer by the admin.
- Failed: The payment from the customer failed or was declined (unpaid) or requires authentication.
- Draft: The order is created but not yet submitted or confirmed by the customer, often used for manual or test orders.
- Funnel Order Accepted: The order has been placed through a funnel and accepted, indicating the funnel flow was completed successfully.
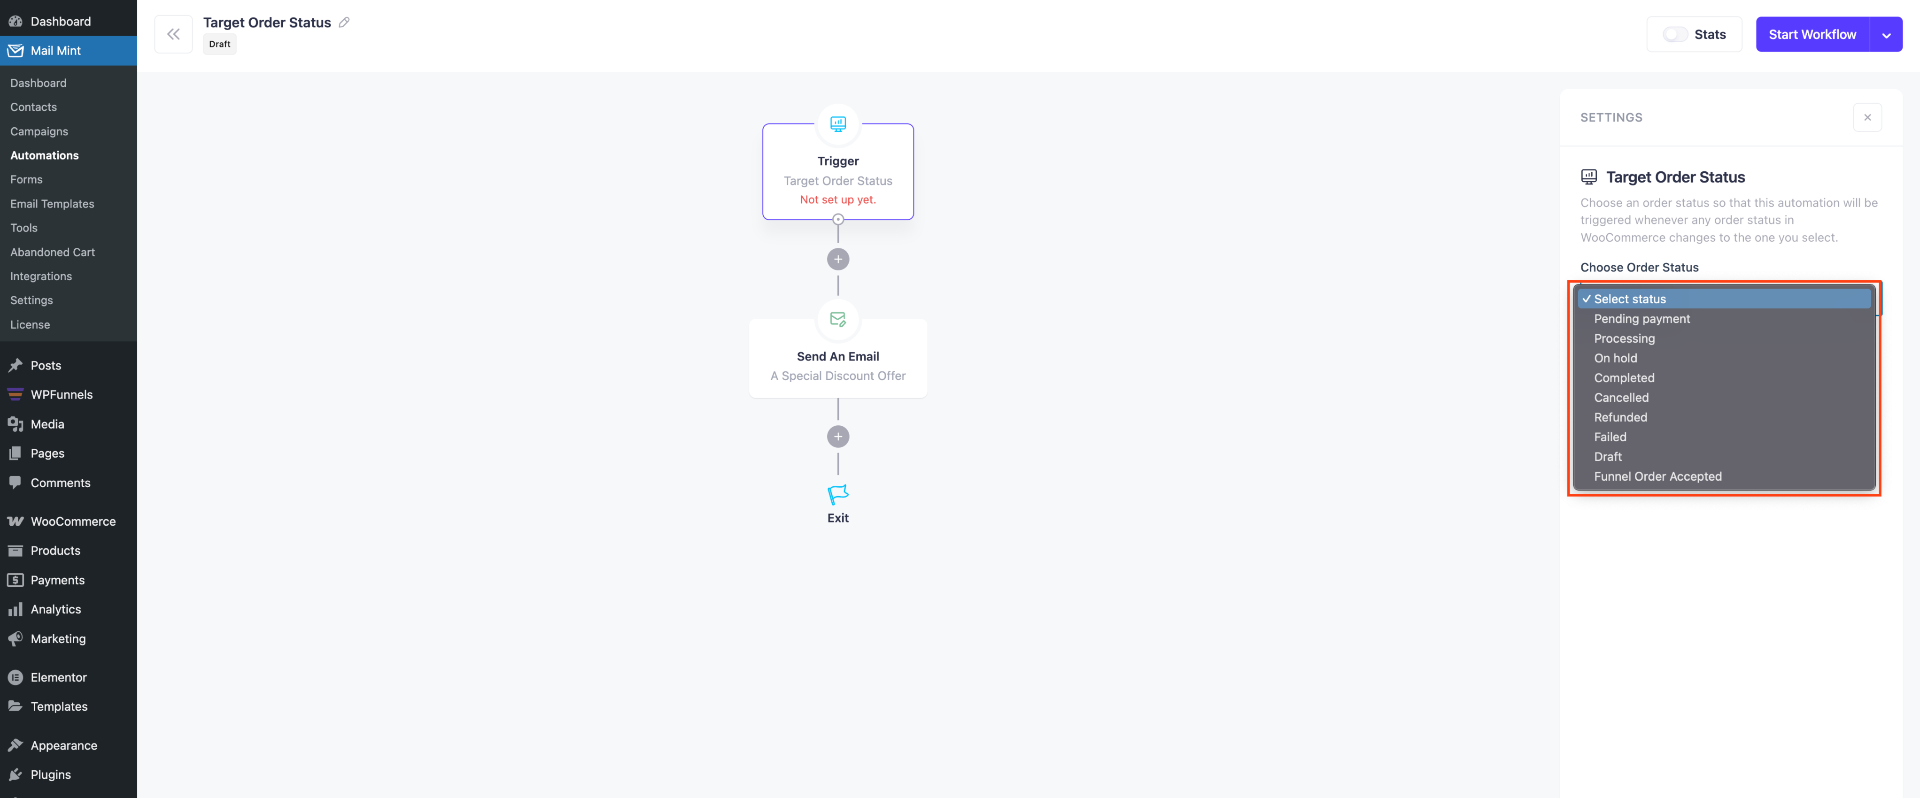
You can use workflows based on the status that you find suitable for your email campaigns.
Order Failed:
This trigger is activated when an order fails.
Example:
You can create an automation that sends an email to customers when their order fails, providing assistance or suggesting alternative products.

By utilizing these automation triggers available in Mail Mint, you can automate different email campaigns for your WooCommerce store.
Review Received:
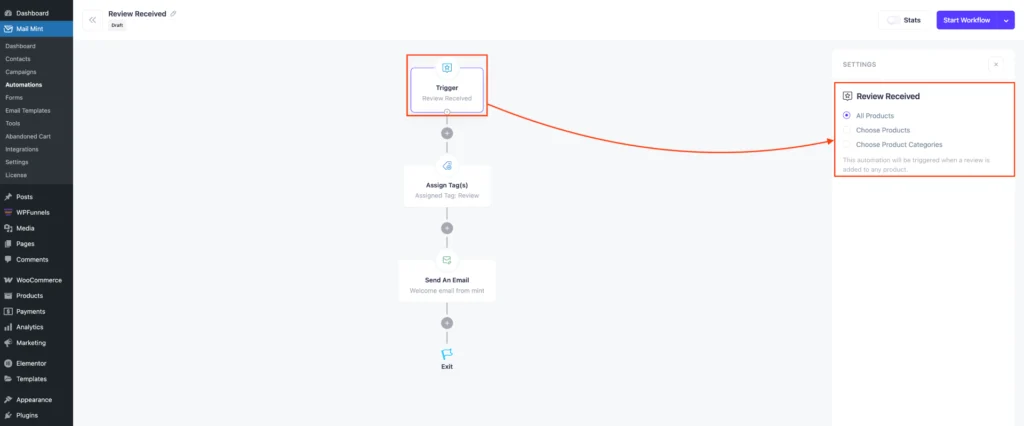
This trigger is activated when a customer submits a review for a product on your WooCommerce store.
Example:
Automatically assign a tag like “Review” to the customer and send a personalized thank-you email (e.g., “Welcome email from Mint”). This allows you to acknowledge their engagement and continue building a positive relationship.
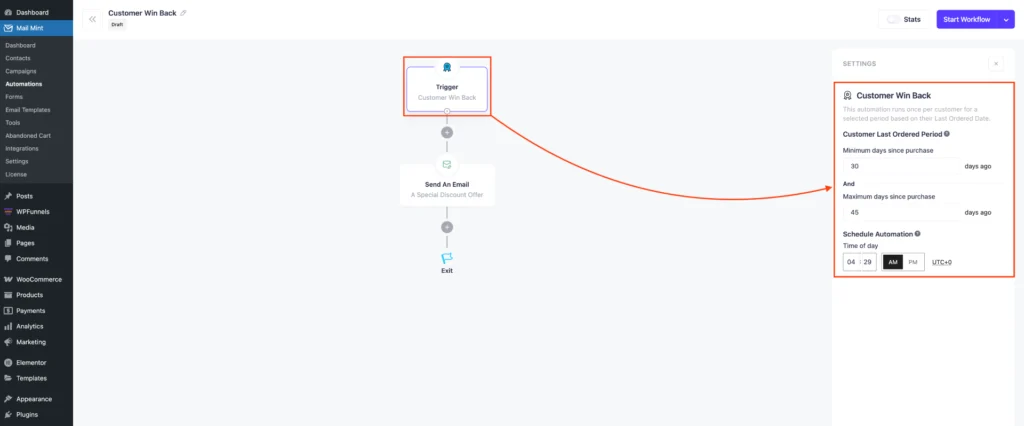
Customer Win Back:
This automation is triggered based on the customer’s Last Ordered Date, targeting those who haven’t made a purchase within a specific time window.
Example:
Send a re-engagement email (like “a special discount offer”) to customers who haven’t ordered in 30–45 days.
Price Drop / On Sale:
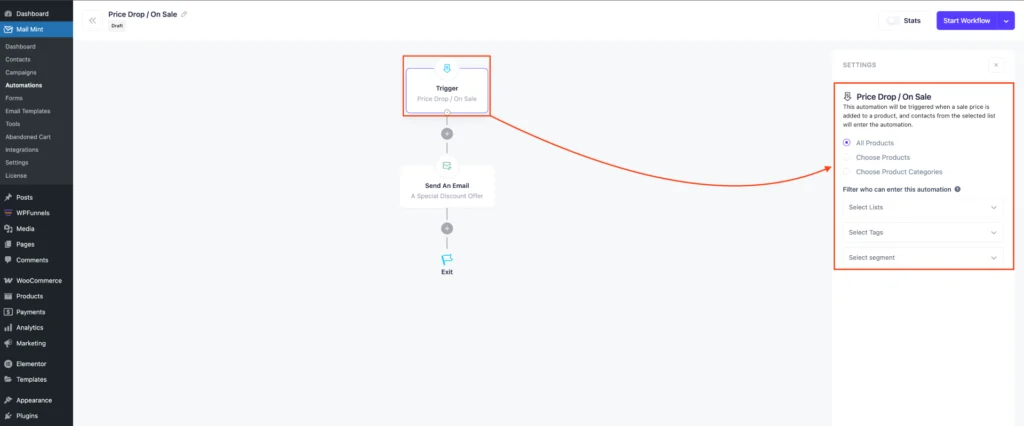
This automation is triggered when a product’s sale price is set or updated.
Example:
You can apply it to all products or select specific ones or categories. It also allows filtering the audience using contact lists, tags, or segments. For example, you can automatically send a special discount email to interested customers as soon as a product they’re following goes on sale.
Each trigger serves a unique purpose so that you can create personalized and timely interactions with your customers.
