Now you can connect Facebook Pixel with your WPFunnels Sales Funnel to track conversions from your Facebook Dynamic ads using WPFunnels.
So you can analyze your conversions from Facebook ads to get a better insight on your targeted customers, optimize your ads and make changes for future ad campaigns.
This will ensure a higher conversion rate from your Facebook Dynamic Ads.
Follow these steps to connect your Facebook Pixel with WPFunnles – the first-ever Drag & Drop Sales Funnel Builder for WordPress.
Step 1: Get Your Facebook Pixel ID
If you haven’t created a Facebook Pixel yet, follow this documentation by Facebook to create and install a Facebook Pixel.
Also, you can follow the steps below to learn how you can create a Facebook Pixel.
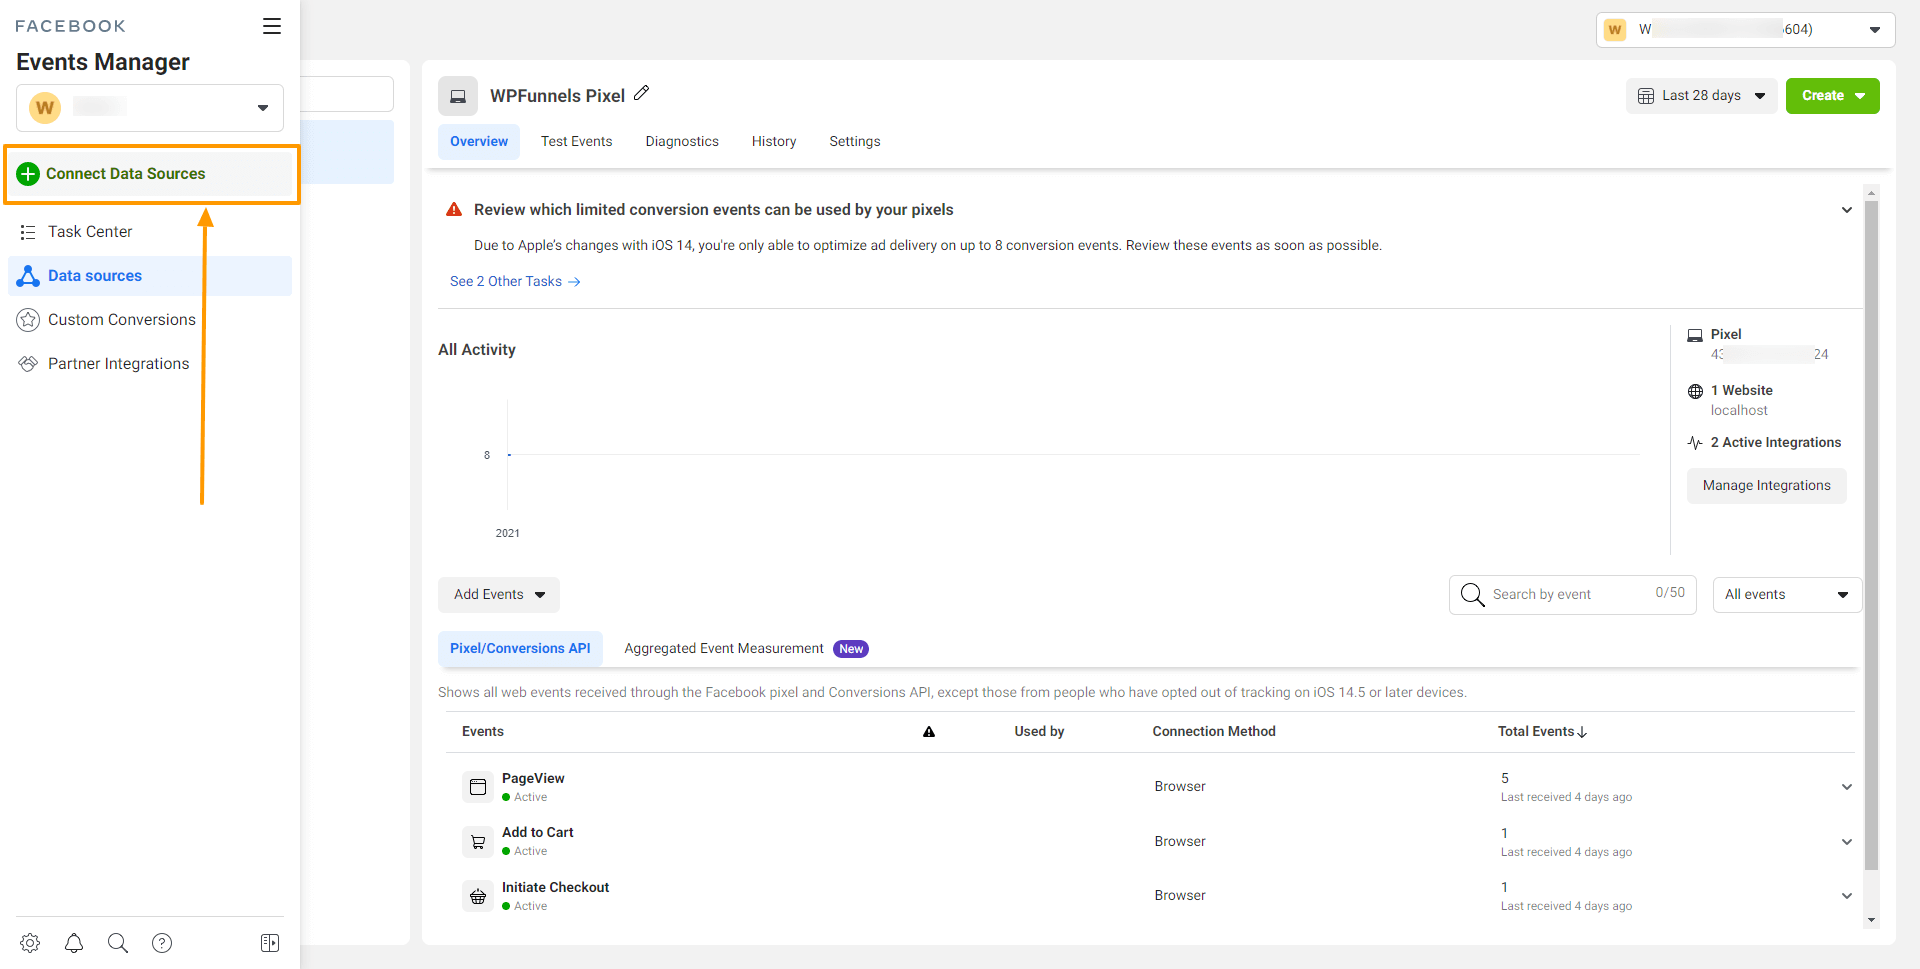
To add that Pixel into your Event Manager, go to Facebook Event Manager, hover your mouse on the “+” symbol on the left sidebar, and a menu bar will slide in from the left side of the screen.
1. Click on the Connect Data Sources option.
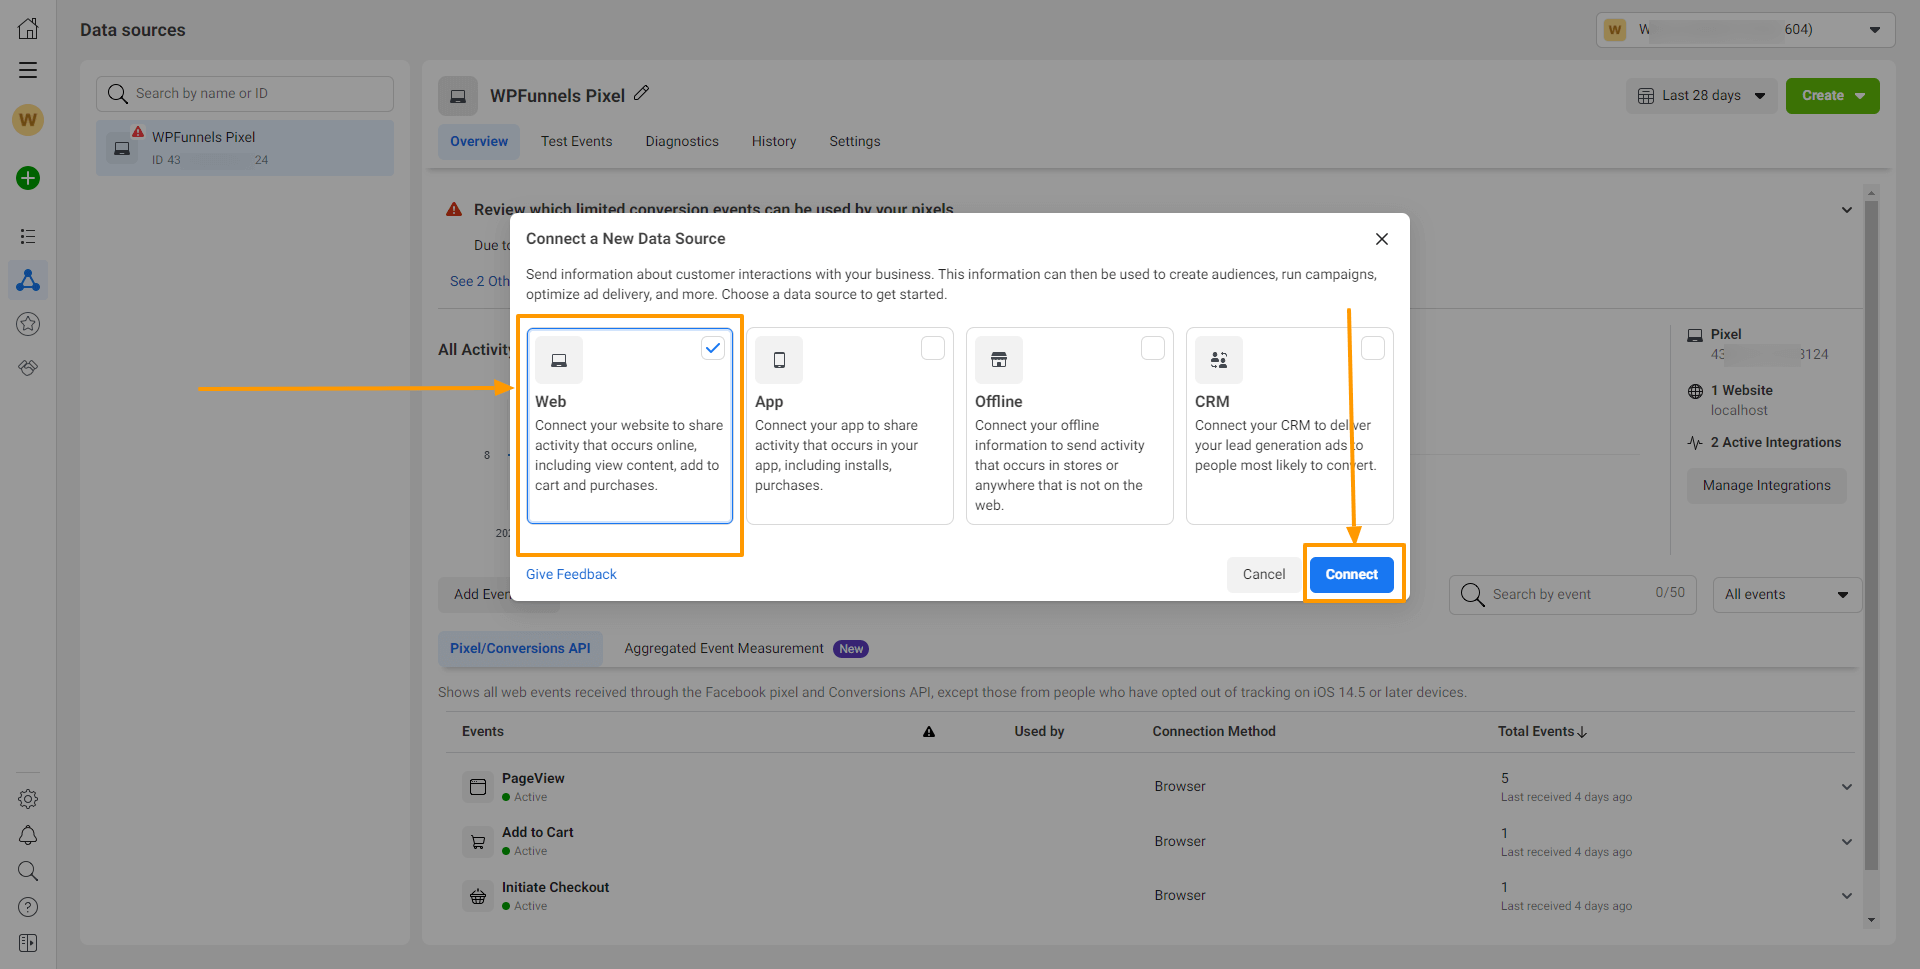
2. A Connect a New Data Source option popup will appear – select Web and click on the Connect button.
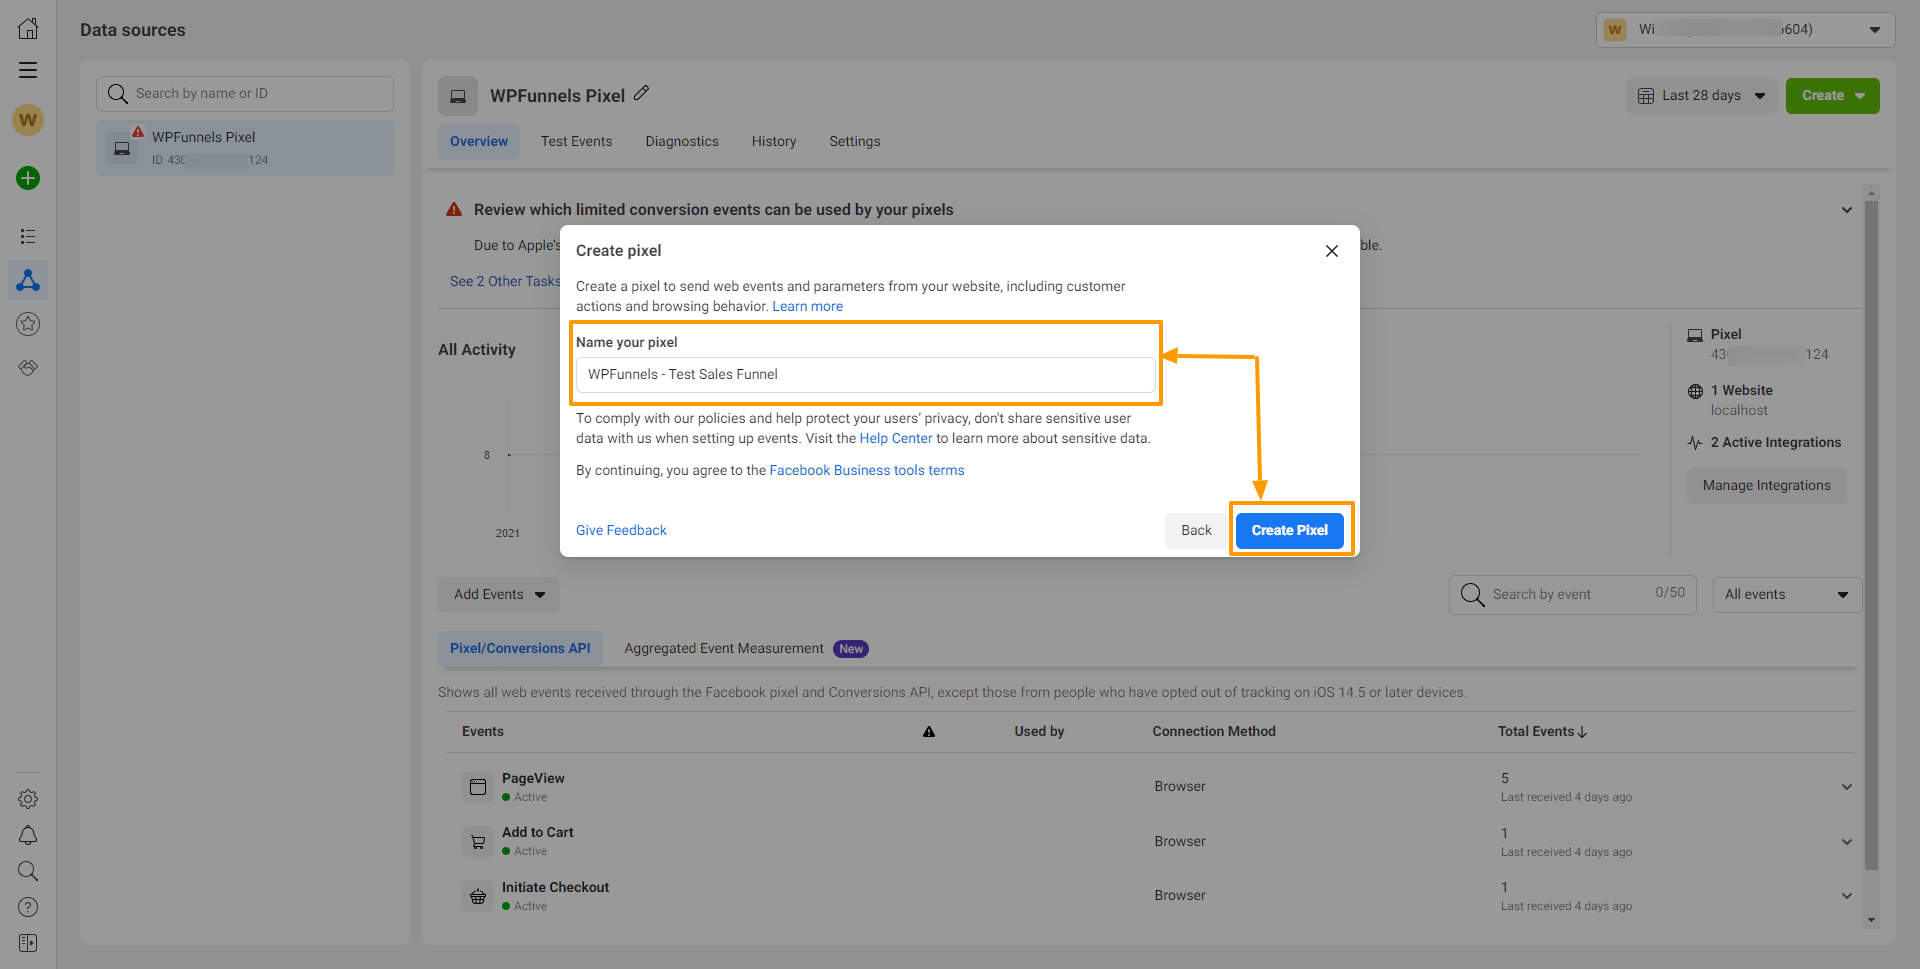
3. Here, give a name to your Pixel, and click on the Create pixel button.
4. Now, enter your web URL and click on the Check button.
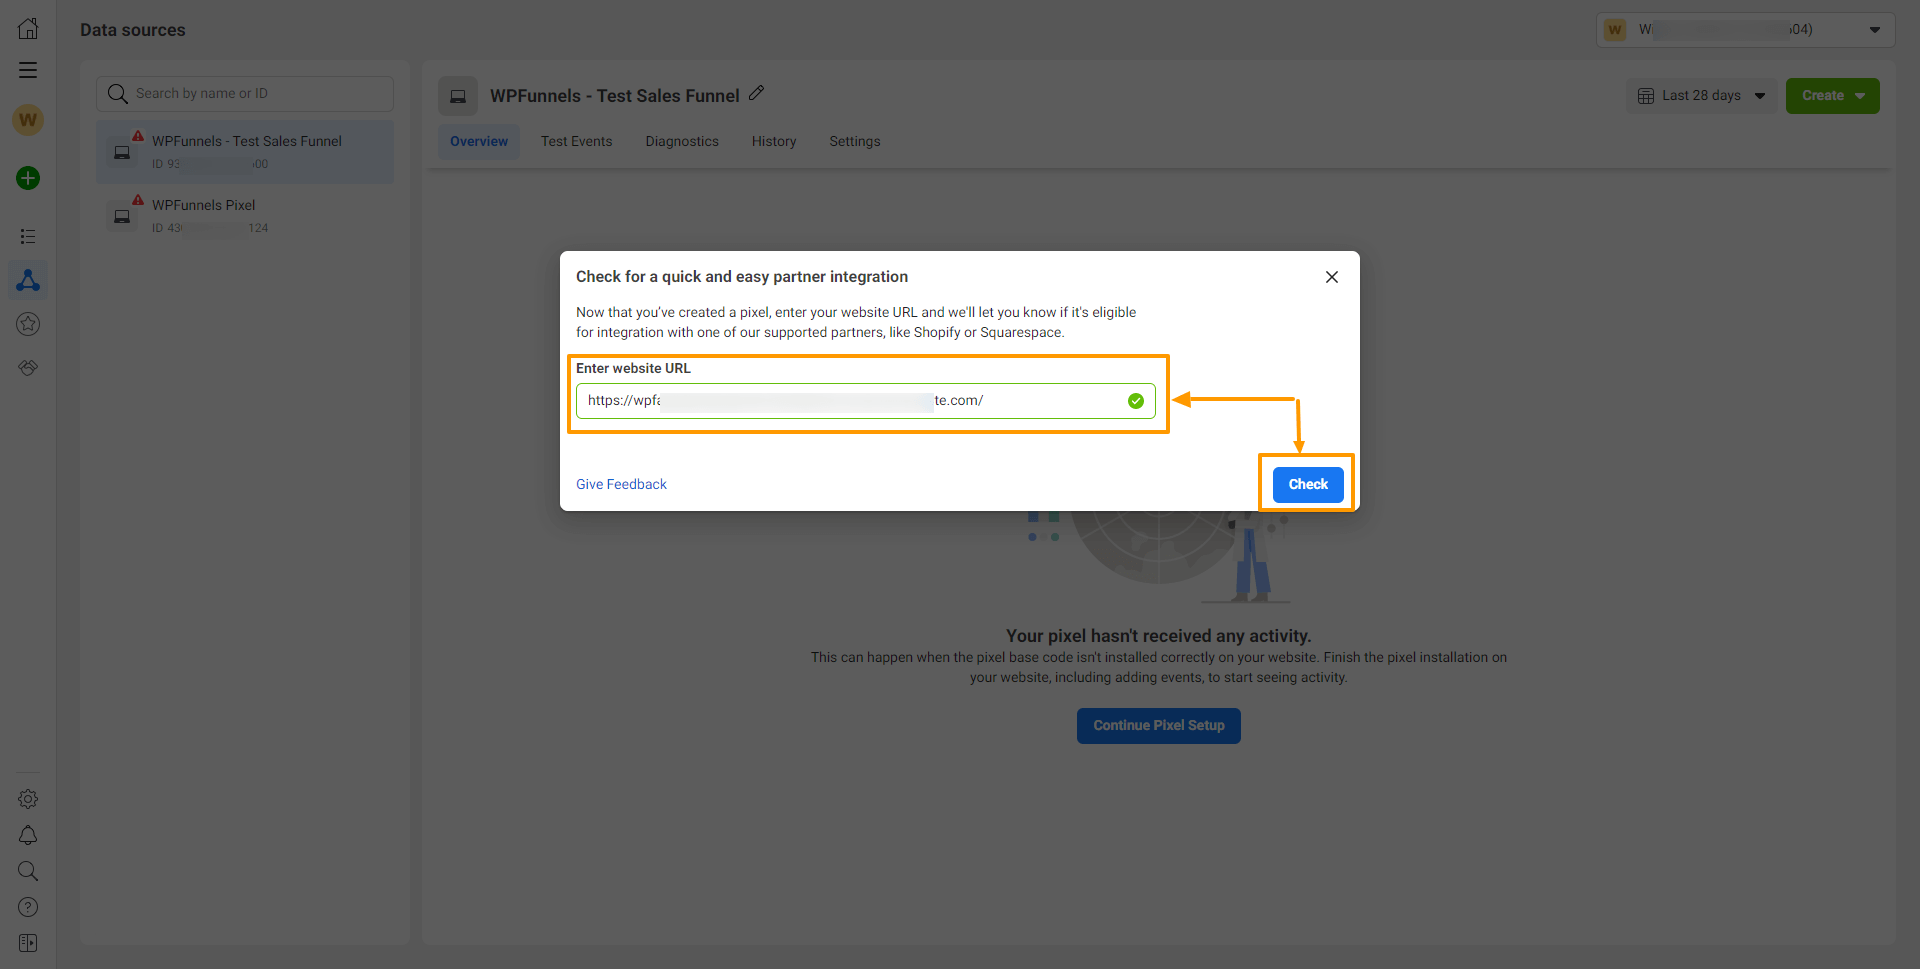
If the URL is valid, you will see a green tick on the right of the URL box, and the Check option will be changed into the Next button.
Click on the Next button.
5. The next option you will get is how to connect your website.
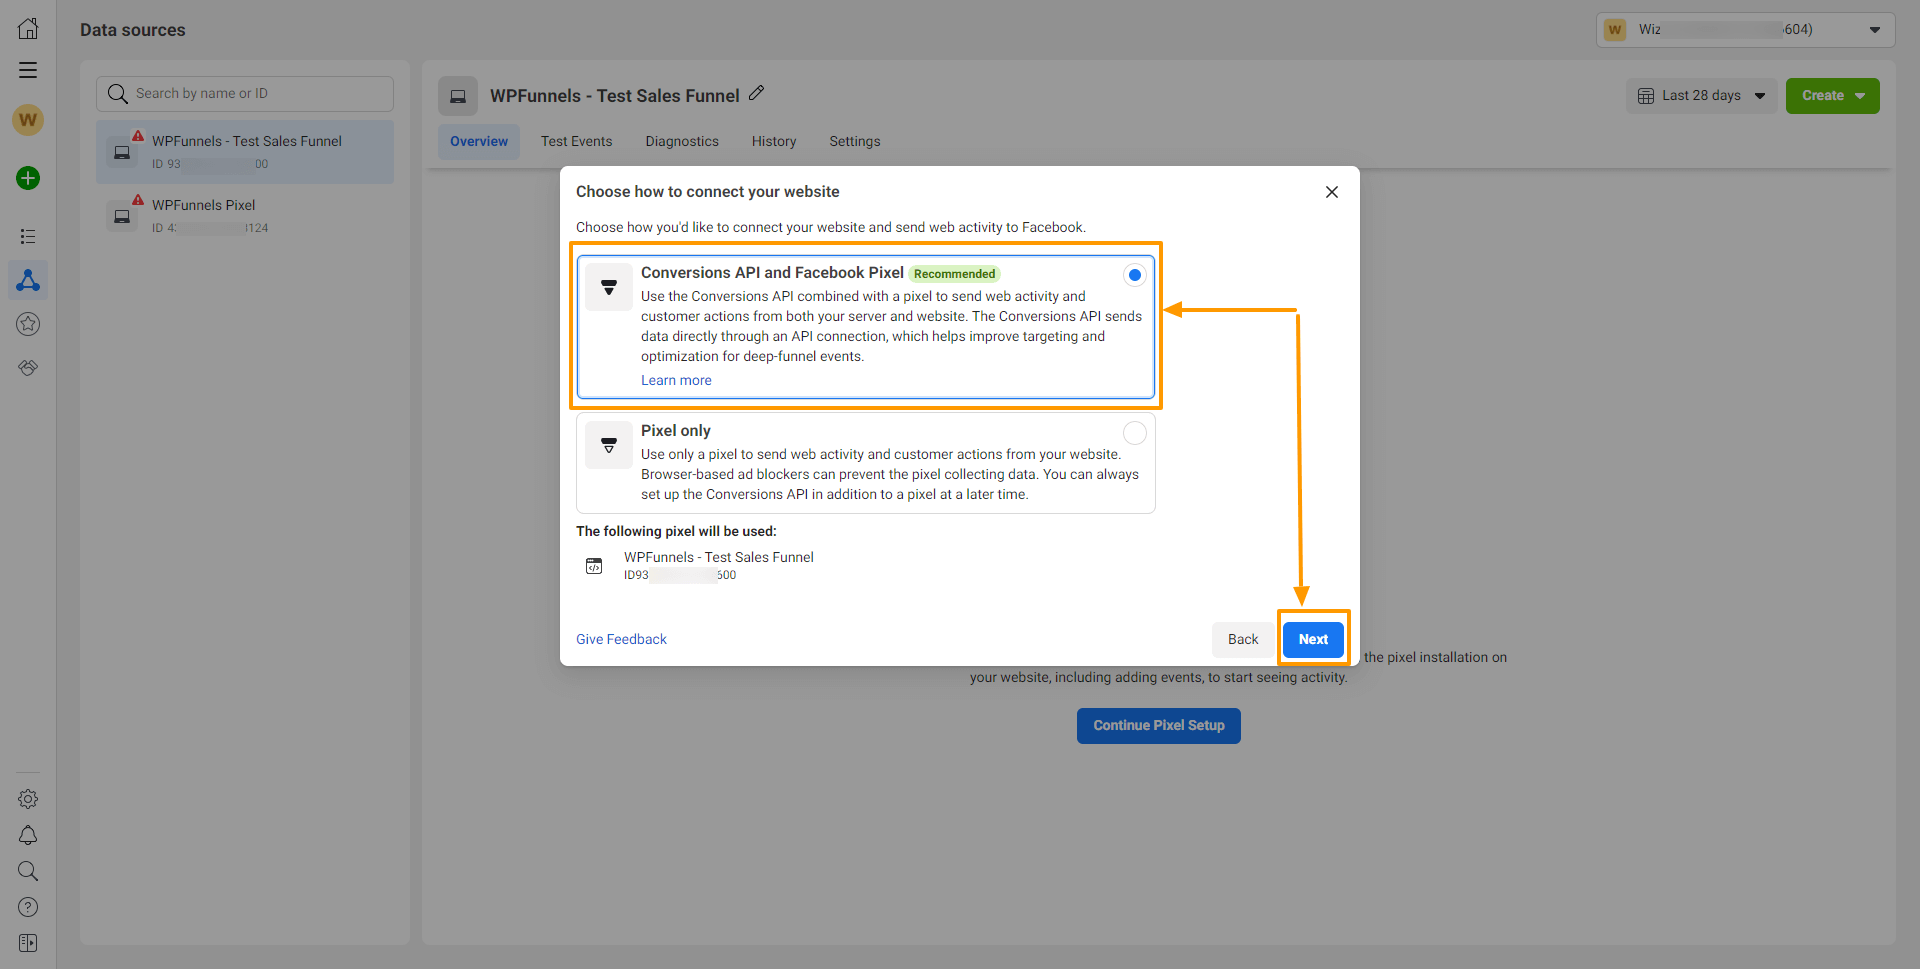
You will see that the “Conversion API and Facebook Pixel” option is recommended, you can go with this.
Click on the Next button.
That’s it, your new Facebook Pixel is ready.
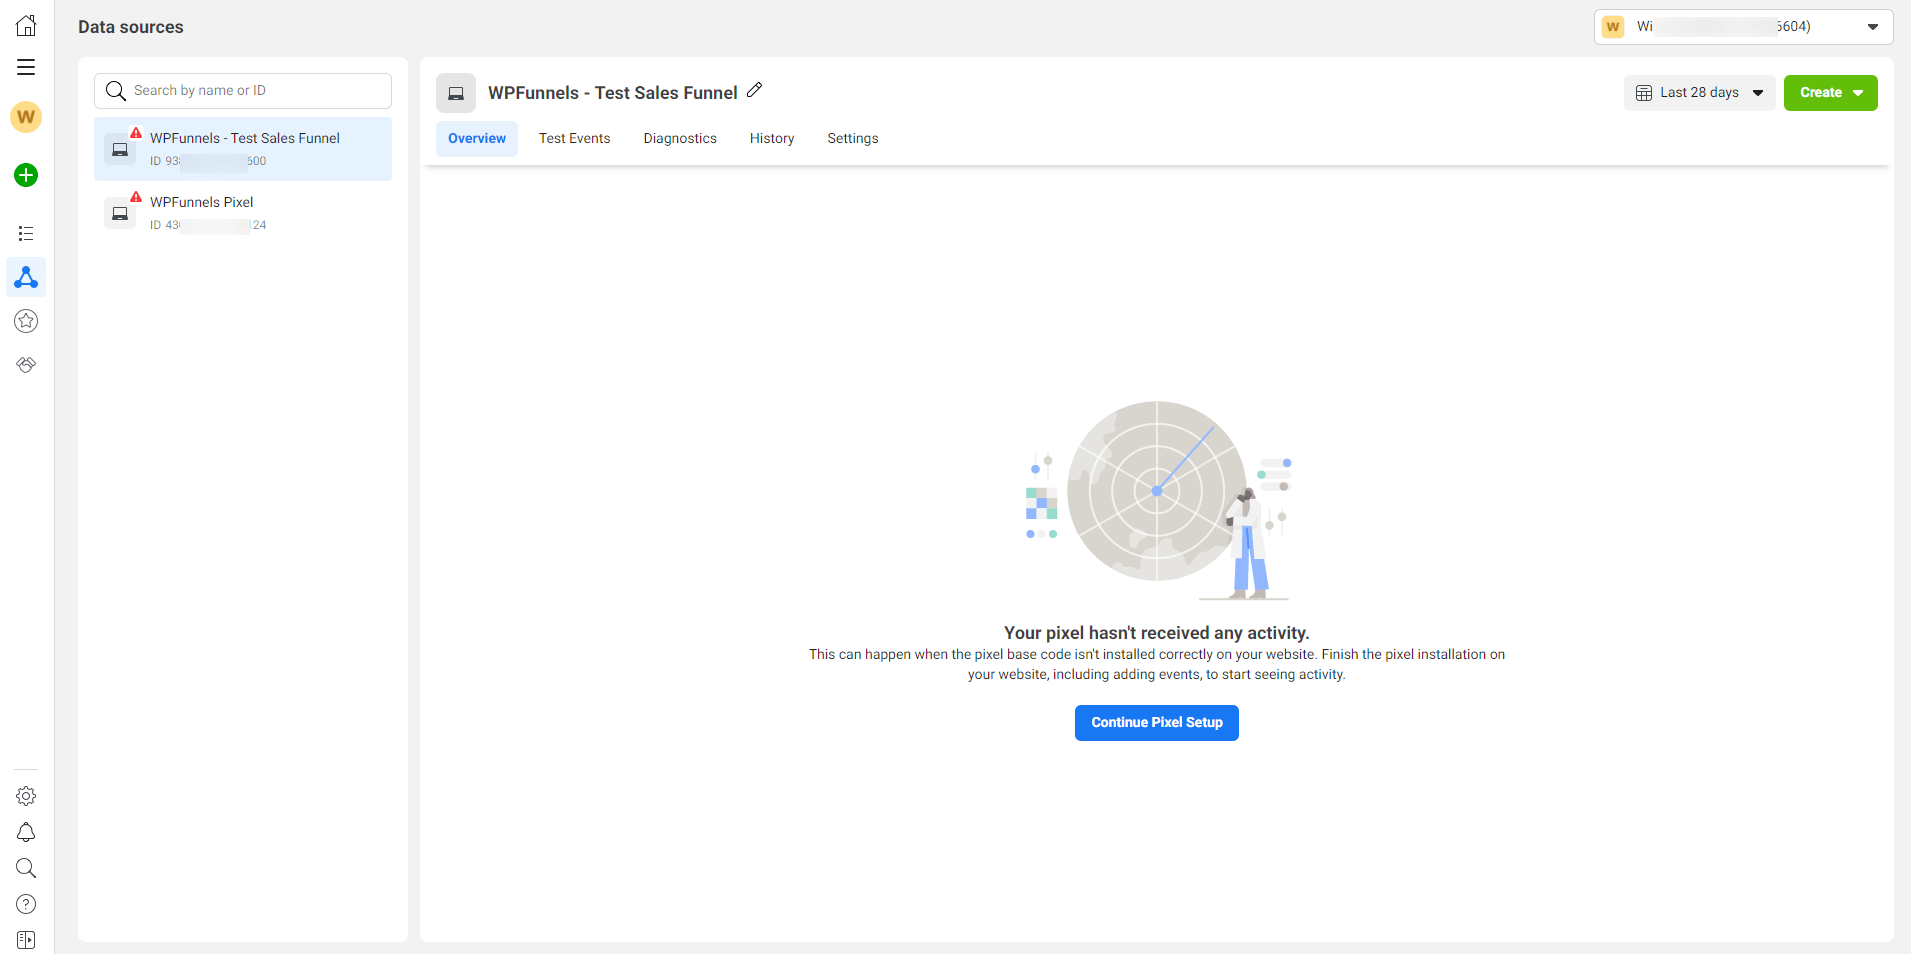
6. Finally go to the Settings of your newly created Facebook Pixel by clicking on the Settings option on the top.
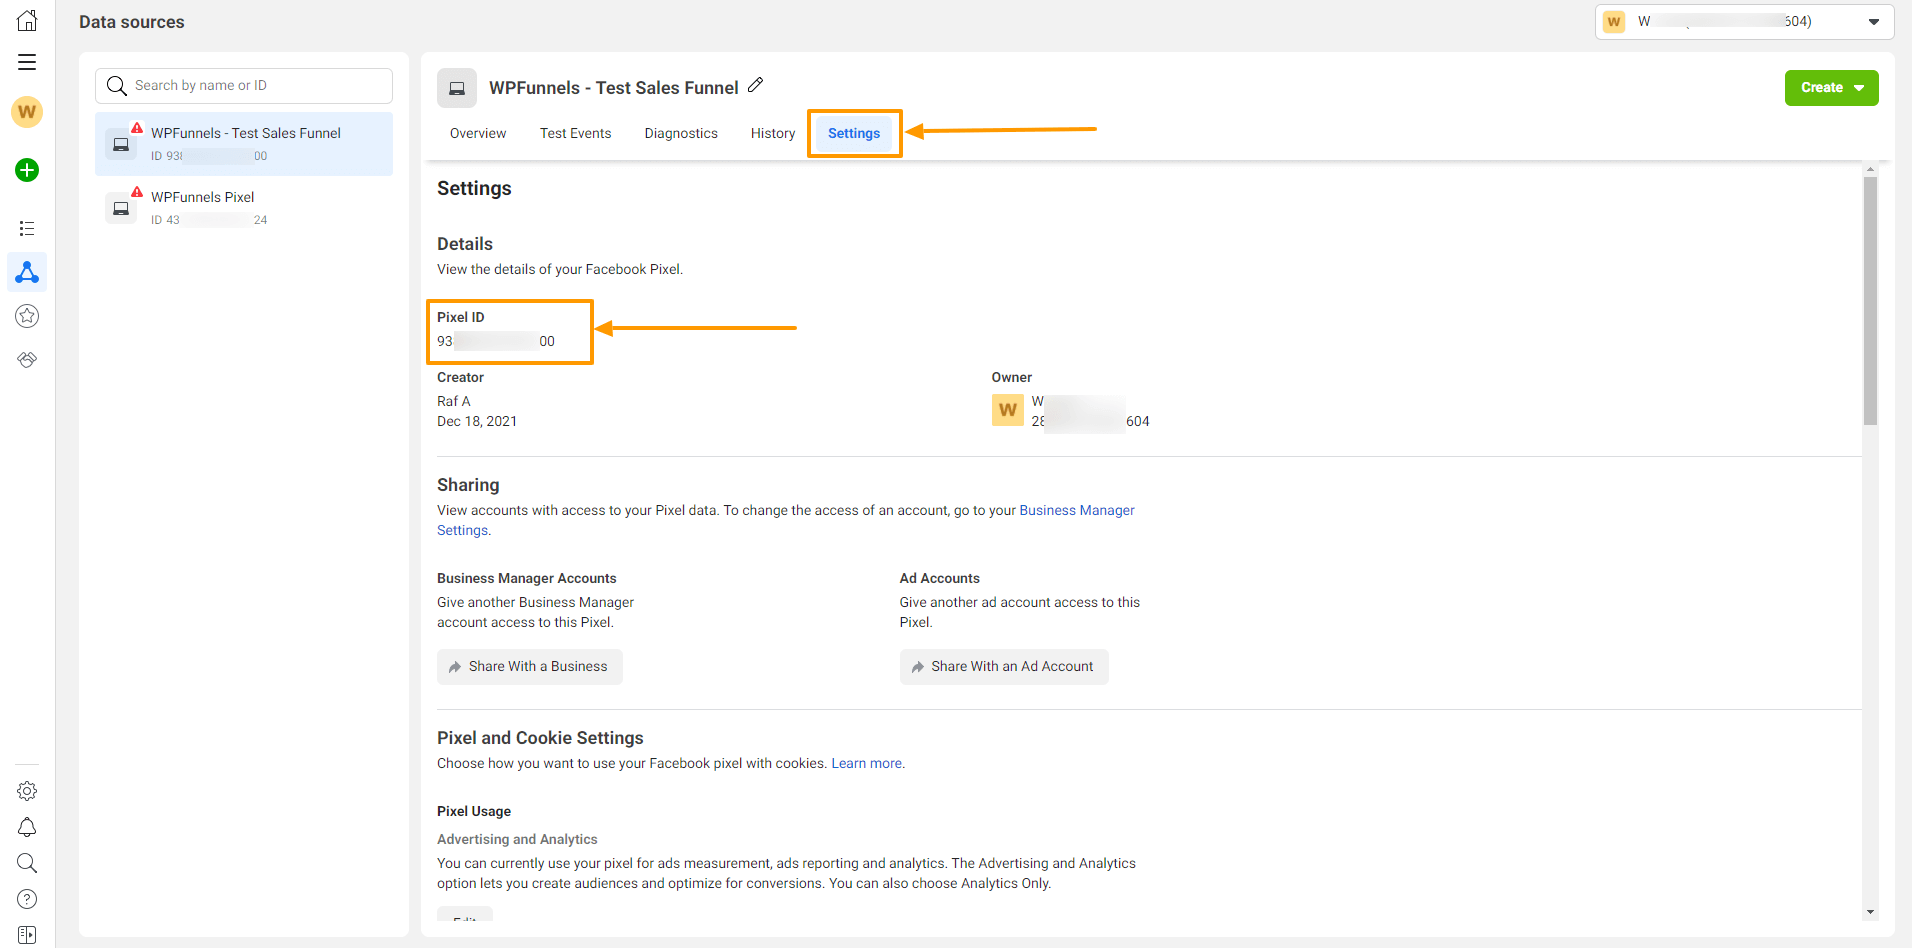
Click on the Pixel Id under the Settings option, and your Pixel ID will be copied on your clipboard.
The next step would be to connect your WPFunnels with Facebook Pixel.
Step 2: Connect Pixel with WPFunnels
1. Go to WPFunnels > Settings and move to the Event Tracking tab.
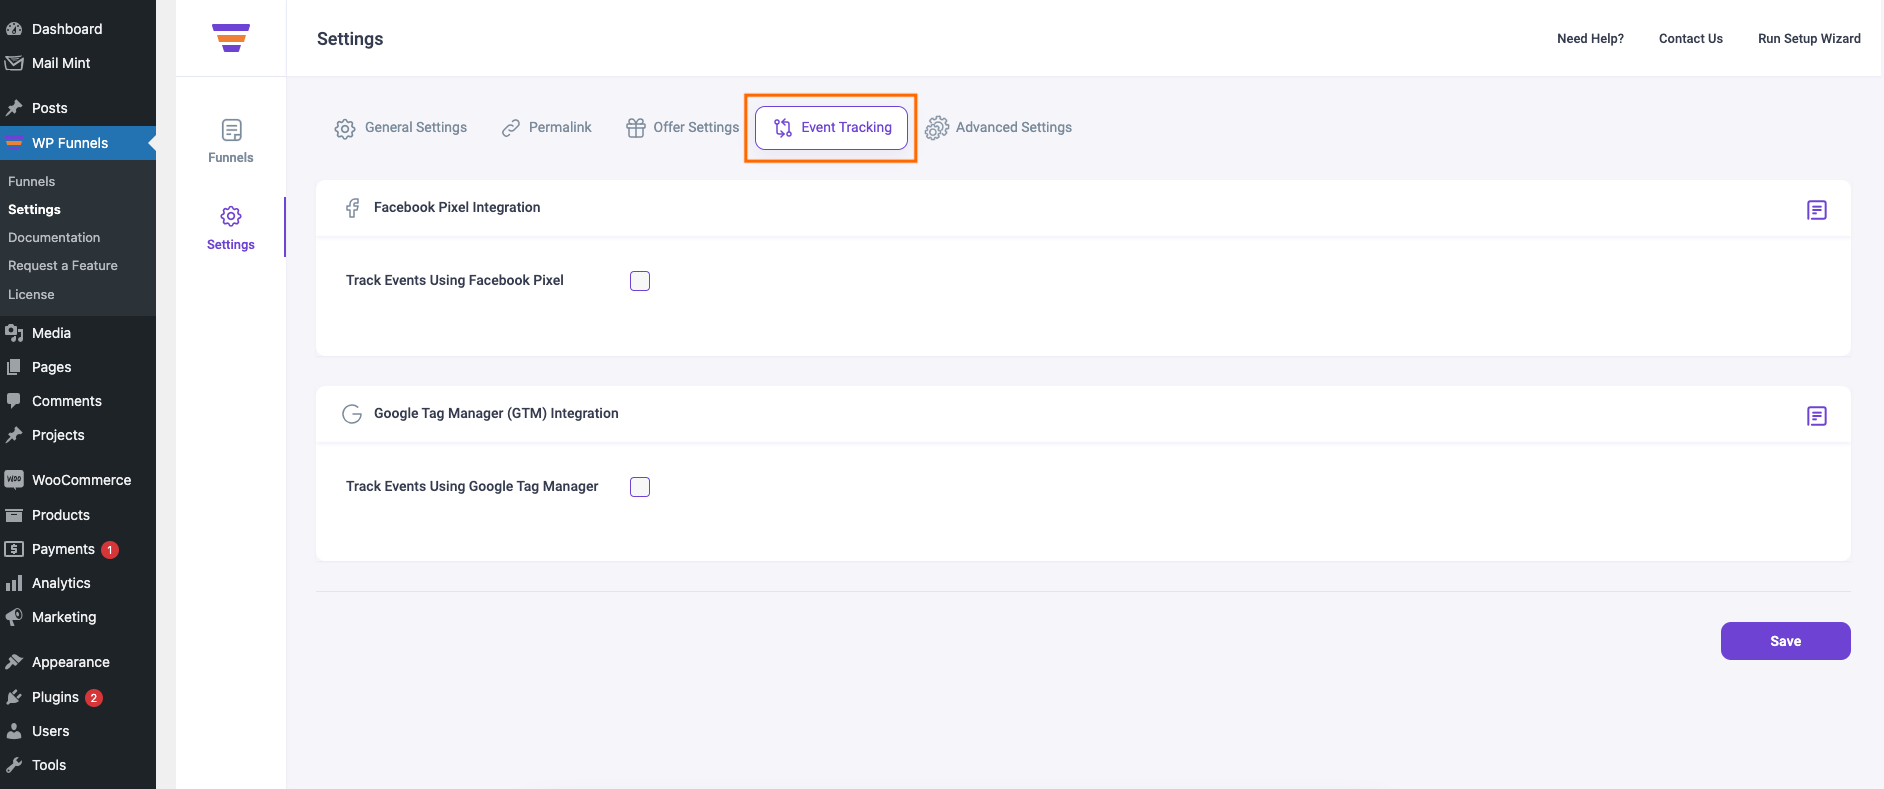
2. Enable “Track Events Using Facebook Pixel” and it will expand to show some more options.
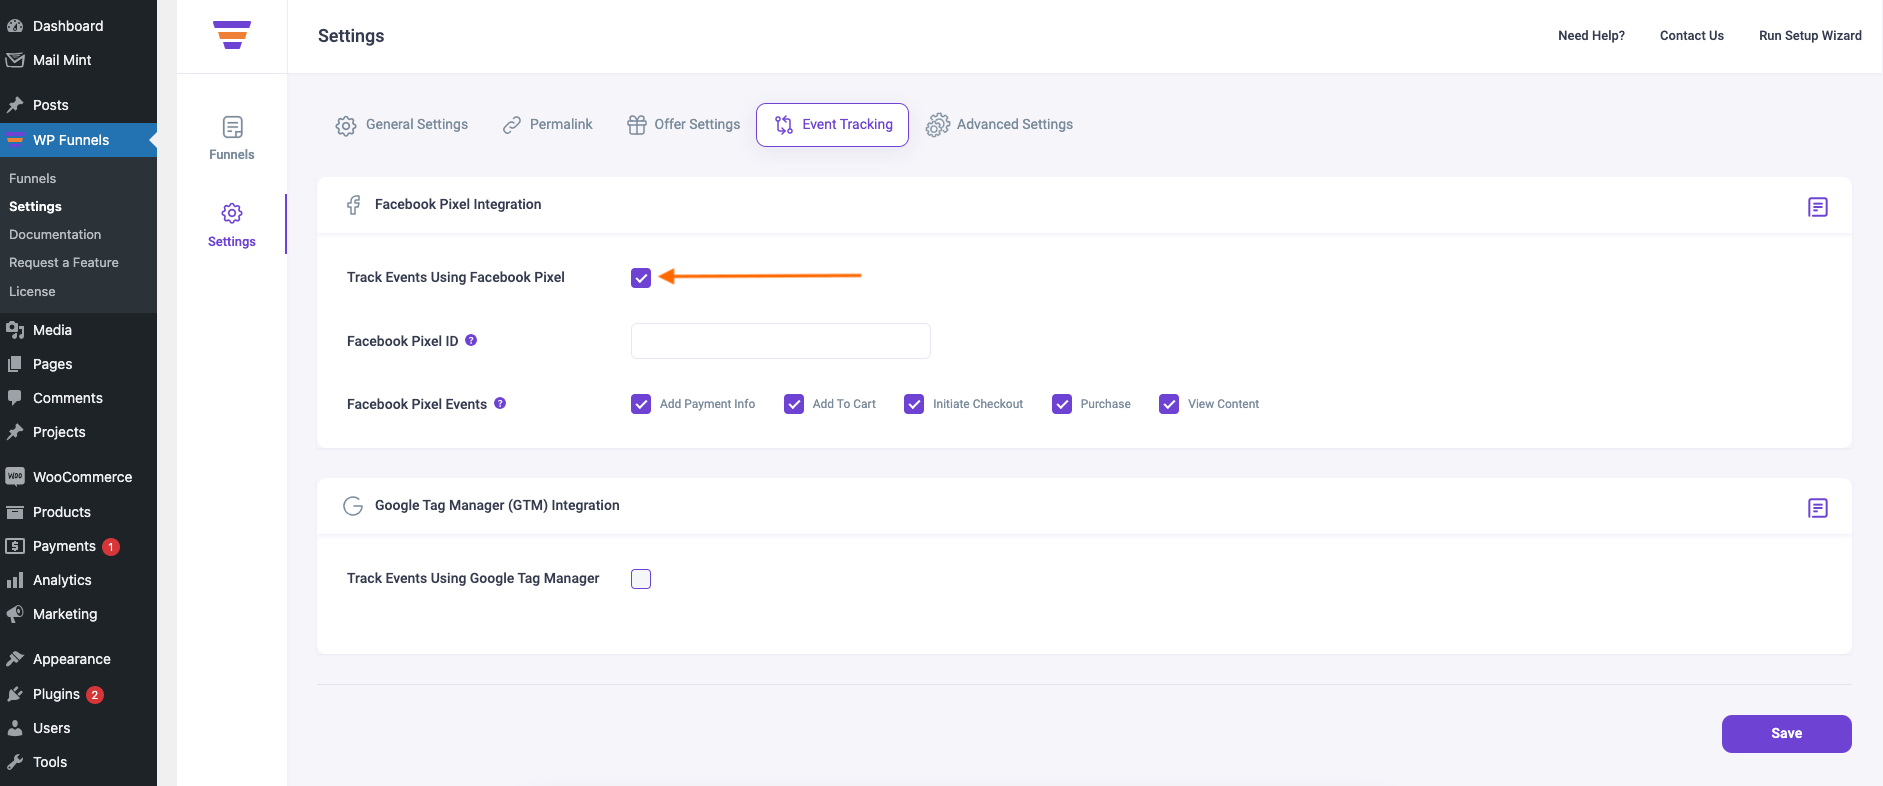
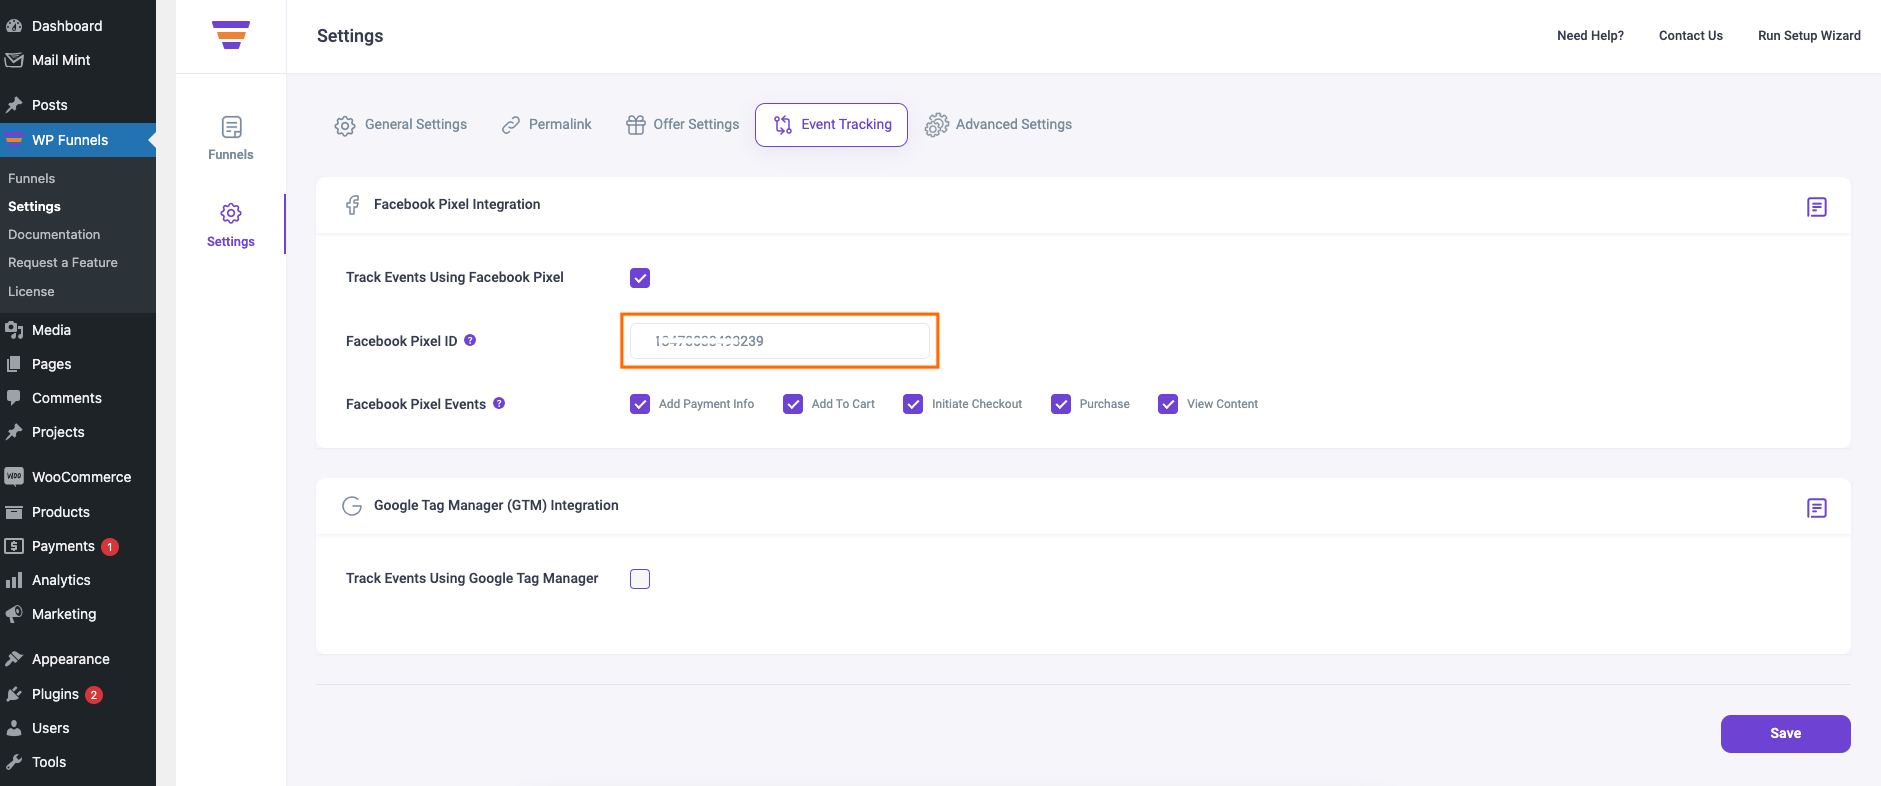
3. Here, paste your Facebook Pixel ID which you copied earlier from the Facebook Pixel Settings.
4. Select the desired Facebook Pixel Events you want to track.
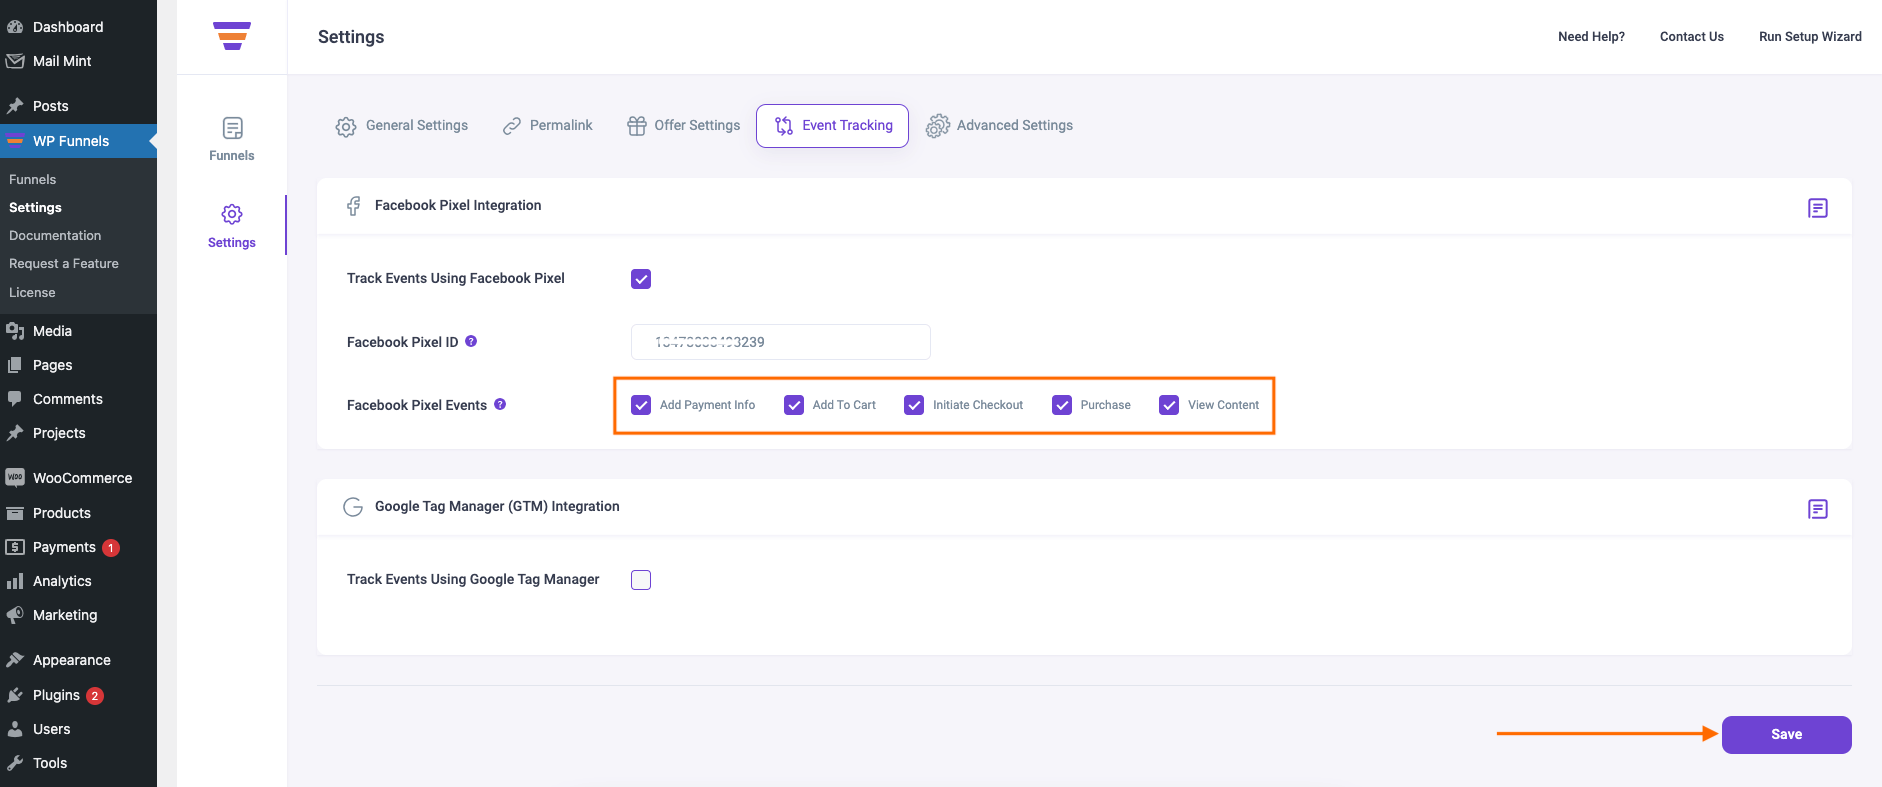
5. Click on the Save button. Your Pixel Integration is now completed.
You can now go back to your Facebook Pixel window and click on the Test Events from the upper tab to test the click events by yourself. From now on your Site activities will be recorded on your Facebook Pixel.
Exclude Funnel From FB Pixel Tracking
1. To exclude an individual funnel from the Pixel tracking, edit that funnel and open the Settings option from the canvas.
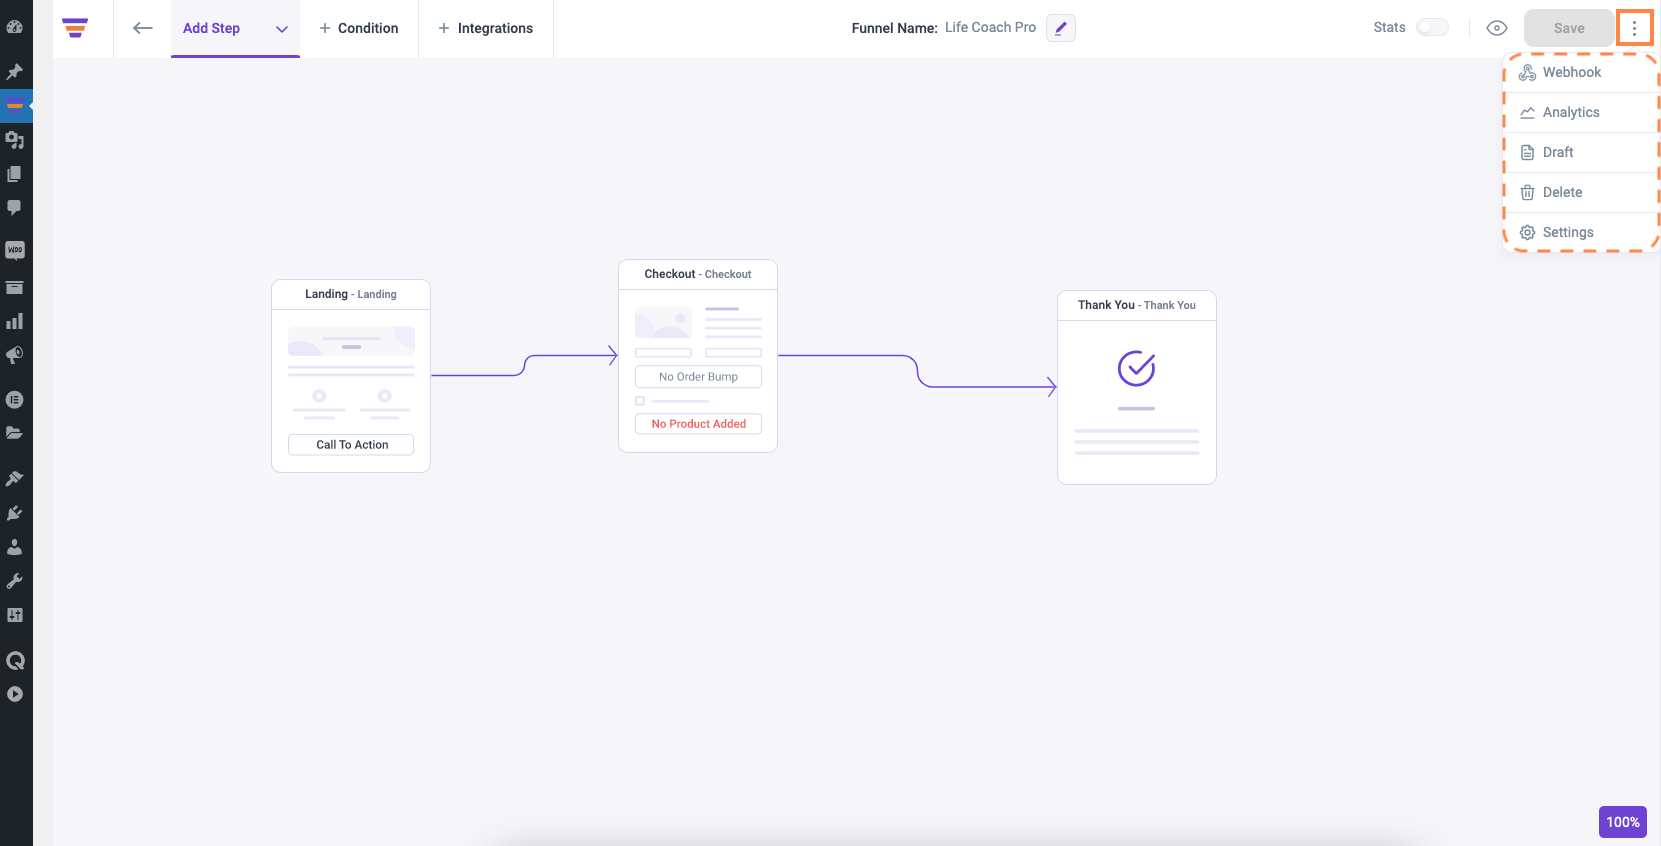
2. Enable the option “Exclude this funnel from FB Pixel tracking” and click on Save Changes.
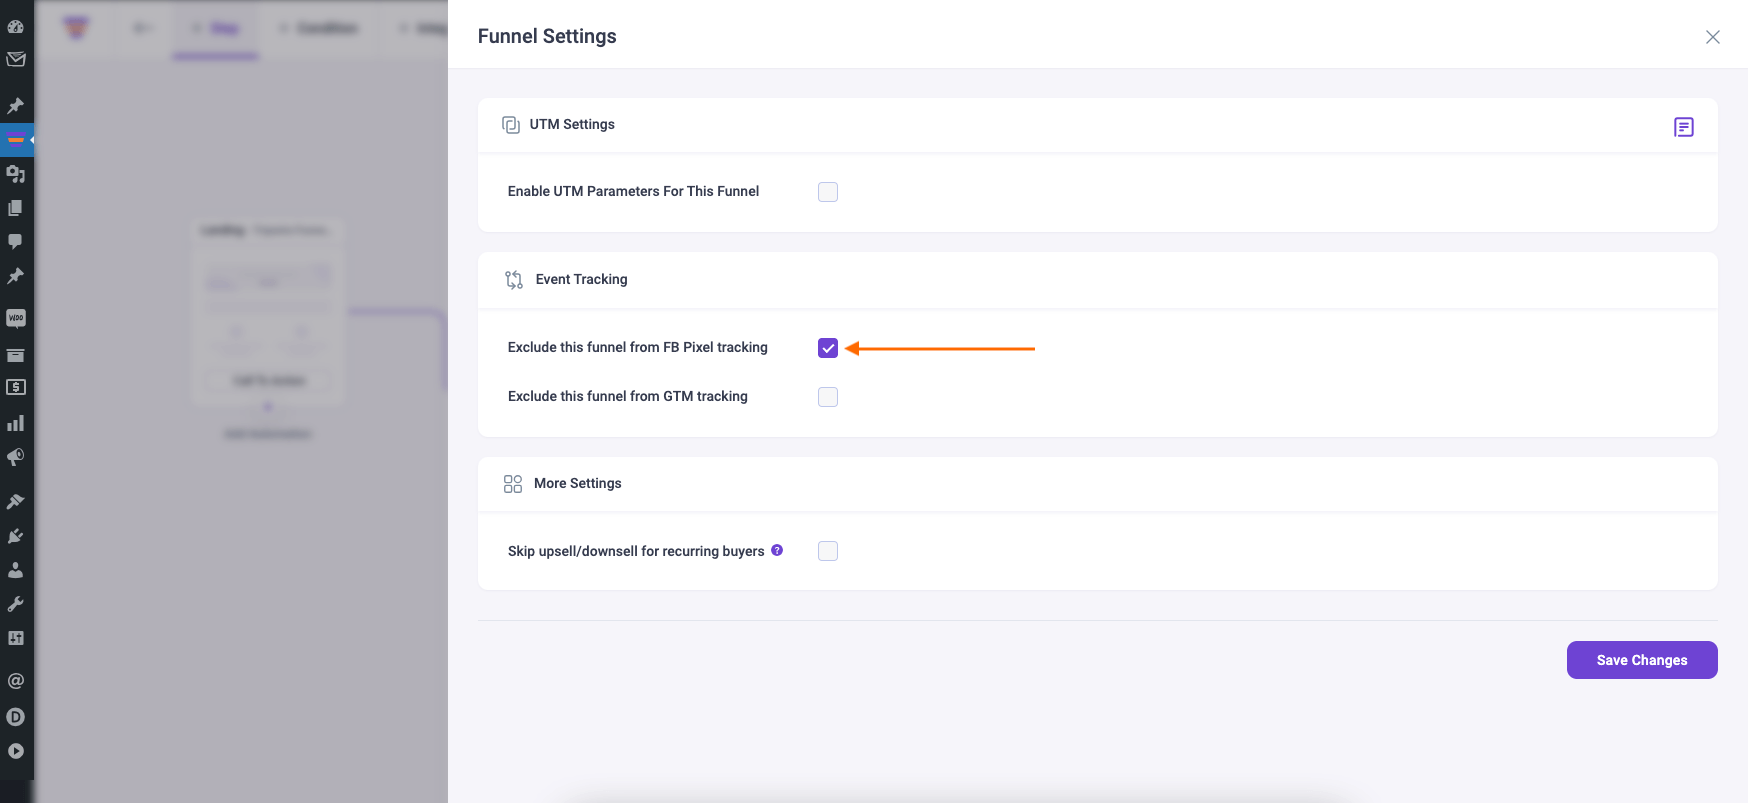
That’s how this funnel will not be included in the Facebook Pixel tracking.
- Follow this guide to check if your Pixel is tracking the events: How To Check Facebook Pixel Is Firing Correctly
