With Mail Mint, you can easily create opt-in forms for collecting leads.
In this guide, you’ll learn how you can create the forms and start collecting more qualified leads.
Let’s get started.
Create A Custom Opt-in Form for Collecting Leads
Follow these simple steps to create a custom opt-in form using Mail Mint.
Step 1: Go to your WordPress Dashboard > Mail Mint.
Click on Forms > + New Forms.
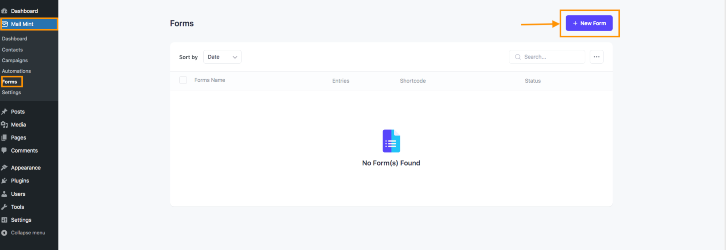
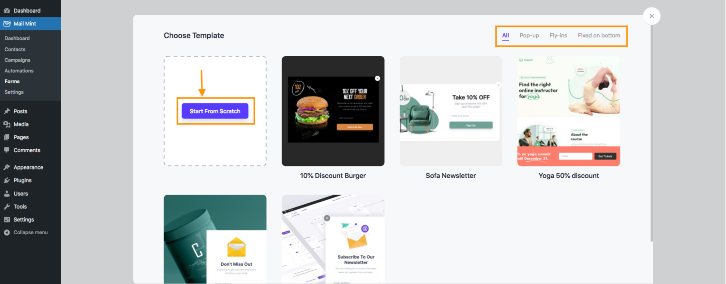
Here, you’ll find 2 options.
- Import one of our pre-built templates.
- Create from scratch.
In this guide, we’ll create one from scratch.
Click on the Start From Scratch to build your form.
Step 3: Put on a relevant title in the Title field.
Then assign a List & Tag for whom you want to tag this form.
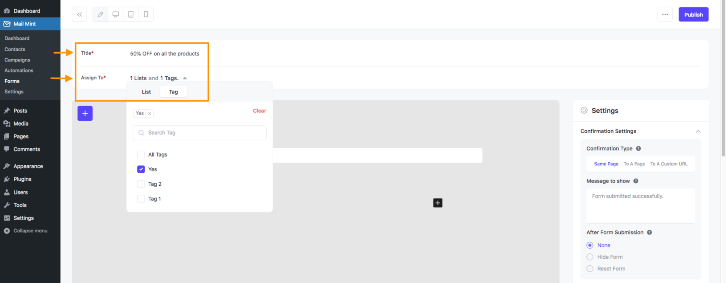
Step 4: After putting up the Title, List & Tag, there are some settings to configure.
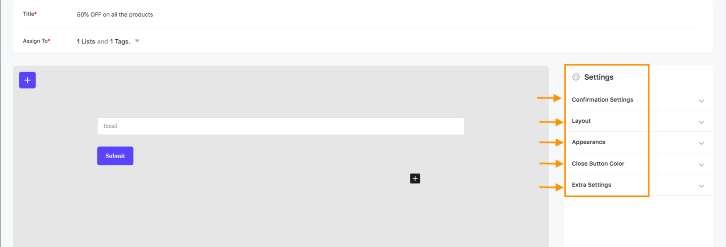
Confirmation Settings
Here you’ll get 3 options to confirm the prospects about their input.
By selecting the Same Page, you let your prospects stay on the same page after they put their information.
You can show them a message in the Message To Show box to ensure a successful submission.
You can either keep the form as it is or hide the form or reset the form after the submission by selecting the After Form Submission options None, Hide Form, or Reset Form respectively.

By selecting “To A Page” you can redirect your prospects to another page with a confirmation message.
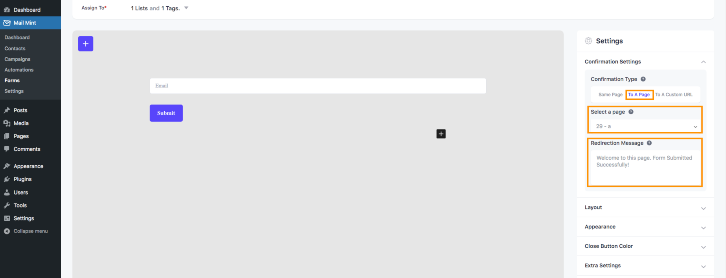
You can redirect your prospects to a custom URL link by choosing “To A Custom URL” with a redirection message.

Layout
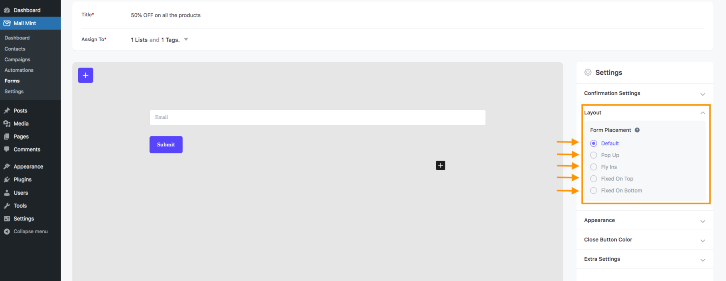
You can choose different Layout options to show up your form to the prospects.
Appearance
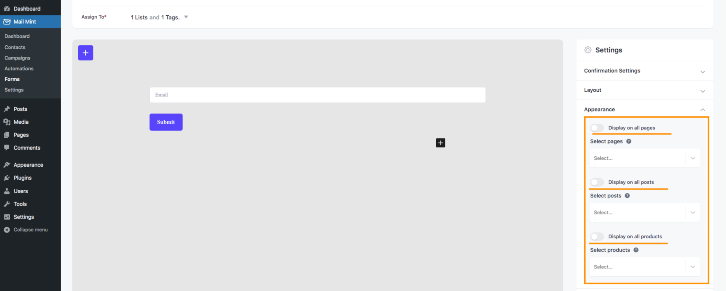
You can control the appearance of your form with this setting. You can display your form on all pages or all posts or all products by selecting any of the marked options.
Close Button Color
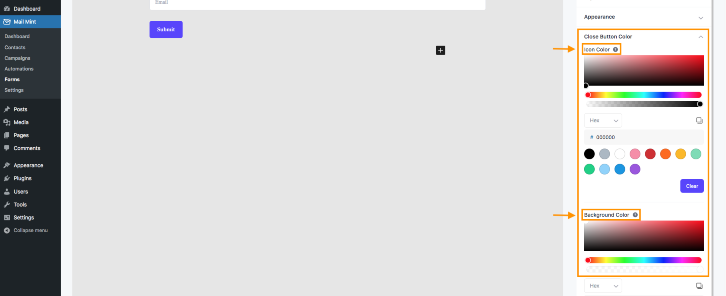
You can choose the close button’s icon color & background color by this setting.
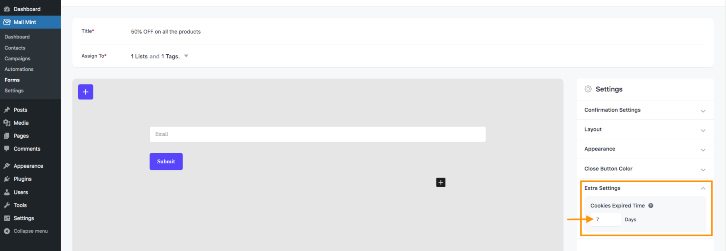
Extra Settings
You can determine how many days the form will take to reappear after the expired days of the cookies.
Creating A Form in Mail Mint
Now we will learn about the Mail Mint form widgets to create a form from scratch.
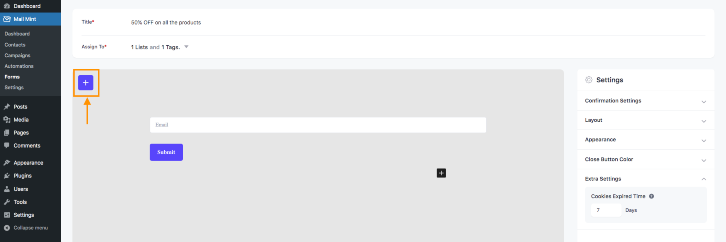
Click on the + button at the upper left portion of the canvas.
To create the form you will get these widgets that you will drag & drop on the visual canvas.
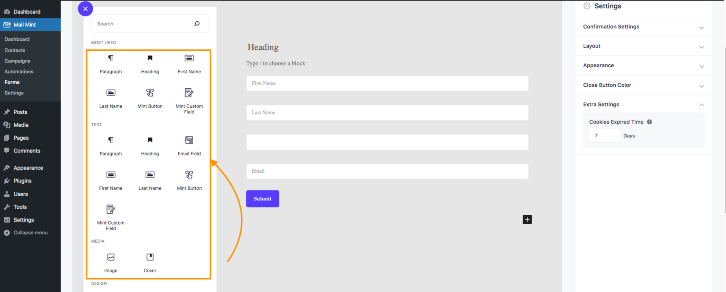
You can design the form the way you want using these widgets.
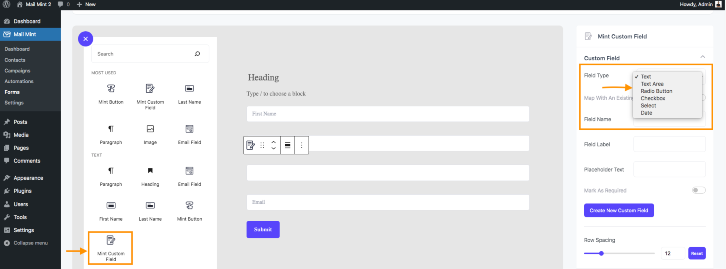
Mint Custom Field lets you create a form with 6 different fields type Text, Text Area, Radio Button, Checkbox, Select & Date.
Using the Mint Button widget you can change the Button Text & Button Style.
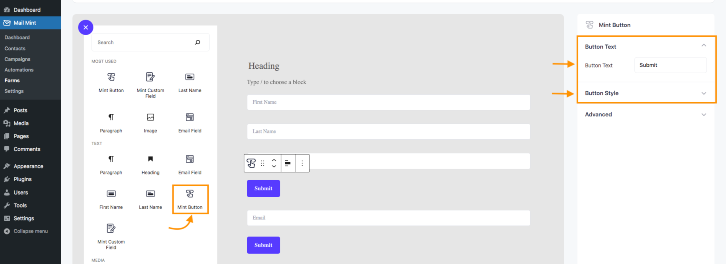
You can use the other Gutenberg widgets to design your form as per your preference.
Once you are done building your form, you can save the form as a draft or Publish the form.
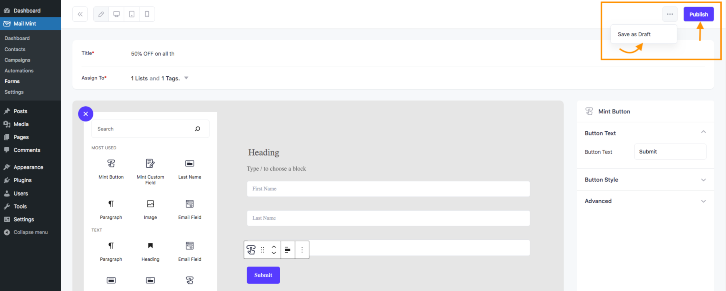
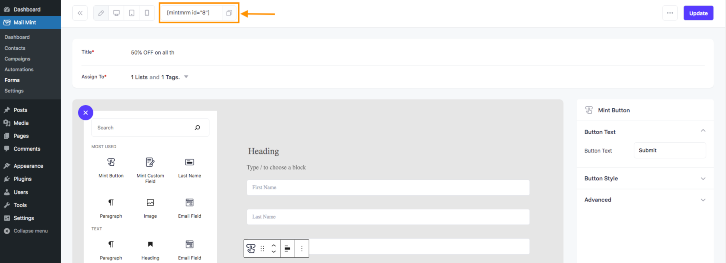
After clicking on the publish button, a shortcode will appear at the upper left corner of the canvas.
Copy the shortcode to set the form to any page, post, or product.
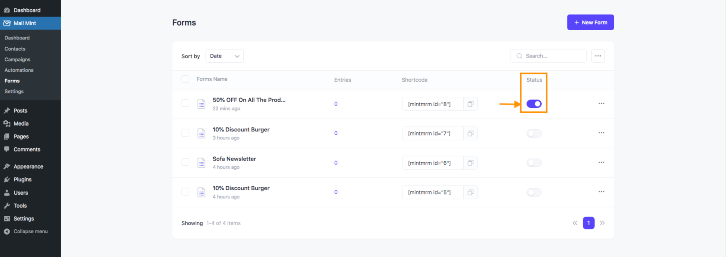
Now get back to the lists of forms you created & make sure the active status of the form is turned on, otherwise it won’t work on any platform.
So, that’s all for creating a Form from scratch using Mail Mint.
