You can create and import your entire contact list & manage it easily for running email campaigns the way you want using Mail Mint.
Following are the ways you can add new contacts/users or leads to the Mail Mint Contact list:
- Manually add contacts
- Import contacts using CSV files
- Import contacts with raw data
- Import WordPress users
- Import MailChimp contacts
- Import WooCommerce customers
- Import EDD customers
In this guide, you’ll learn how you can manually add a new contact in Mail Mint.
Let’s get started.
Manually Add New Contacts in Mail Mint
Follow these simple steps to manually add a new contact in Mail Mint.
Step 1: Go to the Mail Mint dashboard & click on the Contacts tab.
Click on the +New Contact button.
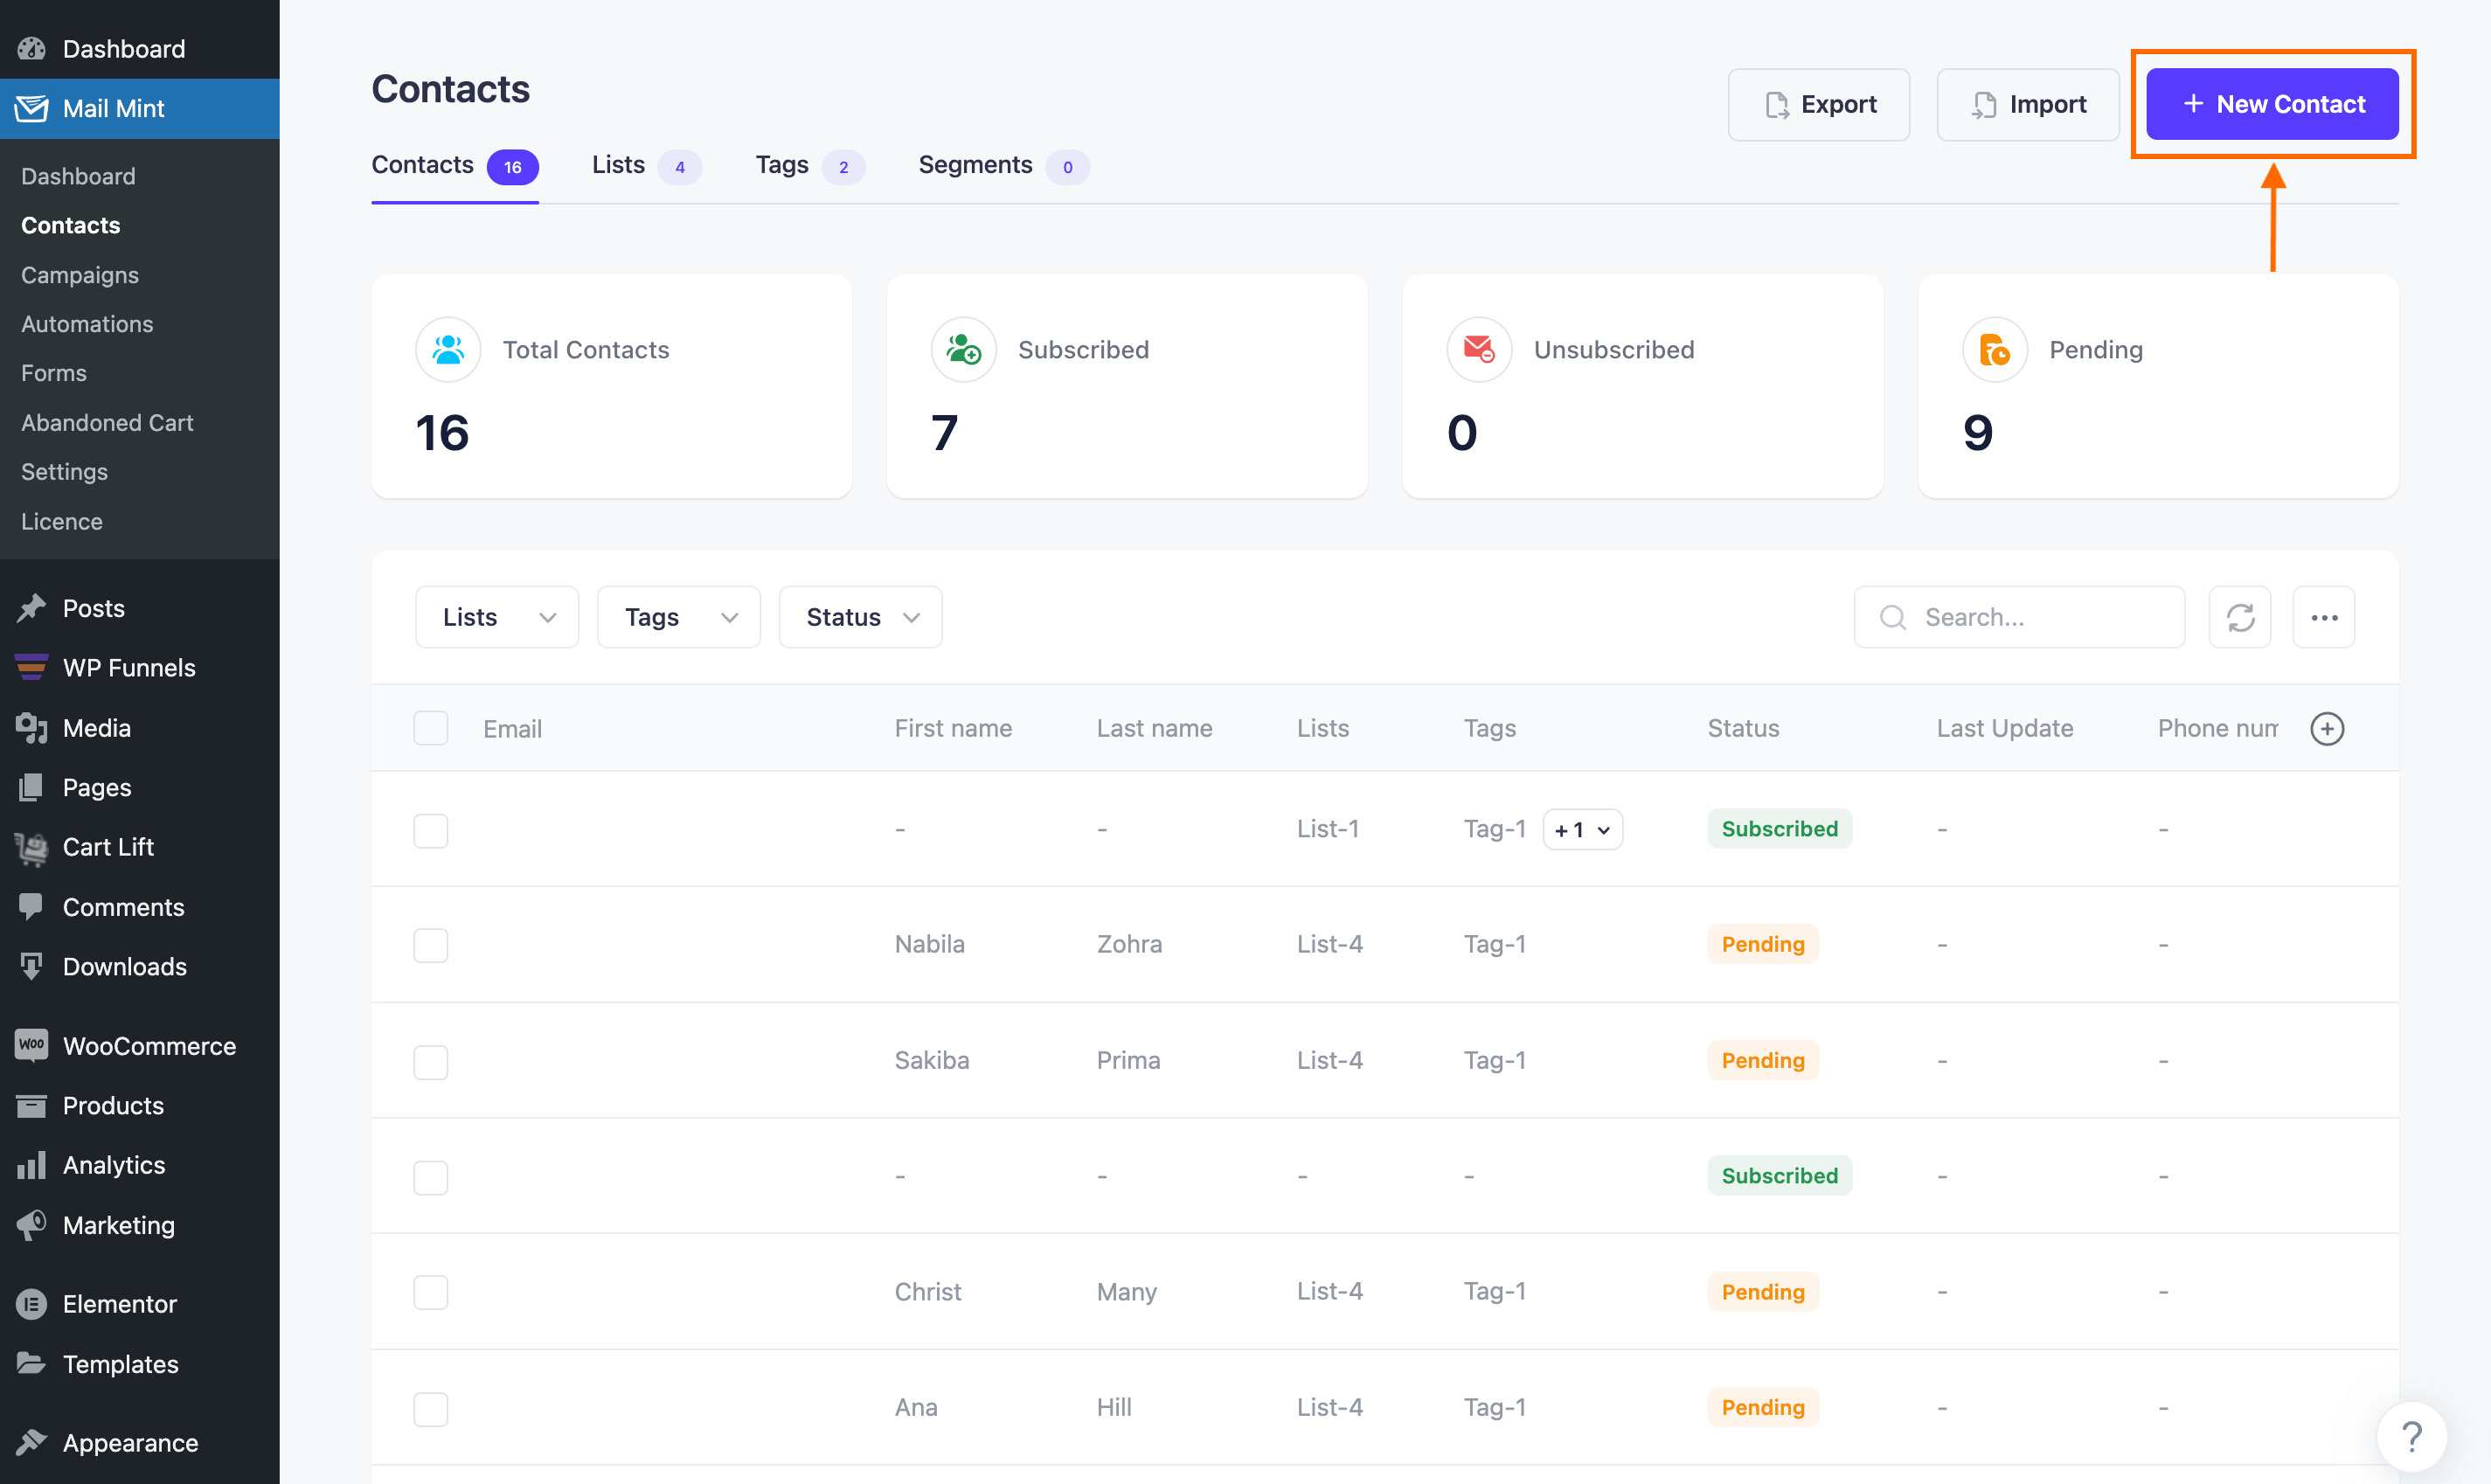
You’ll be redirected to the Add Contacts page where you can set the Email address, First Name, Last Name, Status, Lists & Tags for your new contact.
Step 2: Here, just fill up the data for your new contact.
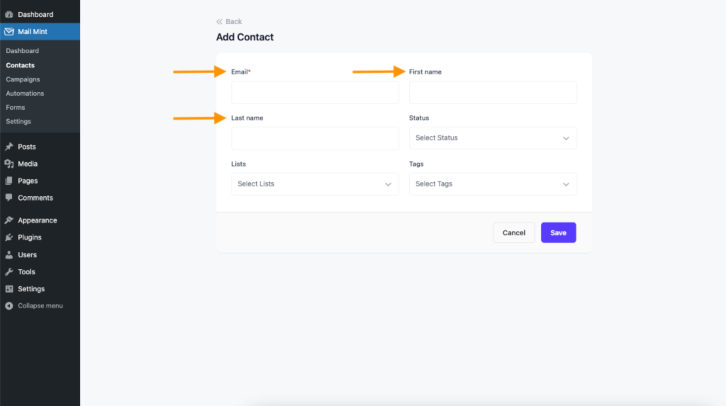
Email Address: Email Address is a mandatory field and you have to assign a valid one for your contact.
First Name: Here, just set the First Name of your contact. It’ll come in really handy when you’ll be personalizing your emails.
Last Name: Here you can set the Last Name of your contact.
Step 3: Now, set the Status of your new contact.
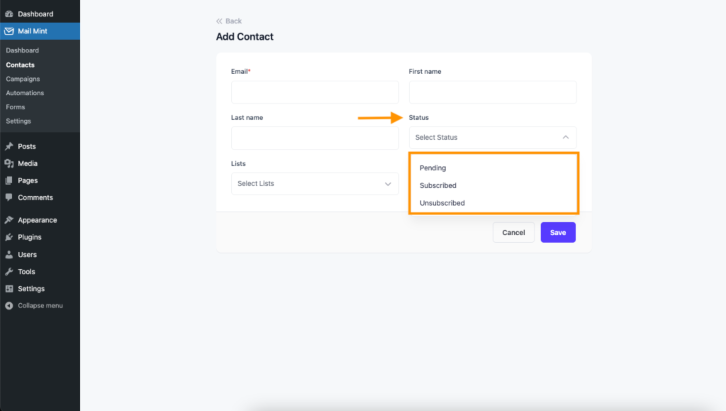
You’ll find 3 options: Pending, Subscribed, & Unsubscribed.
Remember, to send email campaigns to a contact, you need their permission, also known as the Subscribed status.
So, only set the Subscribed status if you have that permission.
Otherwise, set Pending or Unsubscribed.
Step 4: Now you’ll have the option to include this user in a List.
Lists are a group of similar users, who you can target for email campaigns.
You can either select an existing List or Add a List right from there.
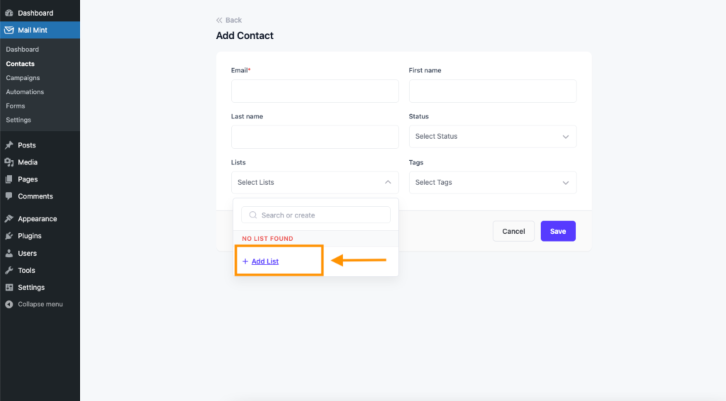
If you don’t have any List, then click on + Add List and you’ll find the option to set a name for your new list.
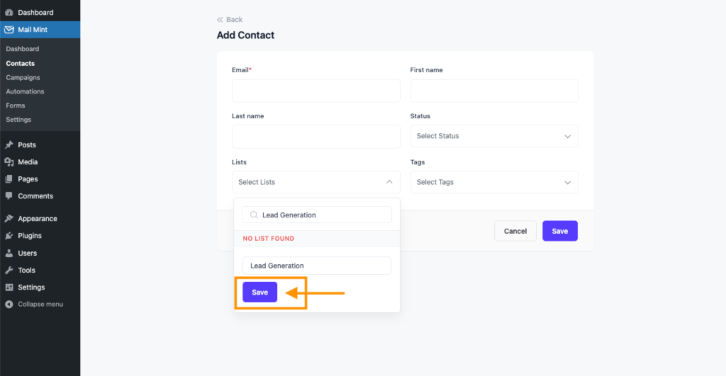
Once you’ve set the name, just click on the Save button.
A new list will be created and assigned to this user.
Later, you can set this List to your other contacts as well.
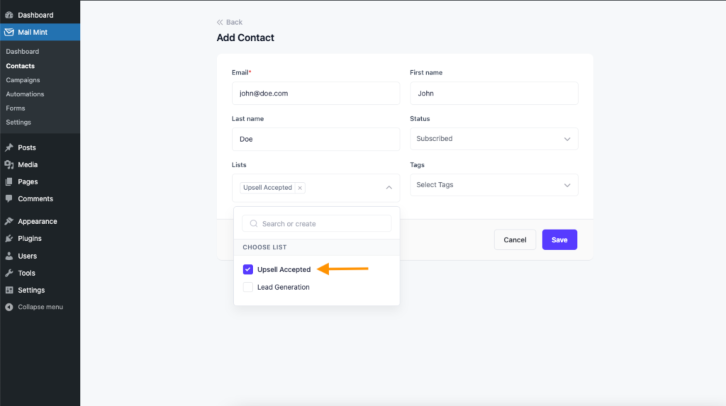
You can also select any pre-existed List for your Contact and assign multiple lists to one contact.
Step 5: Just like adding a List, you can either select an existing Tag or Add a Tag right from there.
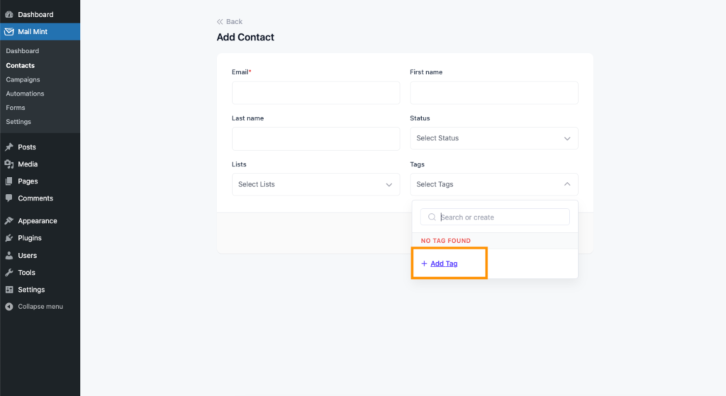
Tags are a common trait among the users that you can identify and run really specific campaigns.
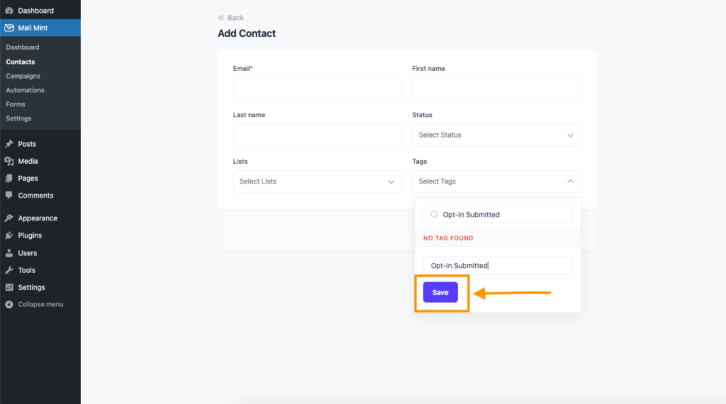
The procedure is exactly the same as adding or assigning the Lists.
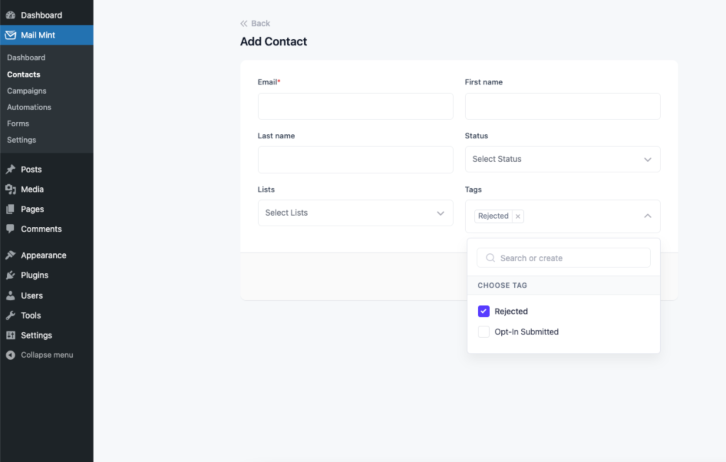
And just like the Lists, you can assign multiple Tags to a contact.
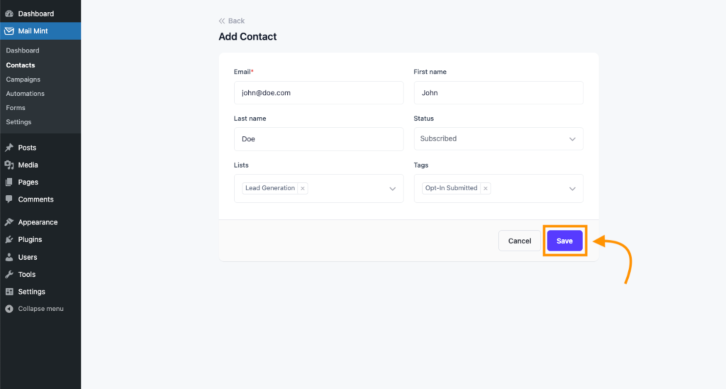
Once you’re done adding the Contact, simply click on the Save button to save the contact.
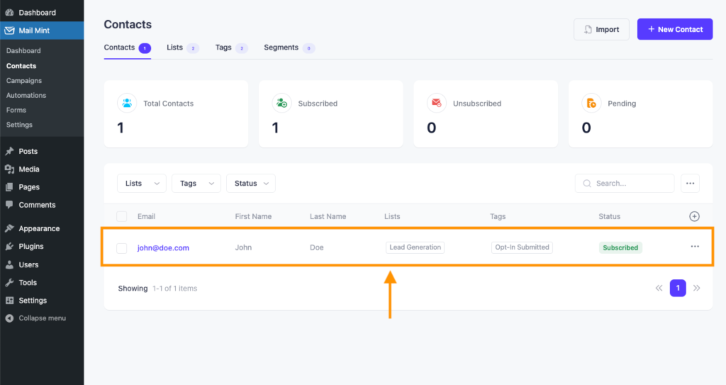
Now if you go to Contacts you’ll see that your contact has been added with the details.


