Once you have upgraded to Mail Mint Pro, the next thing to do is to activate Mail Mint Pro on your website.
To use the Pro plugin, make sure that you have the free version installed and activated on your website.
- Here’s how you can Install & Activate Mail Mint Free.
Next, follow the steps below to collect the Pro plugin and the license key, then install and activate it on your site.
Step 1 – Login To Your WPFunnels Pro User Account
1. When upgrading to Mail Mint Pro, you have created an account as a valued user. You will need to use that email ID and password to log in to your User Account.

2. After you log in with your Email and Password, it will take you to the user dashboard.
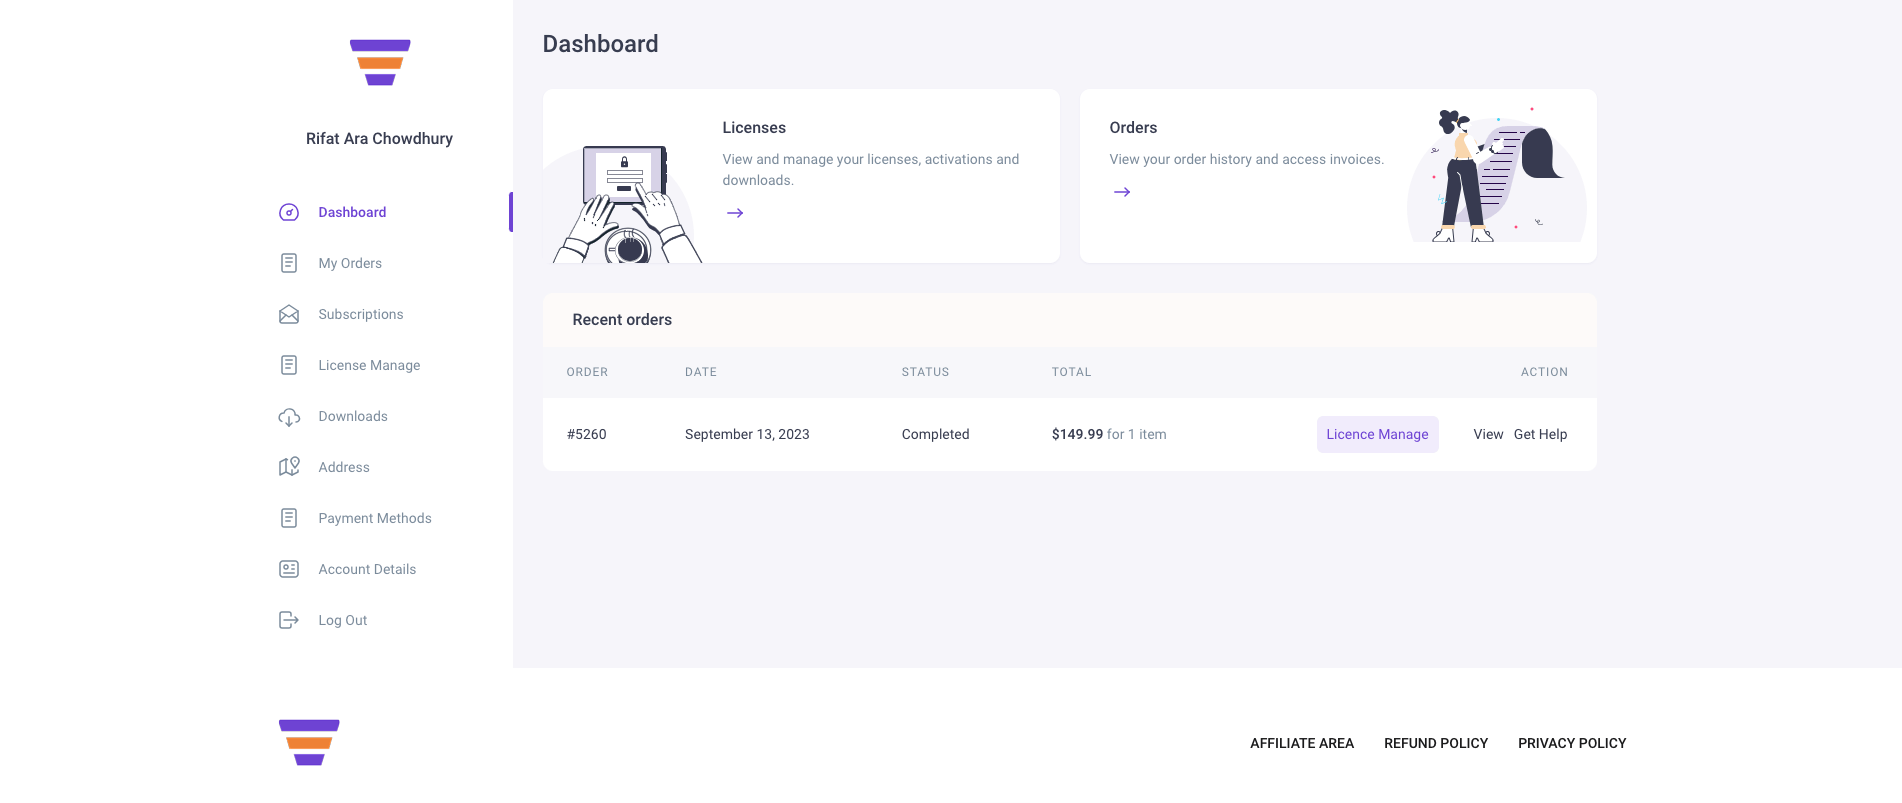
Step 2 – Collect The Latest Mail Mint Pro zip File
On your user dashboard, go to the Downloads tab and click on the latest version of Mail Mint Pro to download it.
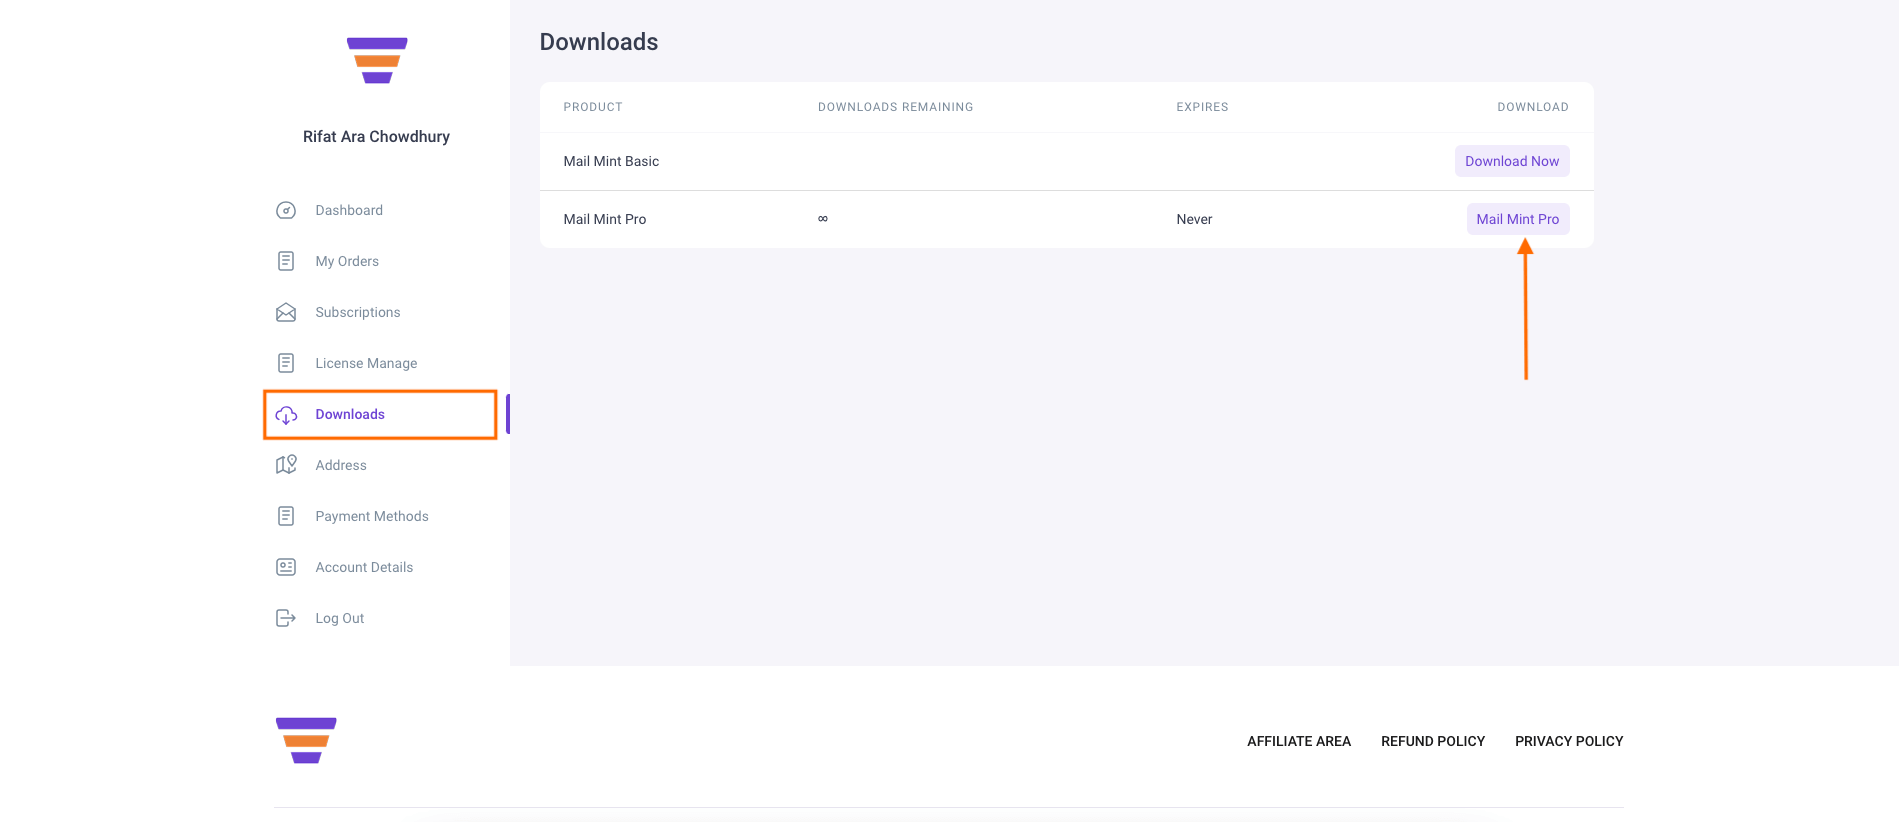
Step 3 – Collect Your Pro License Key
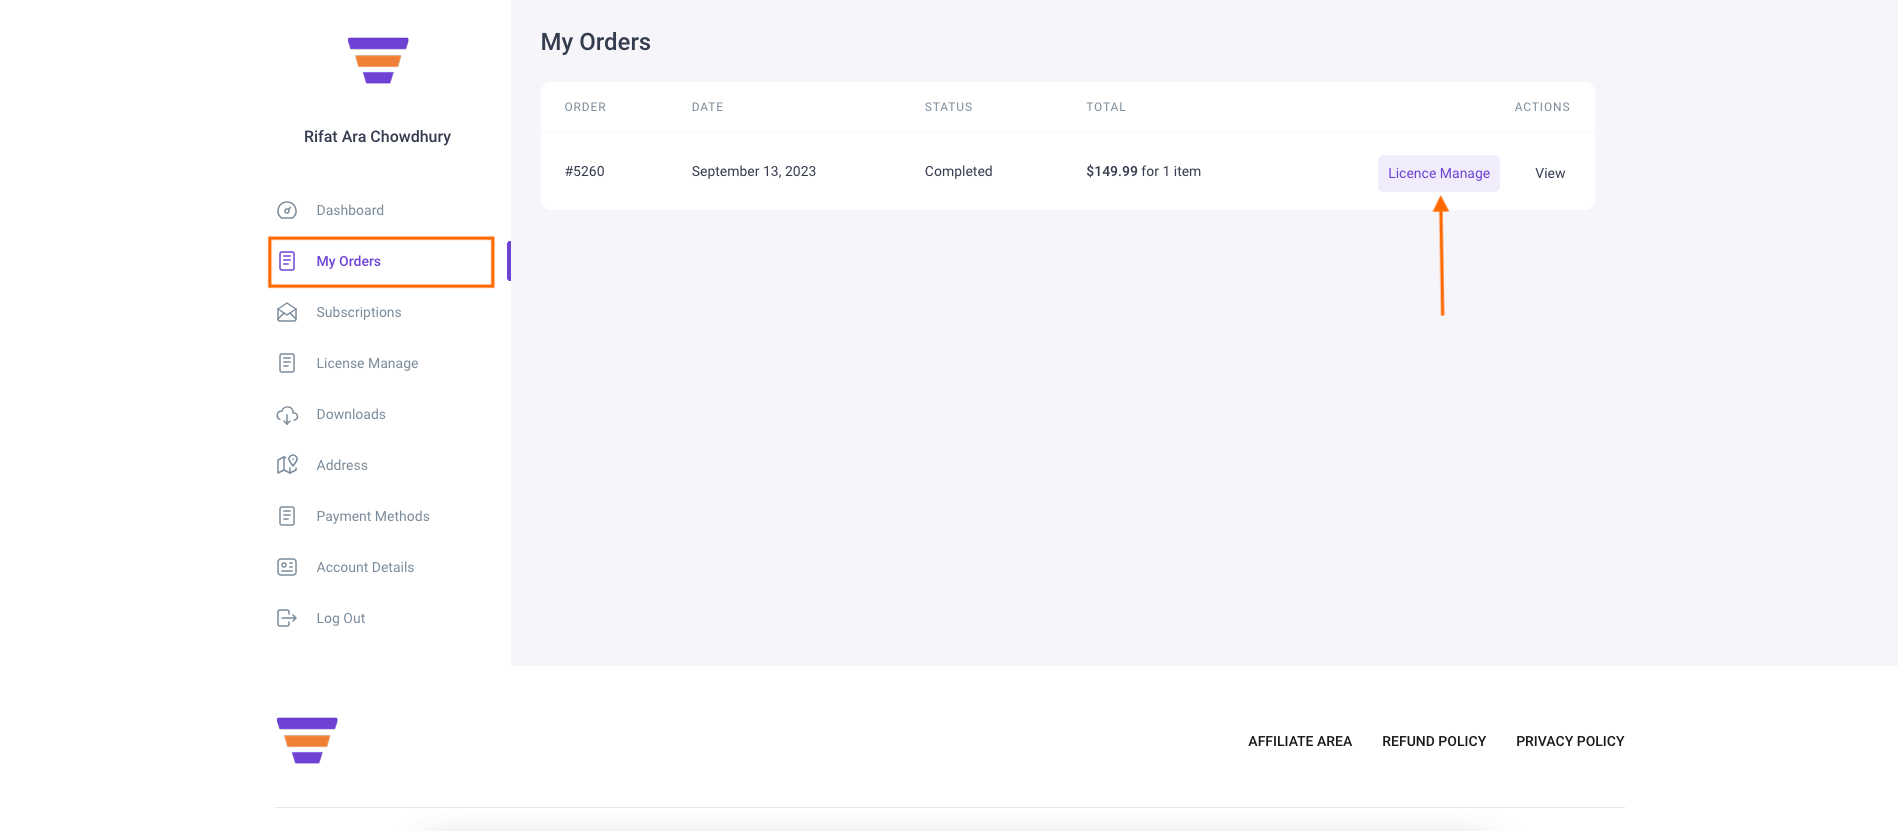
1. Now that you have the Pro plugin, go to the My Orders tab and click on License Manage.
2. Copy the License Key from this tab.
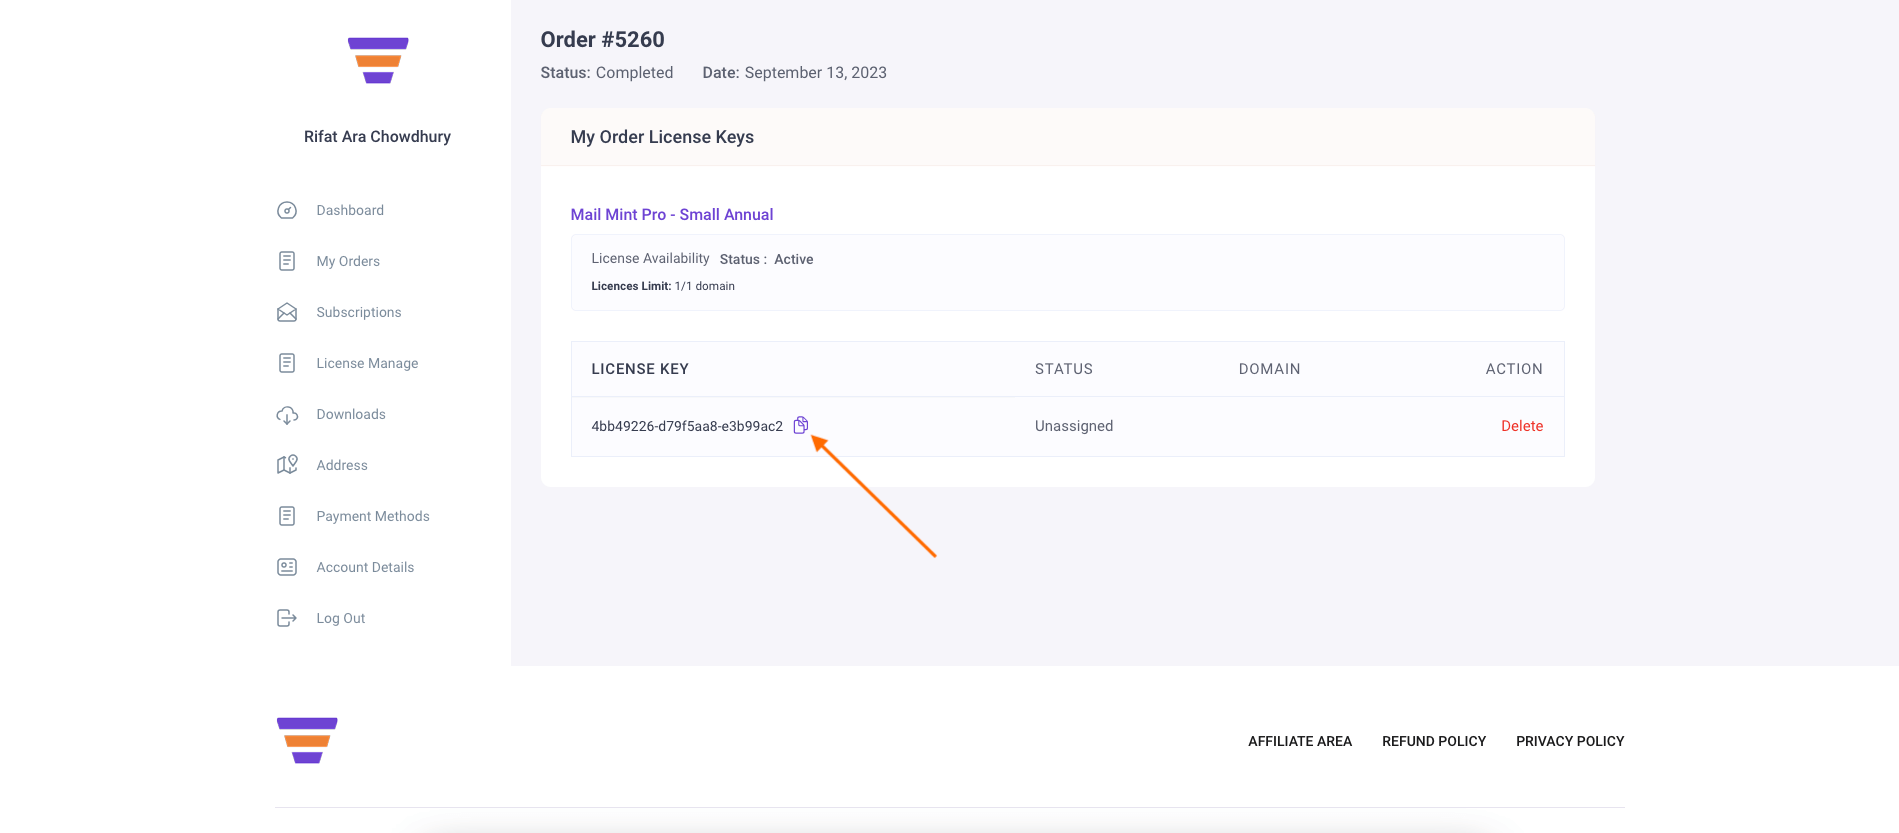
Step 4 – Install & Activate Mail Mint Pro
1. Once you have the zip file of the Pro plugin and the license key copied, log in to your WordPress site and go to Plugins > Add New.
2. Then, on top, click on Upload Plugin and upload the zip file of Mail Mint Pro that you downloaded earlier.
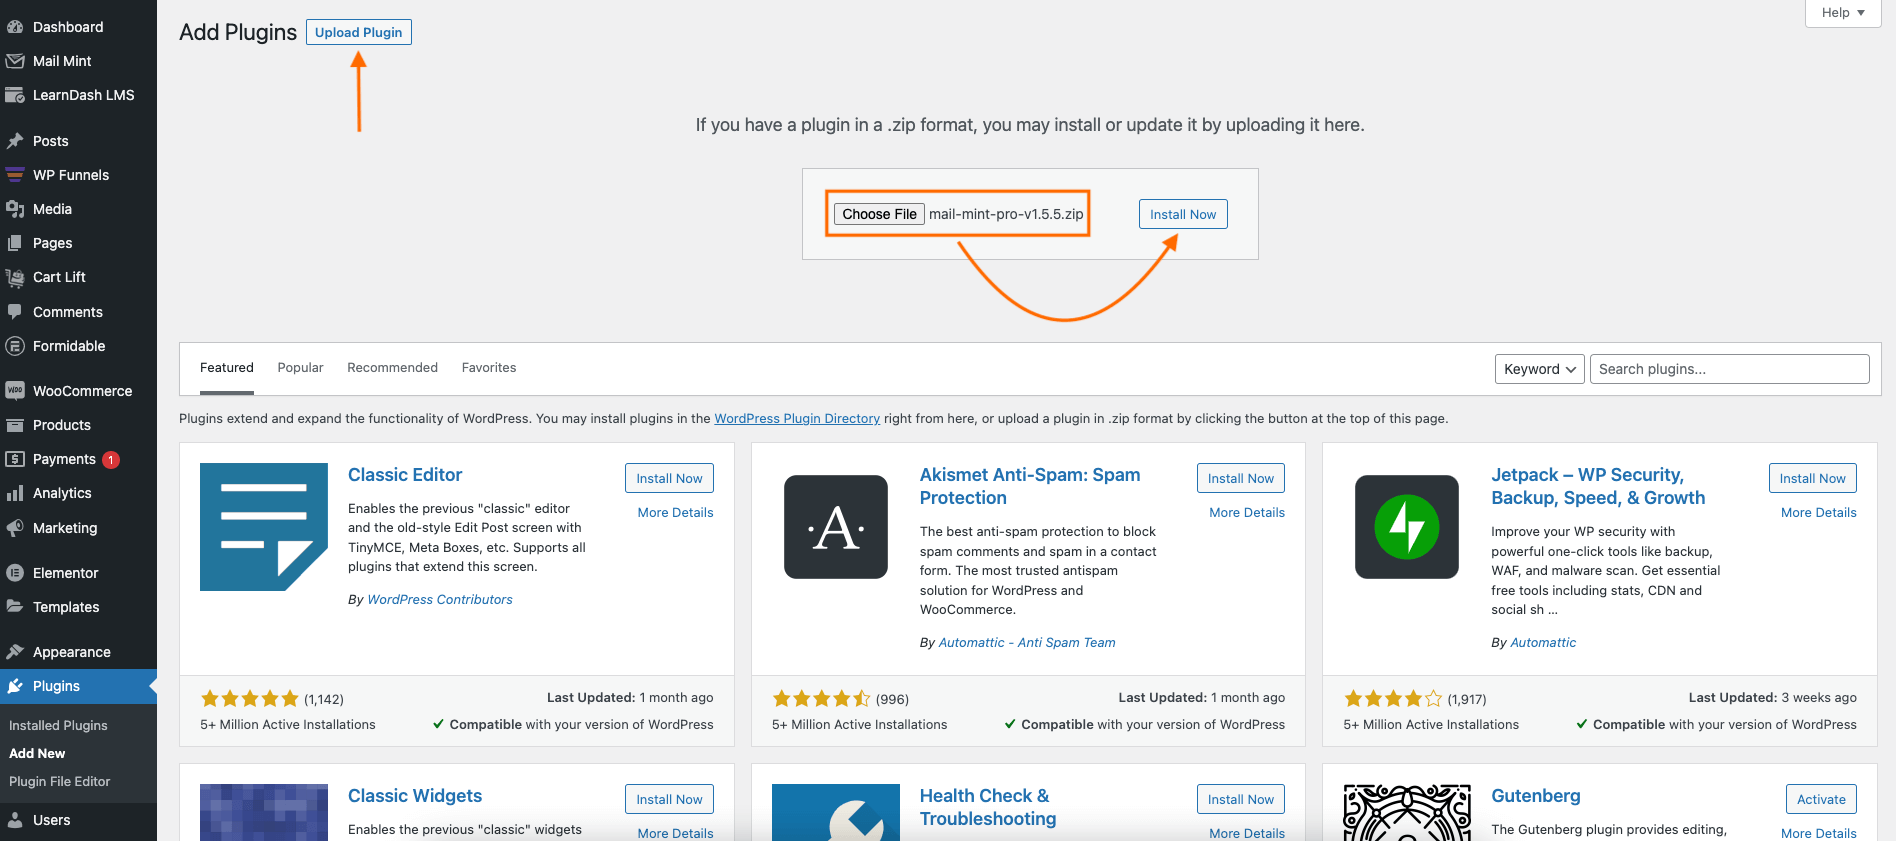
3. Then click on Install and then Activate it.
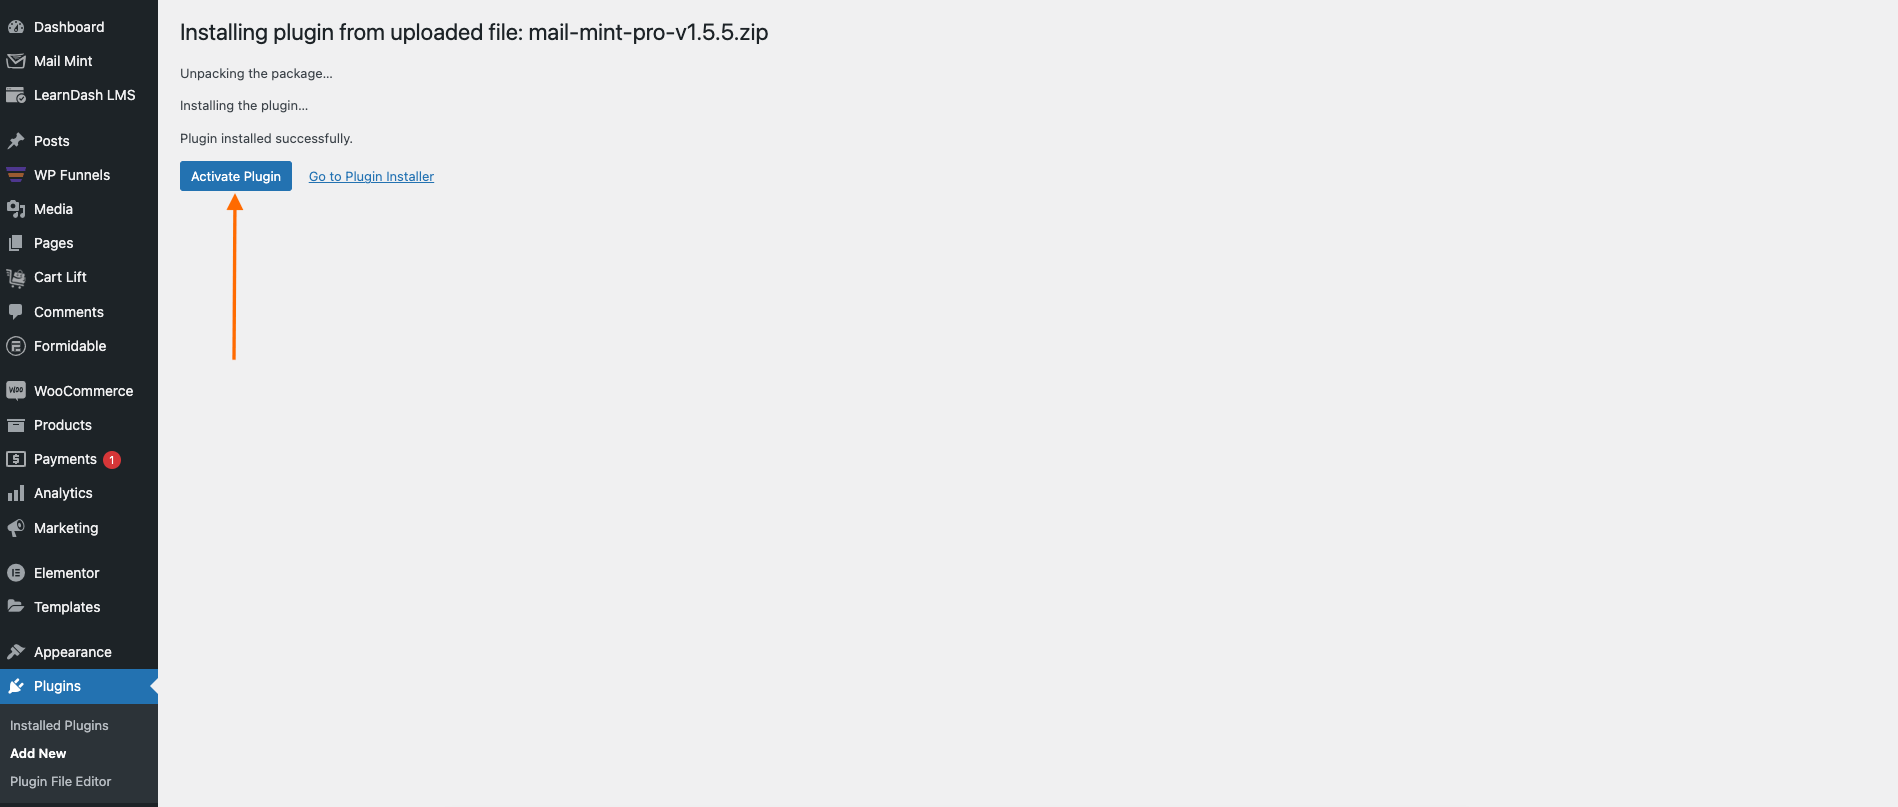
Step 5 – Activate The License Key For Mail Mint Pro
1. Once Mail Mint Pro is activated, hover on Mail Mint in your WP dashboard and click on the License tab.
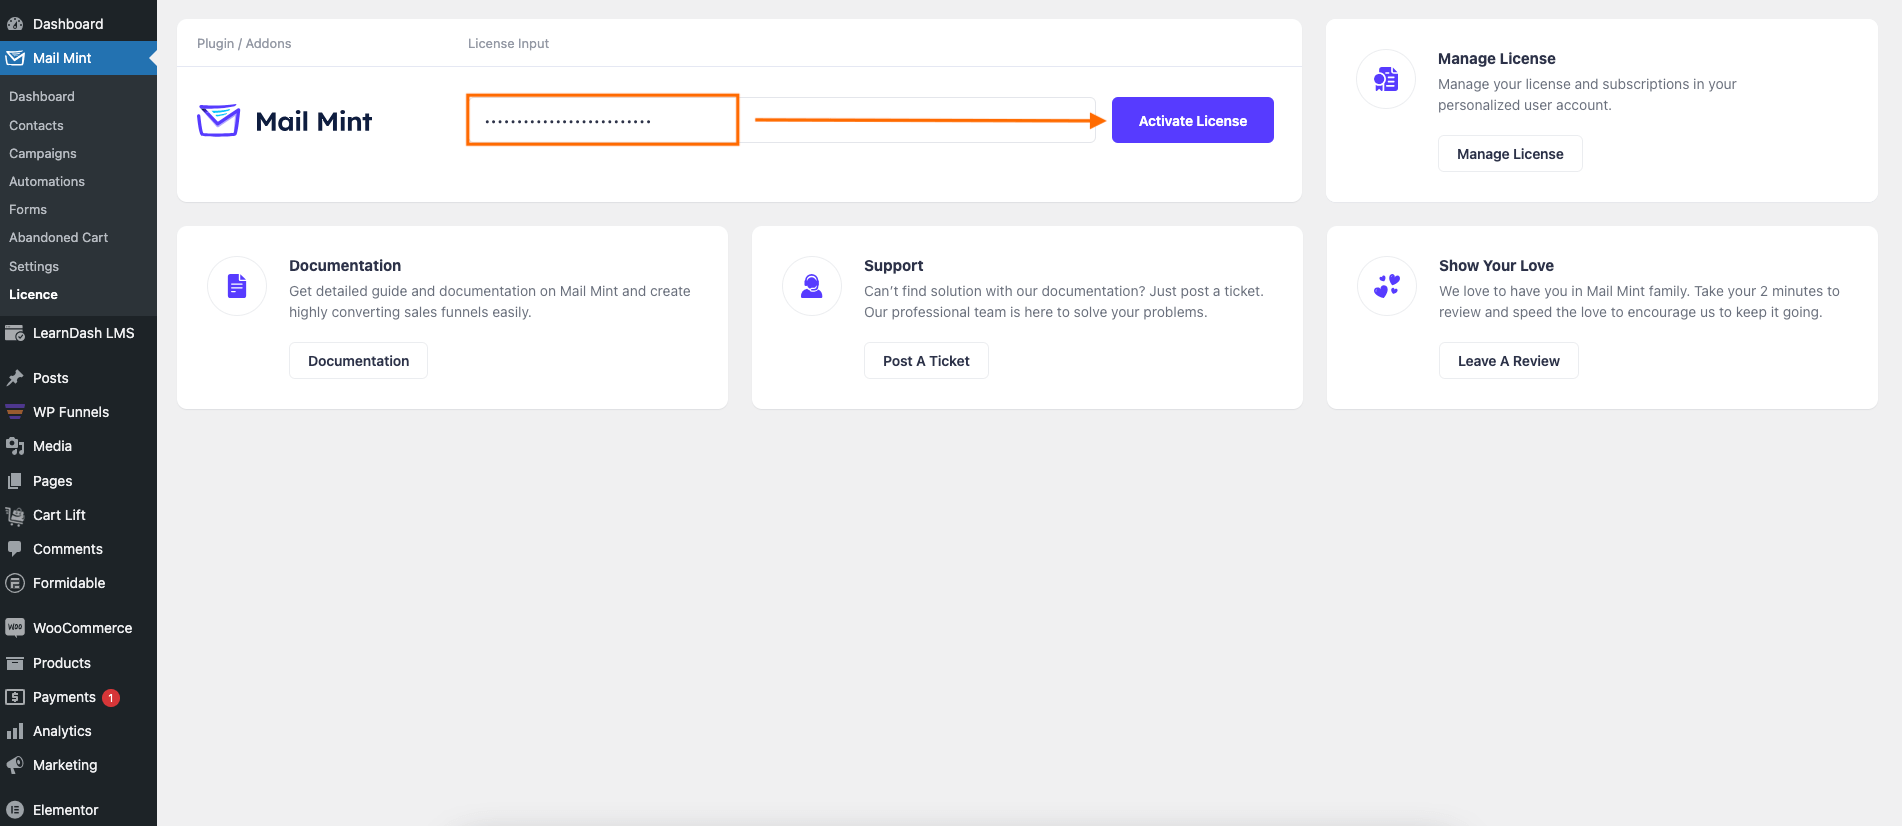
2. Here, paste the License key that you copied earlier, in the respective field, and then click on Activate License.
3. Once activated, you will get a confirmation.
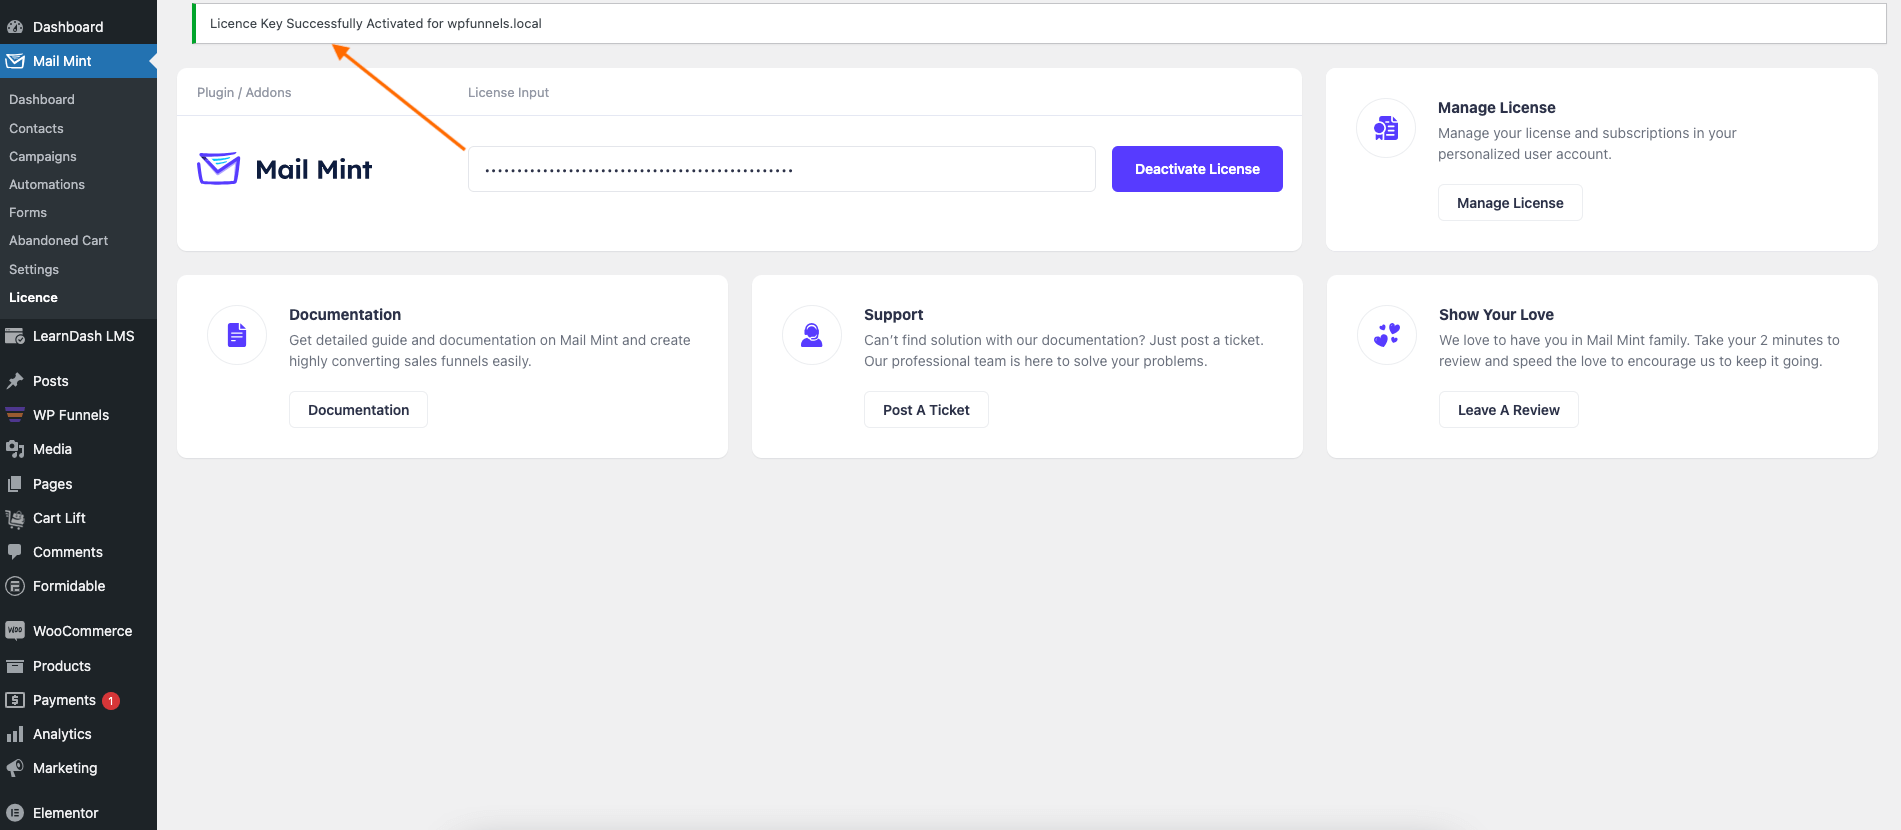
And that’s it. You can now go ahead and use all the pro features of Mail Mint.


