Using Mail MInt Webhooks, you can now connect Mail Mint with other tools like Zapier.
In this guide, you will learn how to use the Mail Mint Webhooks.
So, let’s get started.
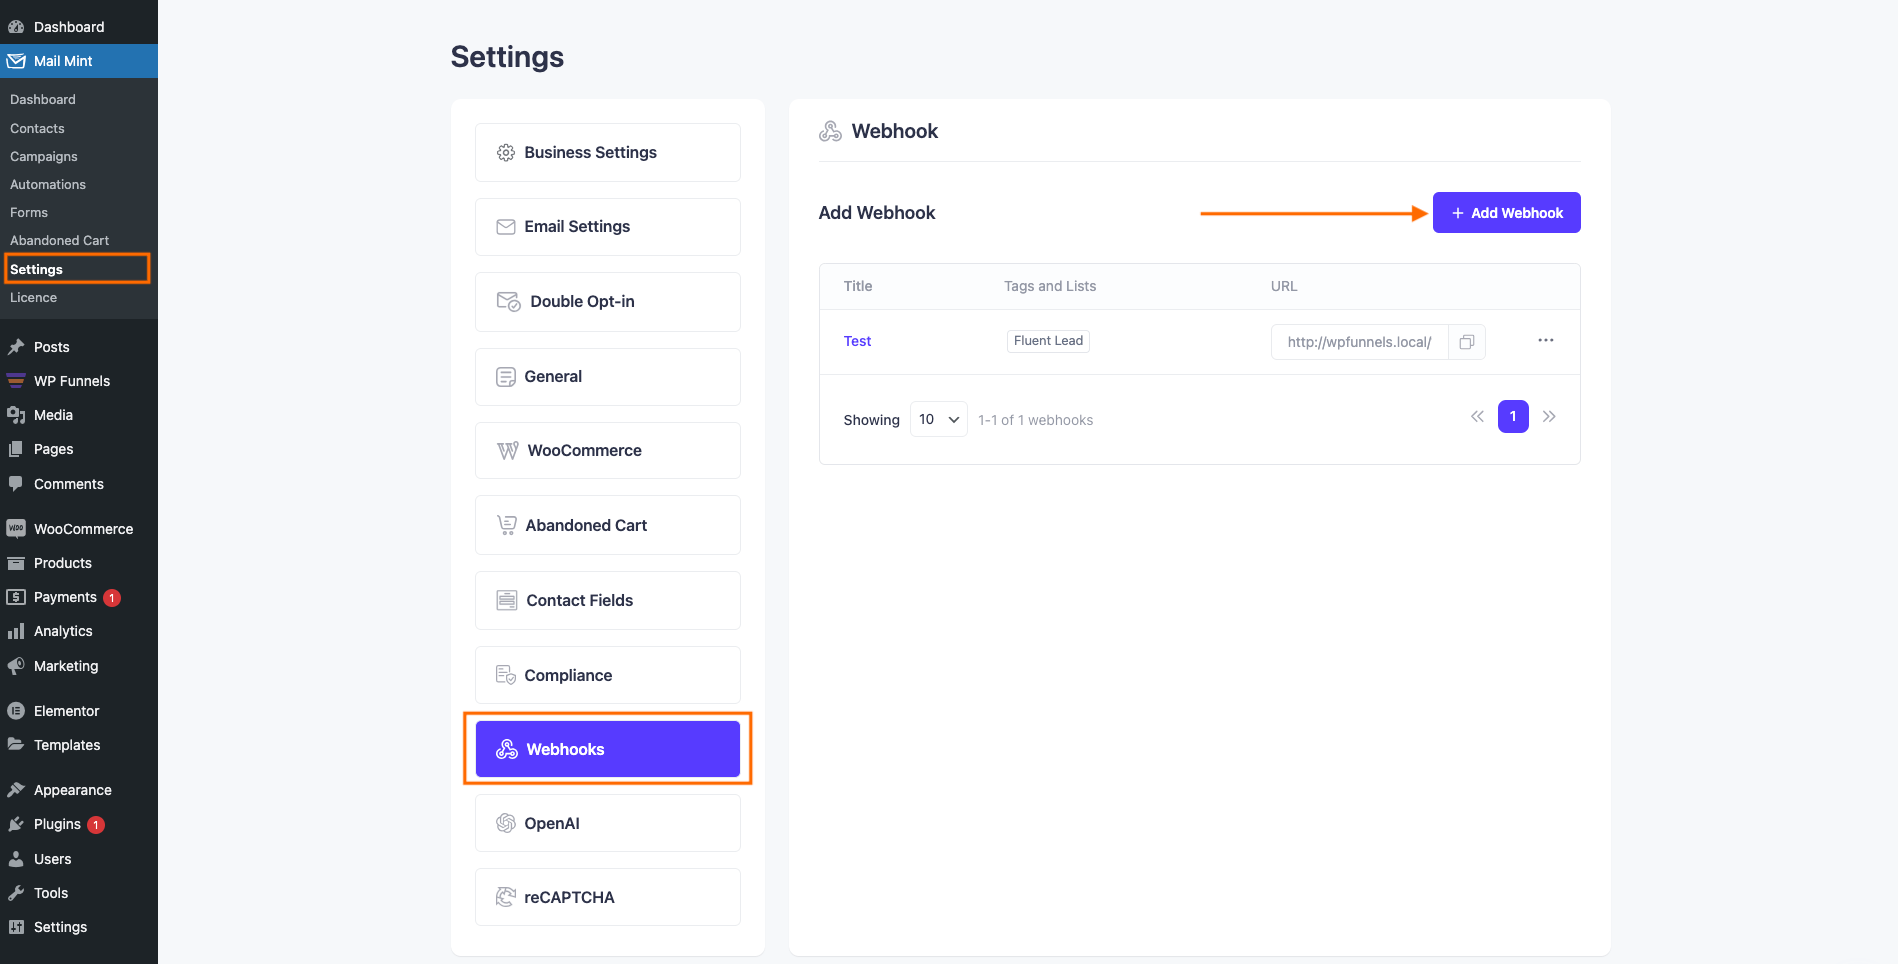
1. Once you have Mail Mint & Mail Mint Pro installed and activated on your website, go to Mail Mint Settings > Webhooks and click on “+ Add Webhooks“.
Here you’ll also see the webhooks listed after you create them.
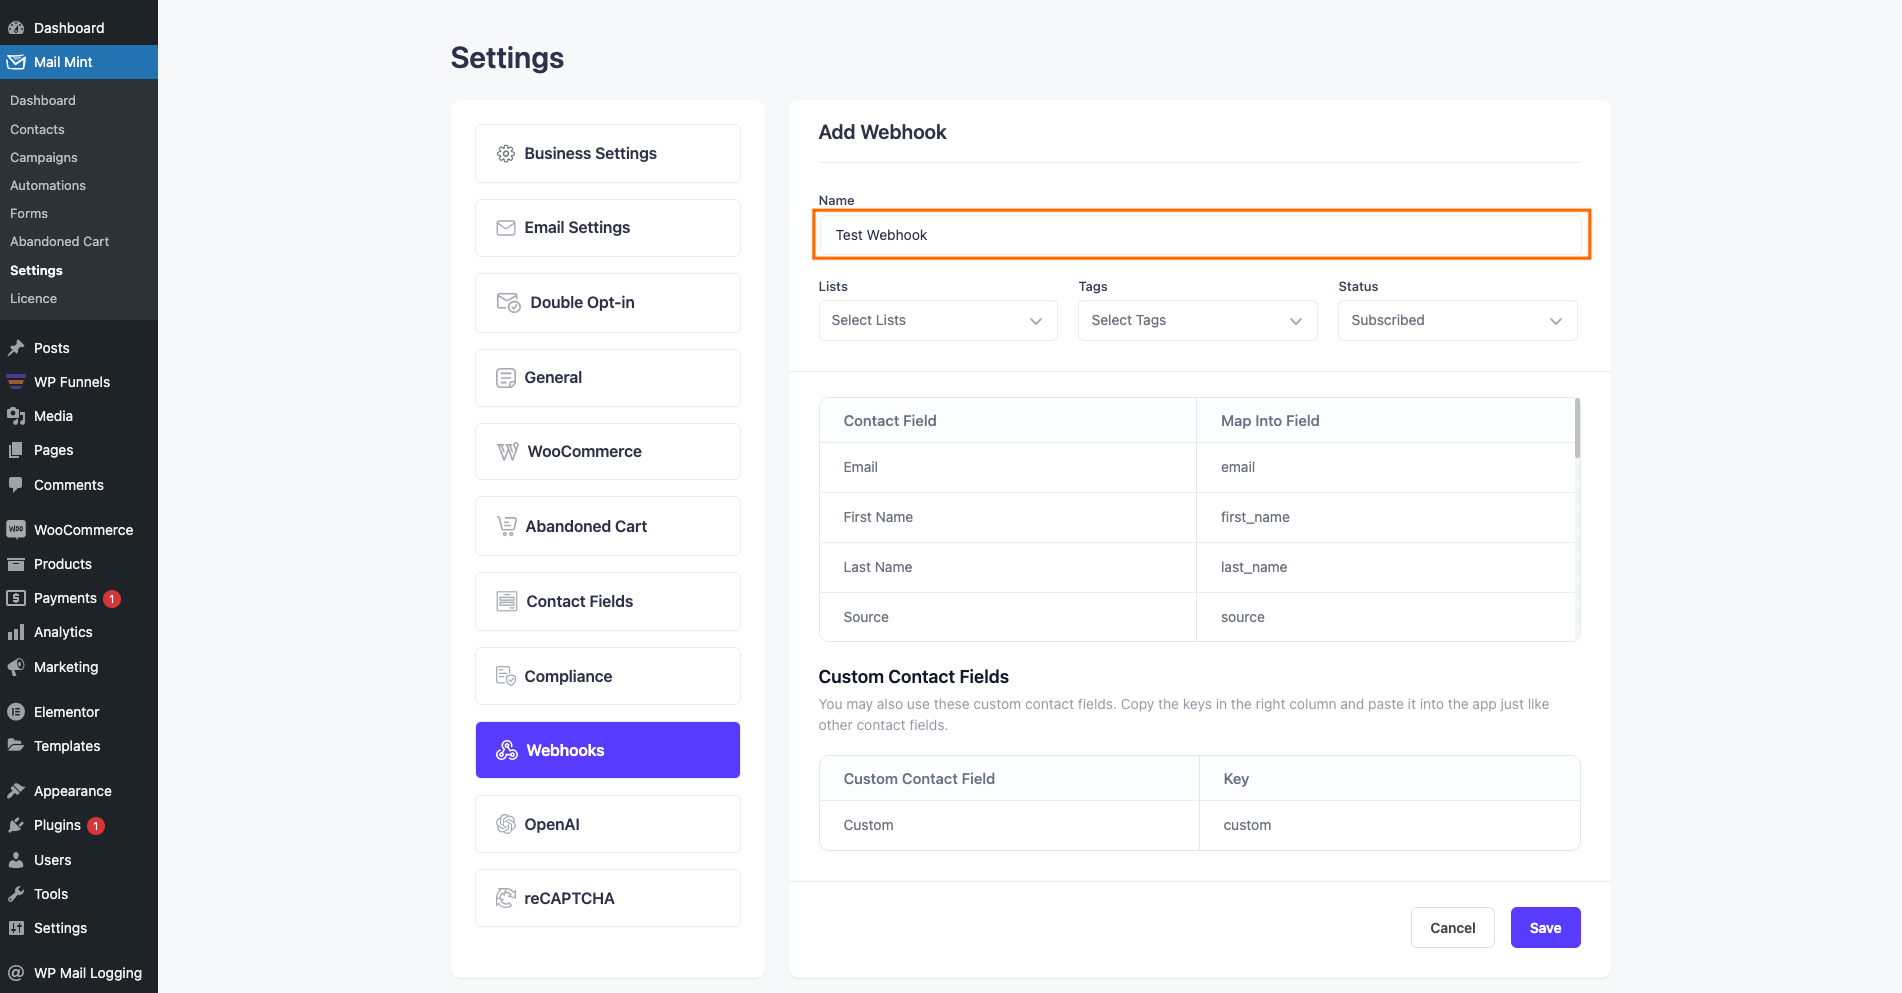
2. Now let’s configure the Webhook. At first, set the Webhook name.
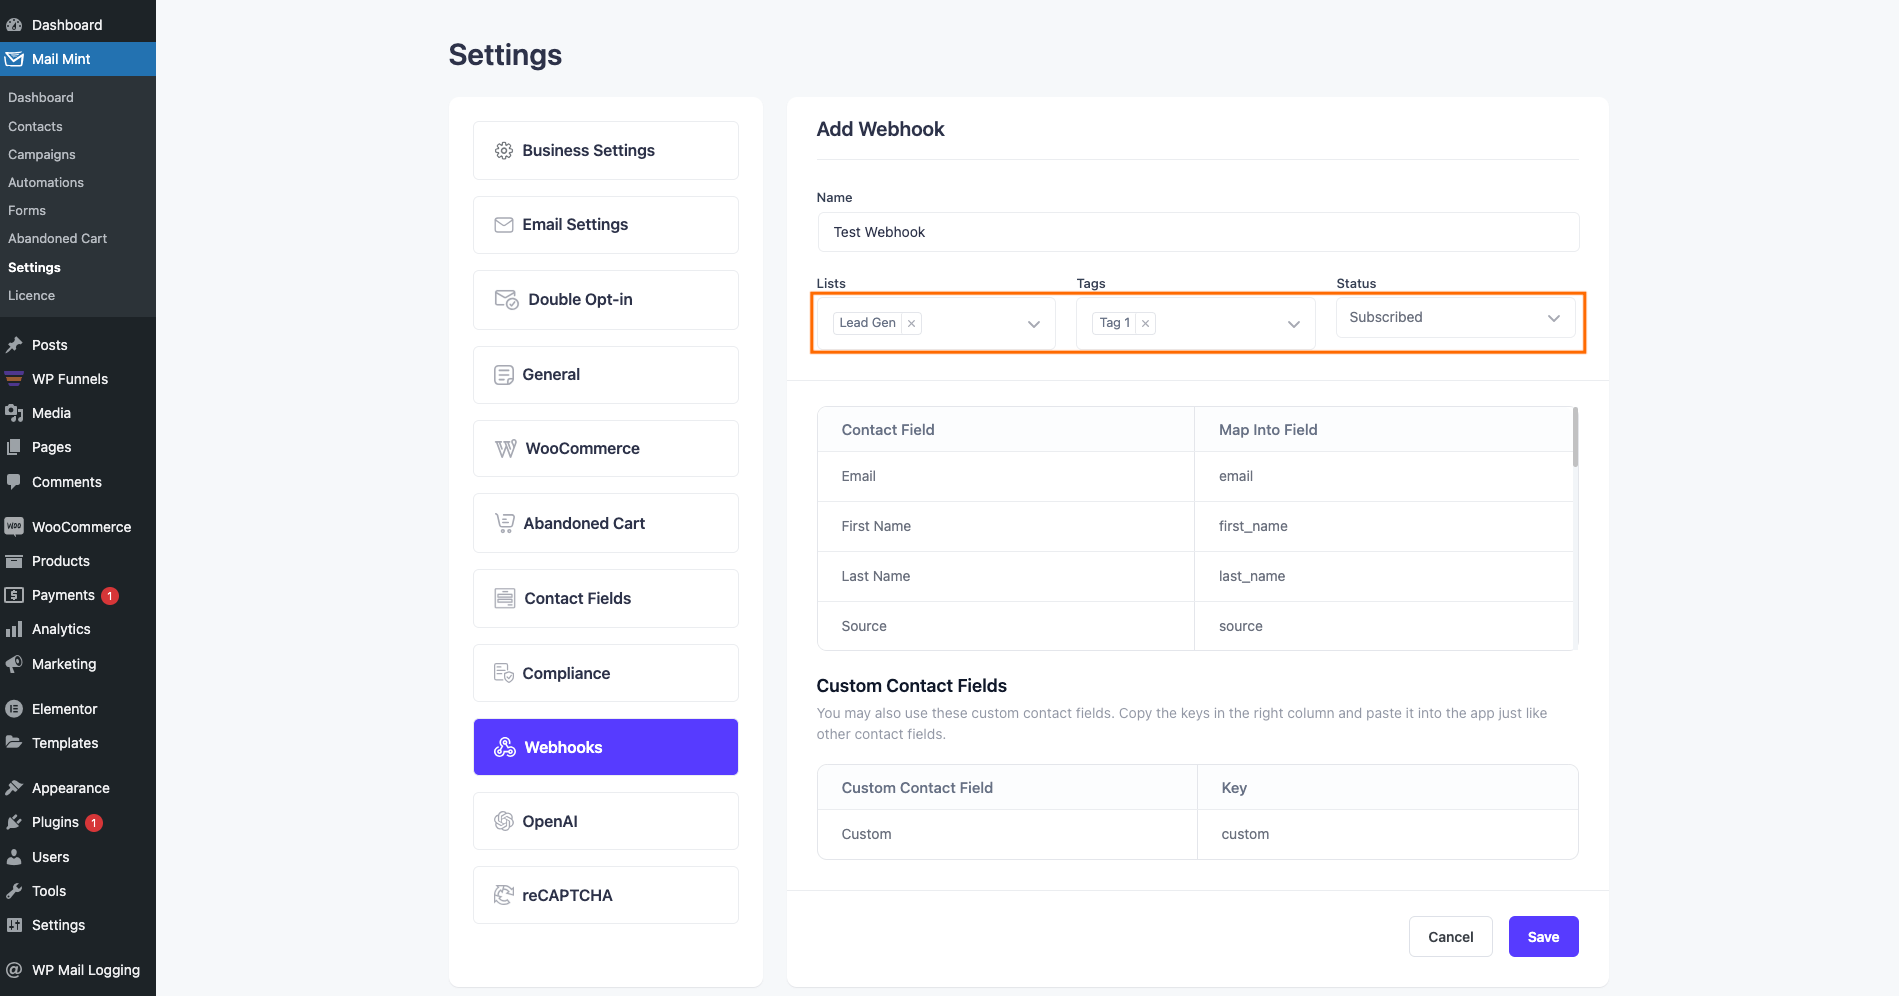
3. Then select your desired Lists, Tags, and Status for this specific webhook.
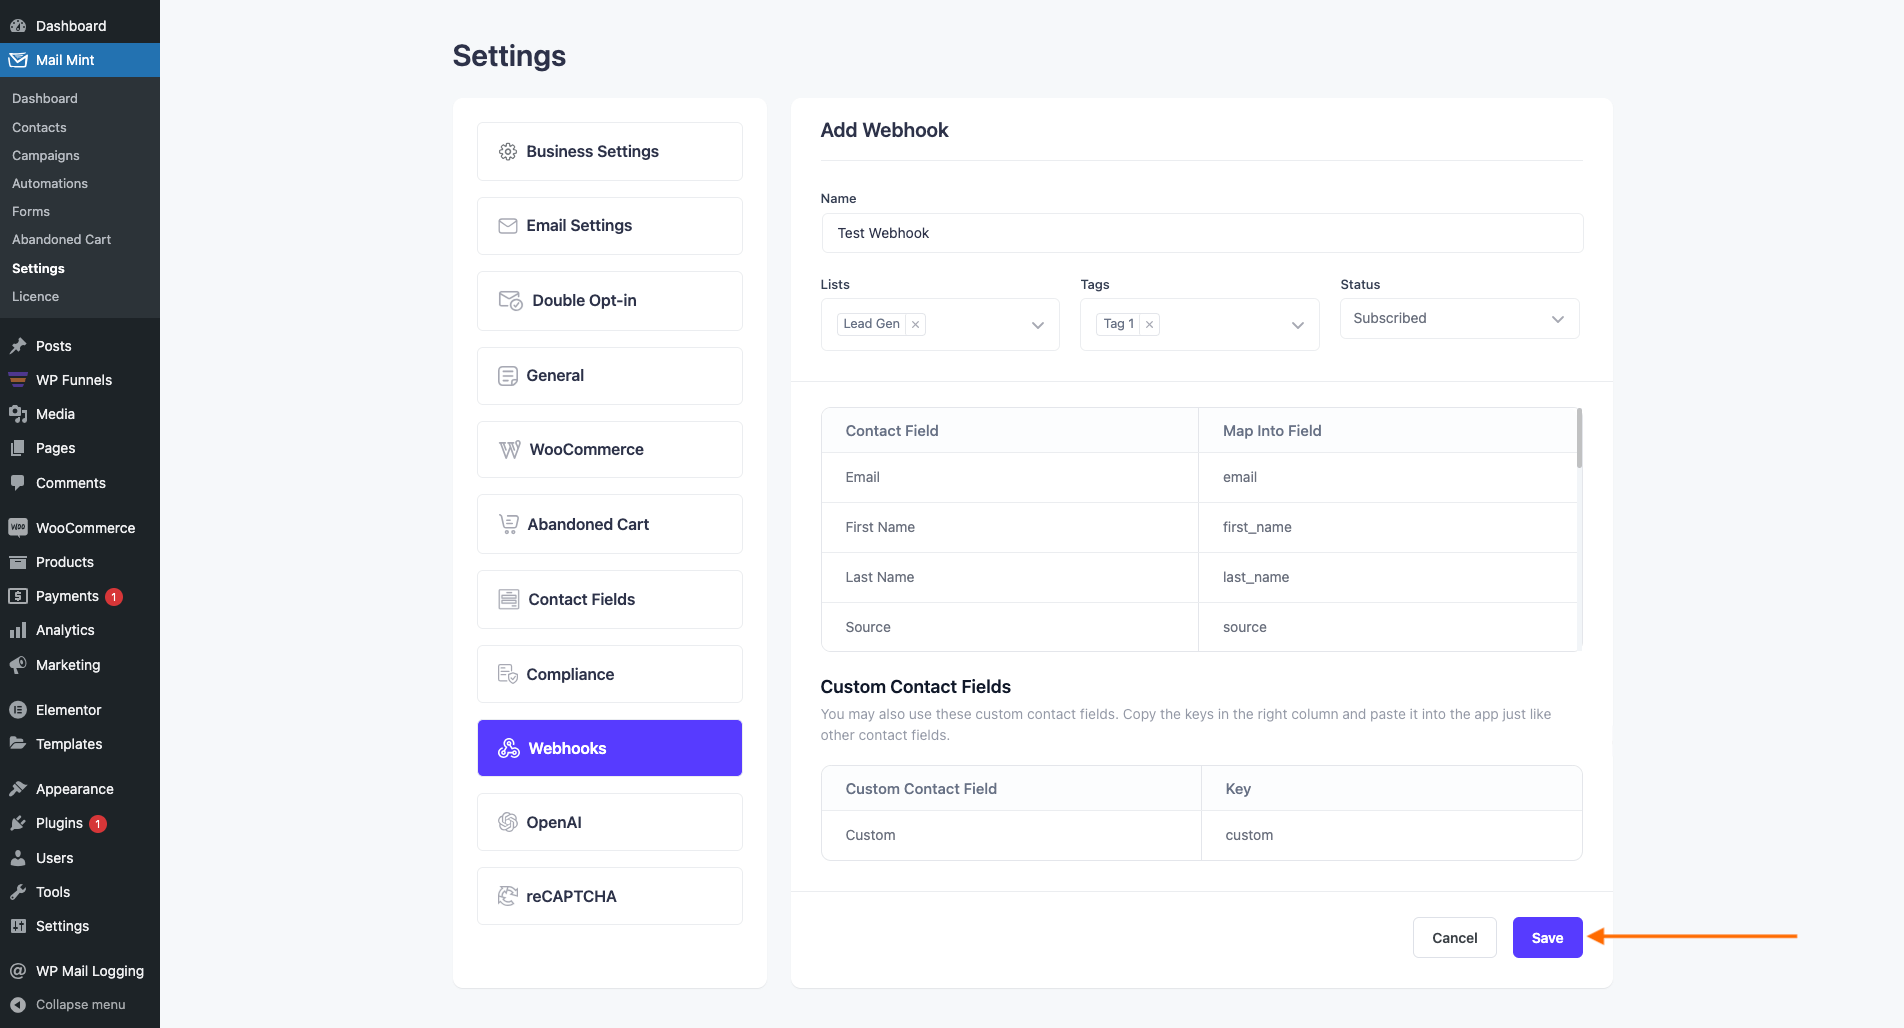
4. After you configure everything, click on Save.
5. Once you save a Webhook, the Webhook URL will be available for you to copy.
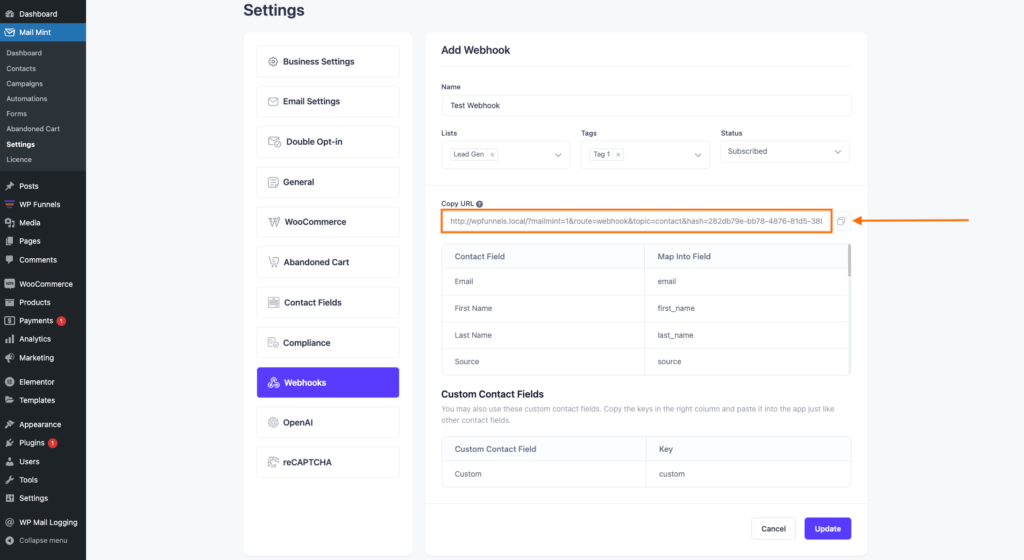
6. Use this Webhook URL on other tools you want to connect.
That’s how easily you can set up the Webhooks in Mail Mint.
