Contact Form 7 is fully integrated with Mail Mint to help you capture leads easily. To do this you’ll need Contact Form 7 and Mail Mint Pro installed and activated on your WordPress Dashboard.
Let’s have a look at how you can use these tools together to collect valuable leads.
Step 1: Create Your Desired Form Using Contact Form 7
1. Create a Form with Contact Form 7 from scratch or use an existing one. Add form fields as you need then click Save.

2. After you finish configuring the form, collect the Contact Form shortcode and embed it into your desired page.

Let’s move on to the Mail Mint part.
Step 2: Create An Automation For Contact Form 7 In Mail Mint
1. Go to Mail Mint > Automations and click on the “+ New Automations“.

2. Click on “Start From Scratch“.

3. After setting your automation name, select click on “Select A Starting Point“. Move on to Contact Form 7 tab and you’ll find the trigger “Form Submitted” under it.

4. Now on the right sidebar, select a form to trigger the automation.

5. Then select the Form Fields and map them with Mail Mint Contact Fields to capture data.

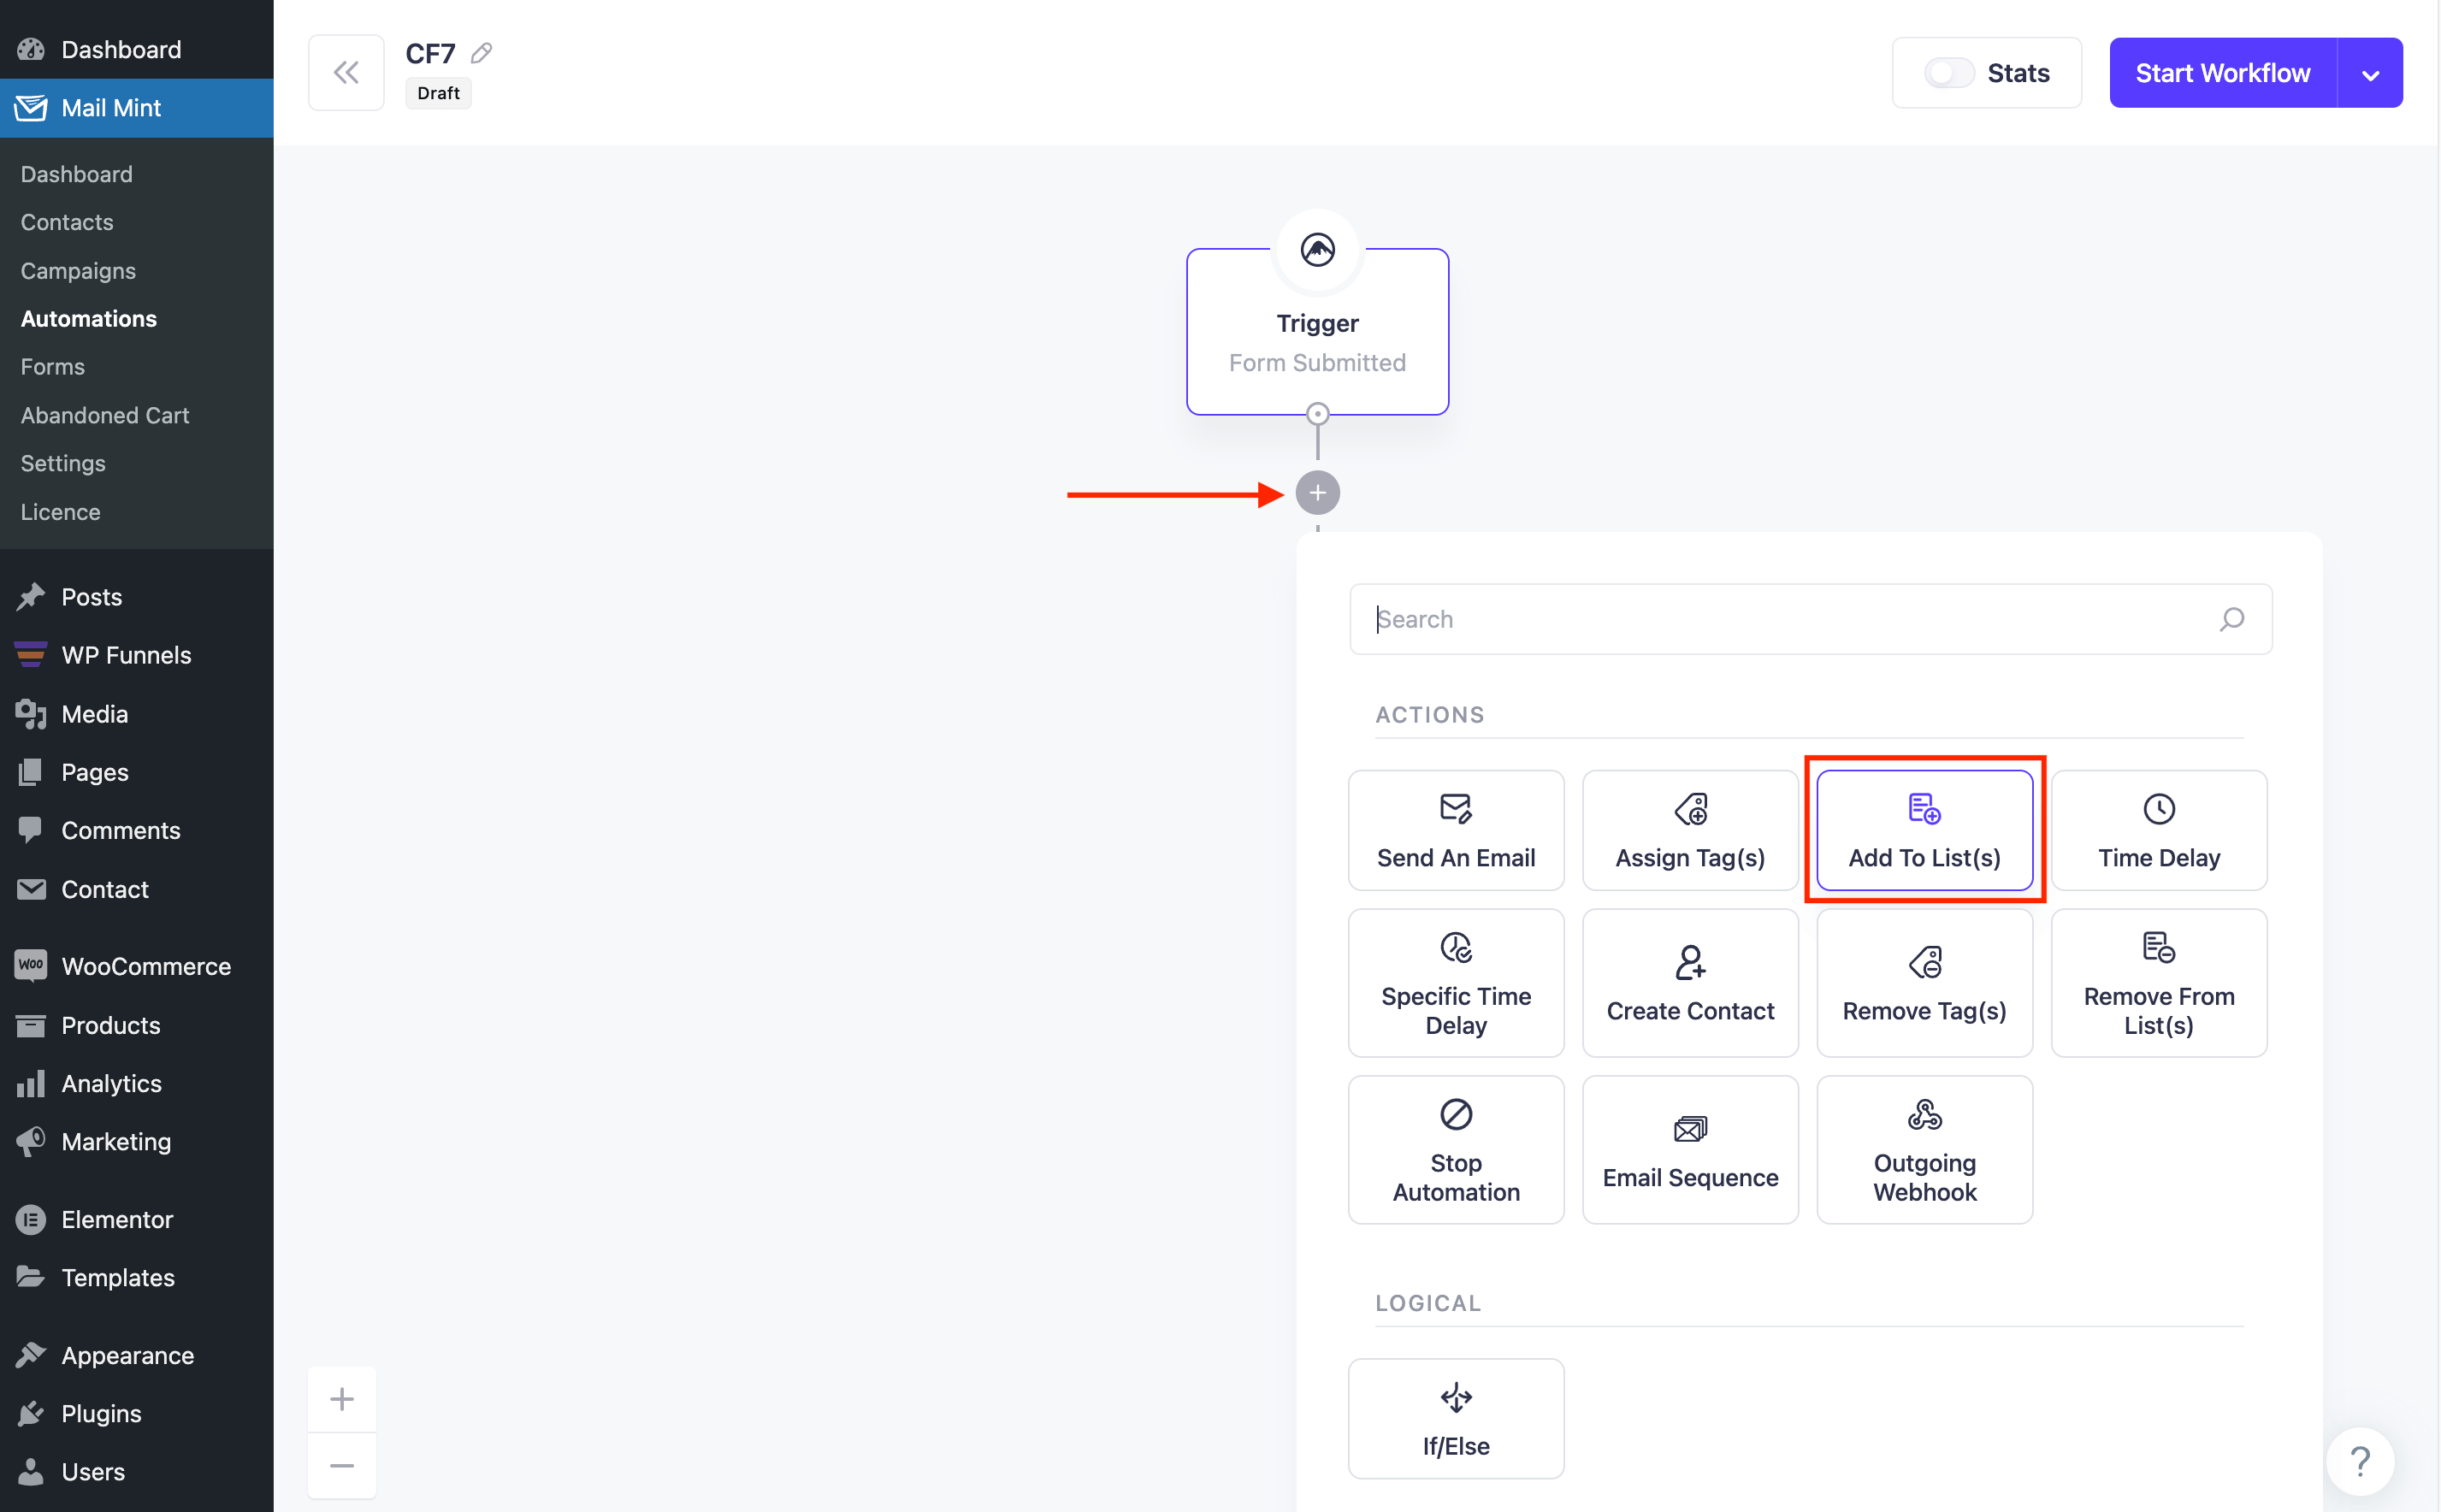
6. Click on the “+” sign to add new actions. Let’s select Add To List.

7. Choose an existing List from Mail Mint.

8. After you configure everything, click on “Start Workflow” to start the automation.

Now go ahead and fill out the Contact Form 7 for testing. You’ll see the lead will be added to your Mail Mint contacts.
