With WPFunnels, you can take your buyers into a sales funnel directly from the WooCommerce store and make dynamic offers based on conditions!
For example, when a person purchases a product under the category “Mobile phones,” you may offer him a specific headphone as the upsell after checkout.
You can maximize your profit by adding order bump offers at the checkout and post-checkout one-click upsell/downsell offers to your Global Funnel.
In this guide, we’ll show you how to create a Global Funnel and add offers to it.
So, let’s get started.
Step 1: Install & Activate the Global Funnel Addon
1. First, you need to install and activate WPFunnels & WPFunnels Pro.
2. Then install and activate the Global Funnel addon – you will find this addon in the Downloads tab in your Account.
Step 2: Enable Global Funnel
1. Create a new funnel or edit an existing one.
2. Click on the [Enable Global Funnel] button on the top right side of your canvas, and your entire funnel will be converted into Global Funnel.
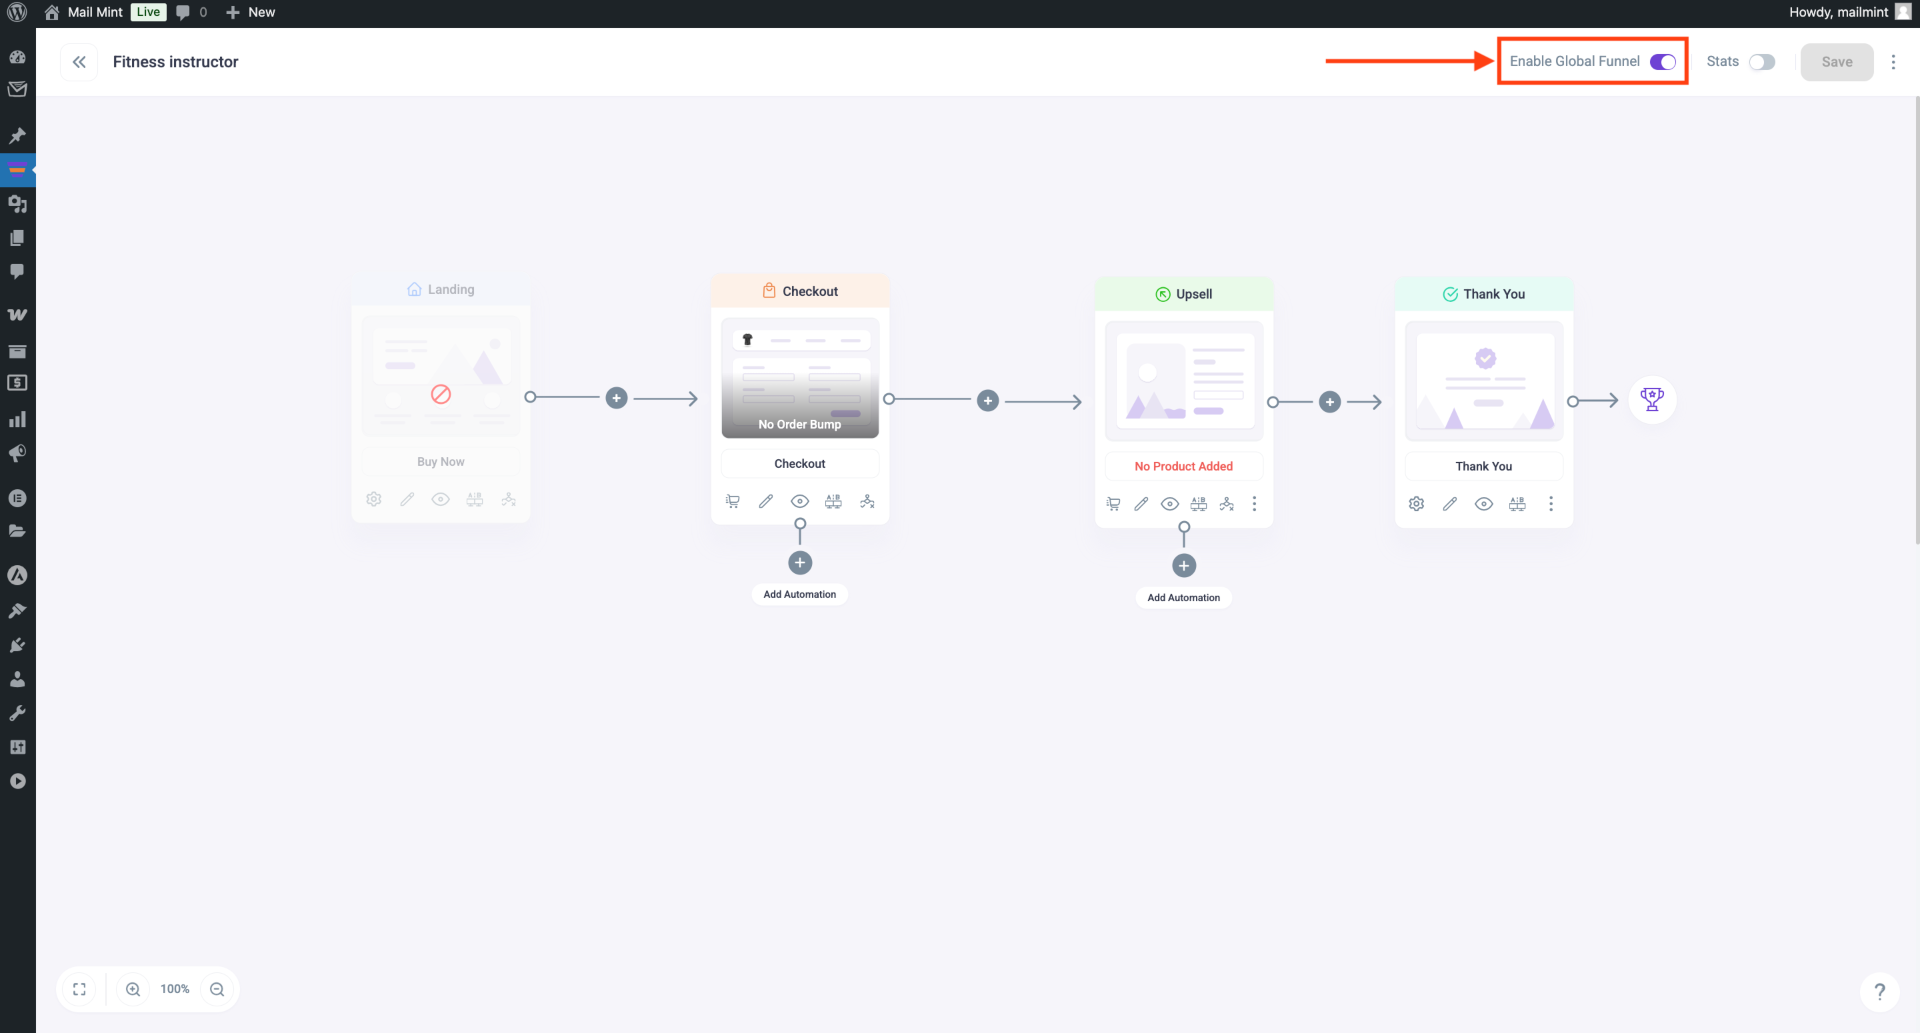
After you enable the Global Checkout option, you will now get to see the Landing Step is disabled, and the rest of the step will be converted into a new UI for Global Checkout.
Step 3: Configuring And Setting Up Checkout Step
Now that you have enabled the Global Checkout Funnel, let us move on to configuring it and getting it ready for use.
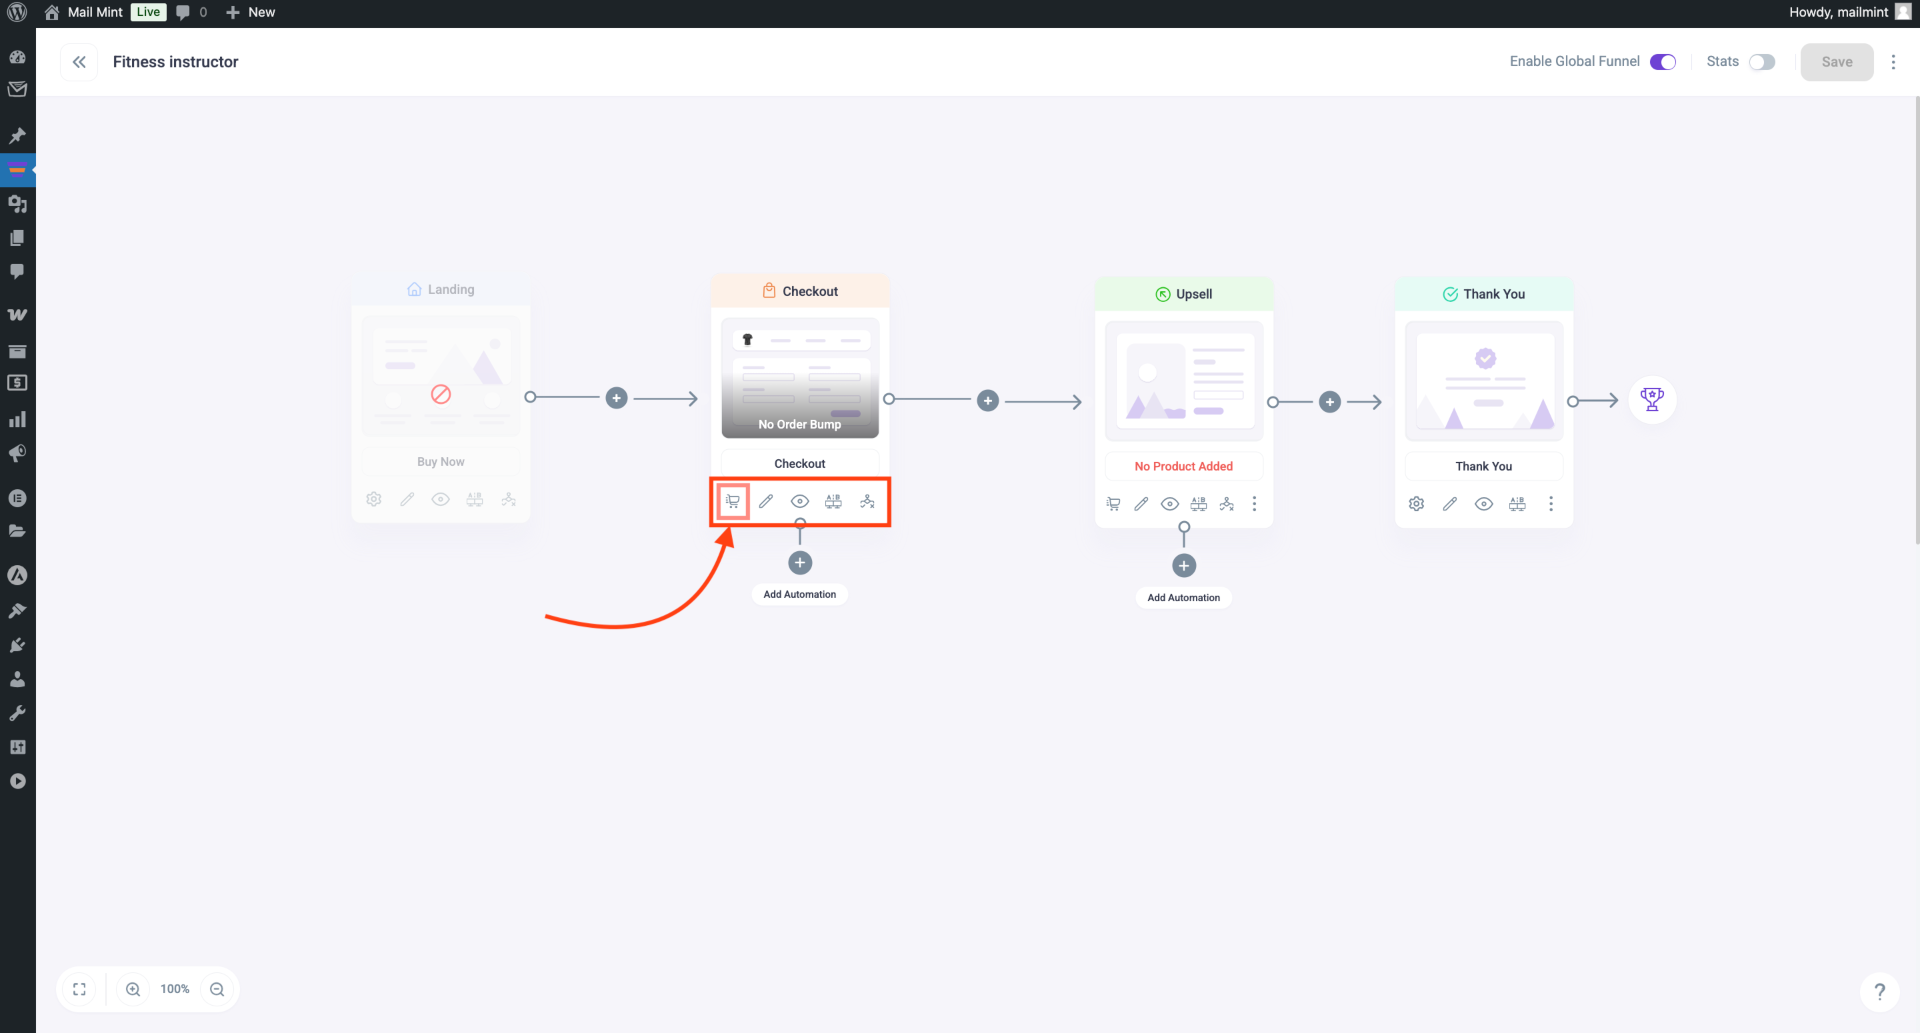
1. Click on the Checkout step to access five new options: Cart, Edit, View, A/B Testing, and Conditional Mapping.
2. Now, click on the Cart icon on the left to open a new drawer for the Checkout step, where you can configure settings like setting the slug from General, adding products, and more.
3. Here, you will find several options to choose from. In this guide, we select the condition as [Product Is]. Then, click on the Add Product field and search for the product you want to display the offers for.
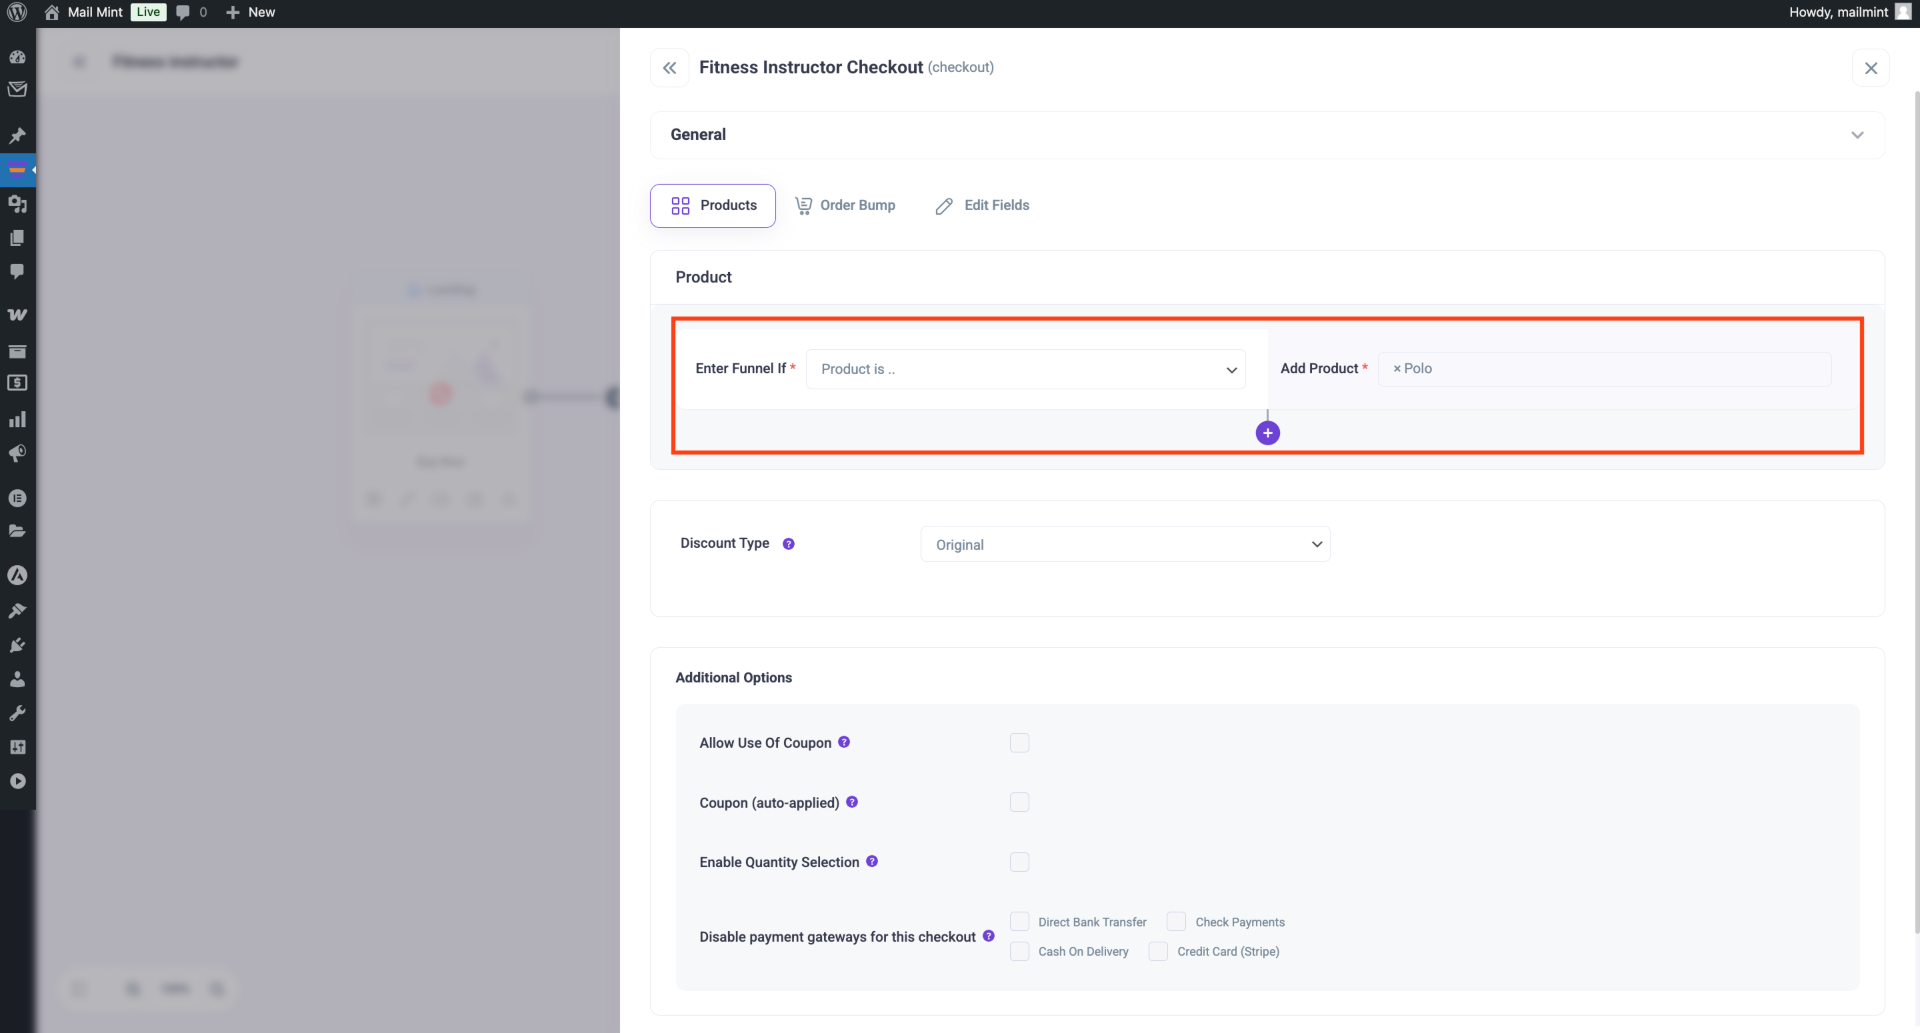
For example, here I’ve added a product named “Polo.”
4. After setting the product, you will find several additional options, such as selecting the discount type and other customization settings.
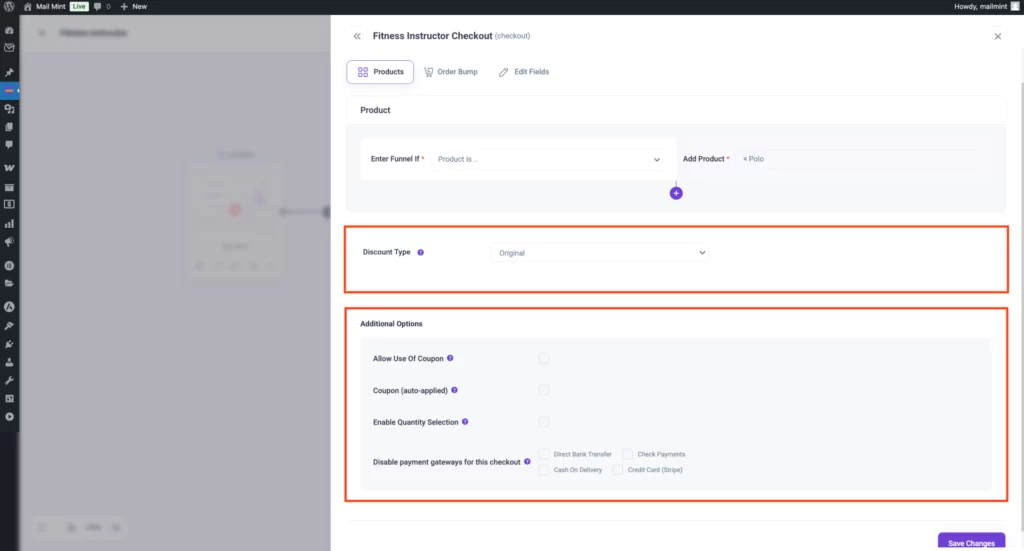
5. Now click on Save Changes below, and then click on the ‘X’ icon on the top right corner to close the drawer.
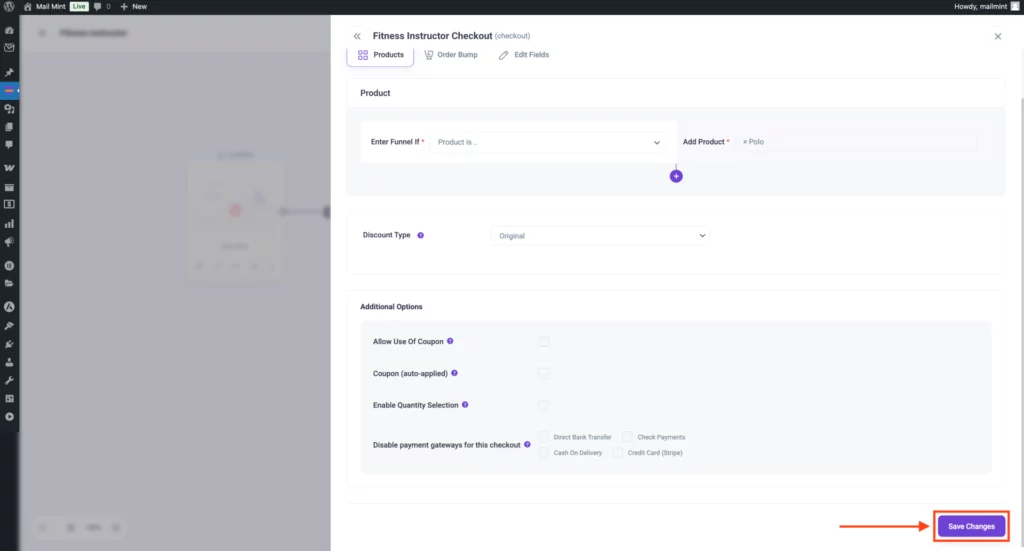
Note: This is the main Category for your funnel to run. Whenever a user selects a product from this specific category, they’ll get to see specific Offers according to your plan.
You can add more categories by clicking the [+] Sign below the section.
Step 4: Add an Order Bump at the Checkout
1. Here, go to the Order Bump tab and click on Enable Order Bump. Once you enable it, you will get to configure your order bump offer.
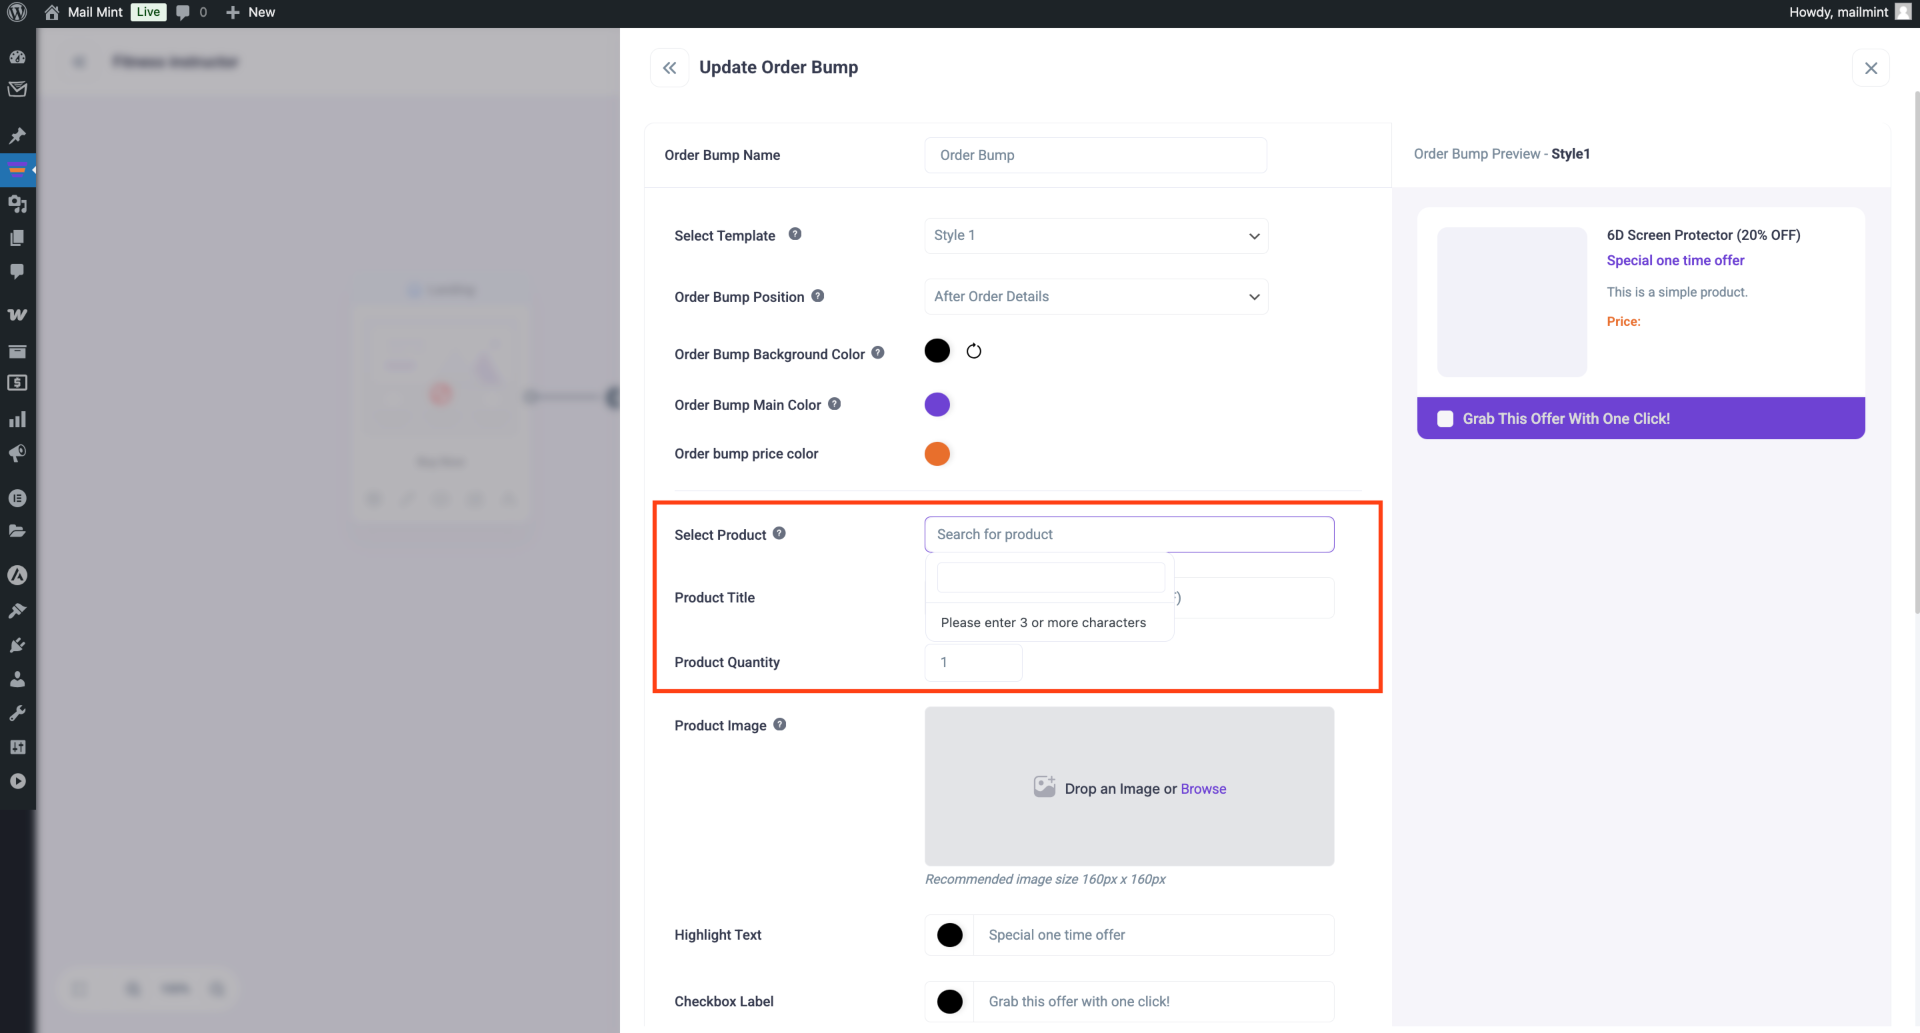
2. Then, click on Select Product, and search for the product you want to offer. Then select it and the product will be added.
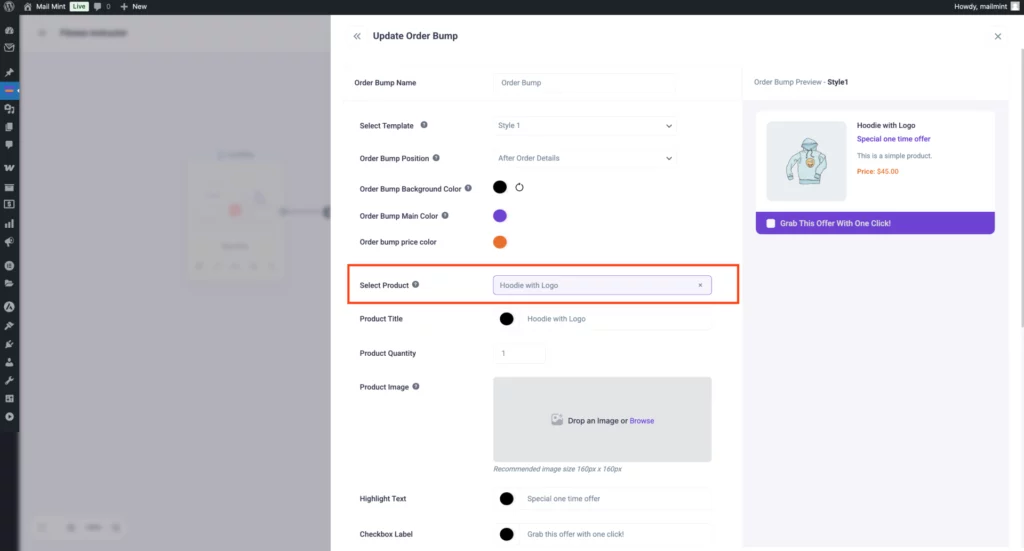
You will see the Product image there, and a Preview of the order bump offer is on the right side.
Just below the field where you selected the product, you can assign the quantity of the product that is included in the offer.
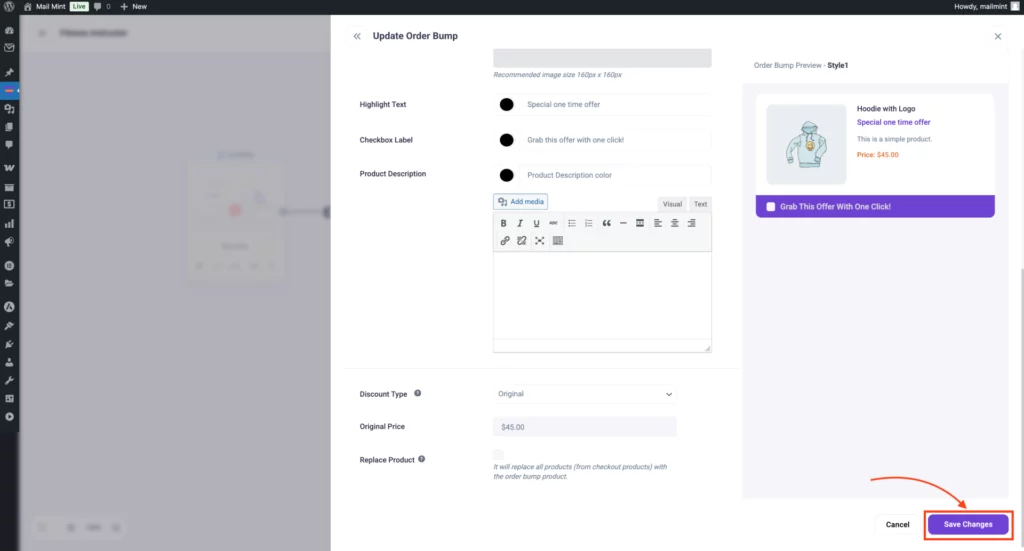
3. After you finish, click on Save Changes and then click on the ‘X’ icon on the top right corner to close the drawer.
Step 5: Configure Upsell/Downsell Offer To Your Funnel
1. Click on the Upsell step, and the Upsell settings section will appear below once you click on the Cart icon.
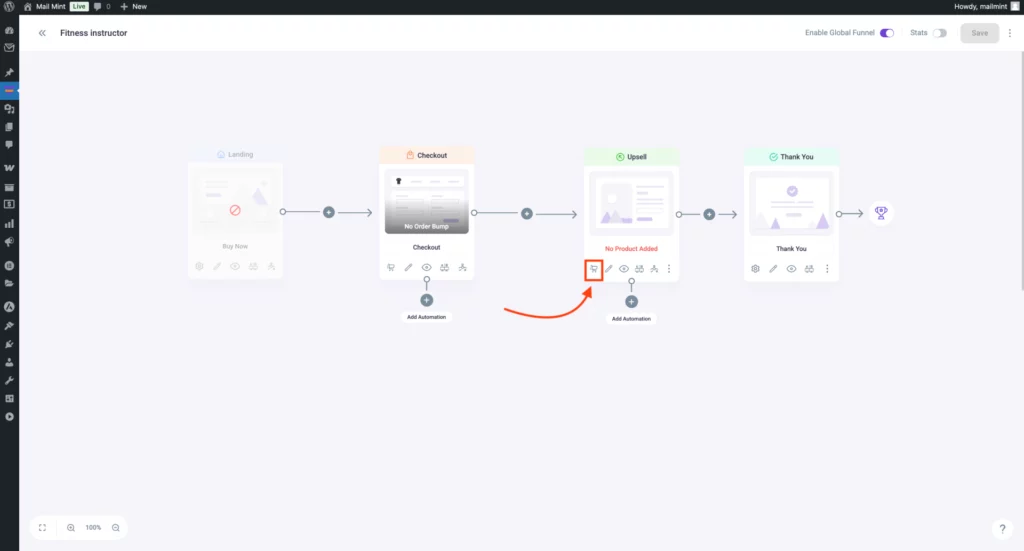
2. Now, select specific Offers from the drop-down option beside Choose Offers.
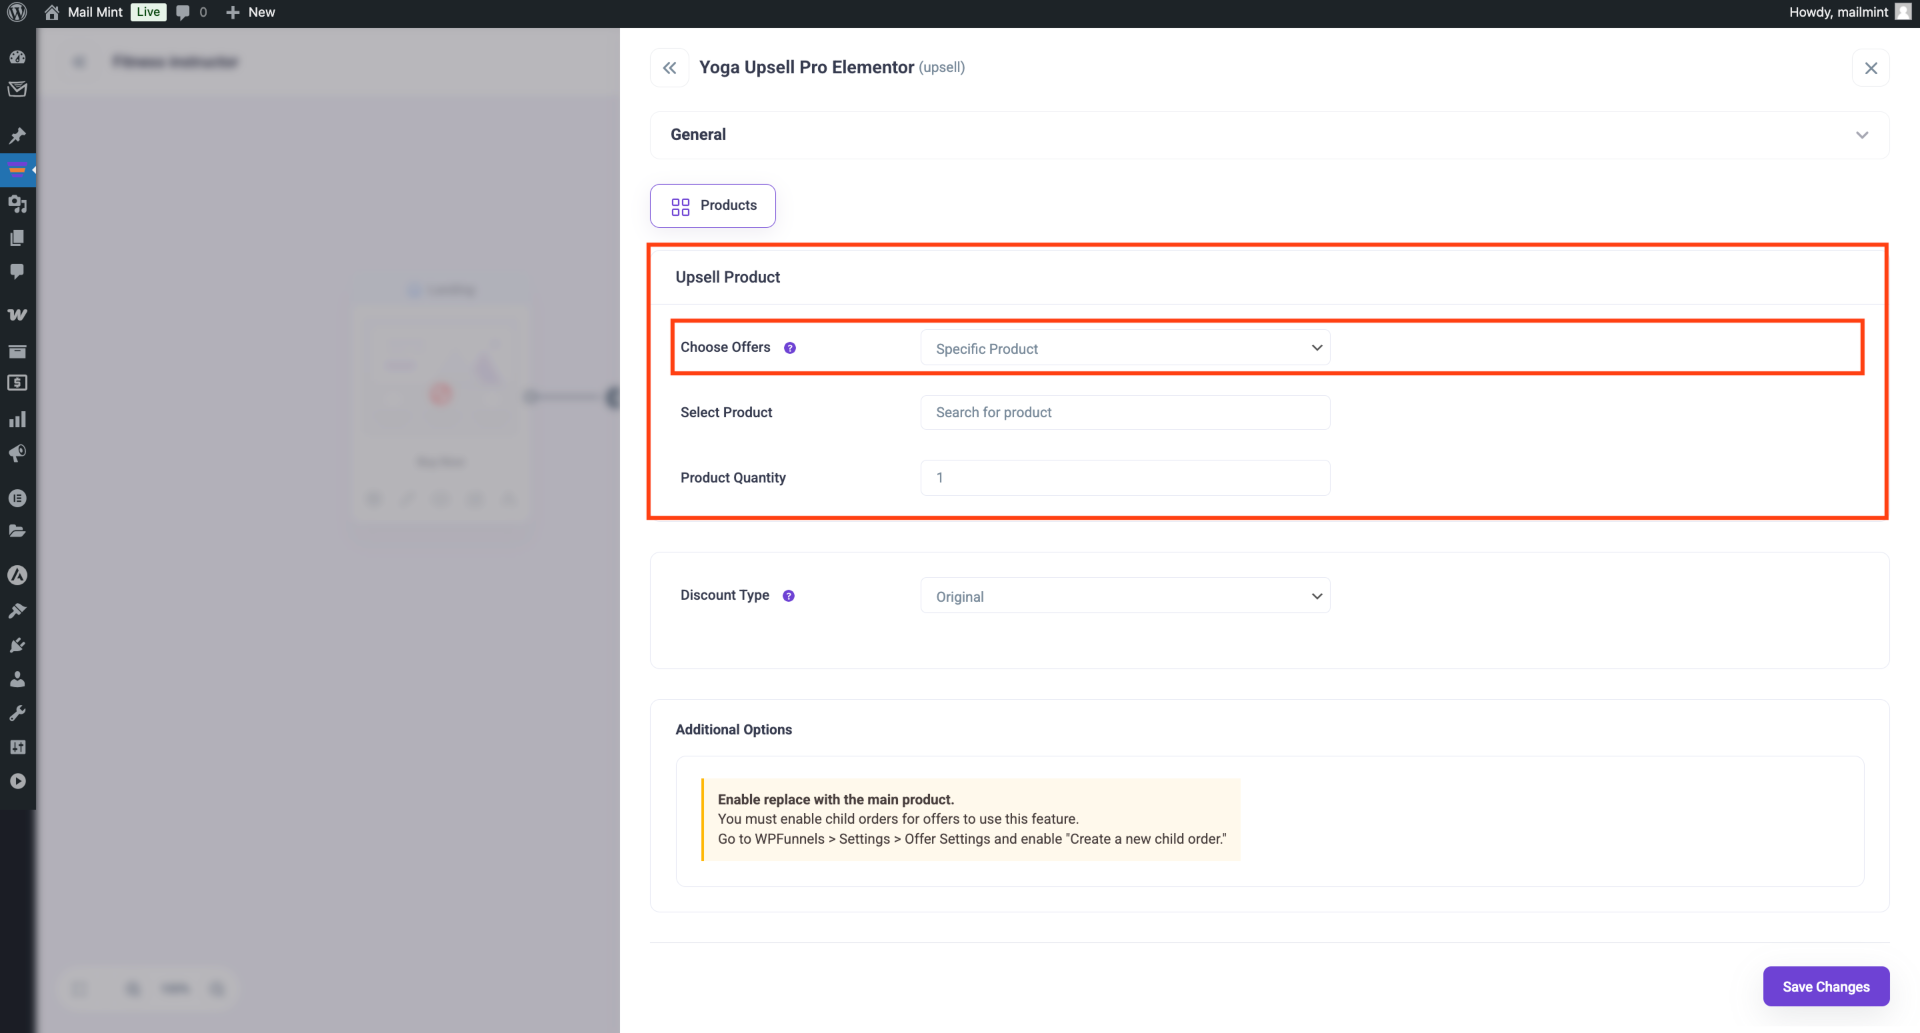
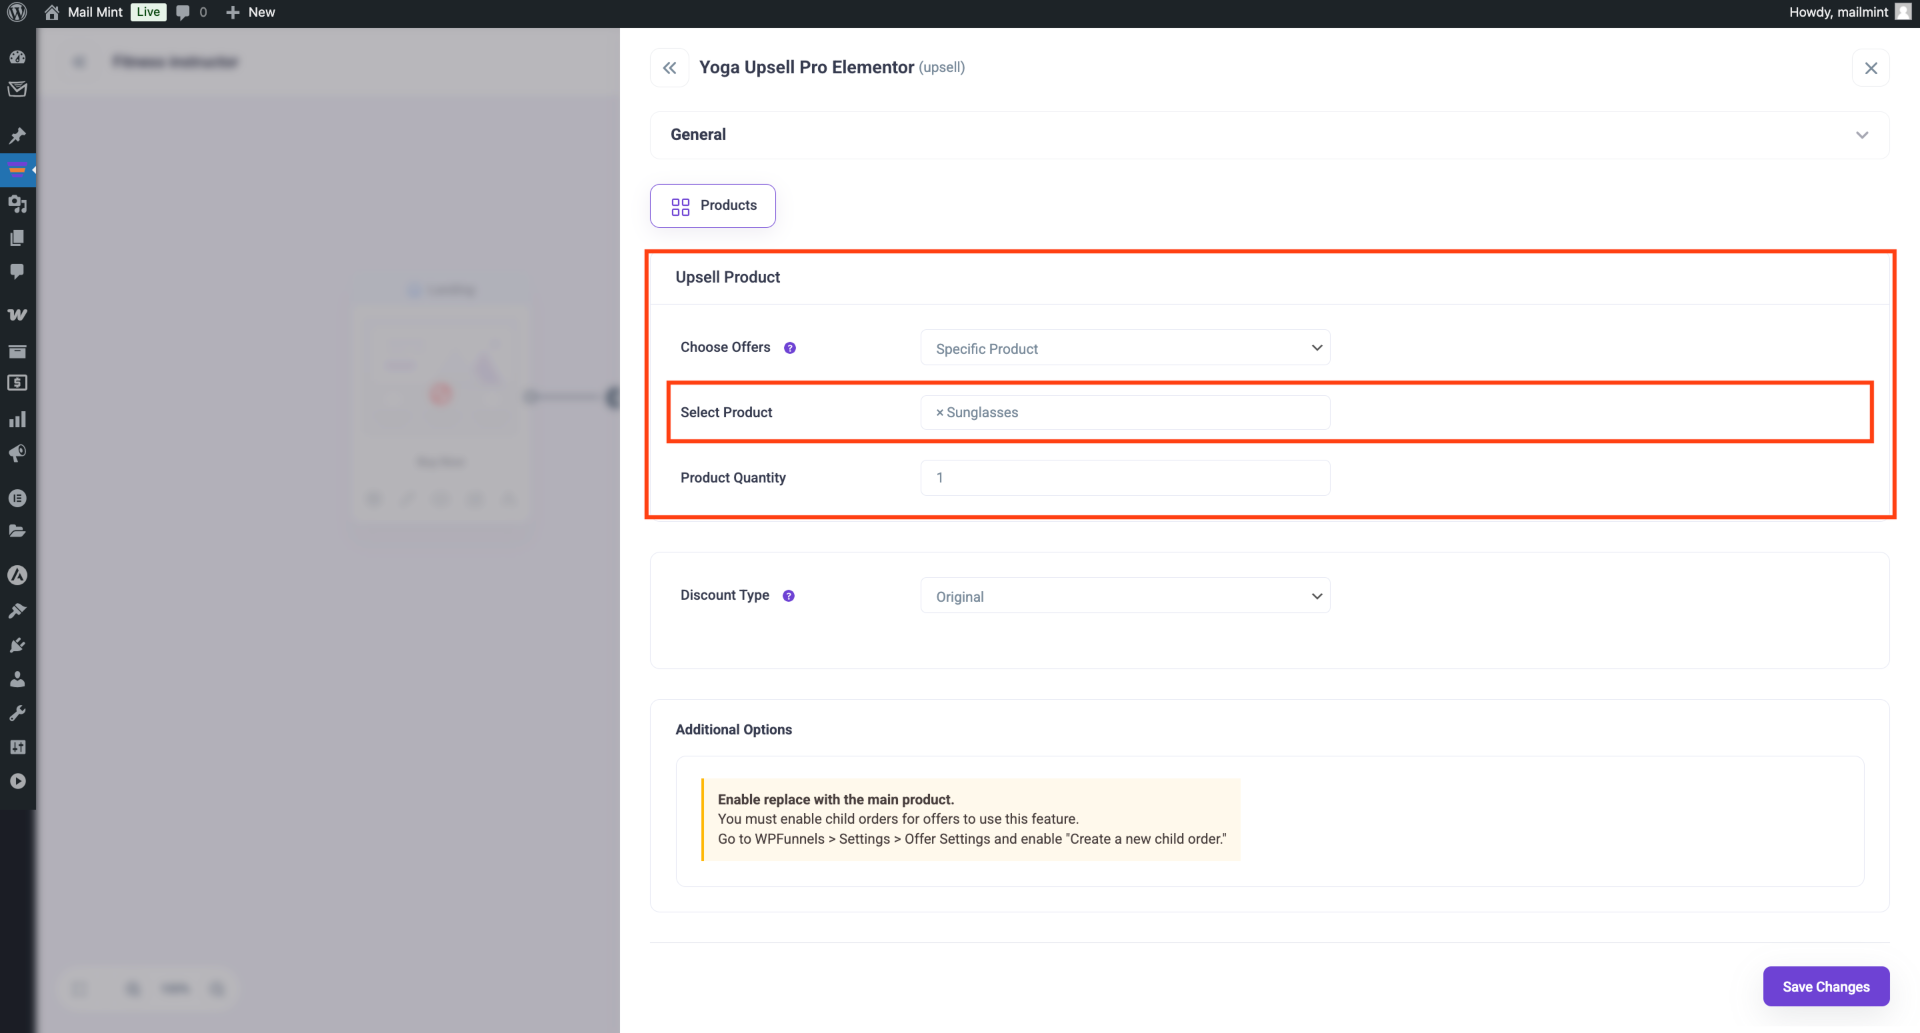
3. Then search for the product you want to add on your Upsell step on the Search for product search box, and while typing you will get suggestions, select your preferred product.
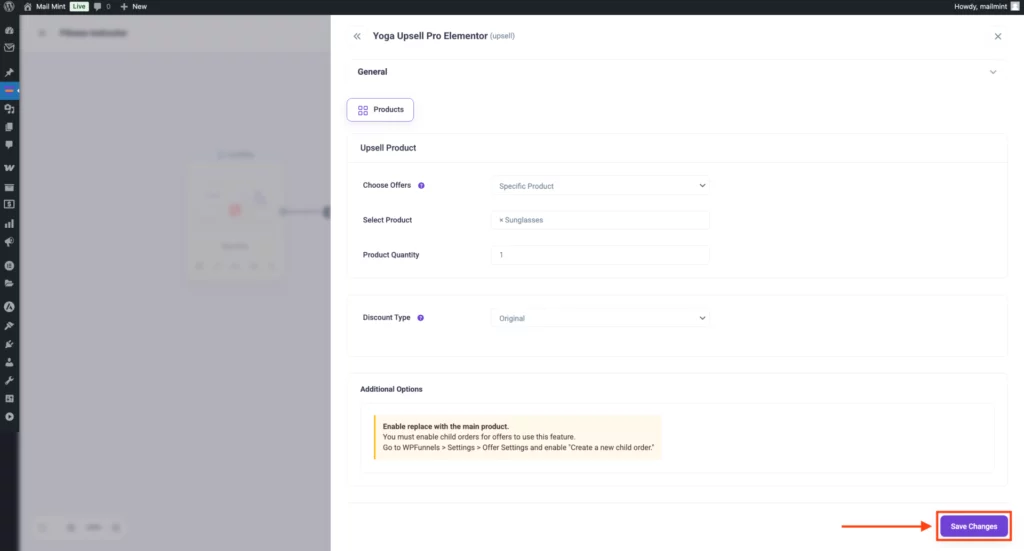
4. Click on the Save Changes button after assigning the product to your sales funnel.
Now, you can configure your downsell step the same way.
That’s it, now you can create a Global Funnel & add offers to it.
Note:
- You can see the Analytics of Global Funnel in the WPFunnels Analytics section.
- You can also add Integration with Global Funnel.


