During the checkout, customers are generally required to add a lot of details on the same page and this process might seem long and confusing.
With WPFunnels, you will be able to use a Multi-step Checkout that helps to split your funnel checkout form into multiple steps so that buyers do not get confused with what information to input.
It is a very useful feature that is one of the solutions to abandoned carts as people often abandoned the site when they are confused with the long checkout form.
Use Multi-Step Checkout – Oxygen Page Builder
In this documentation, you’ll learn how to use a multi-step checkout form during the checkout for Oxygen Page Builder.
So, Let’s get started.
Step 1 – Edit Your Funnel Checkout Page
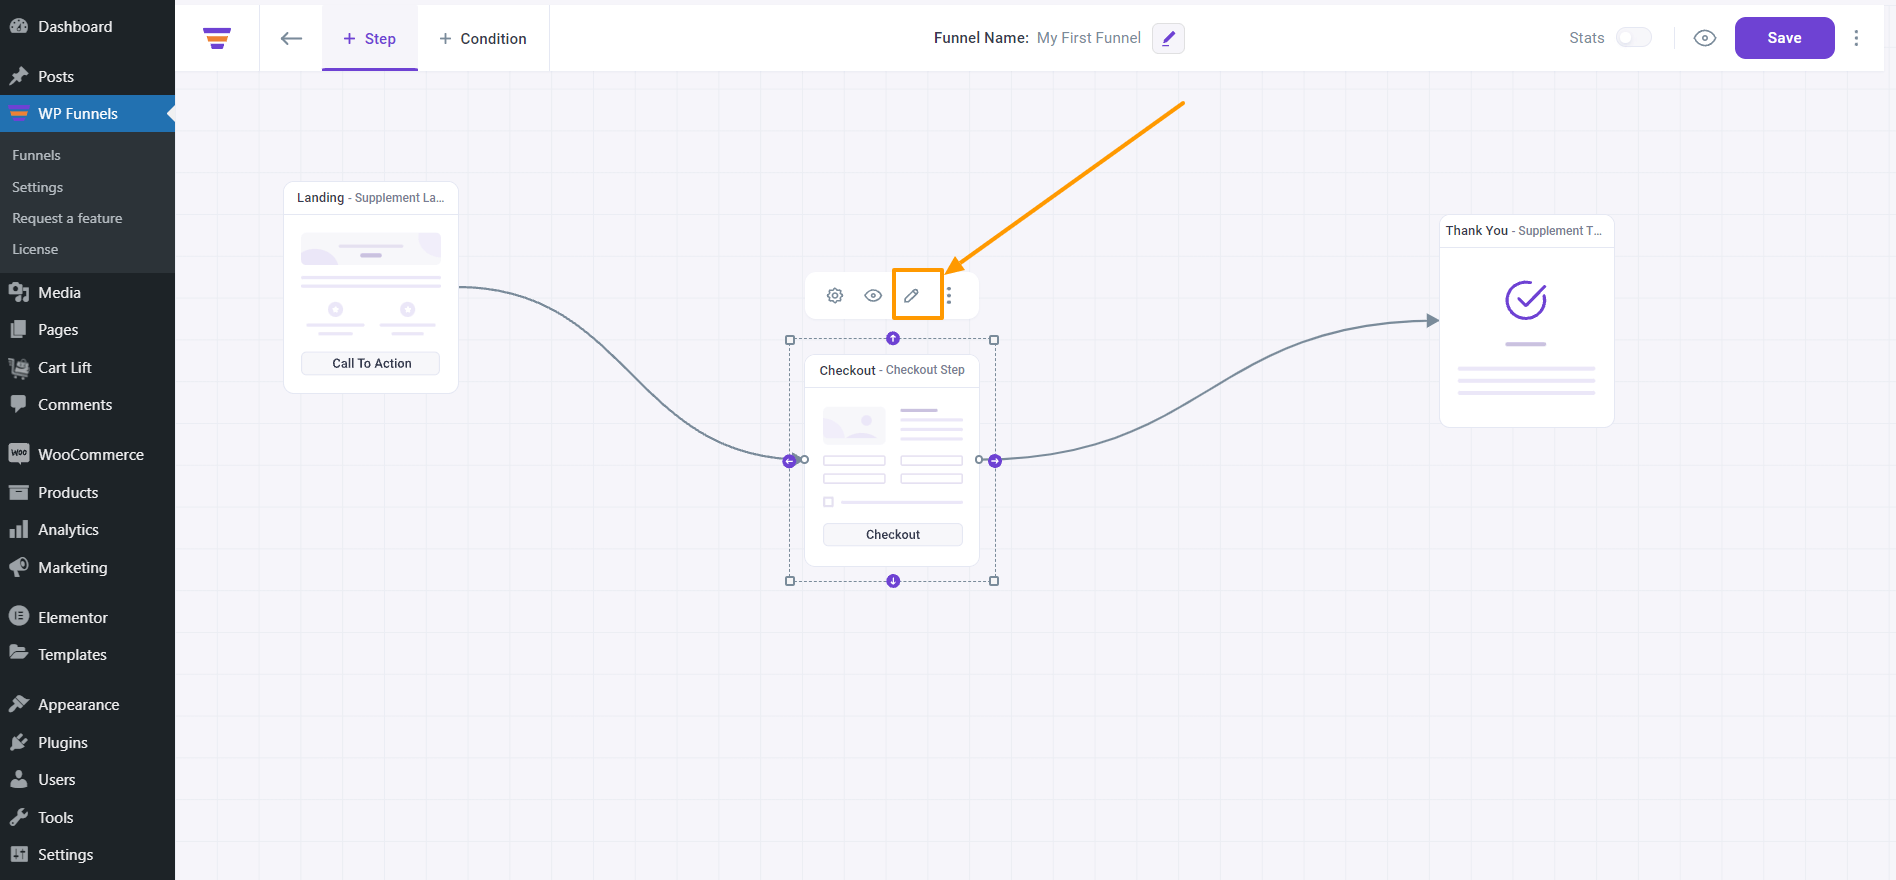
1. On the drag and drop canvas, Click on the Checkout step on your funnel canvas.
4 new options will appear on top of it.
- Settings
- View
- Edit
- Configure
2. Click on the Edit Icon.

And it will open the checkout page in Oxygen edit mode. Click on the button that says “Edit With Oxygen“.
Now, you’ll be able to Edit the Checkout Page with Oxygen Page Builder.
Step 2 – Assign The Checkout Form Layout As Multi-Step
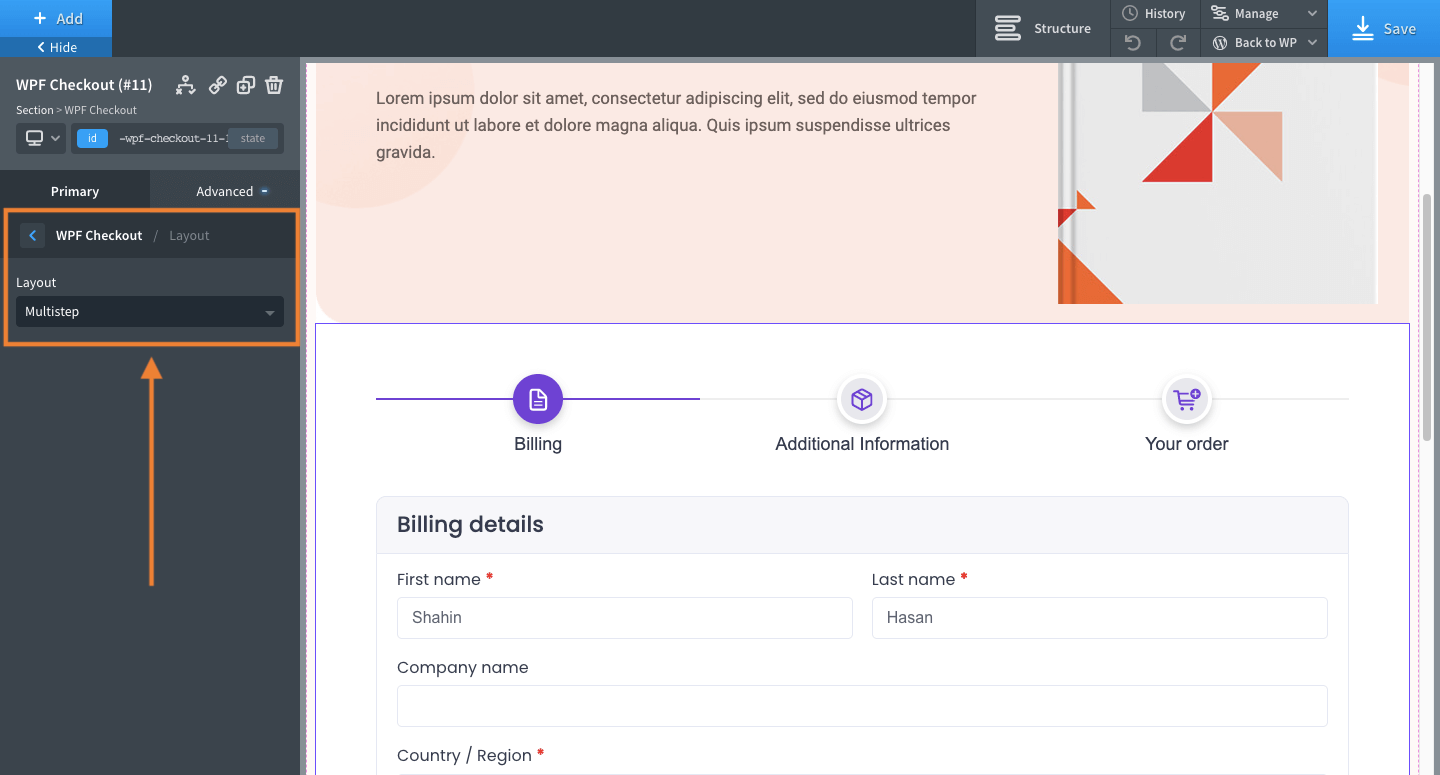
- On the checkout page, first, add the ‘WPF Checkout‘ element to your page.
Or, If you have imported a template, then the form is already added to your checkout page. - Now click on the option called ‘Layout‘.
- Click on its drop-down options and choose ‘Multistep‘.

Your form will be broken down into four sections:
- Login/Register (if you allow customers to login during checkout in WooCommerce > Settings > Accounts & Privacy)
- Billing Information
- Shipping Inormation
- Order & Purchase Details
Note: Right now, the multi-step checkout gives you four steps. Soon we will work on three steps and two steps checkout.
That’s it! You have enabled the Multi-step checkout format for your checkout page.
