In this guide, I will show you how you can assign Order Bump for your Courses. With this feature, you can intrigue your customers to pay more than what they initially intended.
Follow the easy steps below to learn how to configure Order Bump:
Step 1 – Go to WPFunnels Checkout Order Bump Section
1. First, create a typical sales funnel. You may import a template or create one from scratch.
Then plan & map your steps and assign a main Course to the funnel.
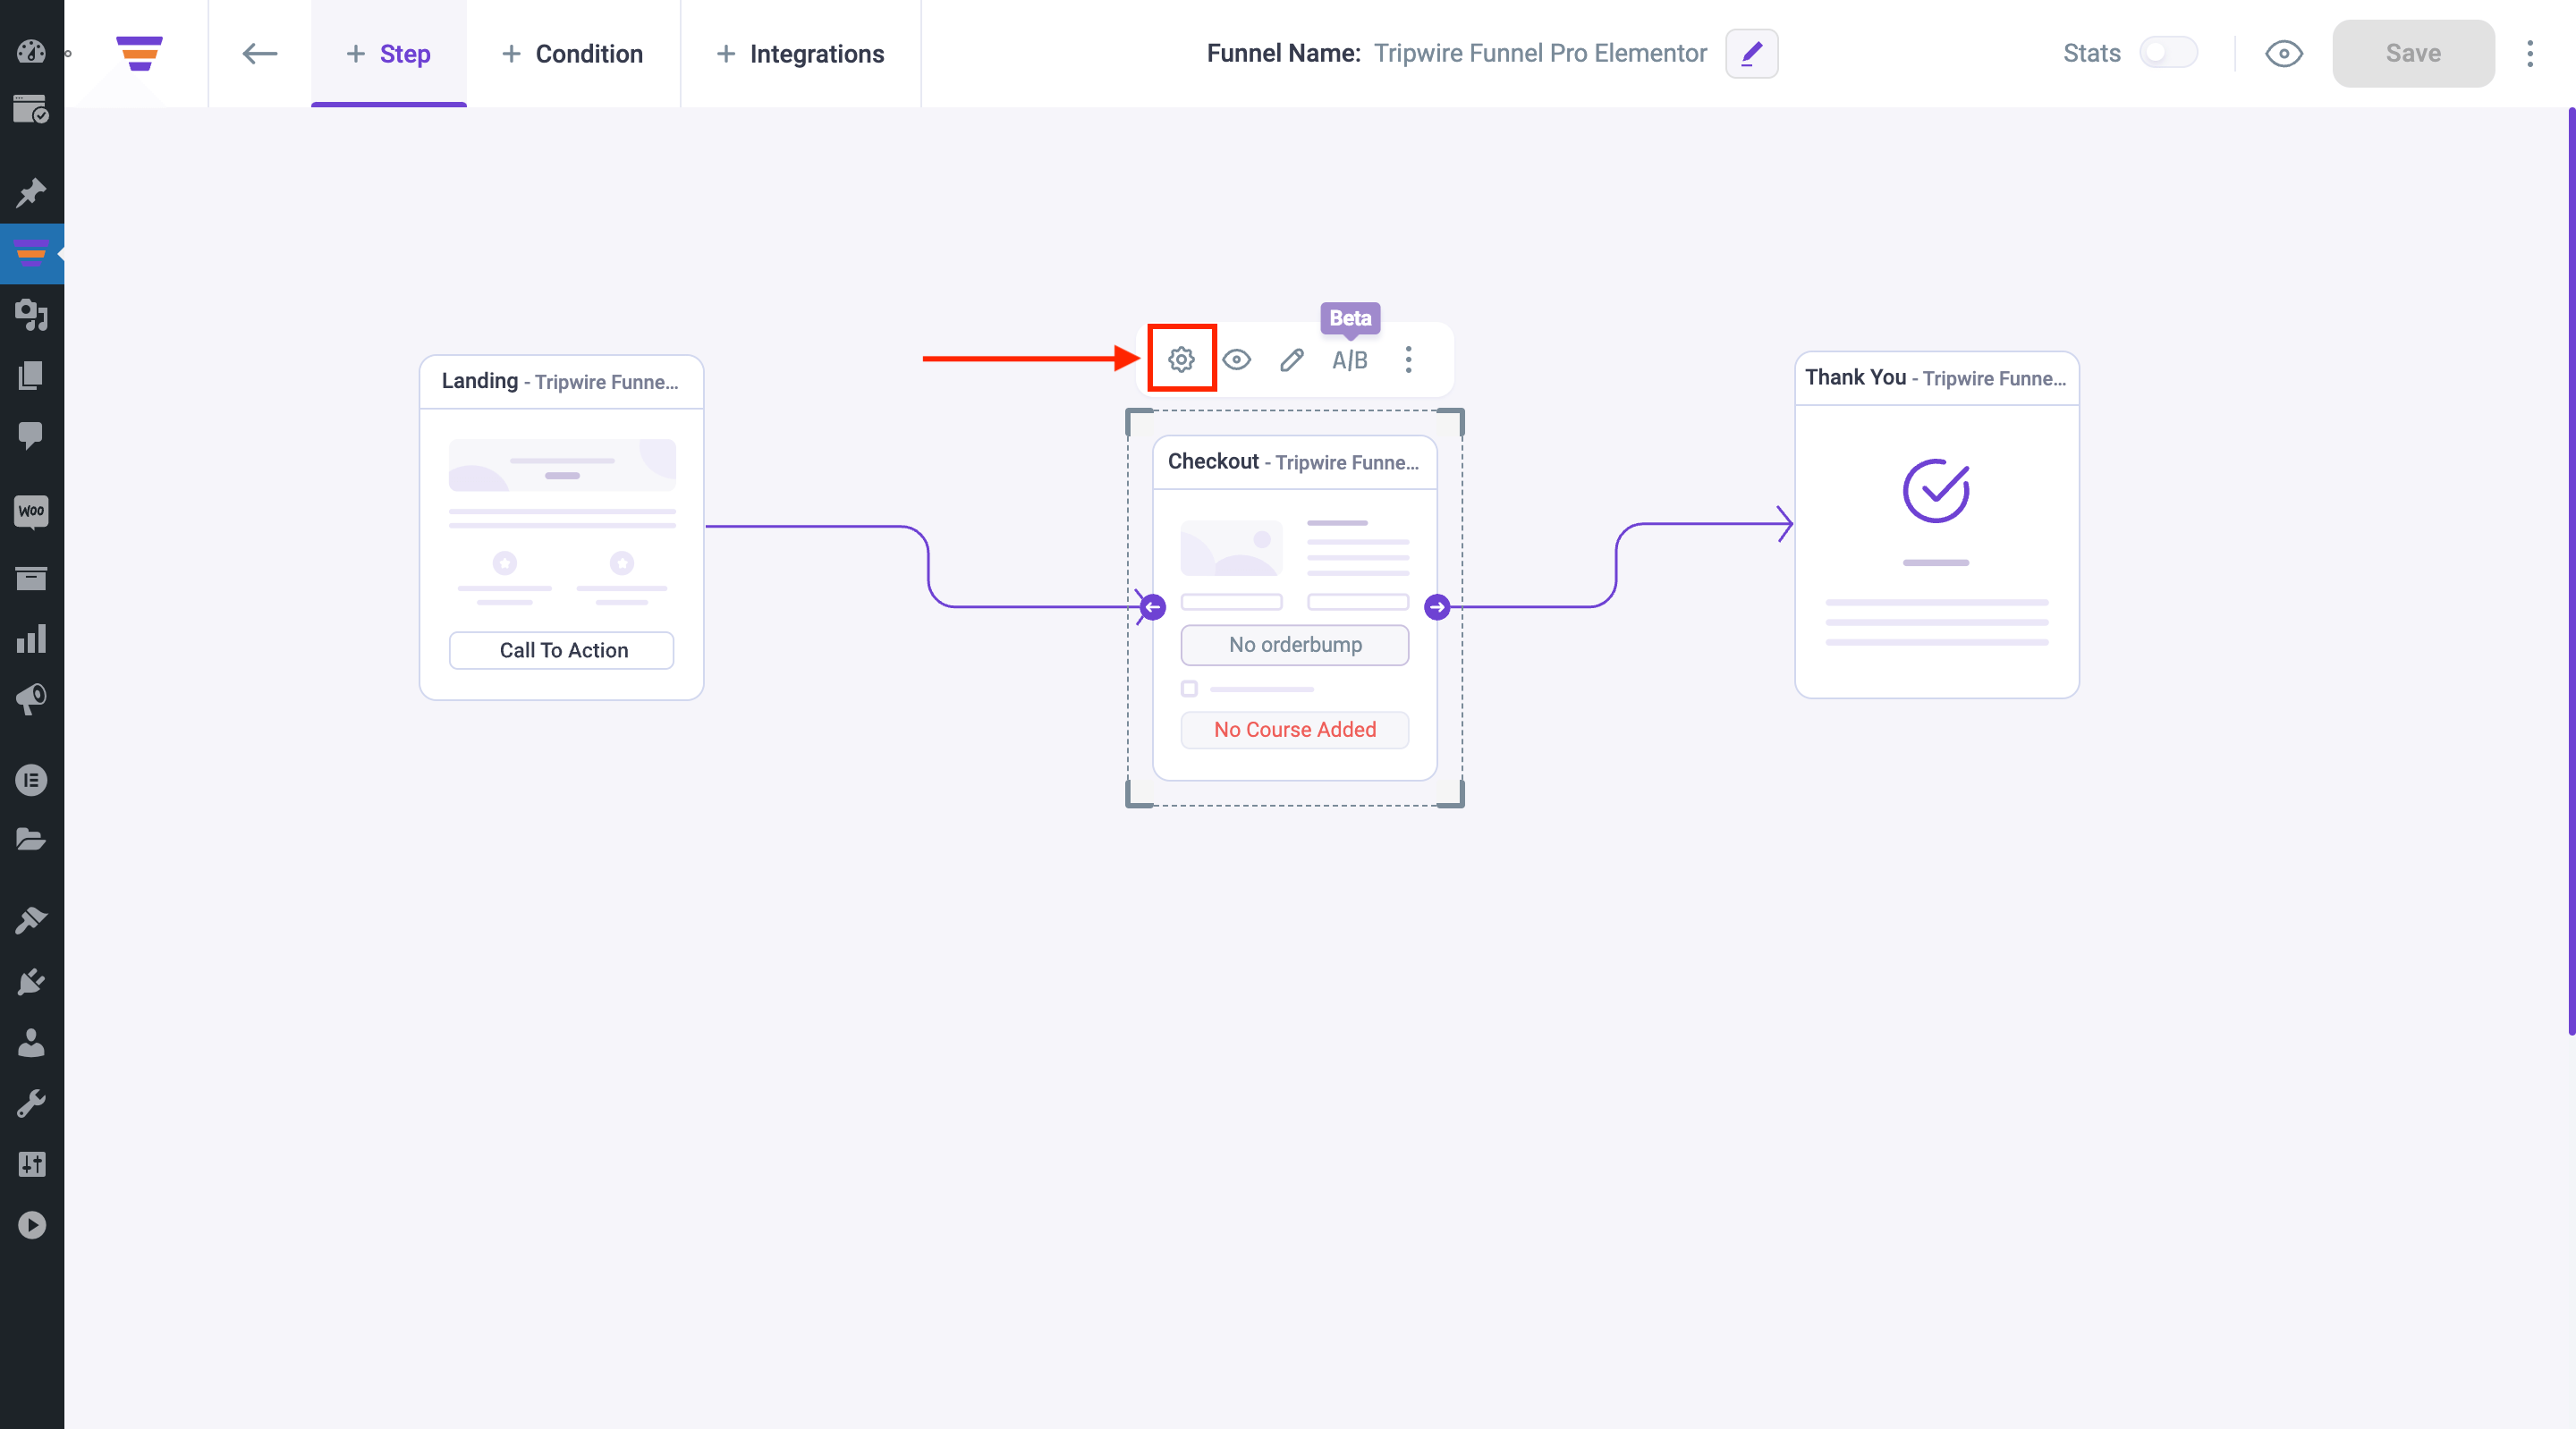
2. If you have already added the main Course, simply go to the next tab “Order Bump” or if you have closed the Checkout drawer already, click on the Checkout step and click on the Settings icon to open the checkout step settings drawer.
3. Once the Checkout drawer is open, you will see an Order Bump tab next to the Courses tab.
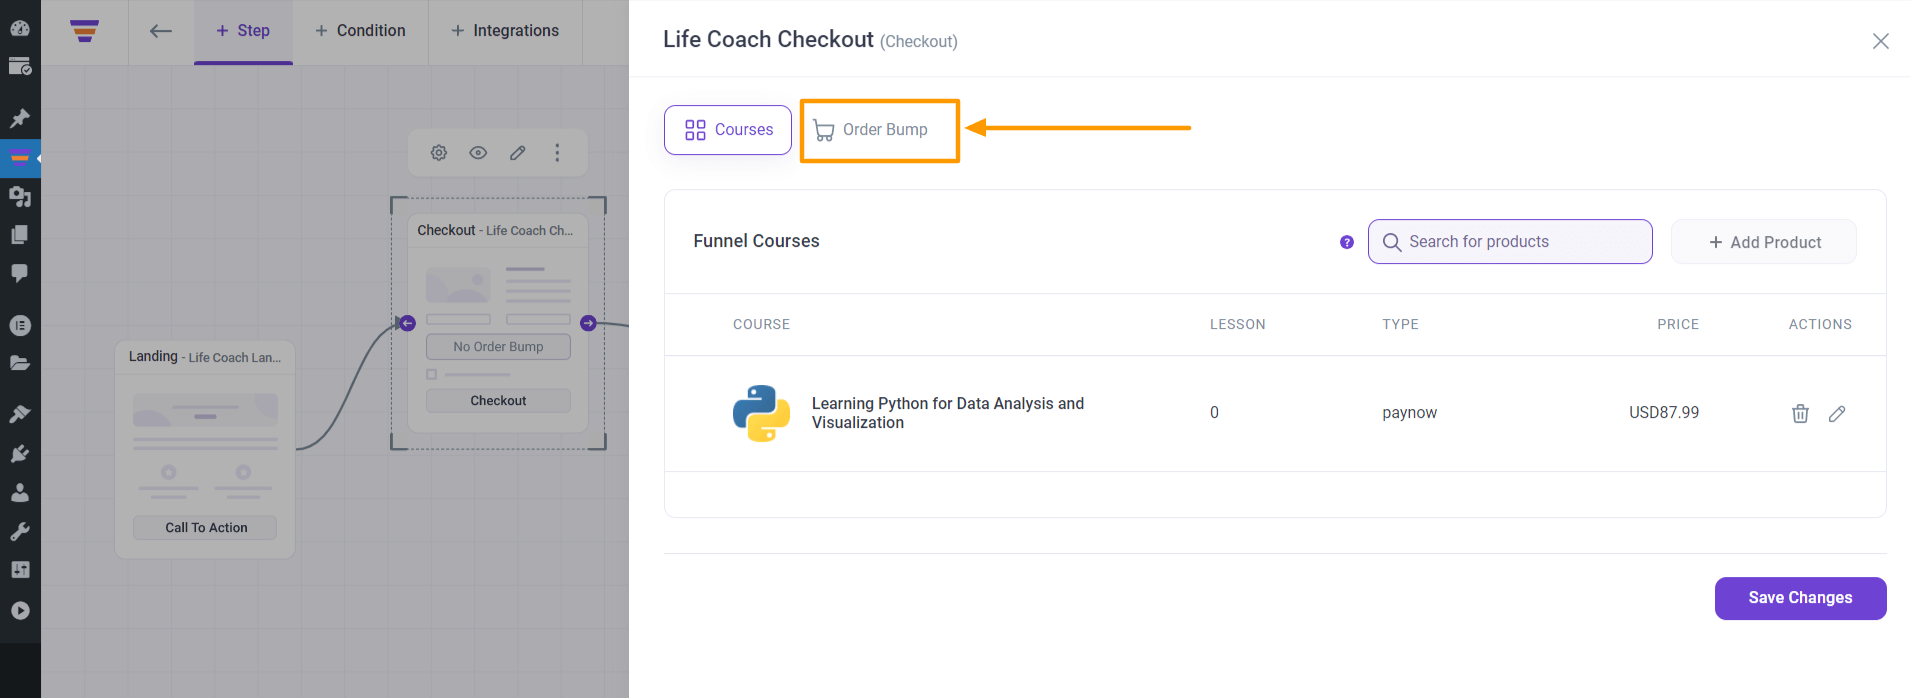
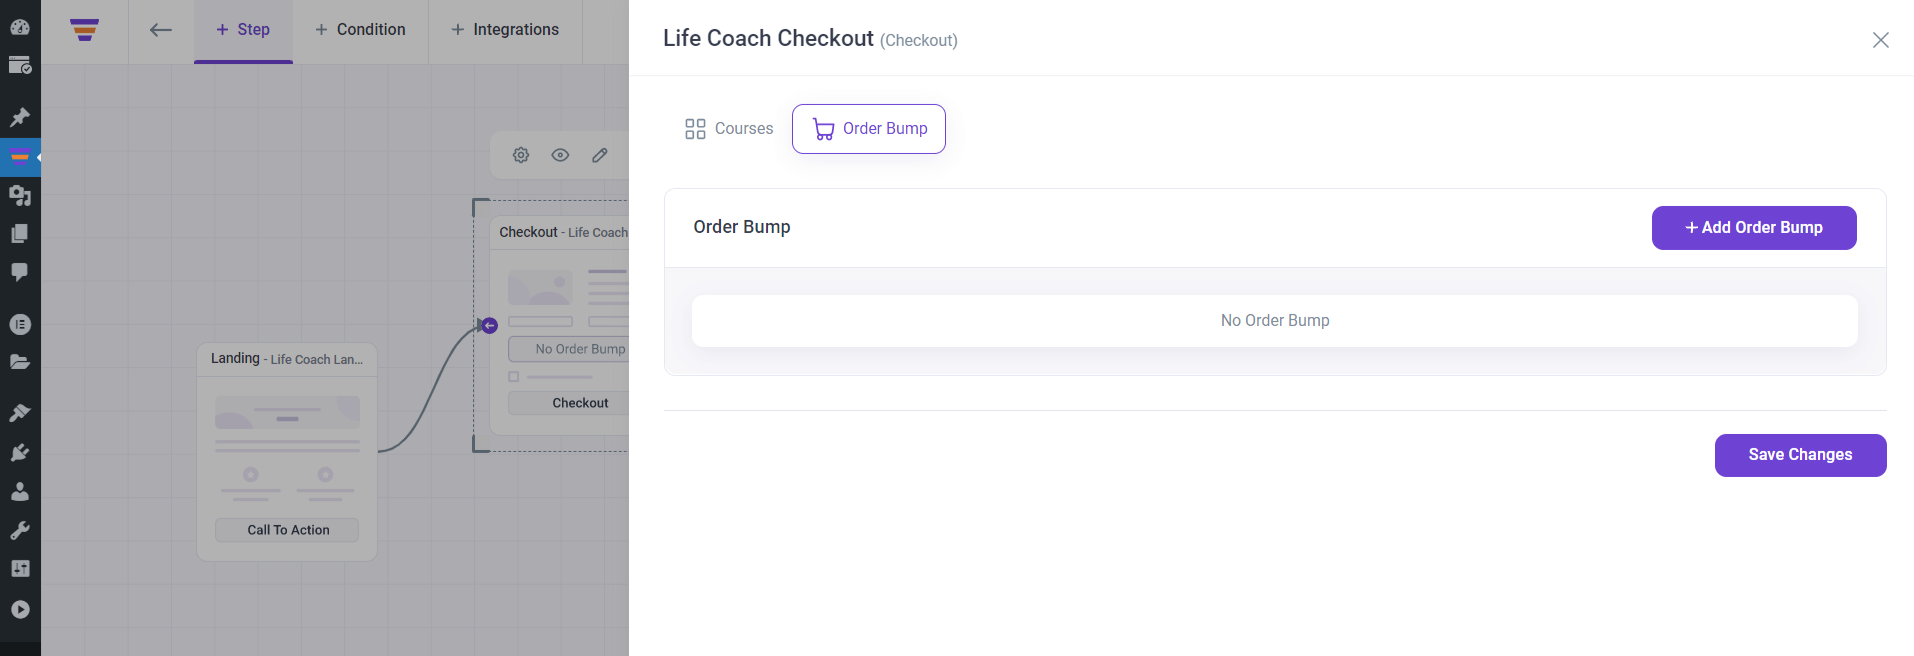
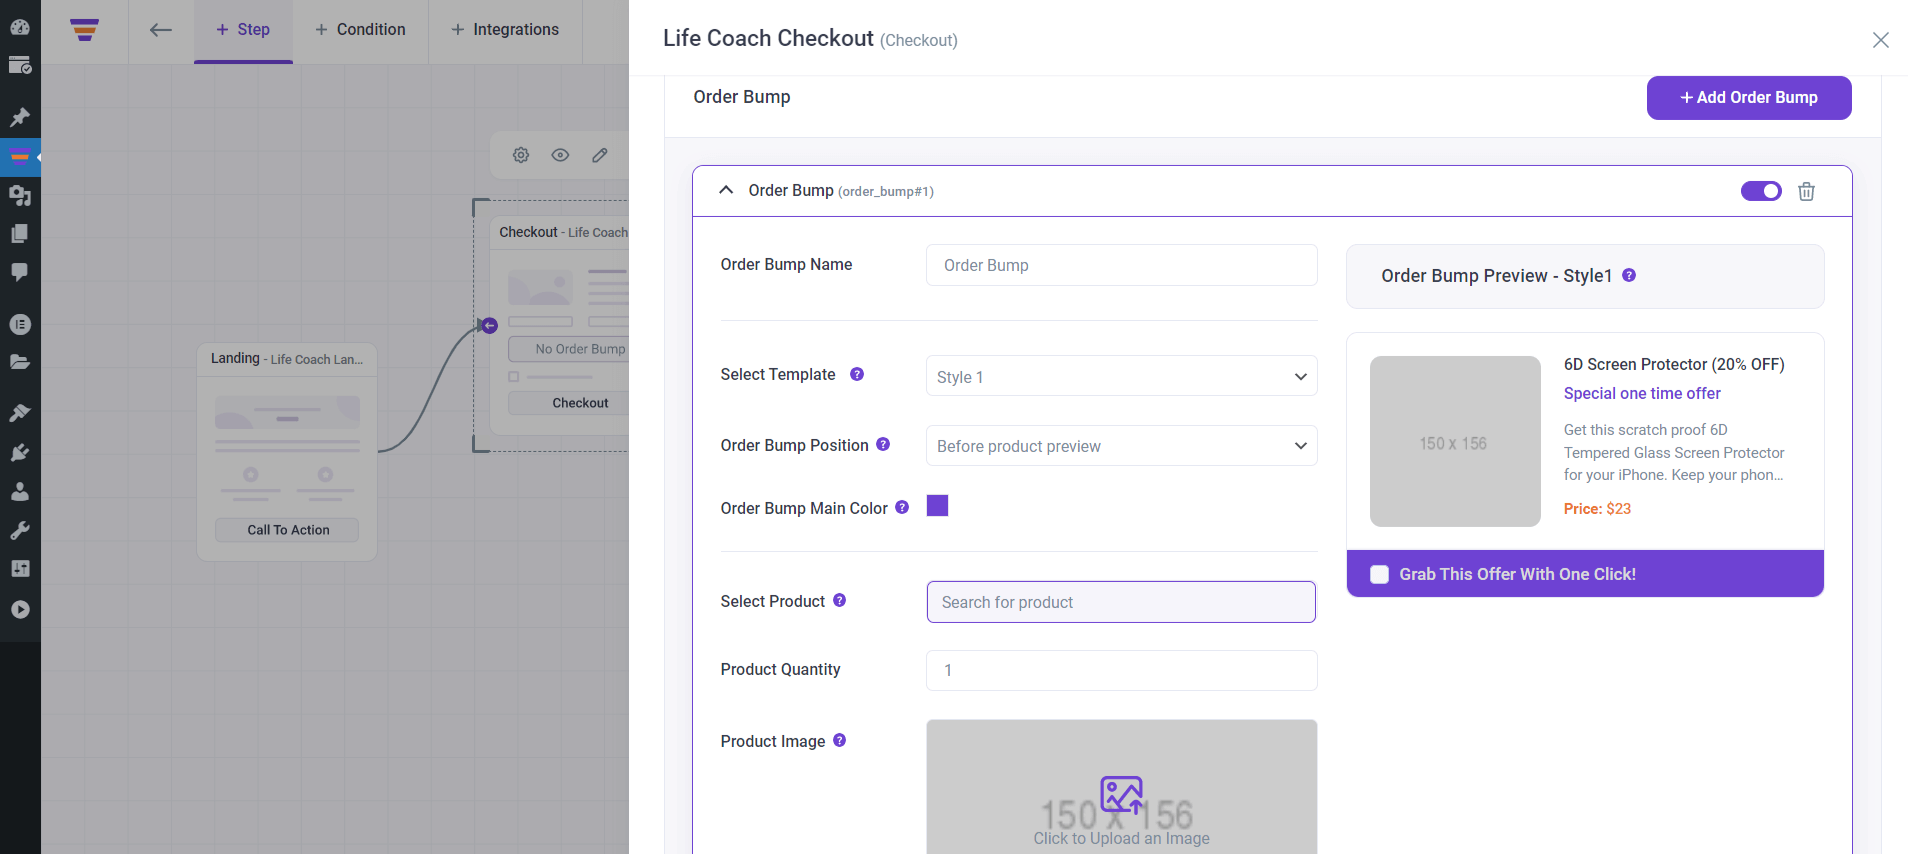
Click on the Order Bump tab and you will get the following view:
Step 2 – Add A New Order Bump
To add a new order bump, click on the + Add Order Bump button, and you will see that a new order bump is added.
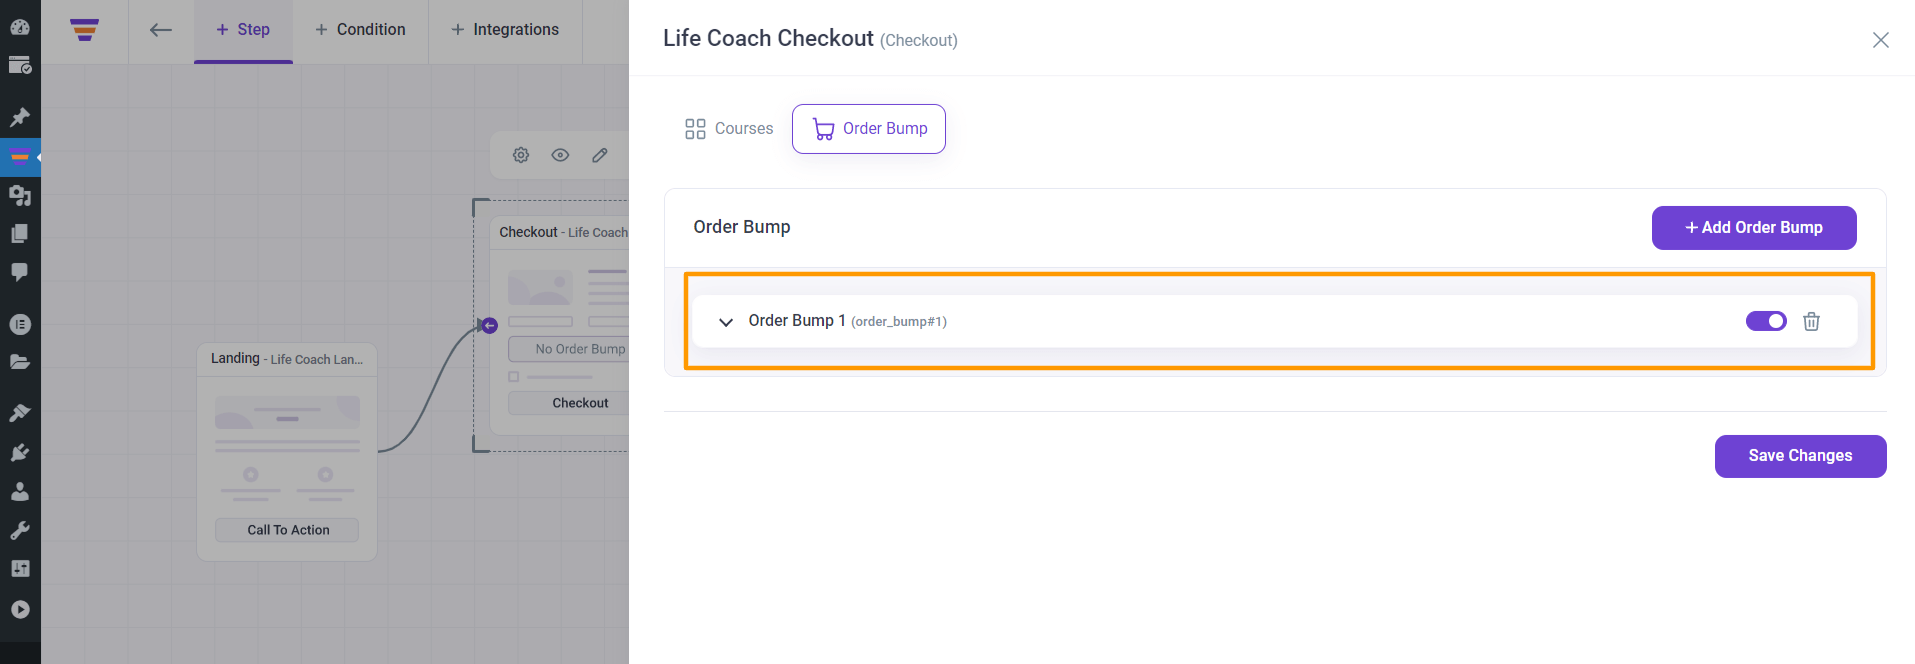
This newly created order bump is named “Order Bump” by default and on the right side, you will see that this order bump is enabled by default too. If you click on the Save Changes button, an order bump will be added to your funnel checkout page, but it will show an error that the order bump Course is missing as you haven’t assigned any Course to this order bump.
So, the next thing is to configure this order bump by assigning an Course to this order bump.
Click on the Order Bump section, and you will get all the relevant options to this order bump.
Step 3 – Configure Order Bump
Here, the first thing would be to assign a course.
Click on Search for product, and search for the Course you want to offer. Then select it and the course will be added.
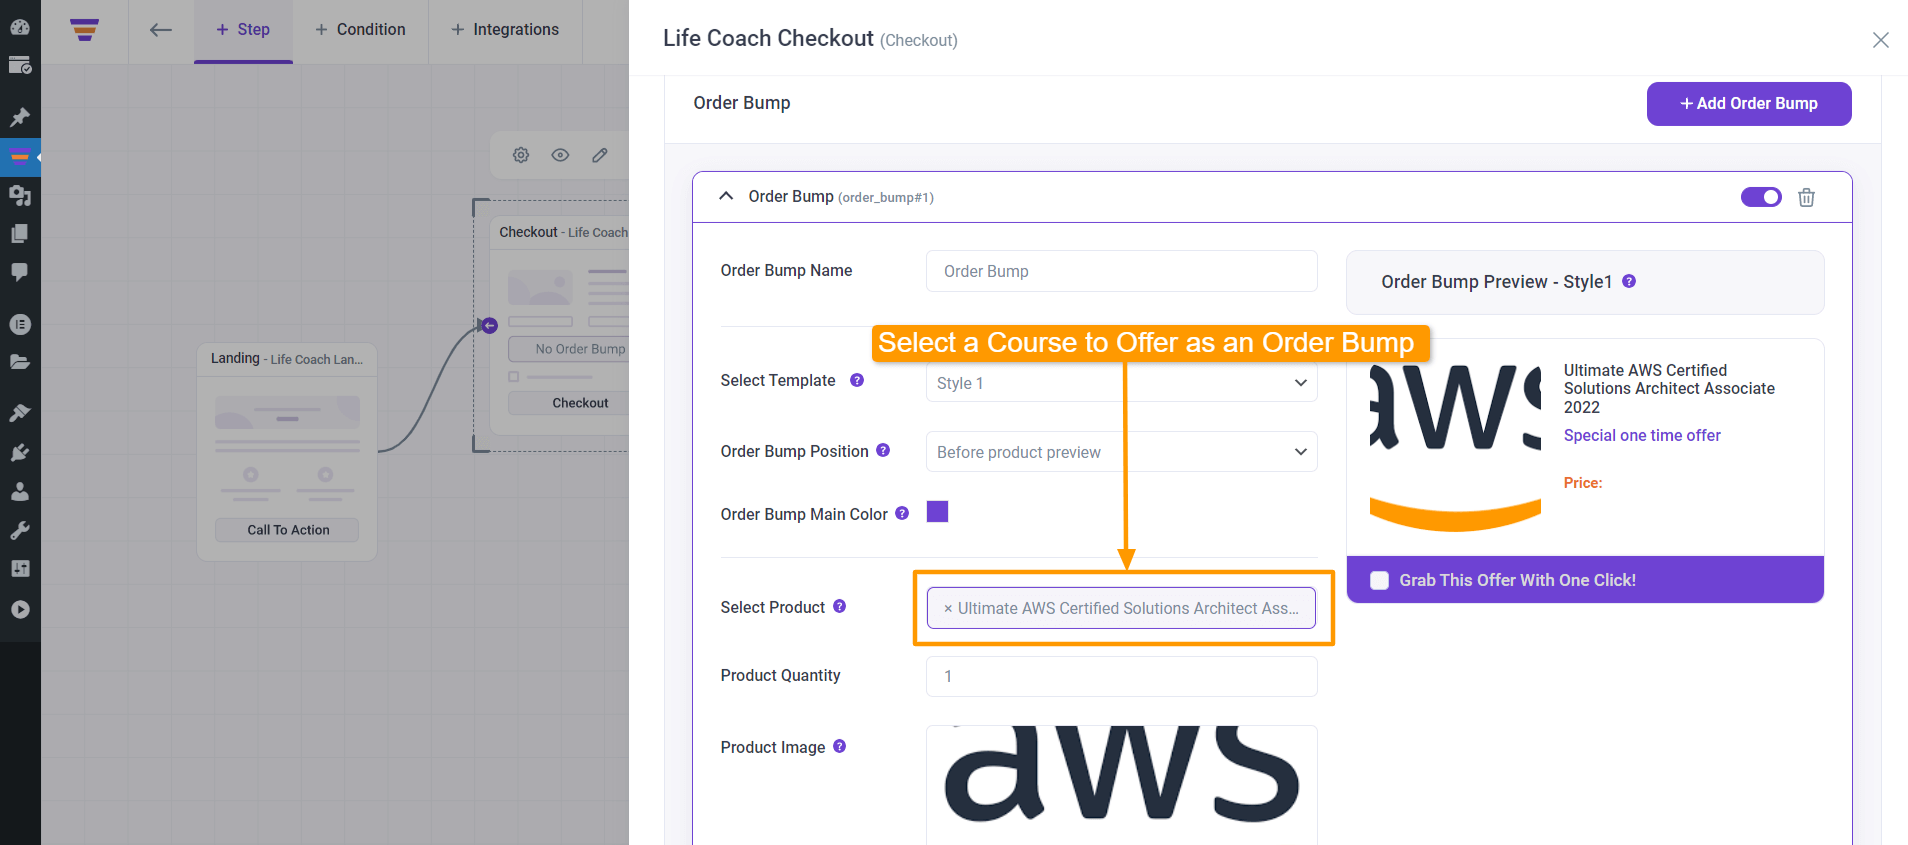
You will see the Course image is there, and a Preview of the order bump offer is on the right side.
Just below the field where you selected the Course, you can assign the quantity of the Course that is included in the offer.
Step 4 – Set The Order Bump Style And Template
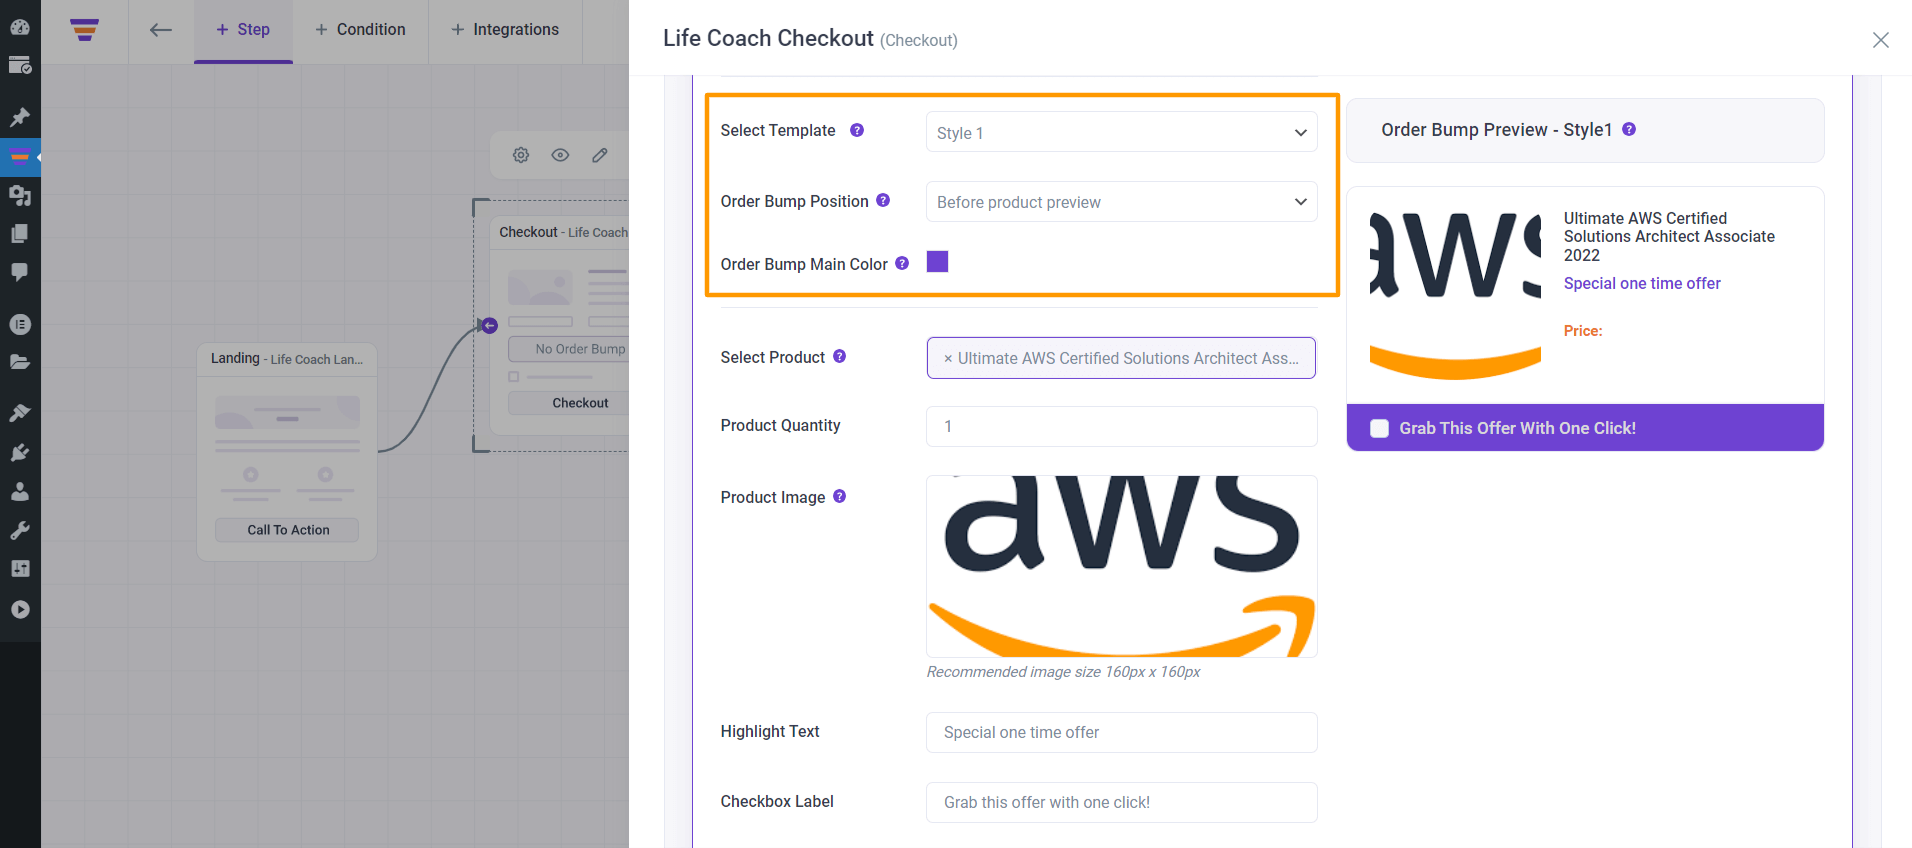
After you choose the offer Course, choose the style and position of the order bump. To do so, you will get the following options:
- Select Template
- Order Bump Position
- Order Bump Main Color
i. Select Template
Here, you will find multiple order bump templates to choose from. We will regularly add more and more templates and you may choose the one you find suitable here.
ii. Order Bump Position
You may also change the Order Bump position anywhere on your checkout page:
- Before Order Details
- Before Checkout Details
- After Checkout Details
- Before Payment Options
- After Payment Options
- Pop-up Offer
**Besides choosing the positions here, you can also configure these visually when editing the checkout step in your page builder, through the WPFunnels Checkout widget/block. We will learn in detail about it in a later guide.
iii. Order Bump Main Color
You can choose the main color of the order bump through a color picker.
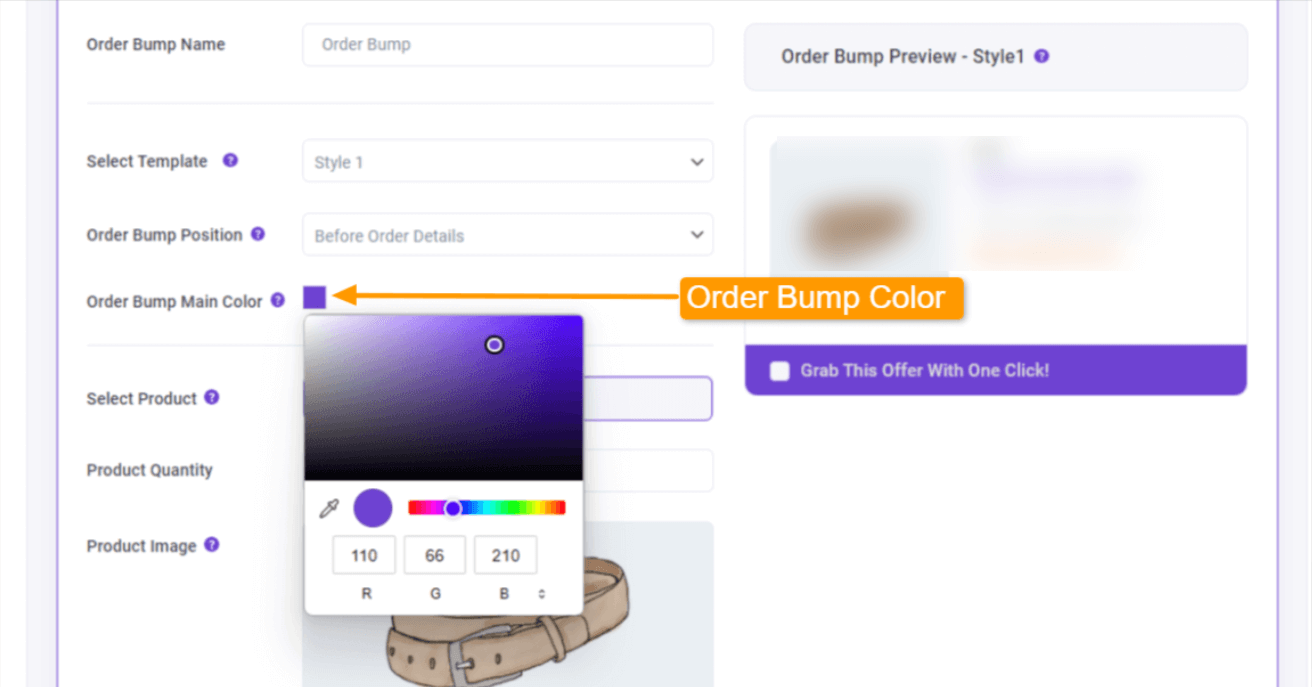
Changing the color will change the main color of the offer. Also, you will get the new color on the preview section.
Next, it’s time to set up the offer content.
Step 5 – Optimize The Offer Content
If you scroll down a bit, you will see, there are a few things you can work on for the content which includes:
- Product Quantity
- Product Image
- Highlight Text
- Checkbox Label
- Product Description
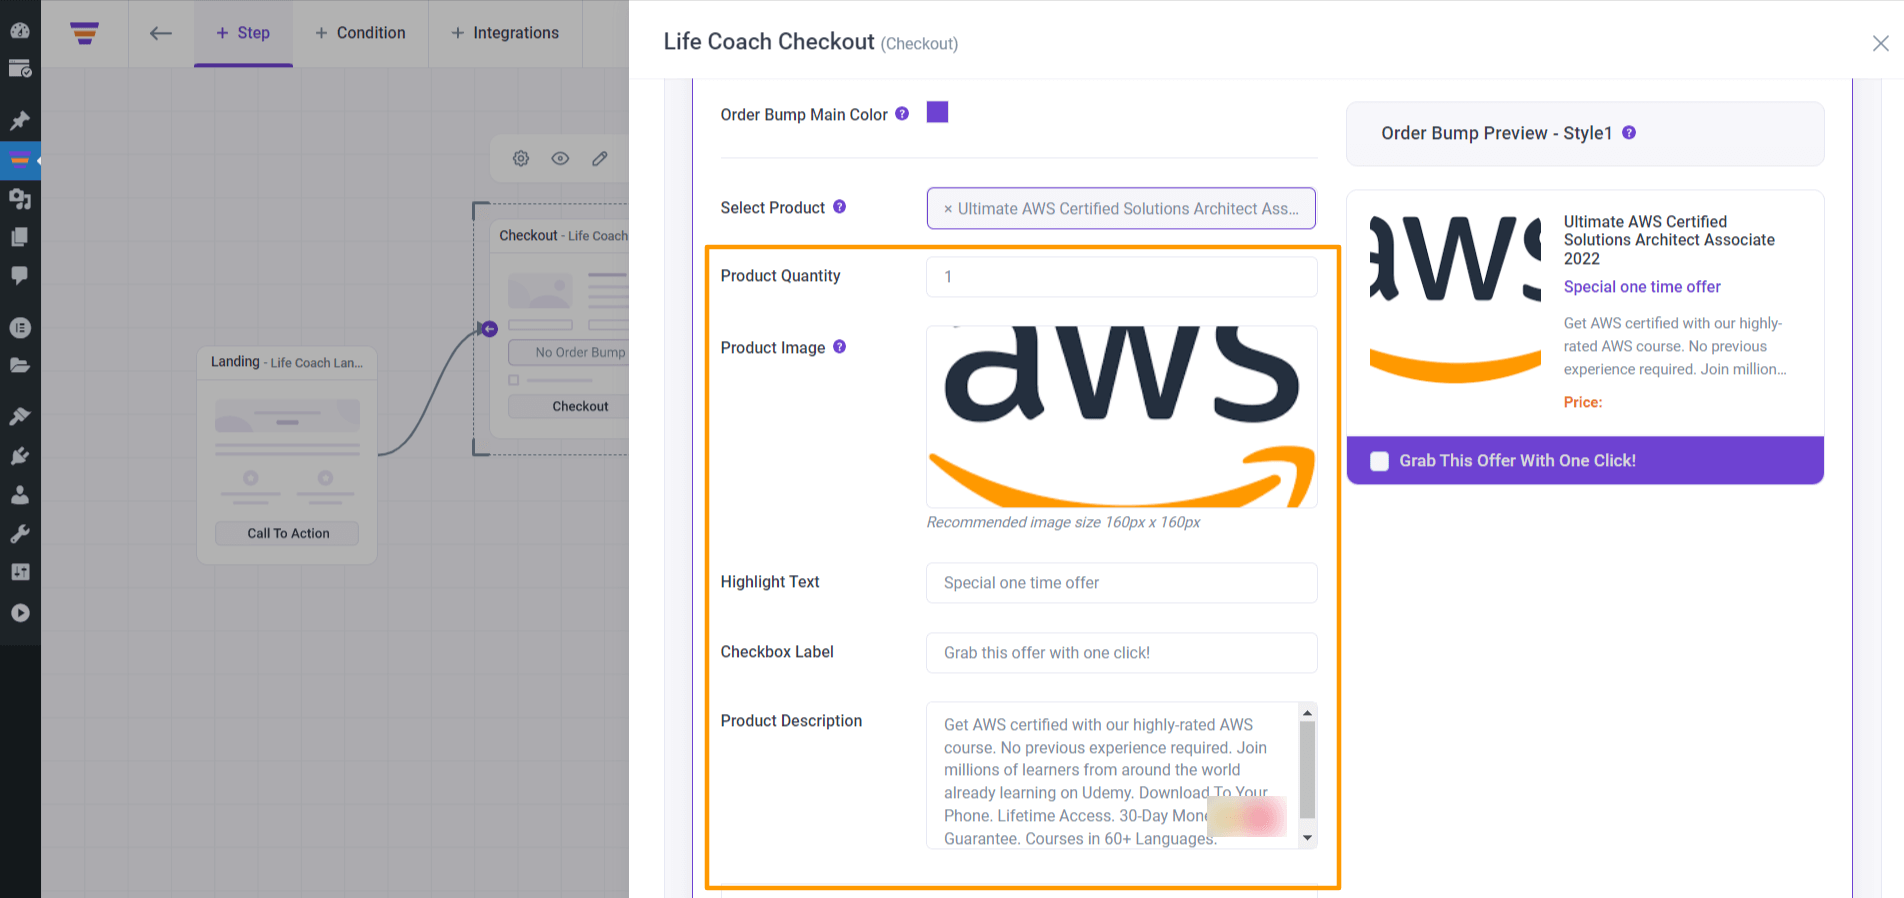
i. Product Quantity
Here you can set the product quantity – this indicates the quantity of this product that will be added to the cart when a user selects this Course.
ii. Product Image
When you select the order bump Course, initially, it will use your courses default feature image as the offer image. However, you can change it and use a different image just for the offer.
Simply hover on the image and click on it, and it will open the Media Library where you can choose from one of your existing images or upload a new image.
This will be the image viewed in the order bump offer section.
iii. Highlight Text
This will be a special text just below the Course title on the order bump offer.
As you can see, this text is highlighted to grab the buyer’s attention, which means you have to use a catchy sentence that will help to convert the buyer.
iv. Checkbox label
This will be the label beside the checkbox to accept the offer.
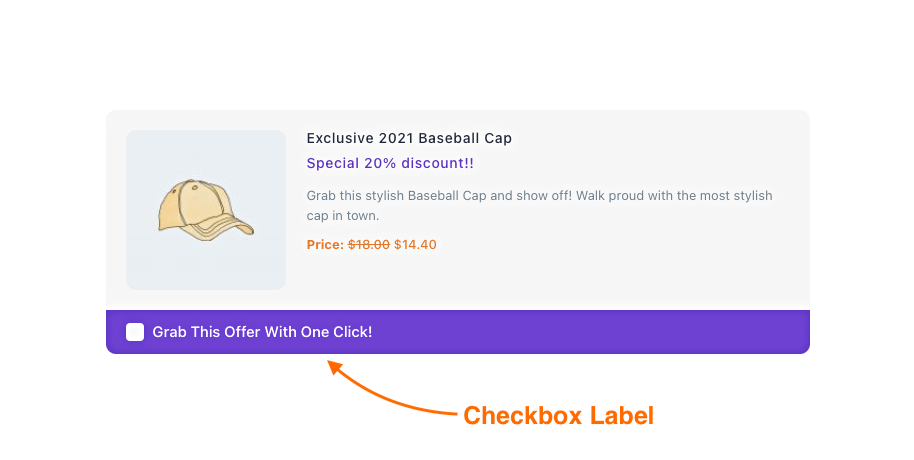
v. Product Description
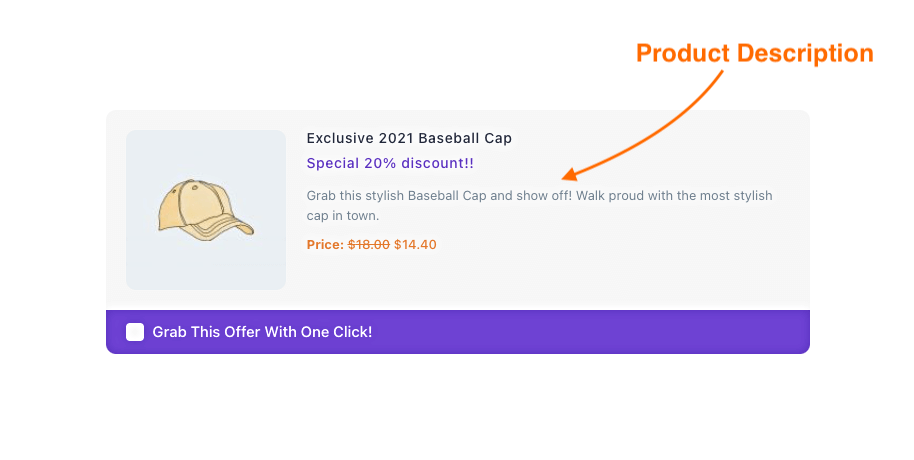
**How these details are viewed will vary depending on the order bump template you use.
Step 6 – Use Exclusive Discounts If Needed
After inputting the offer content, your order bump is just about ready. You can simply save it and it will be in effect.
However, you will notice that below, there is a section for applying exclusive discounts on your offer Course through this offer.
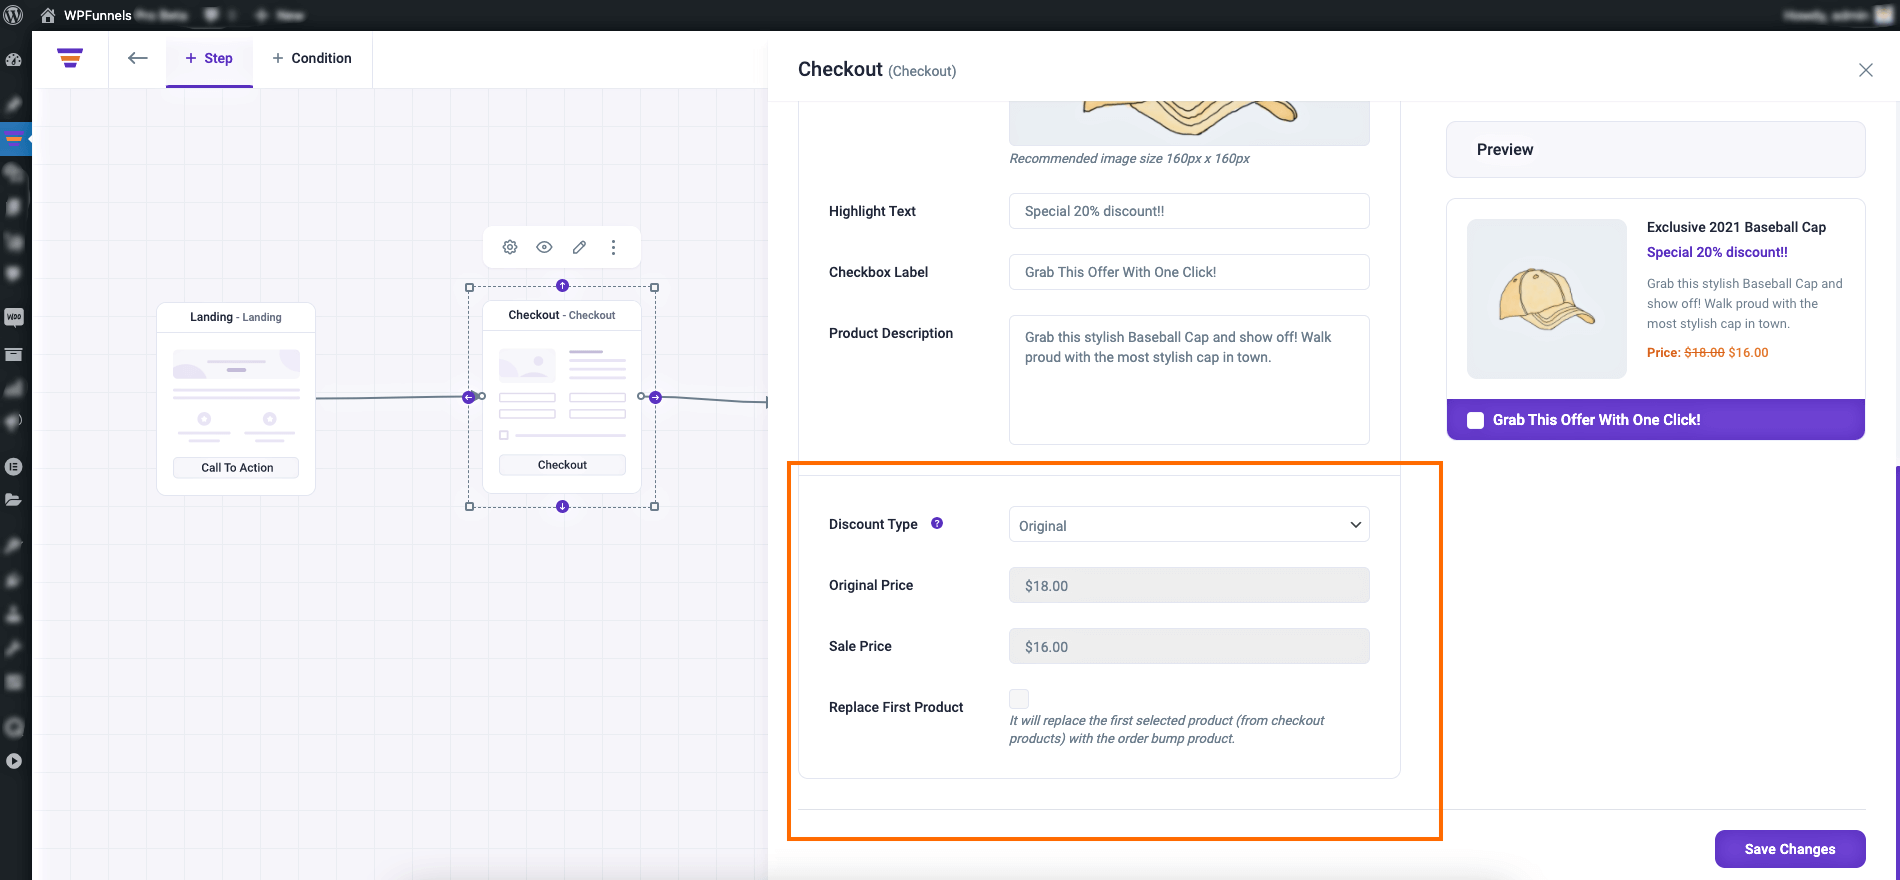
Here, you can choose to add a special discount on your order bump Course just for this funnel.
Depending on what type of discount you want to apply, select Percentage or the Sale Price.
When you select any of the offer types, you will see that some new fields will appear such as Discount Apply To, Discount Value, and Discounted Offer Price.
**We will learn in detail about the different discount options here in a later guide.
And that’s it. These are all you need to set up the Order bump. You can then click on Save Changes below and your funnel will now have a functional order bump offer.
Step 7 – Add More Order Bumps (Multiple Order Bumps)
You have created an order bump, and if you want then you can add as many order bumps to your checkout page the same way you created the order bump above.
You can put multiple order bumps in the same position, or you can place different order bumps in different positions.
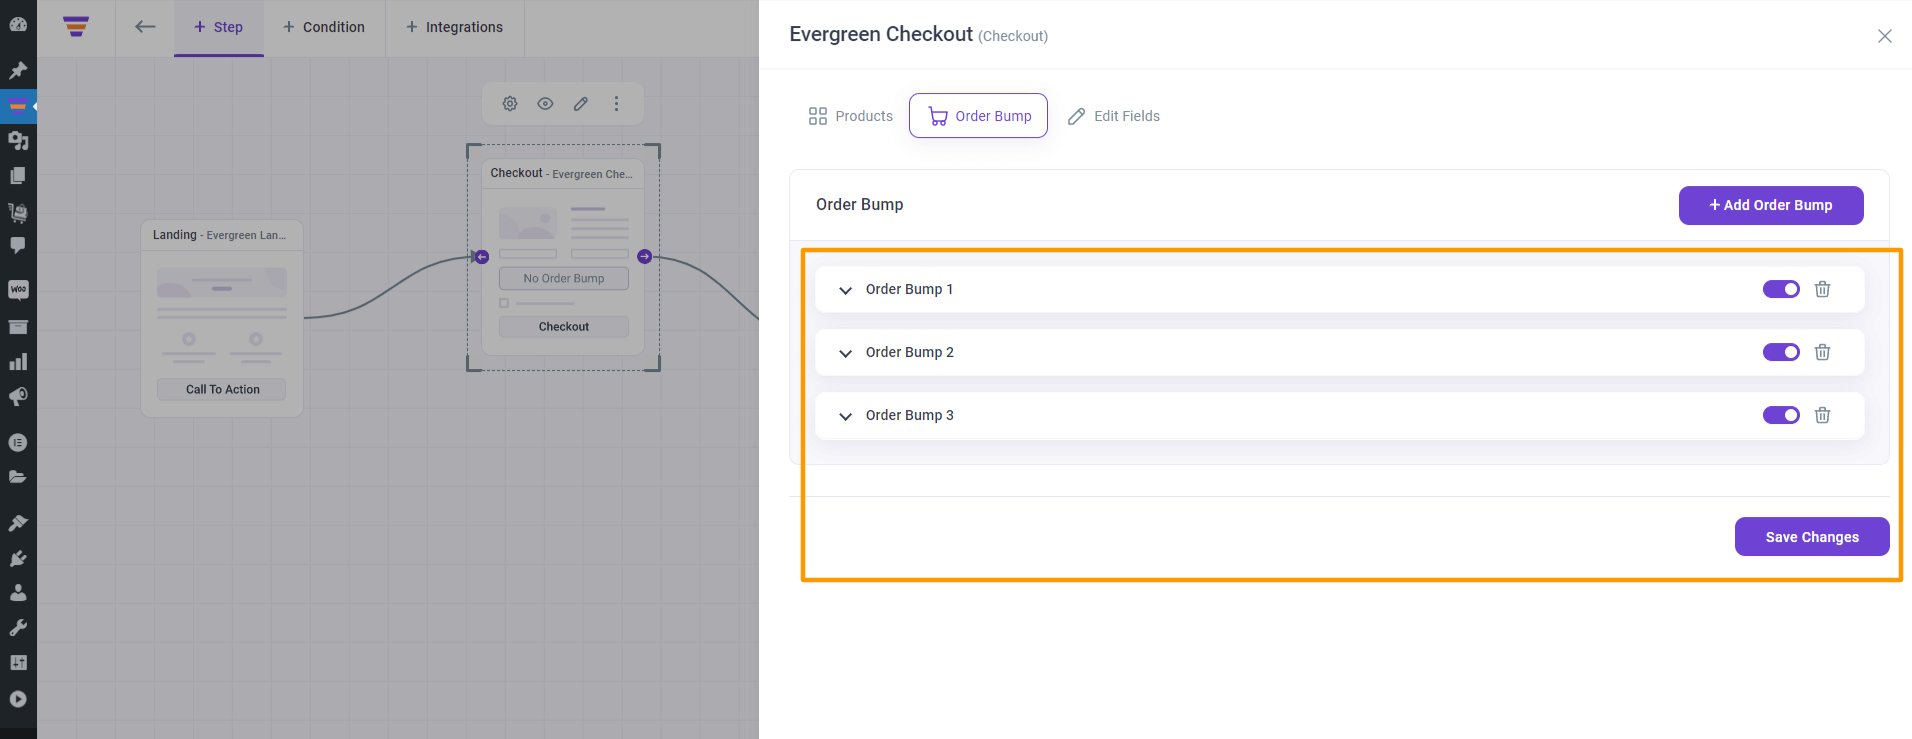
That’s it, this is how you can add one or multiple order bumps to your checkout page.
If you imported a template for the checkout page, then you can now simply preview the checkout page to see the order bump in action.
In the next guide, let’s learn more about changing the order bump position.
