You can create Segments with single or multiple conditions in Mail Mint.
Suppose you want to identify users who have spent more than $200 and have birthdays in February.
You can find out these specific users to send them a special discount or voucher for their birthday.
In this guide, you’ll learn how to create segments to identify these.
Let’s get started.
Create Segments To Target Qualified Leads
Follow these simple steps to create Segments within your contact list.
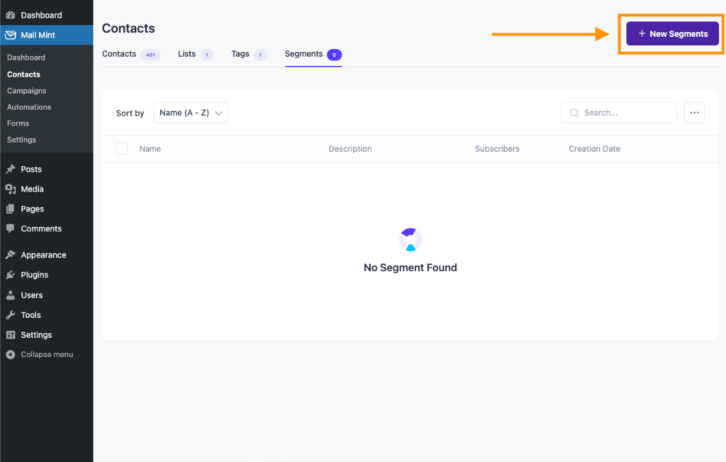
Step 1: Go to Mail Mint > Contacts and move on to the Segments tab. Then, click on +New Segments.
Step 2: Set a name for your segment and give it a suitable description.
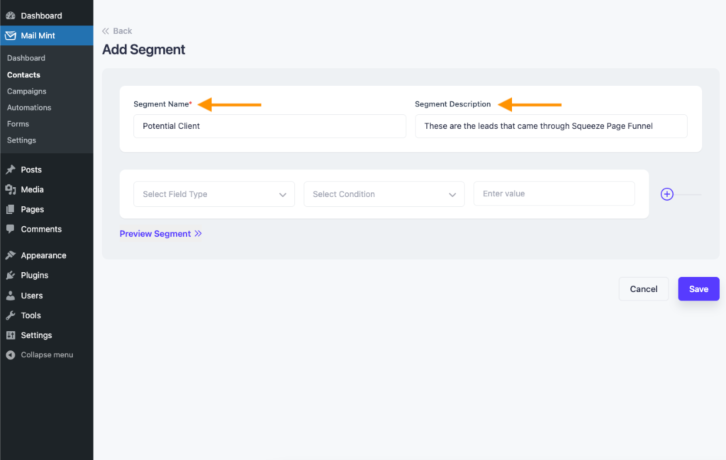
Step 3: Now you can Select Field Type for your Segment. You can choose from these fields:
- Contacts: Email, First Name, Last Name
- Address: City, Postal/Zip, Country, State/Province
- Contact Segment: Status, List Tag
- Custom: any custom field you have in Mail Mint

Step 4: You may select different conditions based on the Fields and assign values. Here’s an example:
If you select Email as your Field Type, the conditions will appear like this:
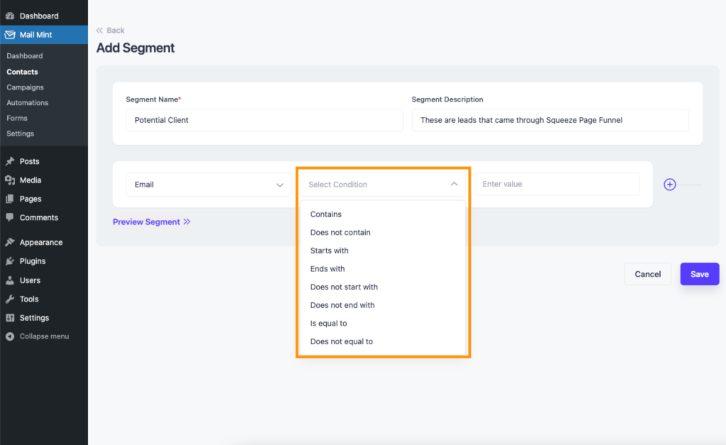
Step 5: Once you’ve set a Condition, you can enter a conditional value that will have to be in the Email.
Conditions for segments vary from Field to Field.
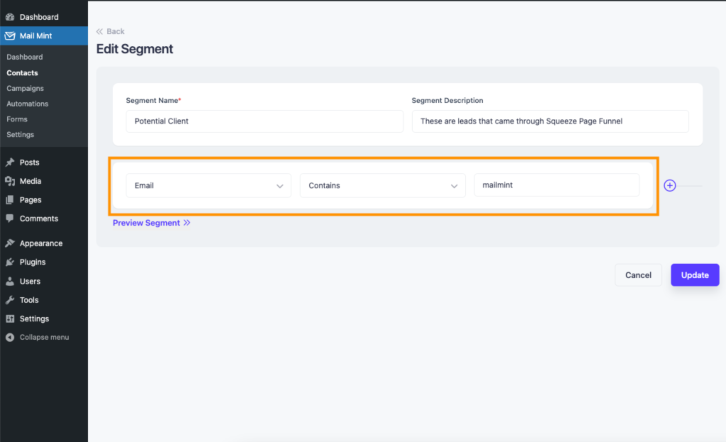
For this case, let’s find people who have “mailmint” in their email, for adding to this Segment.
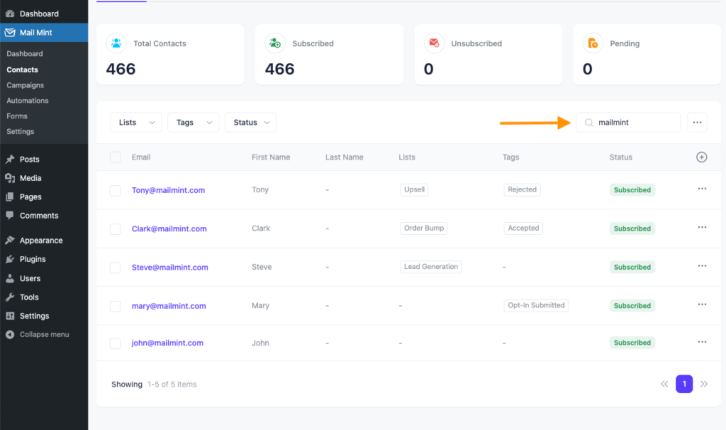
Now, in this Contacts list, there are 5 contacts who have “mailmint” mentioned in their Email.
So, this segment contains only 5 contacts.
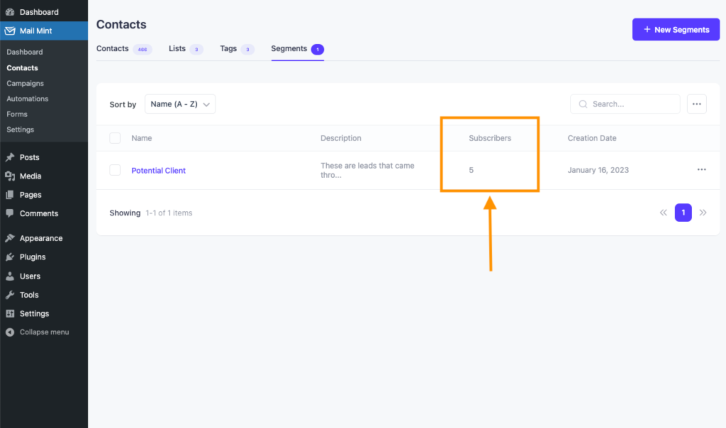
And as you can see only 1 contact is updated in this Segment.
Step 6: You can also merge different Fields to create one Segment.
Apply multiple And/Or conditions to these Fields.
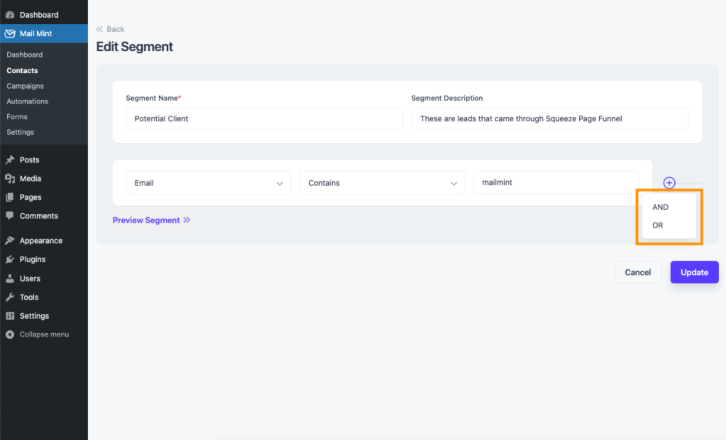
Here’s an example of a Segment:
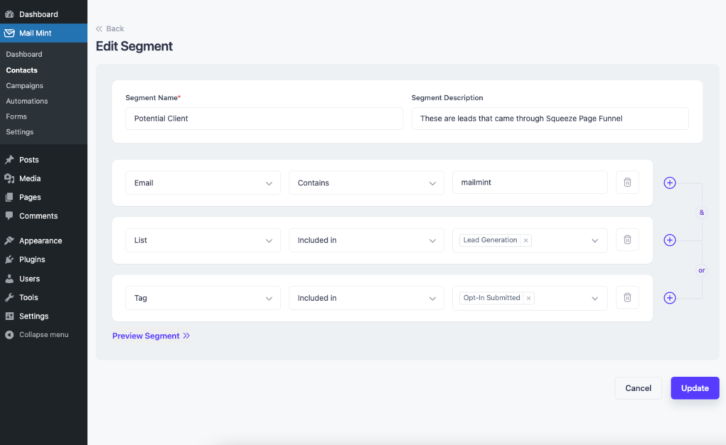
According to this Segment, in this Segment:
- The Email will contain “mailmint”.
And
- The contacts are in the “Lead Generation” List.
Or
- The contacts contain the “Opt-In Submitted” Tag.
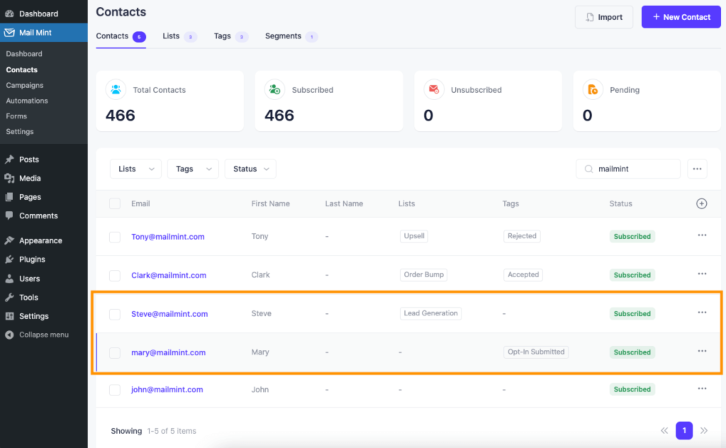
This is how you Create Segments.
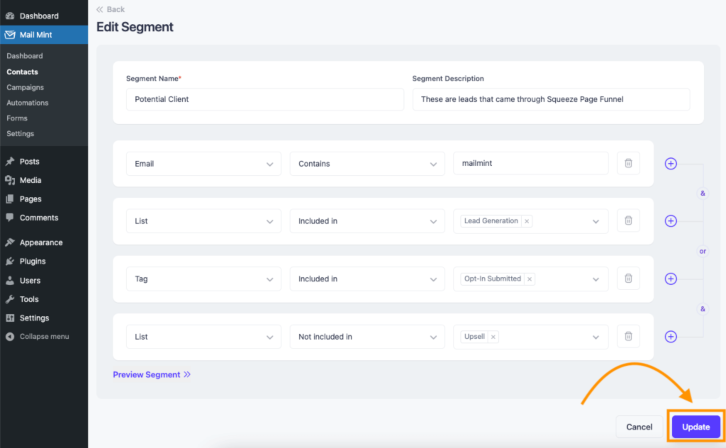
You can always Update and add more fields and conditions in a single Segment whenever you want.
