Custom fields allow you to collect specific information from leads, helping you tailor your communication to their unique needs and preferences.
With the help of custom contact fields, you can categorize leads based on various criteria, making it easier to send targeted messages and offers.
Now let’s follow the simple steps below for creating custom contact fields in Mail Mint.
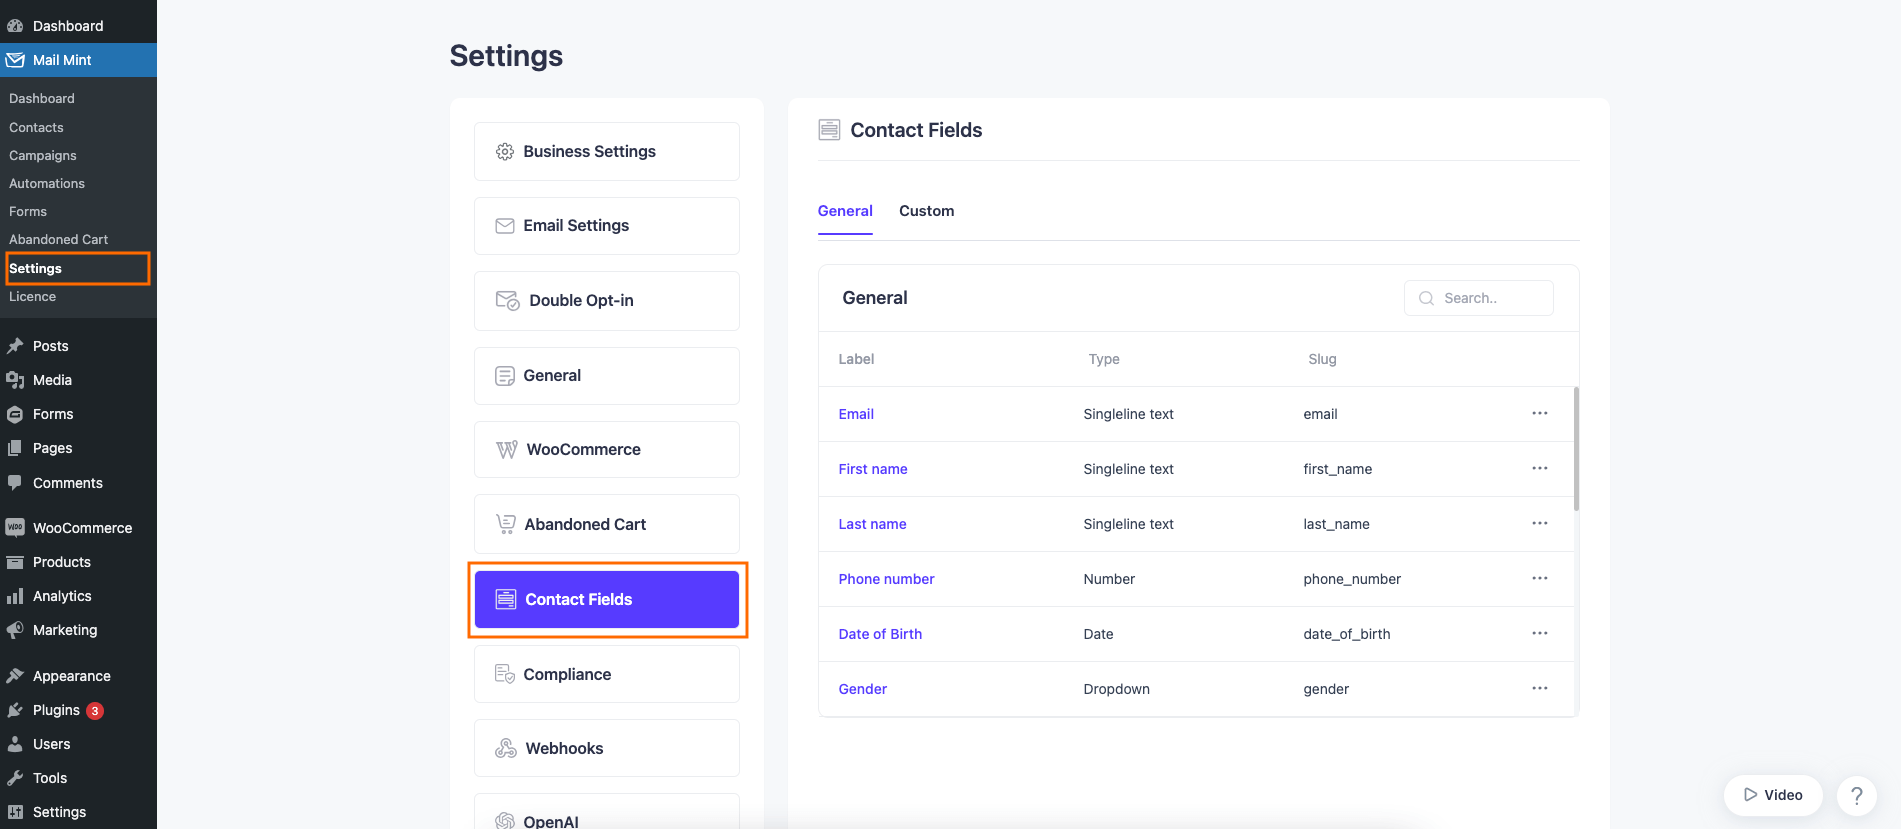
1. Once you have Mail Mint & Mail Mint Pro installed and activated on your website, go to Mail Mint Settings > Contact Fields.
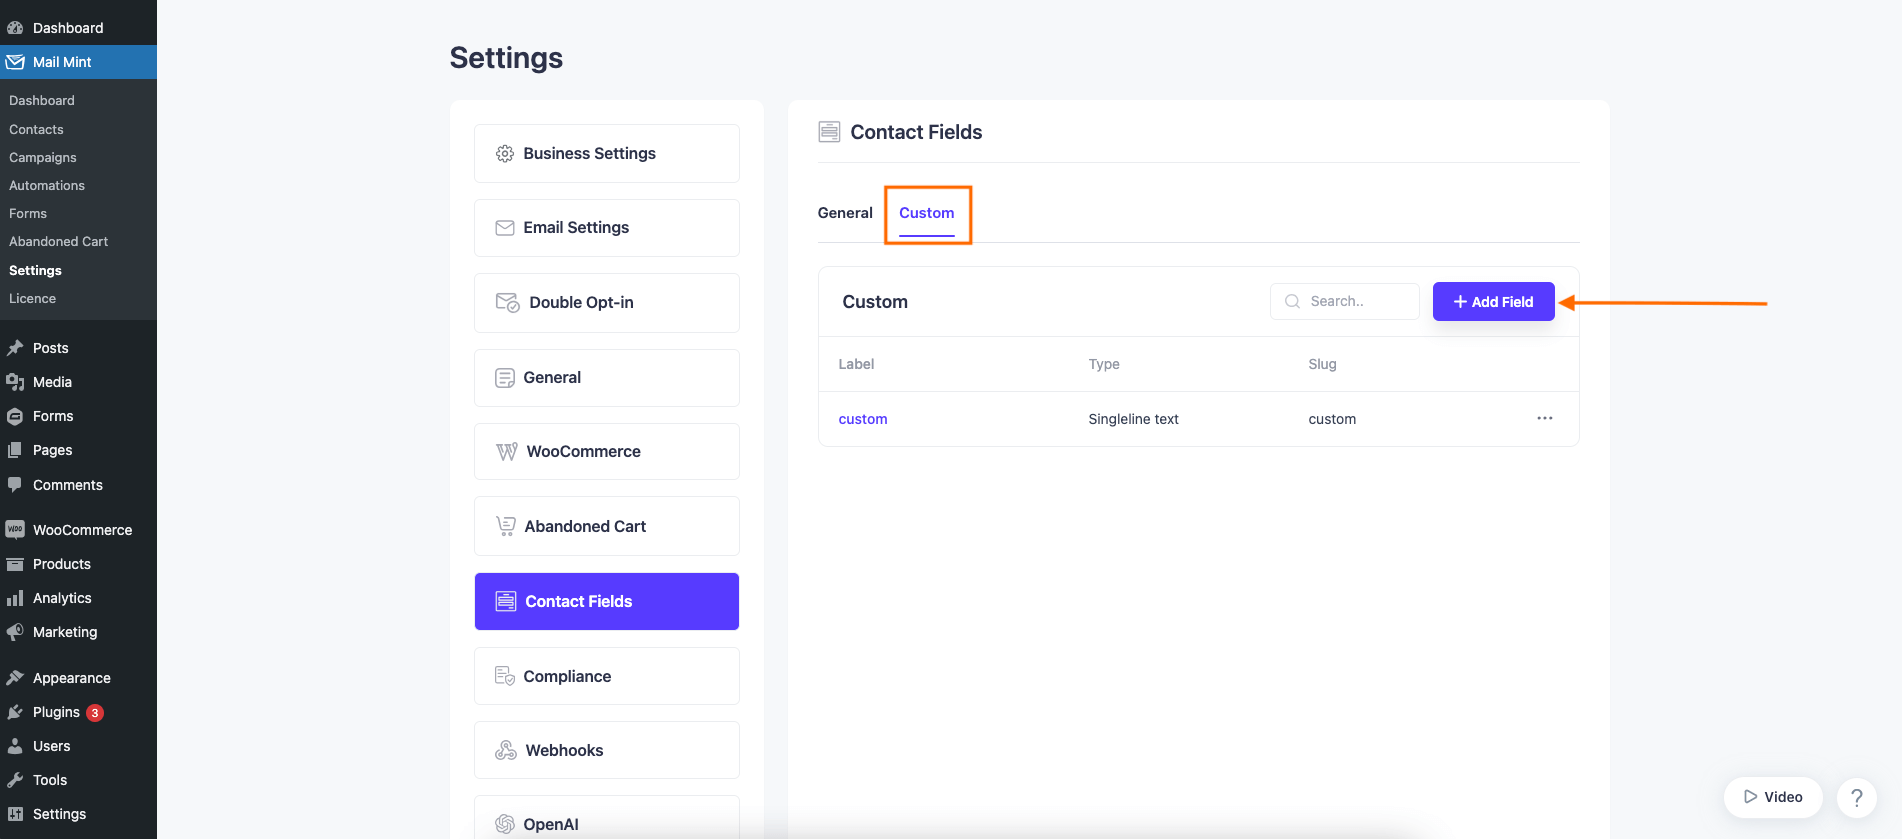
2. Move on to the Custom tab and click on the “+ Add Field” button.
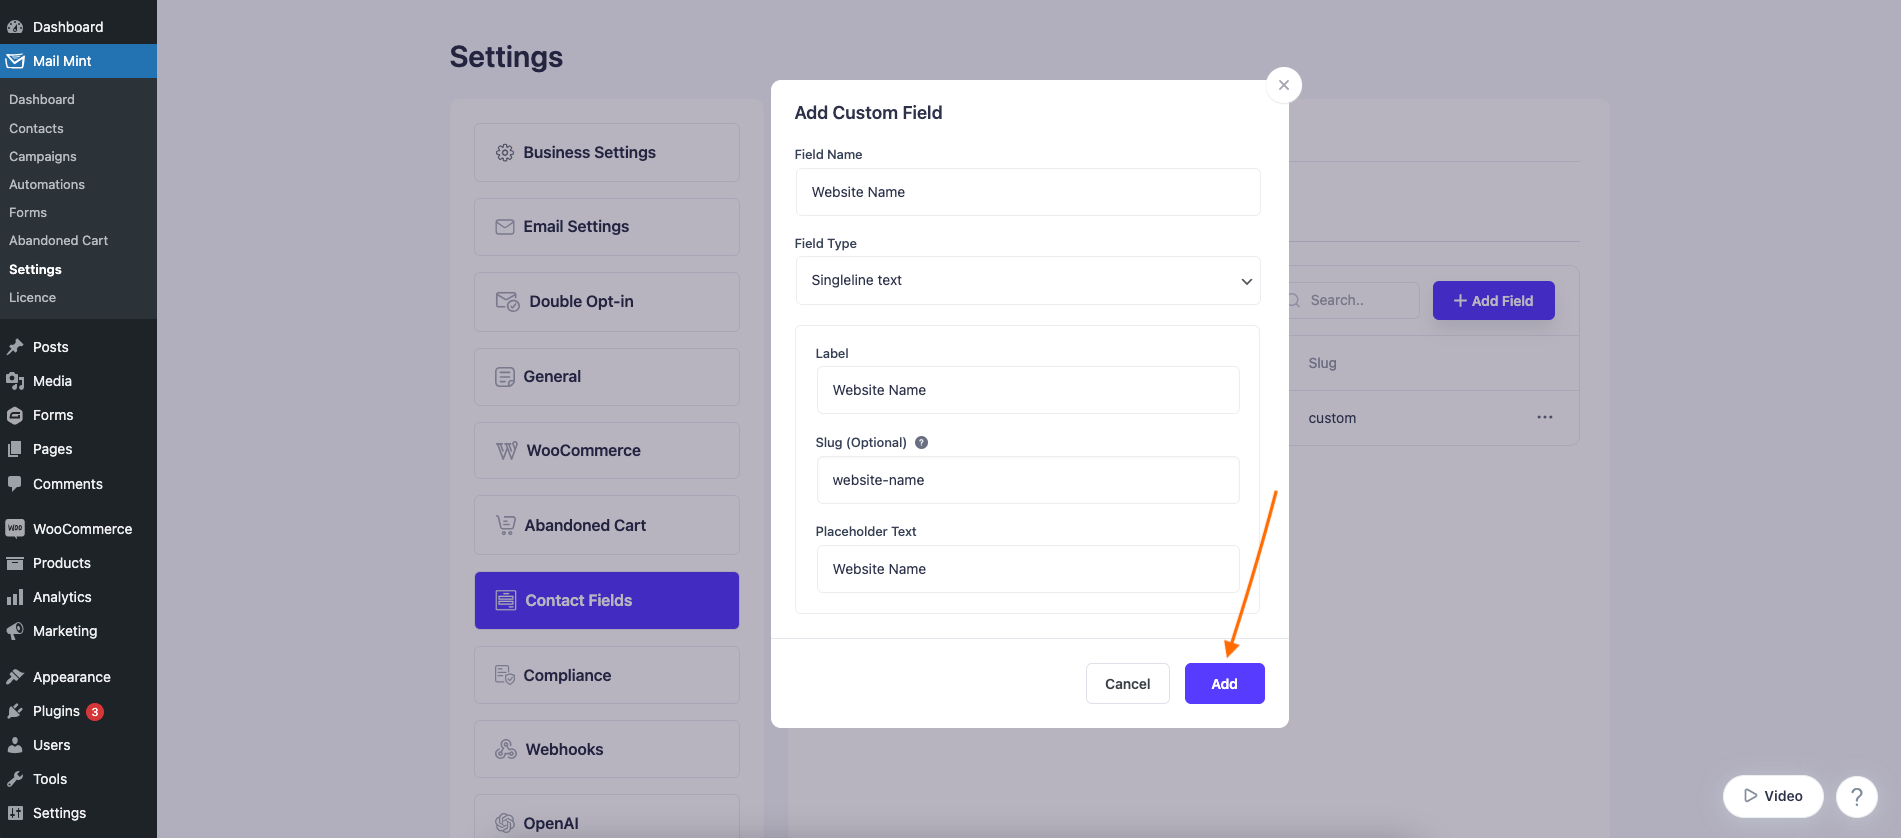
3. After that, a pop-up will appear to set up the custom field.
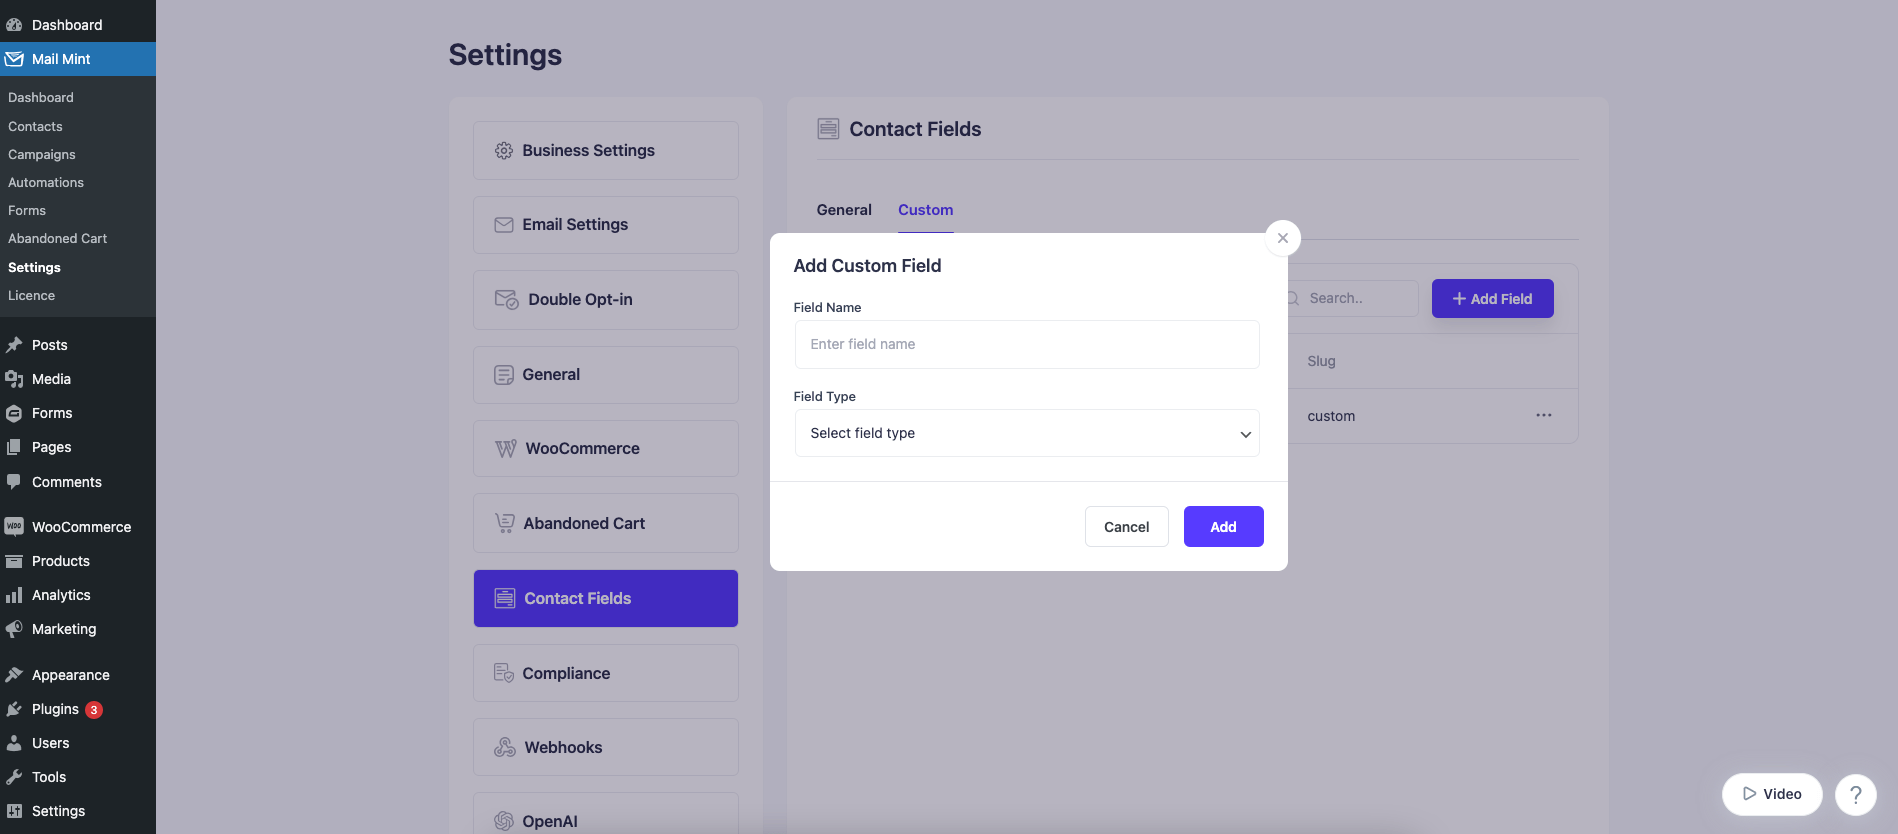
4. Set your Field Name and choose the Field Type.
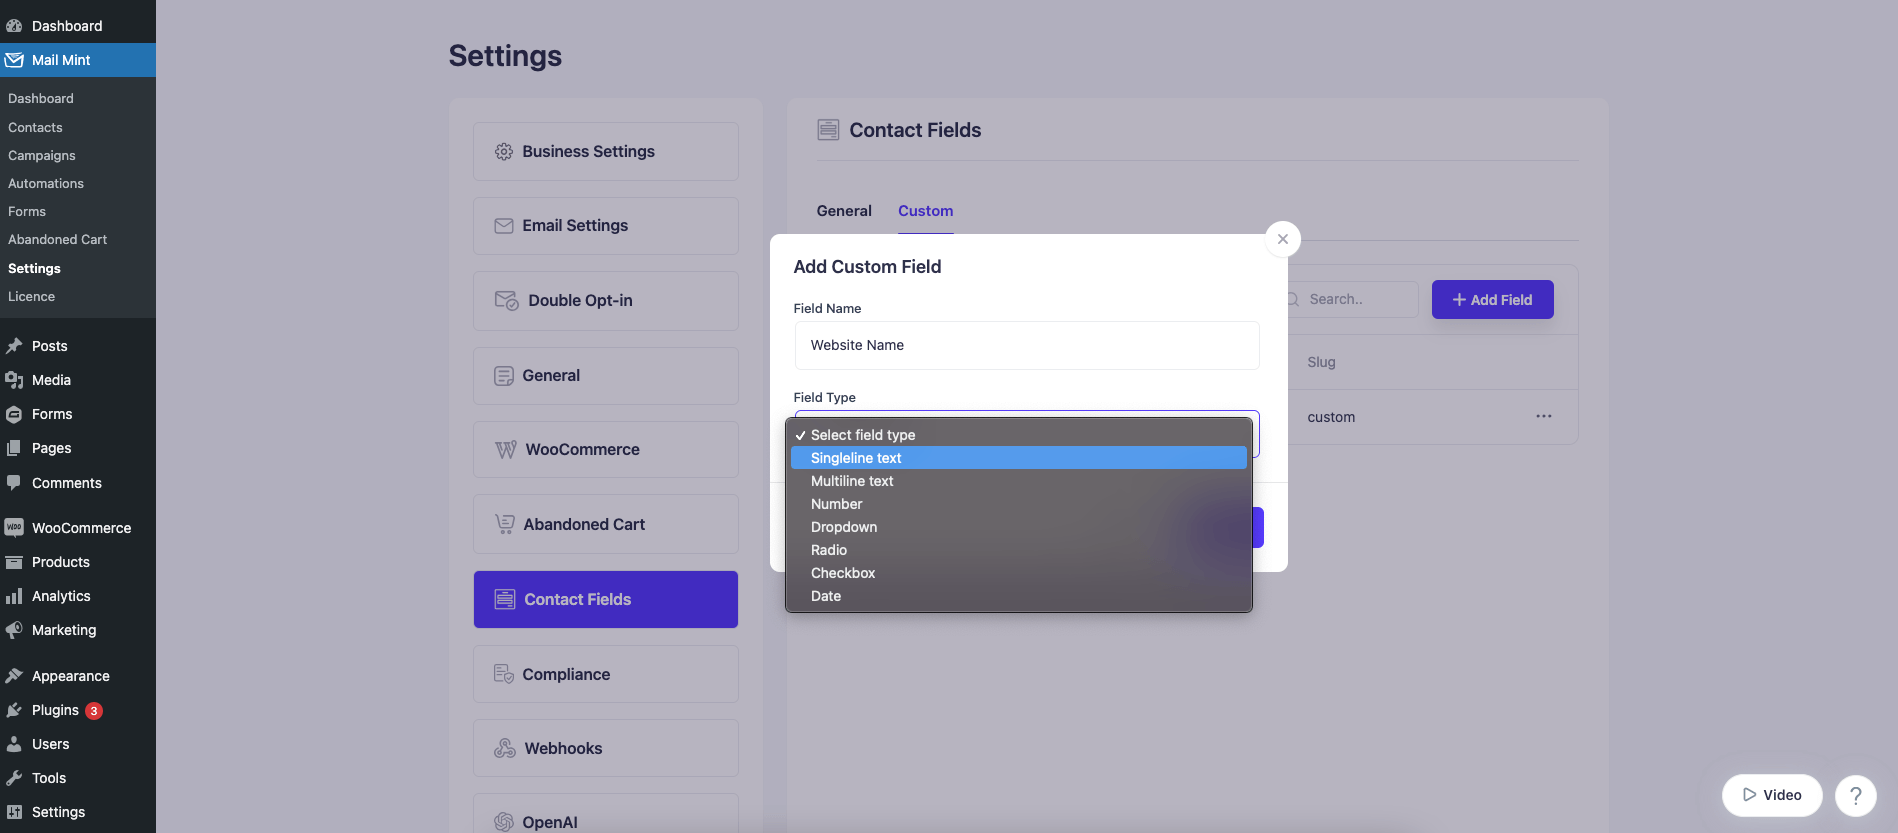
5. Configure the additional information for Field Type. Then click on Add.
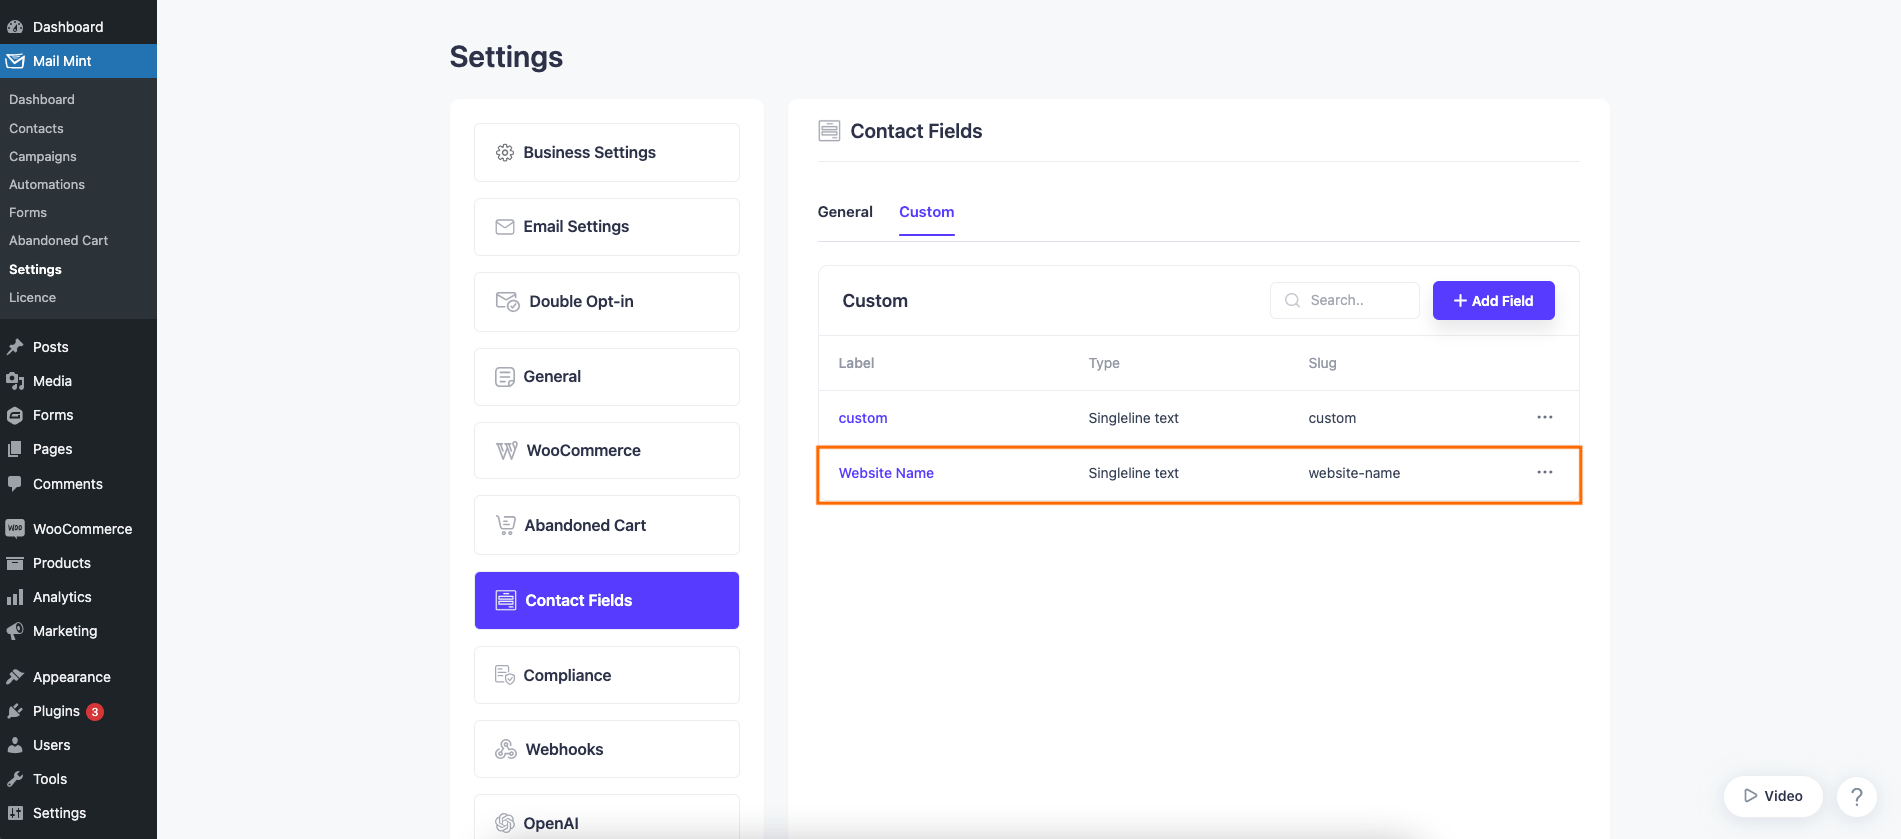
6. Here you’ll see the Custom Contact Fields listed.
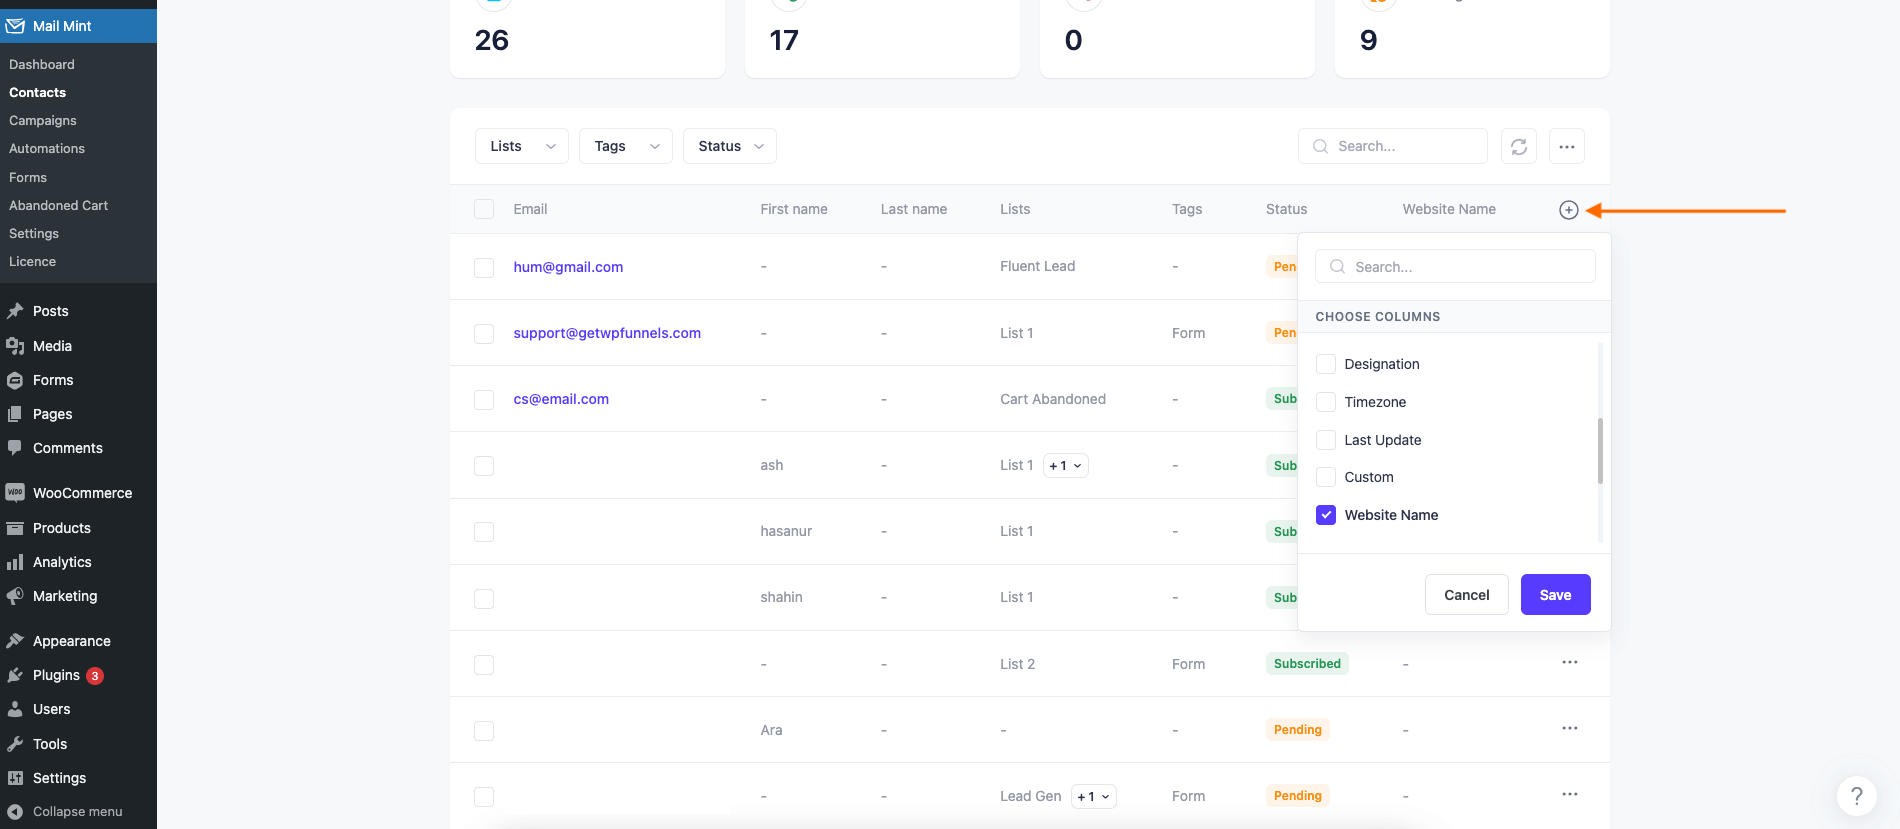
7. On your Mail Mint Contacts dashboard, click on the + sign to show custom fields.
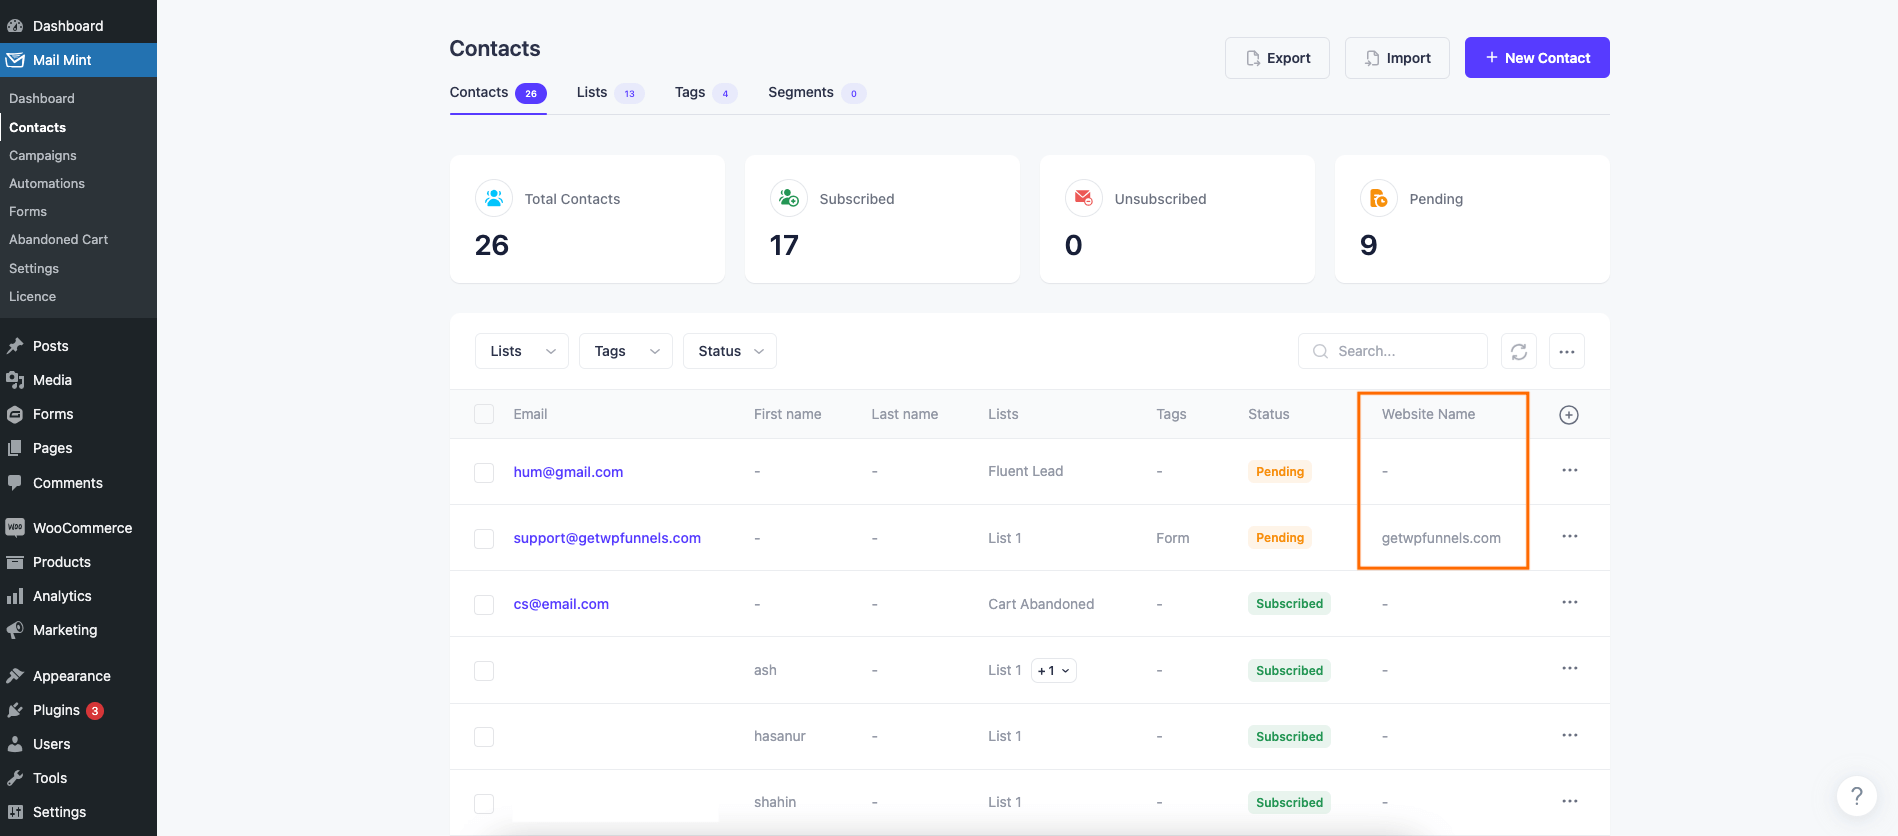
8. Here you can see the custom field data is visible on the Contacts dashboard.
That’s how you can easily create as many custom fields as you want using Mail Mint.


