Adding an order bump into your sales funnel can be a huge advantage for your eCommerce business. And the good news is that with WPFunnels you can include single or multiple order bumps on your checkout page to intrigue your visitors to buy more.
In this guide, you will learn how you can use order bumps at the funnel checkout page.
Steps To Creating An Oder Bump Offer For Your Funnels
First, create a typical sales funnel. You may import a template or create one from scratch.
- Follow this guide if you are new to WPFunnels and want to start creating a new funnel.
Then follow the steps below to add an order bump offer at the checkout.
Step 1 – Add An Order Bump
1. Go to the Checkout steps settings.

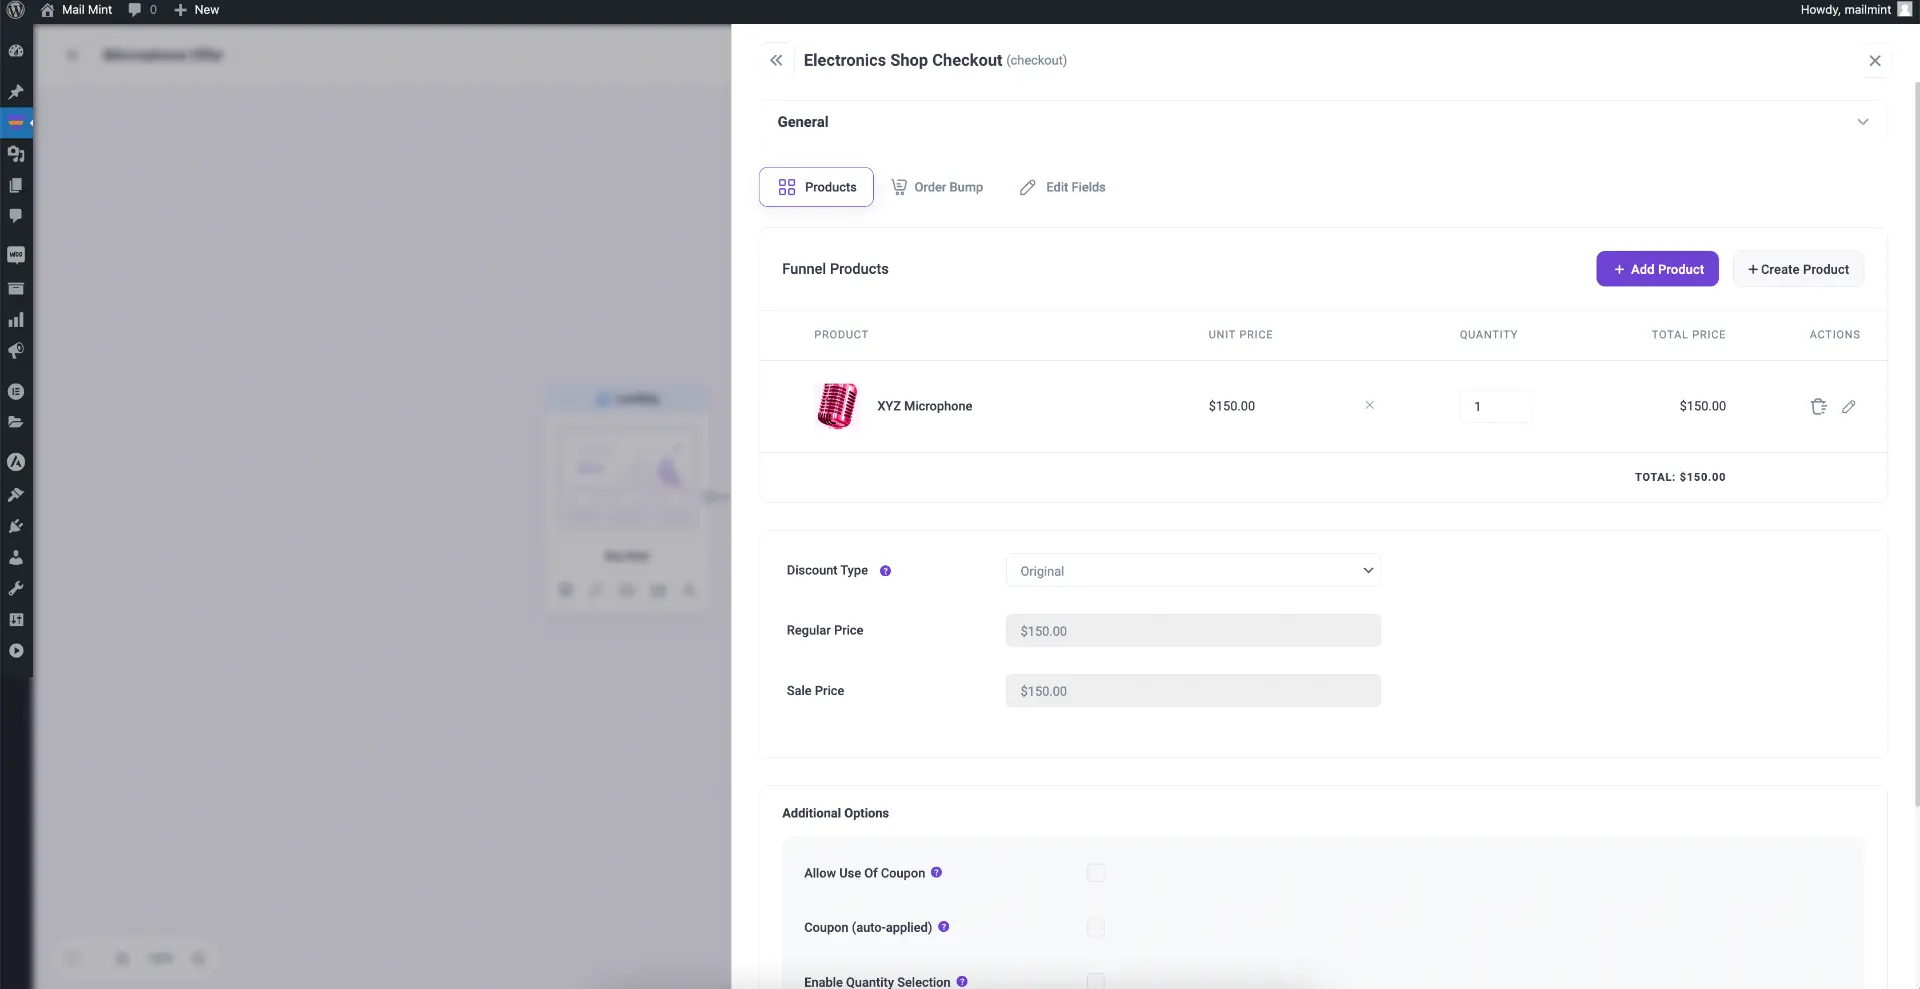
2. Here, go to the Order Bump tab and click on + Add Order Bump.

3. This will open the order bump creation settings.

4. You may name the order bump on the “Order Bump Name” field.
Step 2 – Assign Order Bump Product
Search and assign the product you want to offer as an order bump on the “Select Product” field.

Step 3 – Decide An Order Bump Template To Use
Click on the Drop down menu for “Select Template” and choose from 13 order bump styles. (Get the preview on the right side to get a visual glimpse of the template.)

Step 4 – Customize Your Order Bump Design And Content
1. You may change the title, description CTA text, and the highlighted text, to make the order bump persuasive and attractive.

2. You may even change the product image for the order bump if needed.
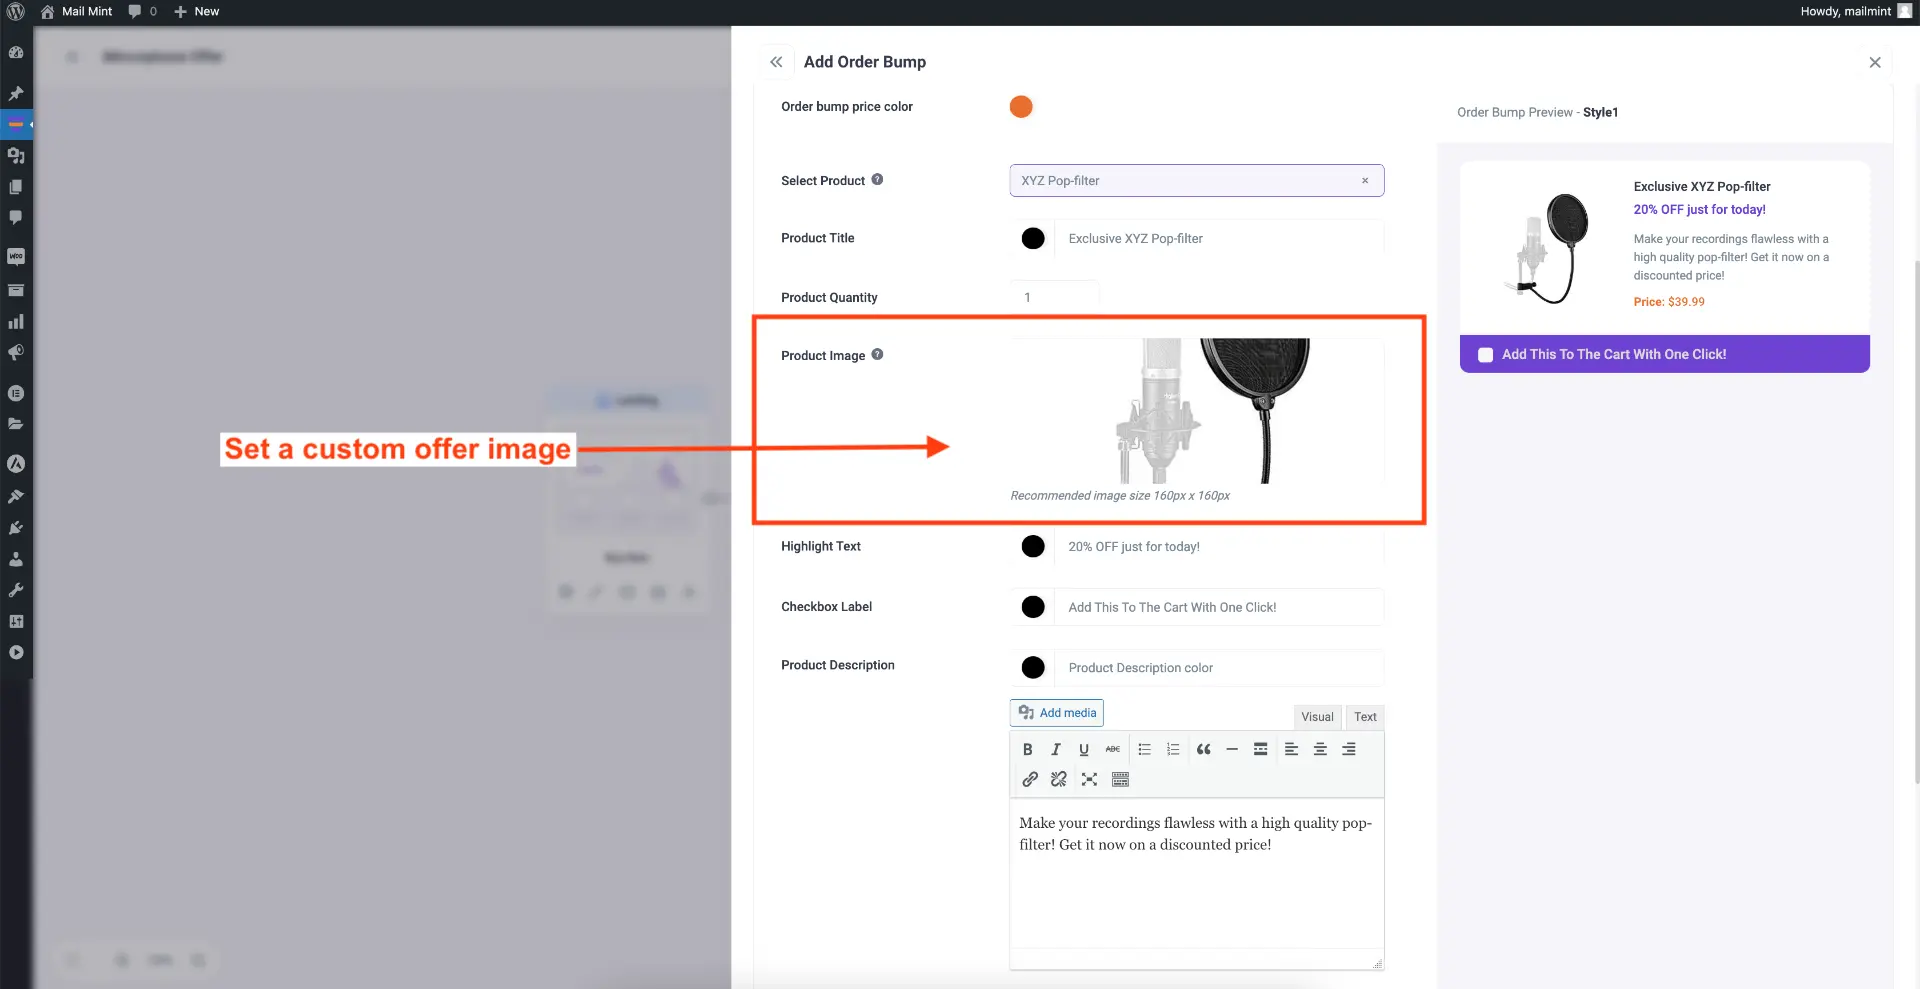
3. You will find several color customization options as well to make it more attractive and get a live preview.
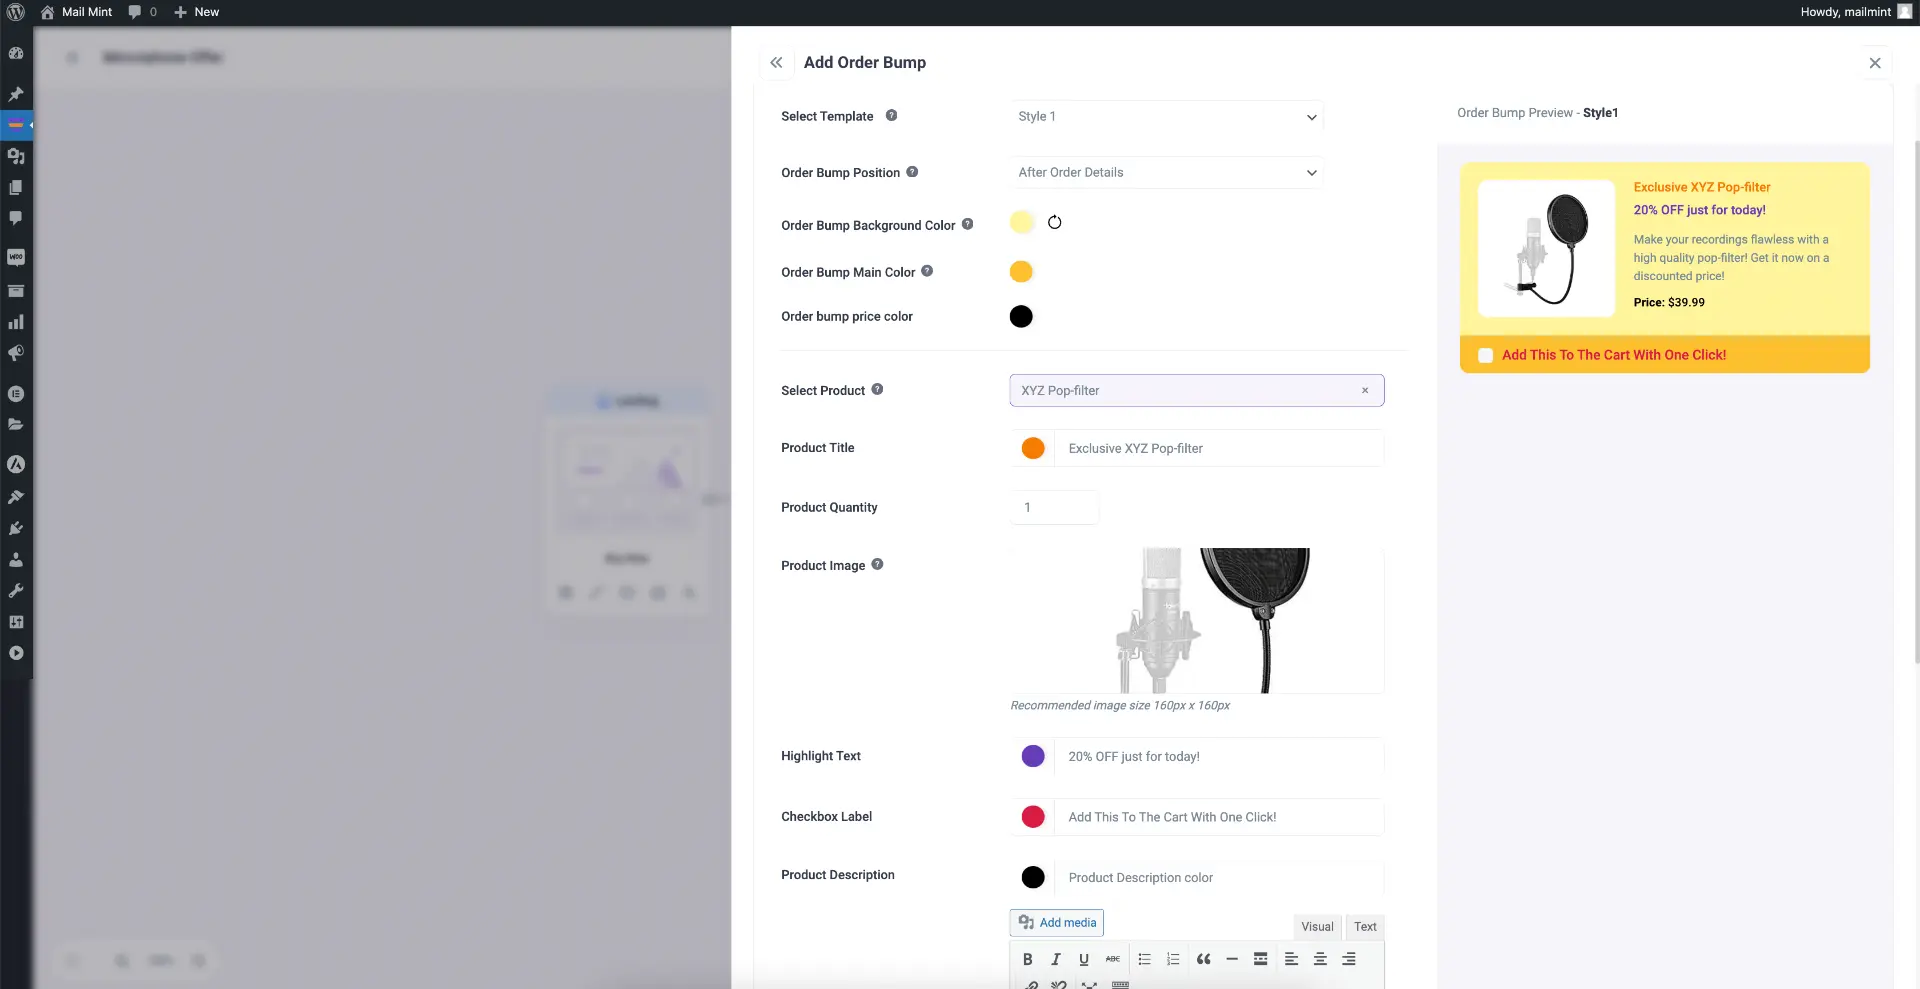
Basically, you will see Colored circles beside the elements for which you can change the colors. These include:
- Background color
- Main color (i.e. the CTA or checkbox section color)
- Price color
- Color of the product title
- Highlight text color
- Checkbox label color, and
- Color of the offer description
Step 5 – Set The Product Quantity And Discount (if applicable)
If you want to offer more quantity in the order bump, you can easily set it up. Simply set the number on the Product Quantity field.

*An example of this scenario is, suppose you created a funnel for an Exclusive Porcelain Vase at $39.99. You may want to offer an order bump to offer two more Vases at a $20 discount. In that case, you may set the quantity to 2. Accepting this order bump will add 2 more vases to the order and a $20 discount.
Step 6 – Offer A Discount In The Order Bump Offer (if applicable)
You may also assign an exclusive discount to your order bump product for this funnel.
1. Scroll down to find the Discount Type. Change it to choose a Percentage discount or a Flat discount.

2. Here, you can define the discount amount in the Discount Value field.
3. And you can choose if the discount will be offered on the original price or the sale price
*Choose sale price only if you have a sale price set in your WooCommerce product settings and you want to offer a discount on that price.
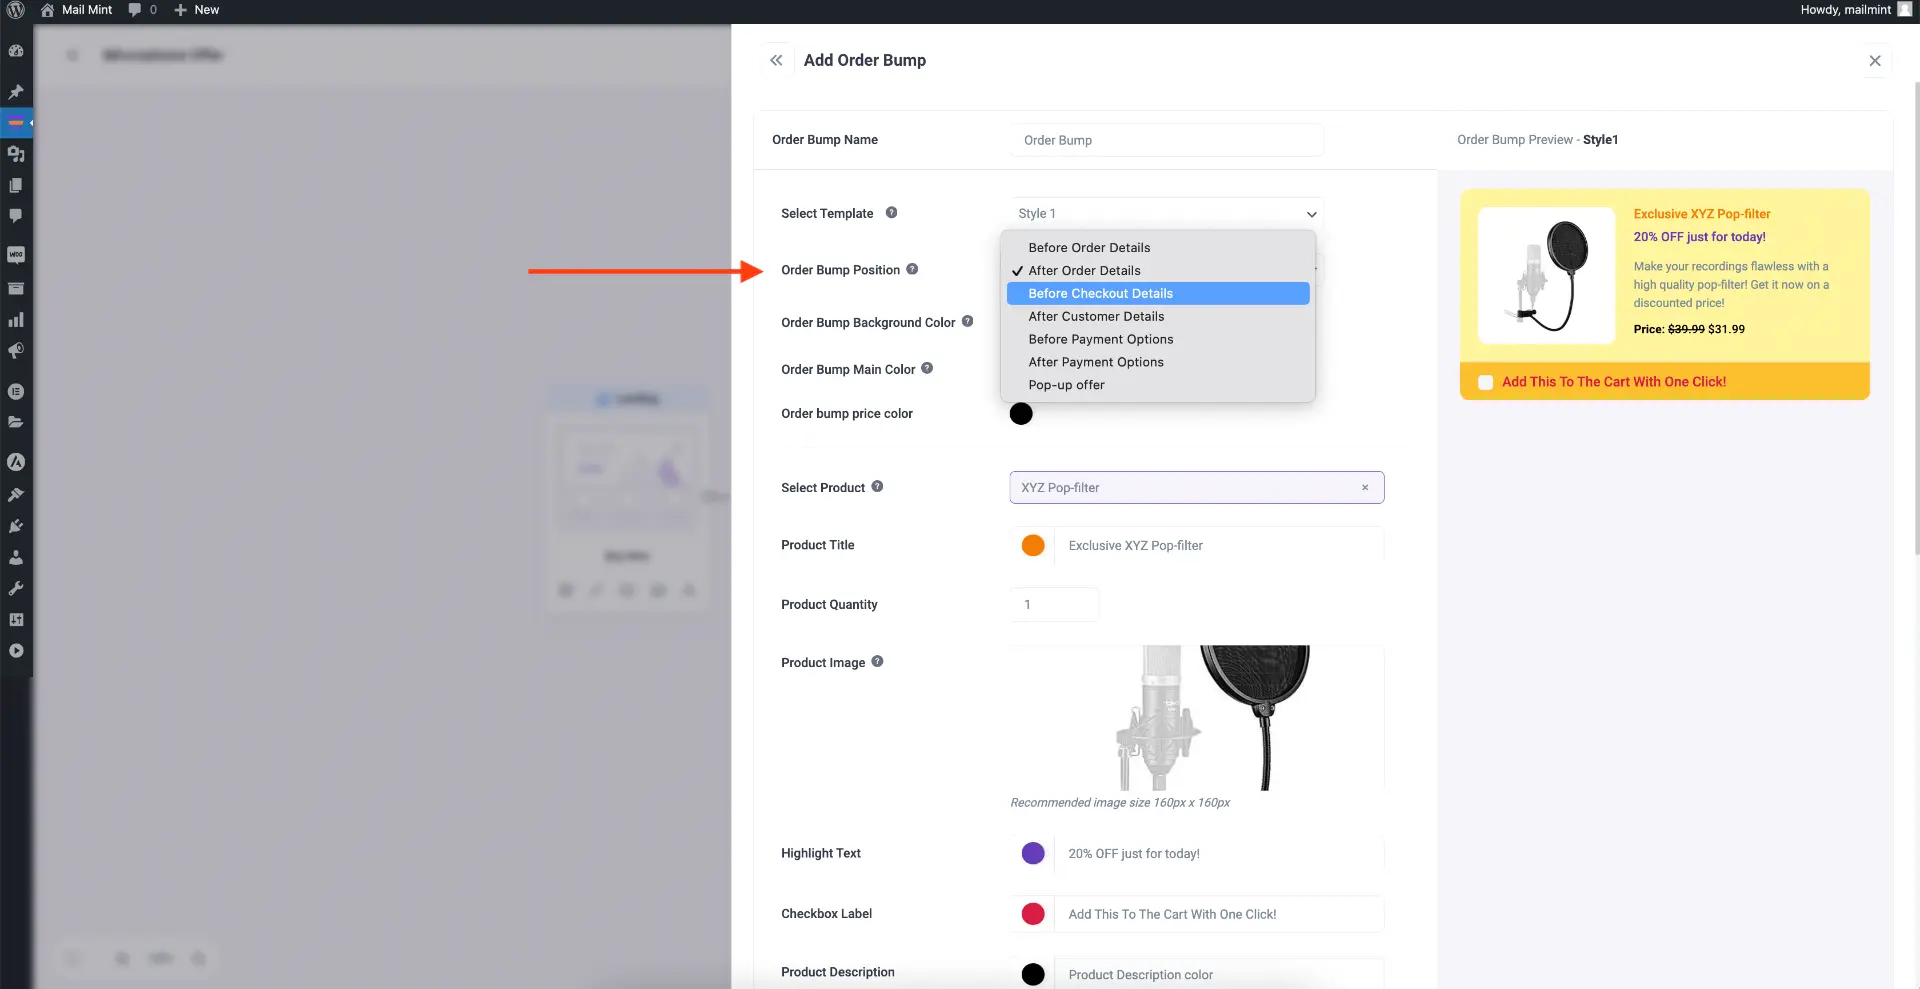
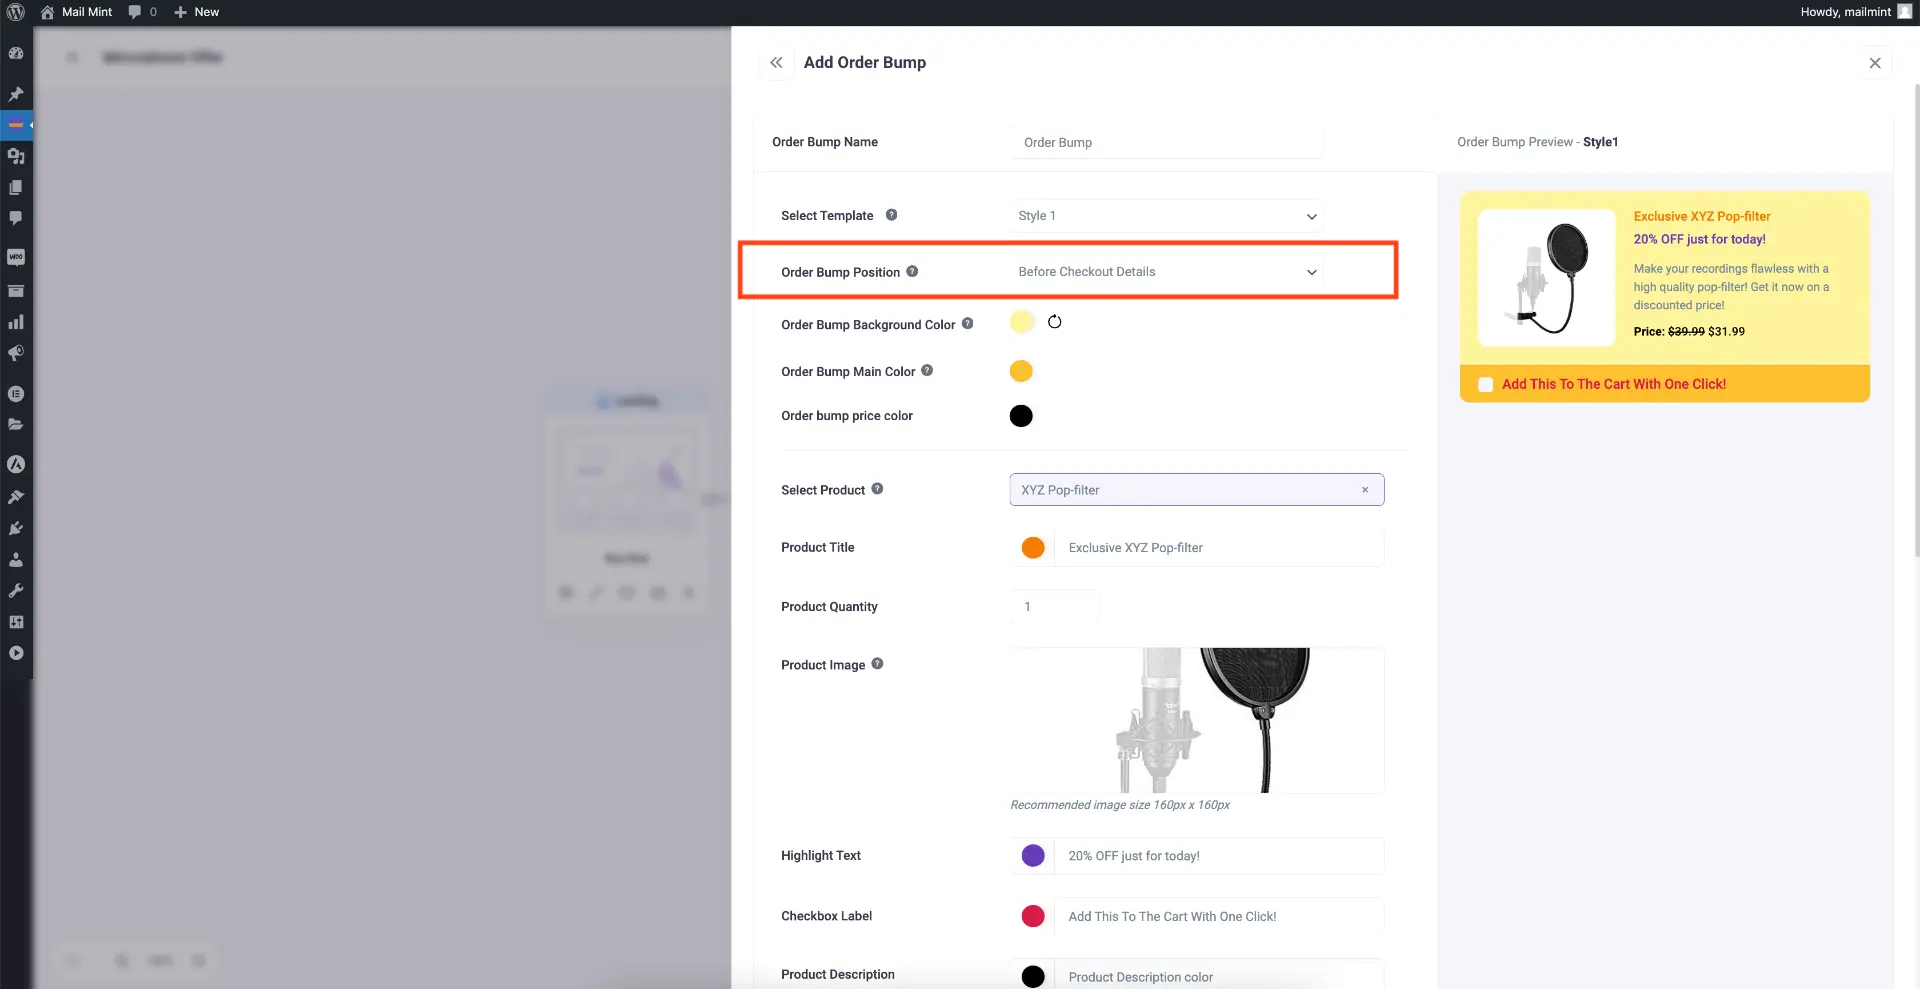
Step 7 – Decide on the order bump position
Scroll up and then define where you want to display this order bump on the checkout page by setting a suitable order bump position.
Step 8 – Save And Preview
1. Once ready, scroll down and click on Save Changes.

2. Then preview the checkout page to see the order bump in action.

How To Add Multiple Order Bumps In Your Funnel Checkout?
You may easily add more order bumps if you have WPFunnels Pro.
To do so, you may simply go to Checkout Settings > Order Bump and click on Add Order Bump. Then, configure the order bump just like you did in the 8 steps above.

When you add order bumps, they will be listed under the order bump tab.

Set An Order Bump To Replace The Products In The Cart
You may want to offer an order bump that’s a better alternative to what you are offering as the main funnel product. In that case, you may set the order bump to replace the main offer product when selected.
For example, suppose you offered a Microphone as the main funnel product. In the order bump, you can offer an upgraded version, let’s say Microphone v2, which will cost a little bit more, but offer greater value. This, when accepted by customers, will be added as the product in the cart, replacing the main product.
To do so, when setting up an order bump, scroll down to find an option called “Replace product” and enable it.
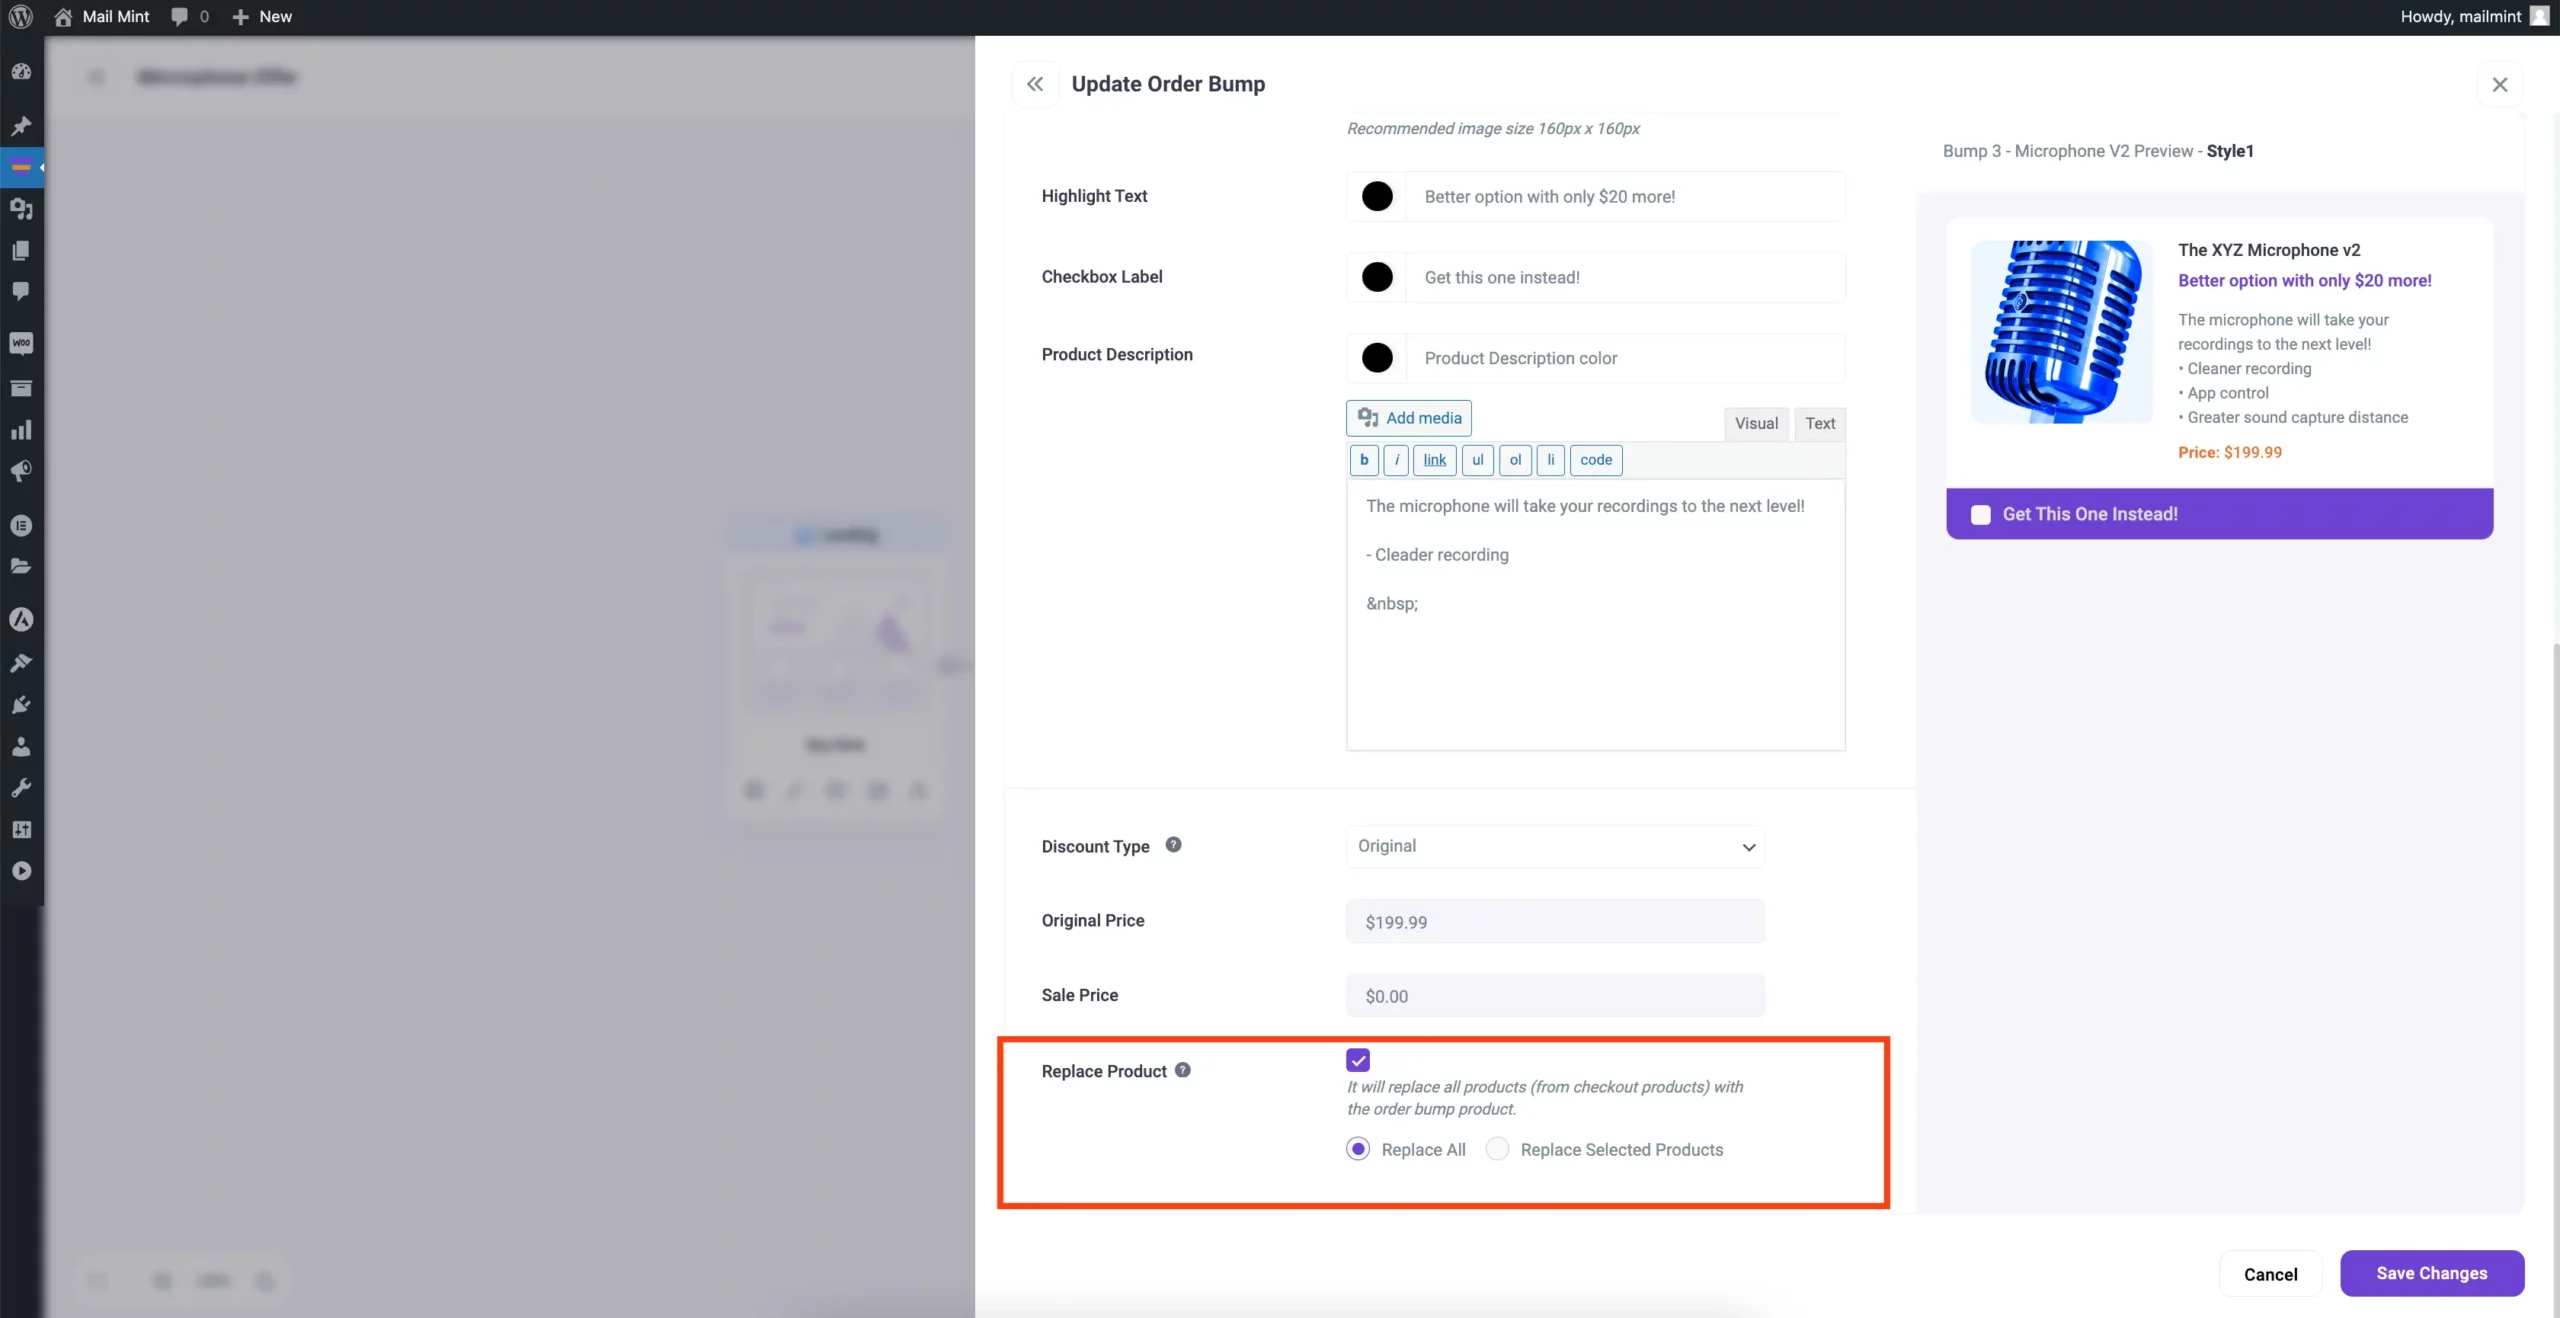
Once enabled, you will get the option to either replace the whole cart or replace a specific product in the cart (in case you are offering multiple products in the funnel checkout).
Done, You Now Know How You Use Order Bumps
That’s it, this is how you can add one or multiple order bumps to the checkout page of your funnel.


