You can easily plan Email Marketing Automation & other simple automation workflows visually with Mail Mint.
Once you have your contacts list organized with tags, lists, & segments, and some strategic email campaigns that you want to target for each specific group of your users – you’re all set to plan the automations for your business & deploy them.
In the following guide, you’ll learn how easily you can plan & create automation workflows in Mail Mint.
Let’s get started.
Create Email Marketing Automation Workflow with Mail Mint
Follow these simple steps to create an automation workflow for your business in Mail Mint.
Step 1: Go to your WordPress Dashboard > Mail Mint.
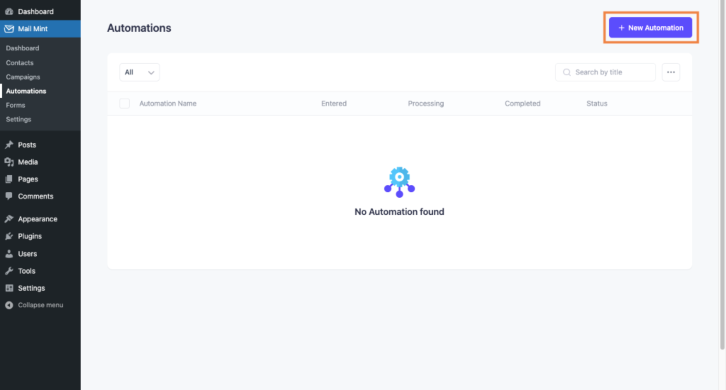
Now go to the Automations tab and click on +New Automation.
Step 2: First, set your Automation Title.
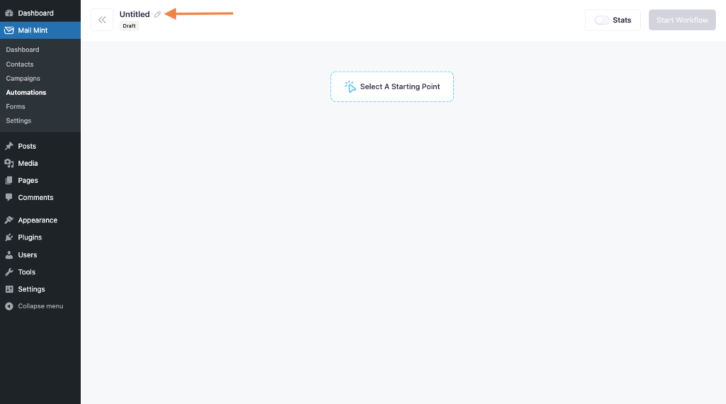
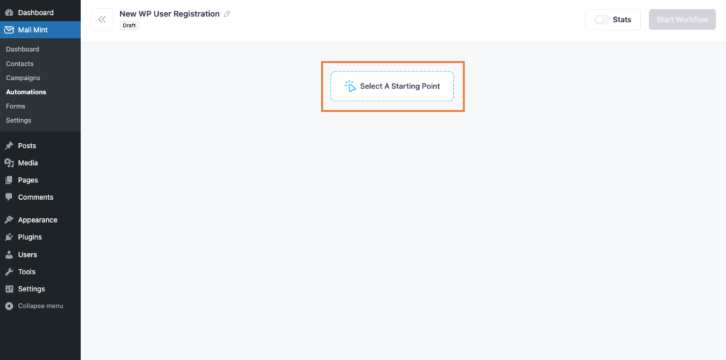
Now, click on “Select A Starting Point” to add an automation trigger.
Step 3: Here you’ll see 2 triggers available for WordPress:
- New User Registration.
- User Login.
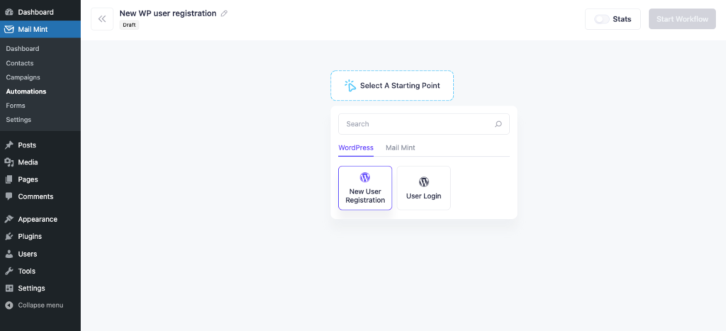
This way, you can automate the journey of your user, right from the start.
Let’s choose the “New User Registration” trigger.
That means, whenever a new user registers on your site, this automation will be triggered and will start working exactly as you plan.
Step 4: Now click on the (+) icon to select an Action.
So, whenever the Automation Trigger is activated, Mail Mint will perform the action of your choice.
You can find these actions here:
- Send An Email.
- Assign To Tag.
- Assign To List.
- Delay.
- Remove From Tag.
- Remove From List.
- Send Sequence.
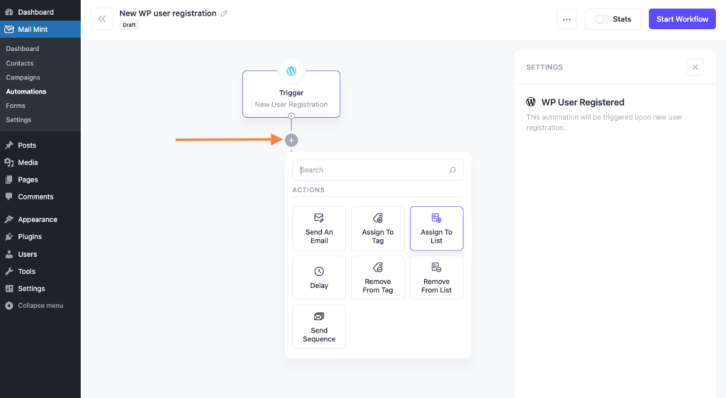
We’ll be choosing the Assign To List action.
Now you have to configure the Action Settings.
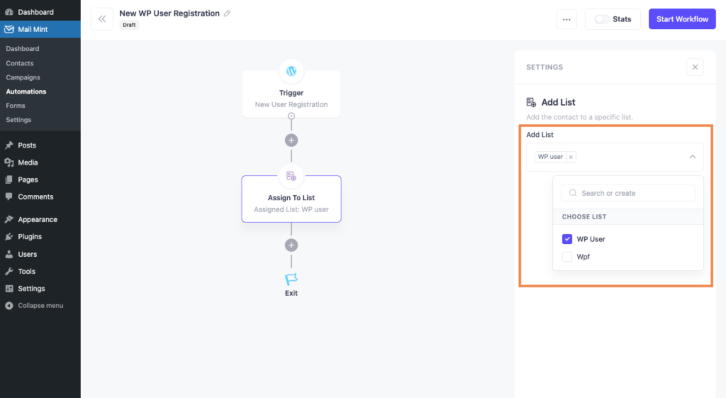
You can choose one or multiple lists in the settings for this action.
That means when a new user registers on your site, they’ll be automatically assigned to the lists of your choice.
Step 5: Similarly, you can add another action Assign To Tag after your previous action.
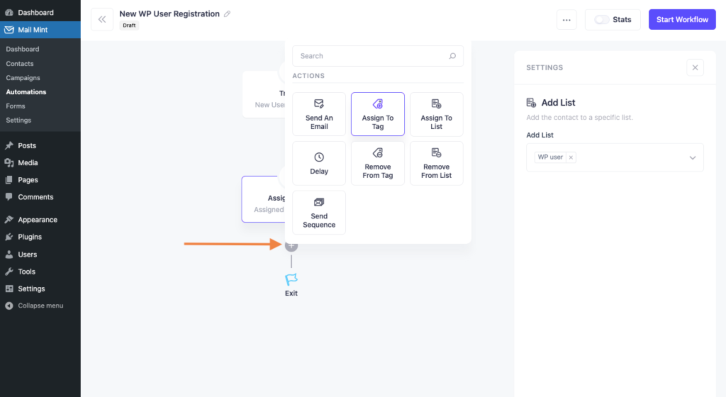
And you can choose multiple Tags for this action as well.
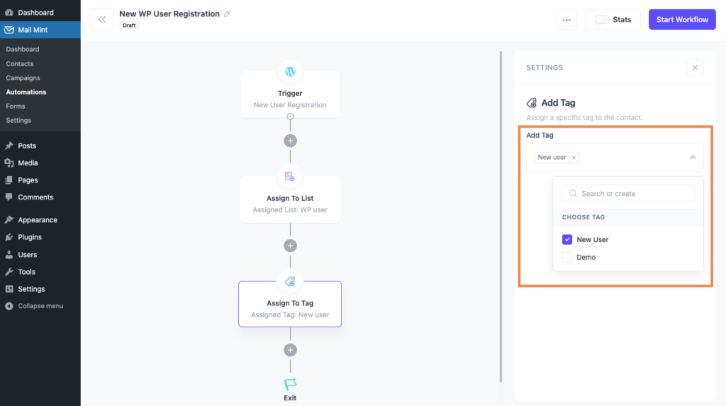
Step 6: After assigning your new registered users the Tags and Lists of your choice, it’s standard to wait for some time before your next move.
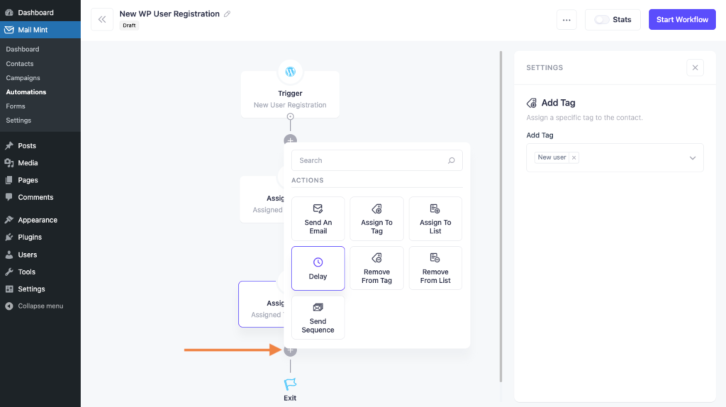
For that, select Delay Action.
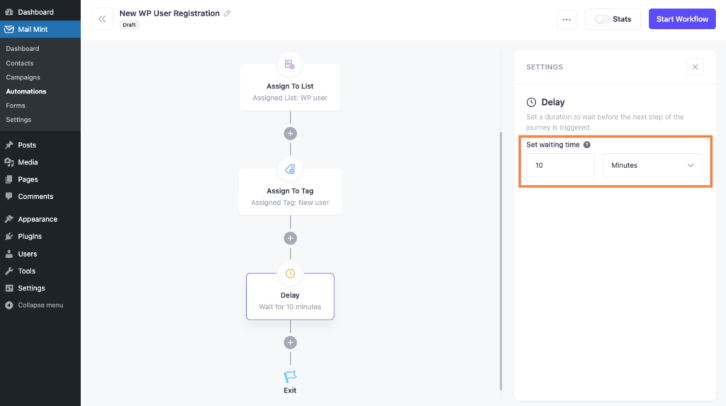
Then set a waiting time. Here it’s 10 minutes.
Step 7: After this delay, you can send an email or a sequence of emails to the users.
For this, select the Send An Email action.
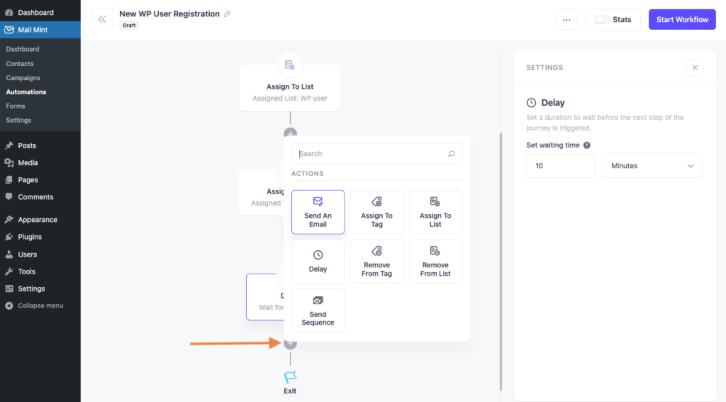
On the action settings for sending an email, you can configure some basic settings.
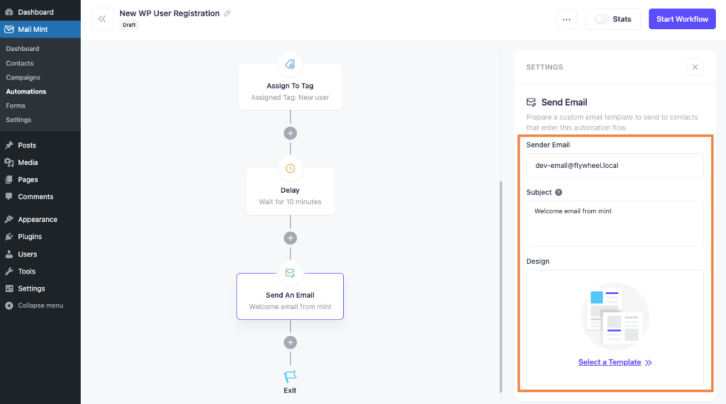
Configure the email by setting us Sender’s Email Address, Subject Line, and Email Template Design.
(Here’s a recap on the automation flow we’ve just created:
After a WordPress new user registration, this will add the user to a List and assign a Tag. Then it will wait for 10 minutes and send an Email, that’s it.)
Step 8: After you configure everything, click on the “Start Workflow” button to start the automation.
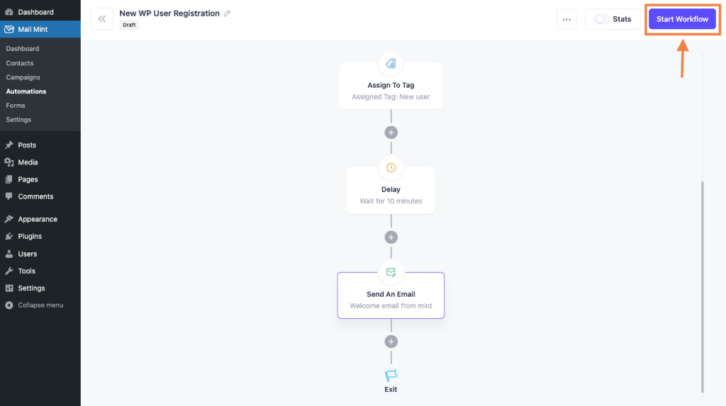
And that’s it. Your Automation flow is up & running.
As you can see. it’s really easy to set an automation workflow with Mail Mint.


