Now it’s super easy to send Post Updates to your email lists using Mail Mint.
Let’s follow the step-by-step process.
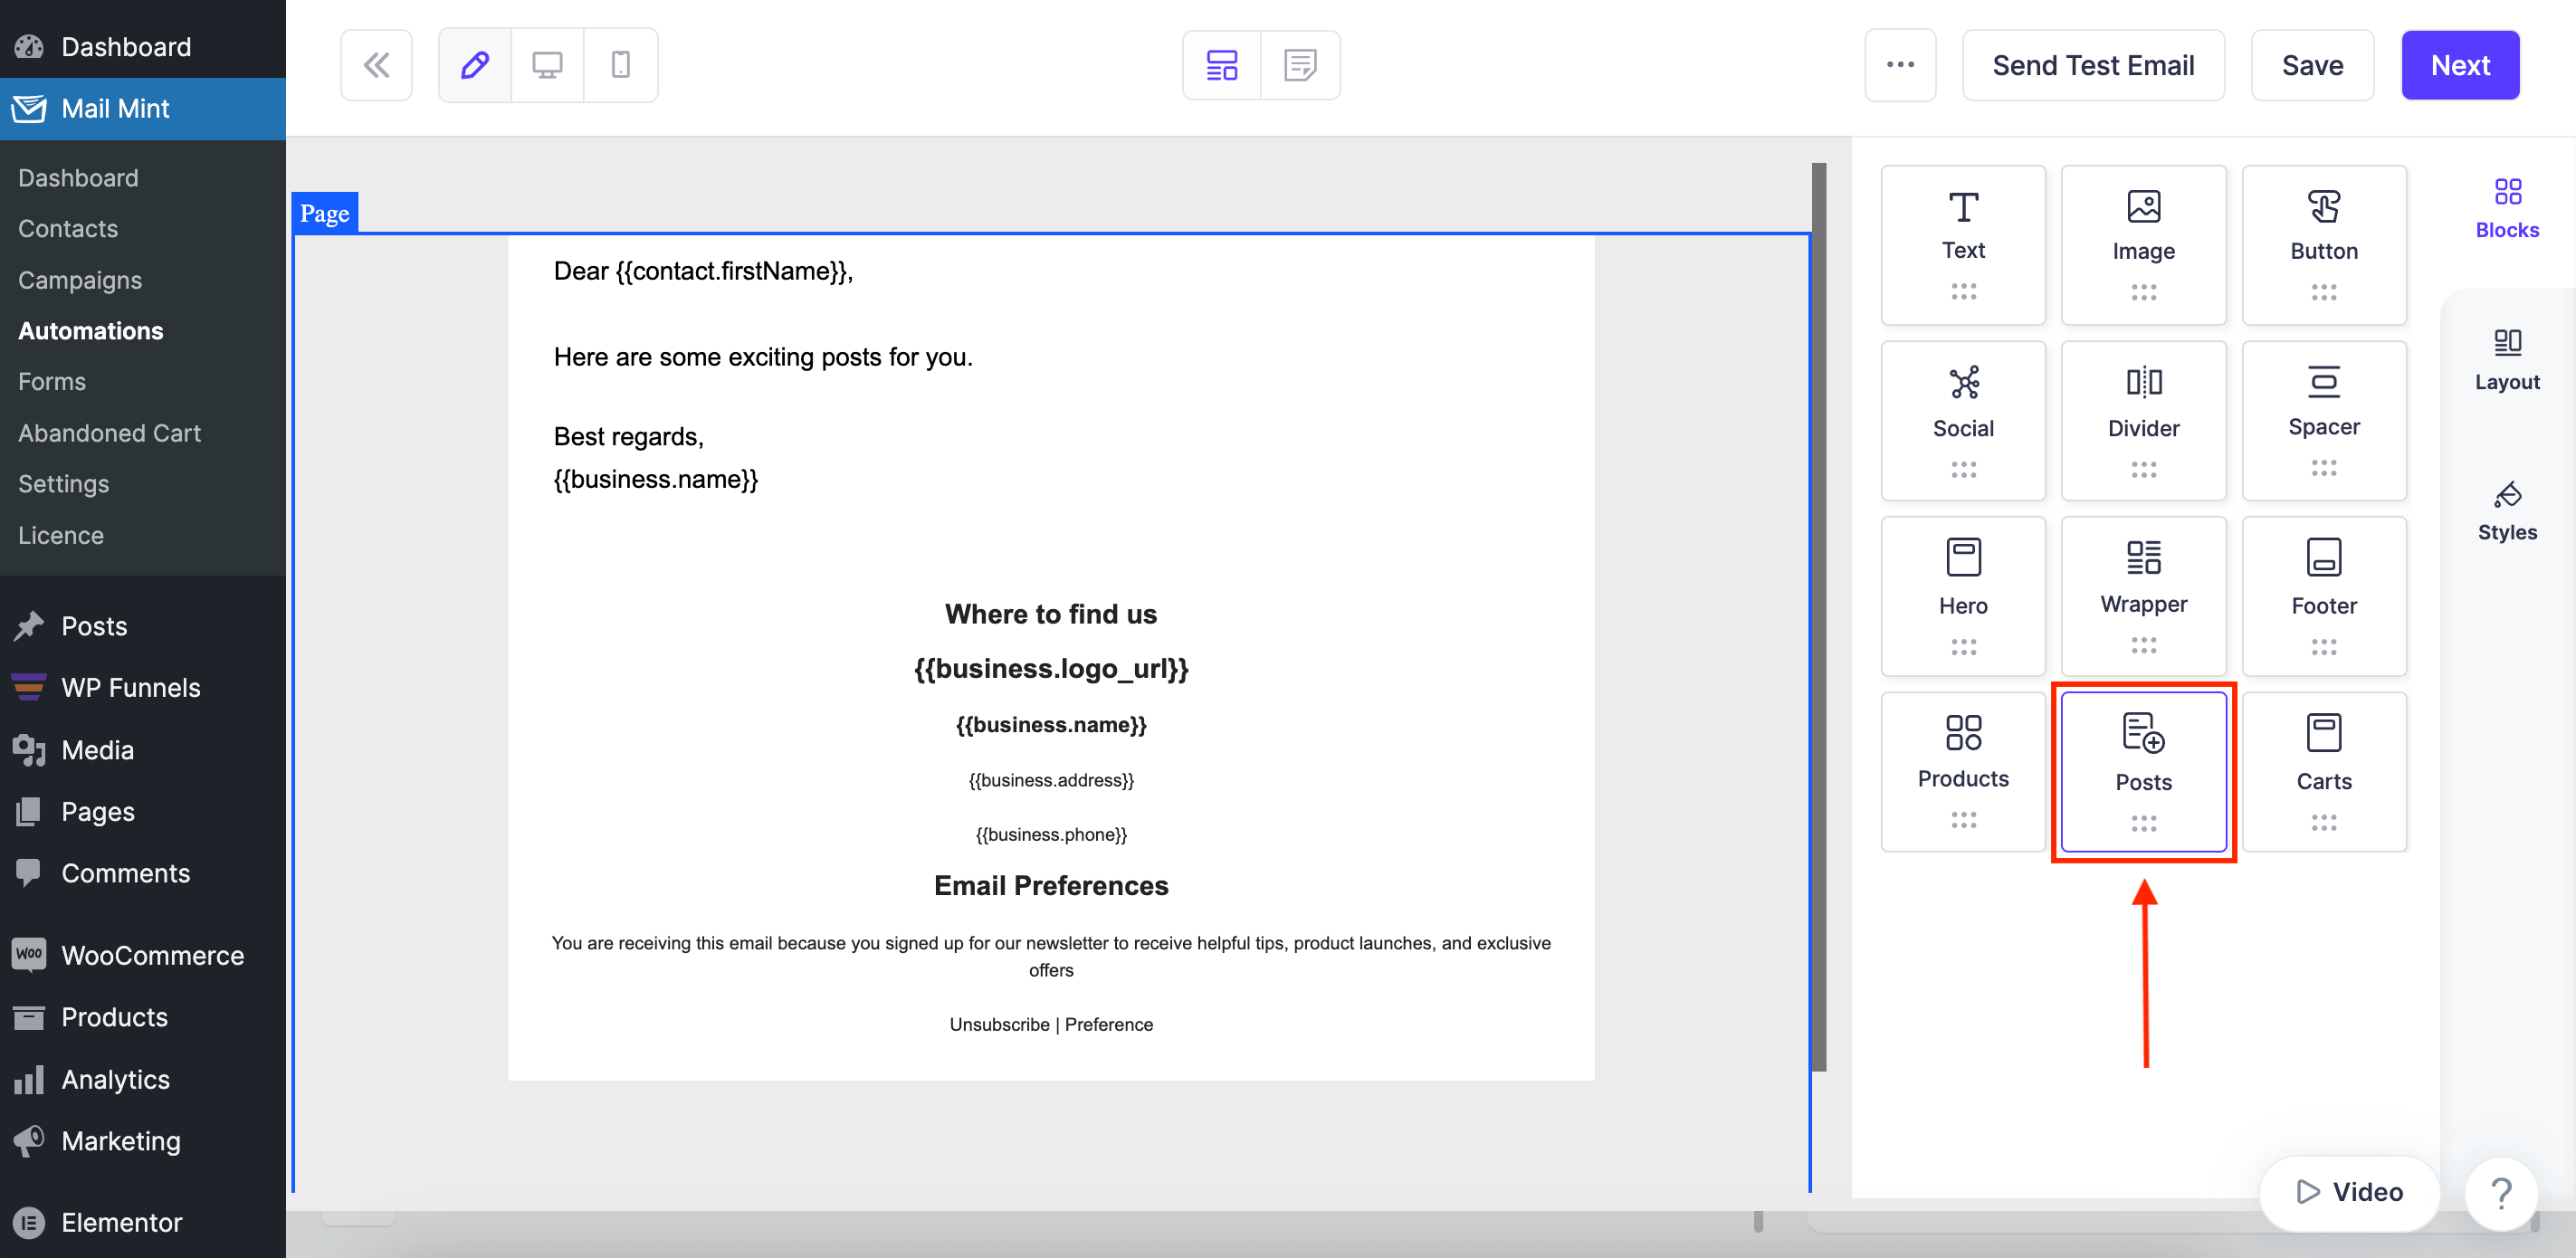
Step 1: Add Post Block
On your email builder, simply select the Post block and drop it in the email.
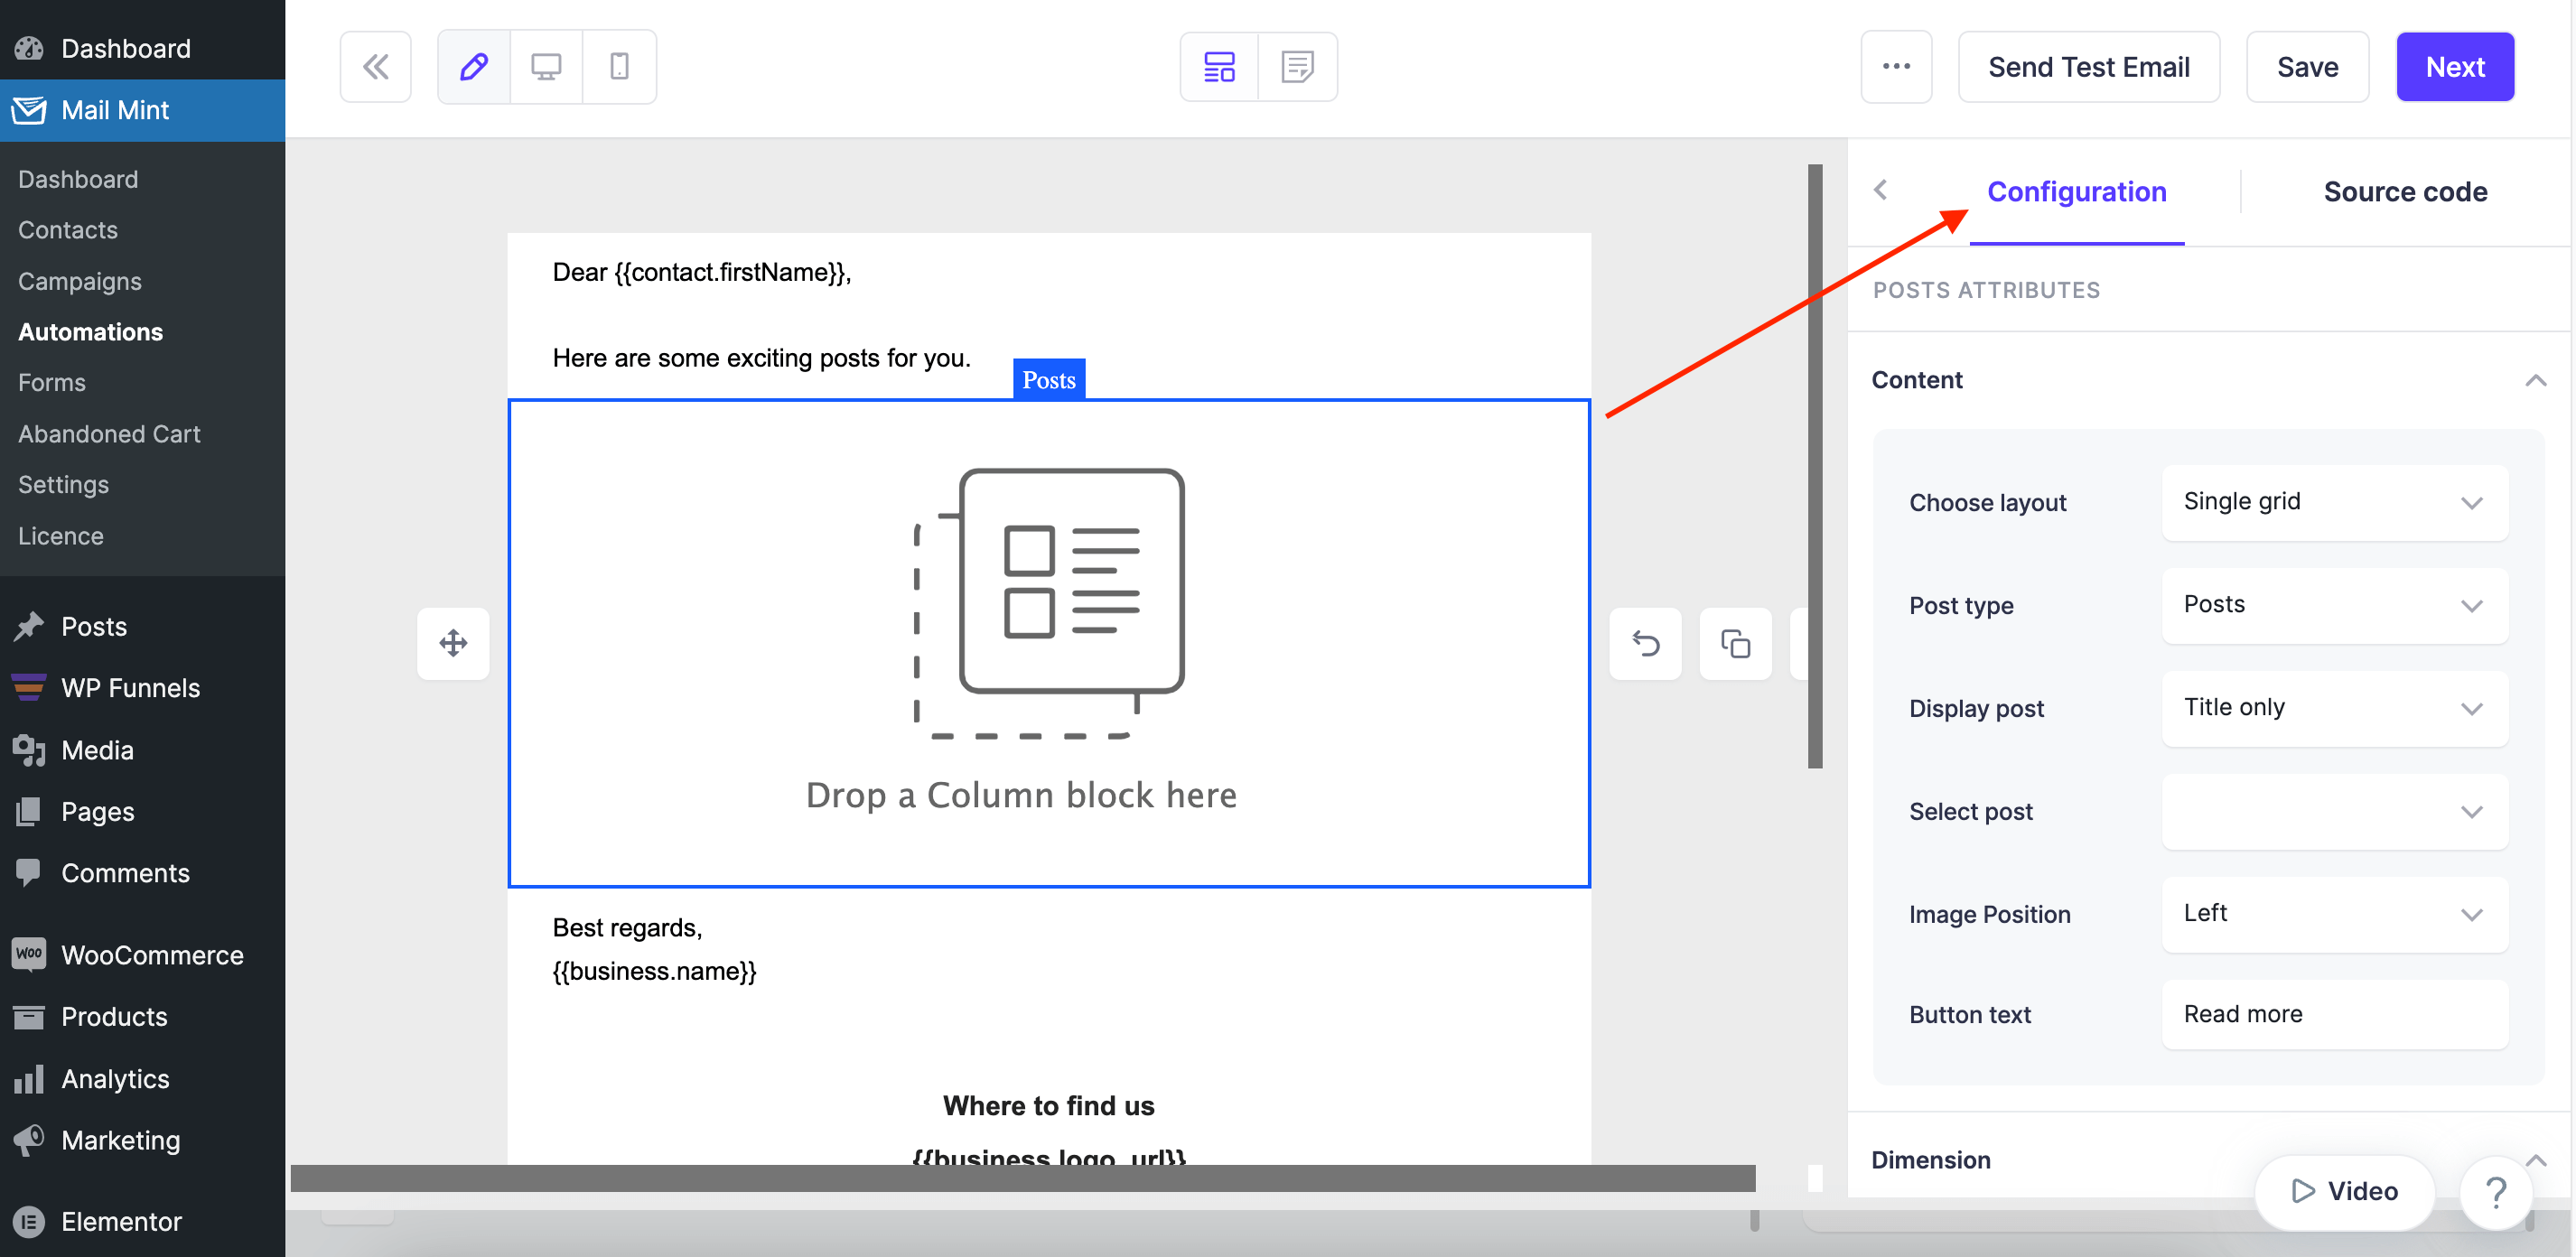
Step 2: Configure Post Block
Then you will get options to configure the Content, Dimension, Color, and Typography for this block.
Configure Content
1. In the Content section, first, you need to choose your layout. Some content options will differ a bit depending on which layout you choose.
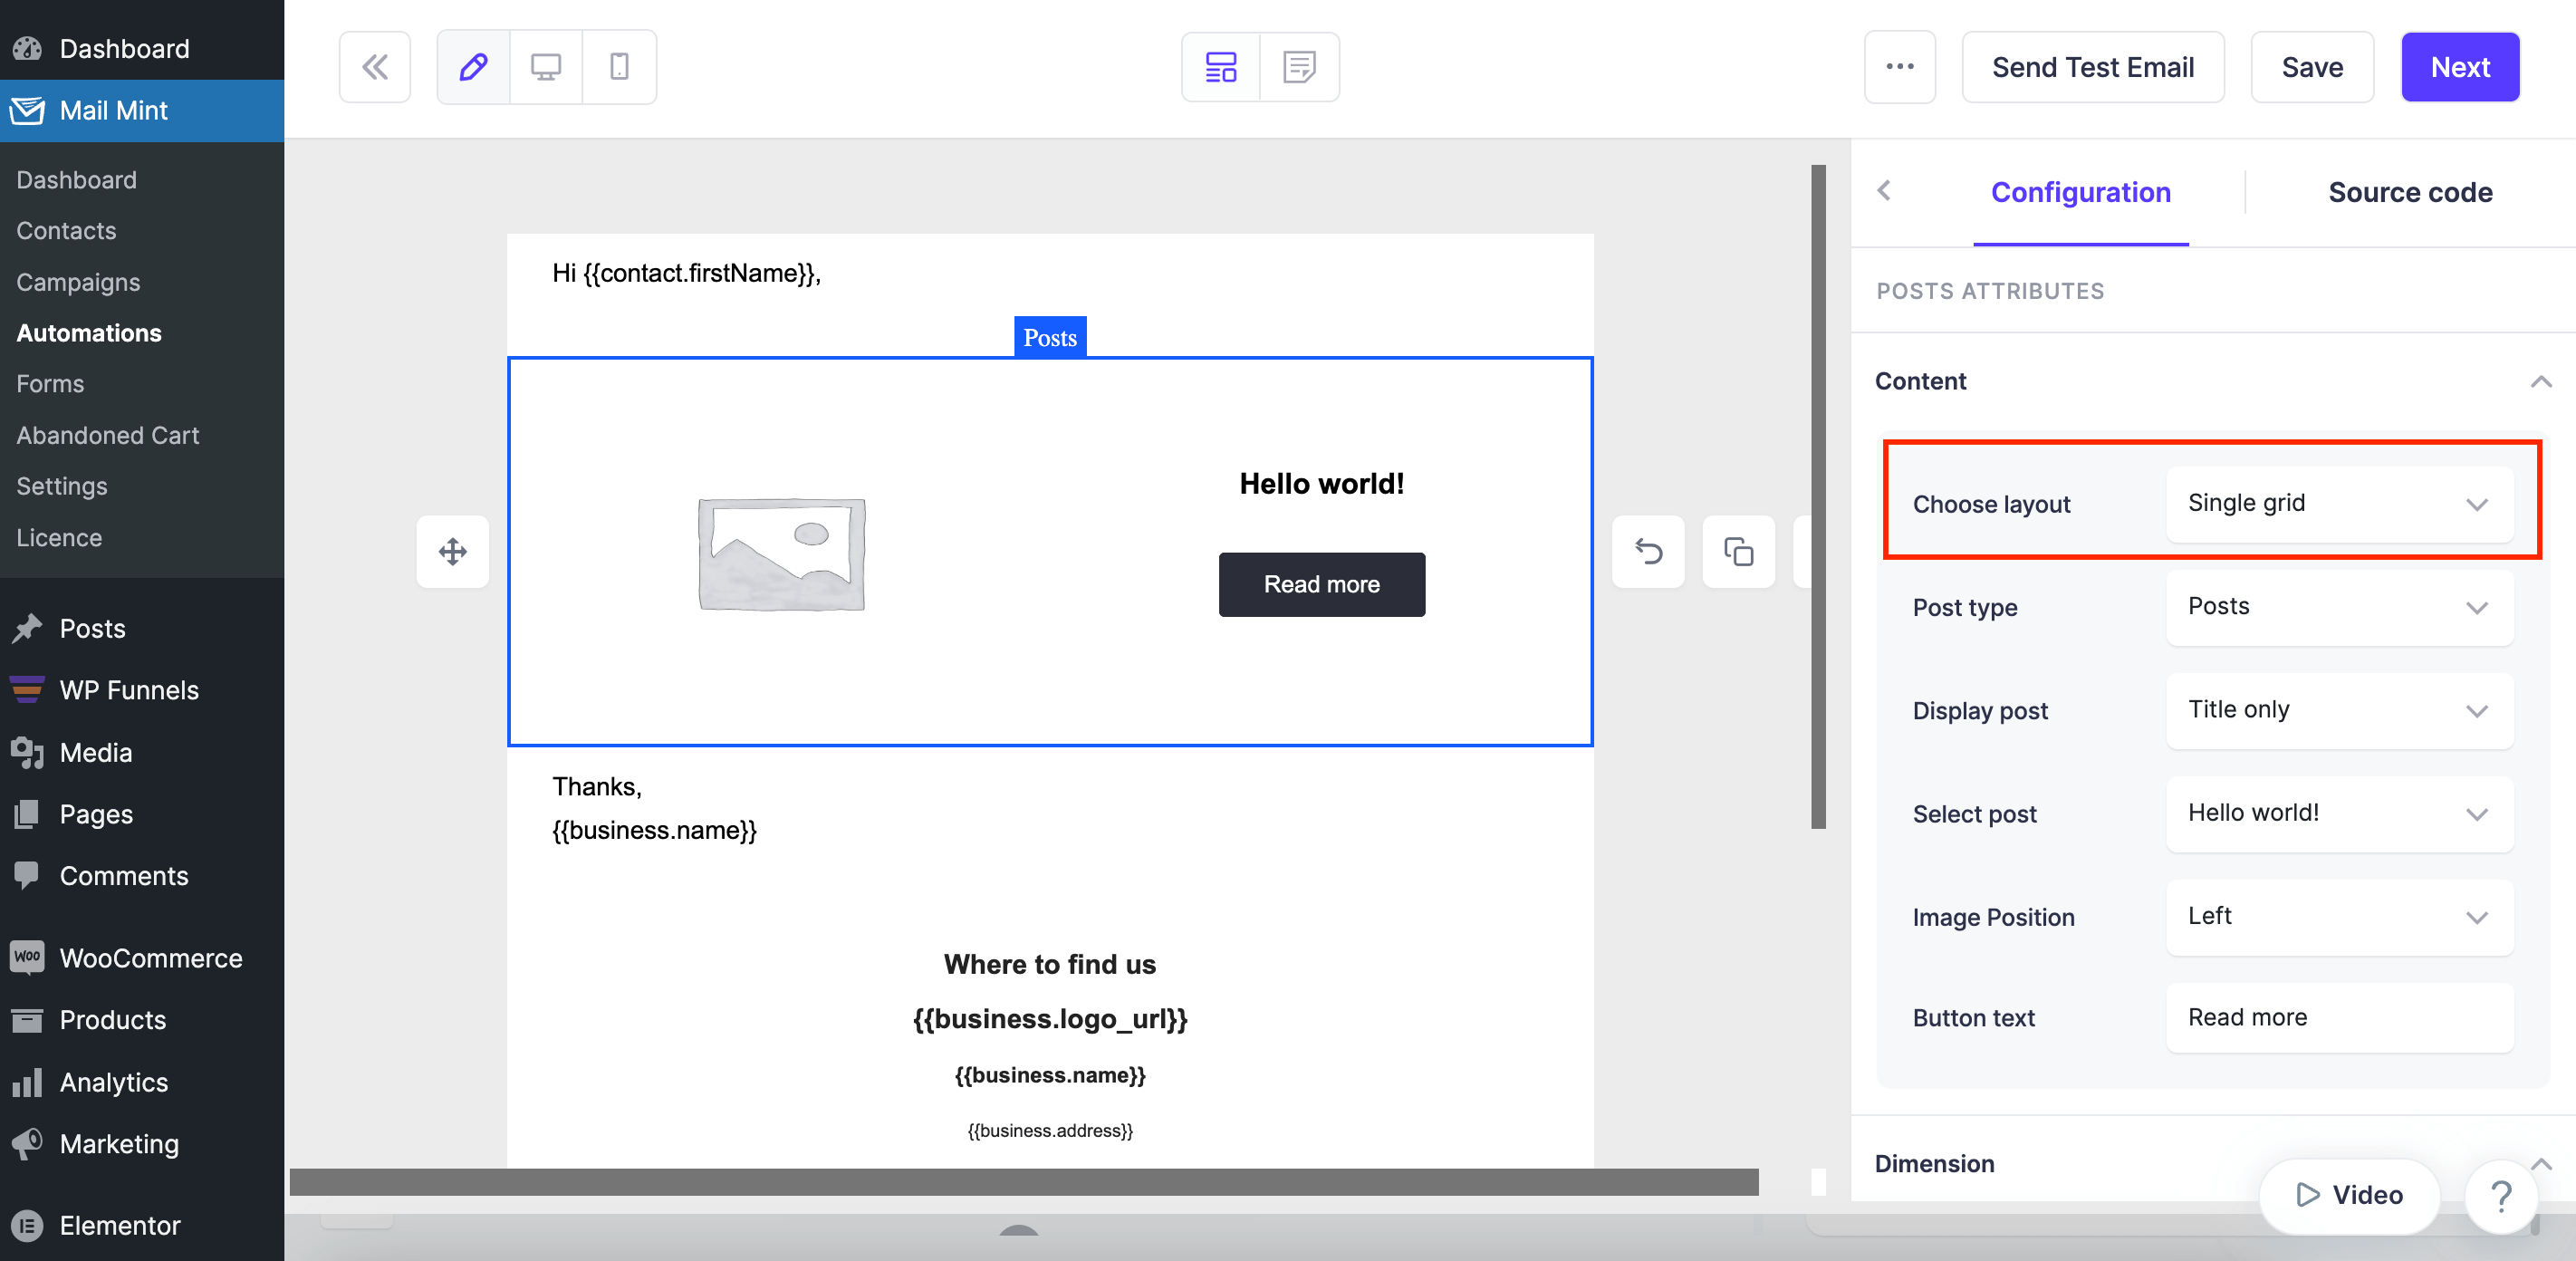
- Single grid layout
- Three column layout
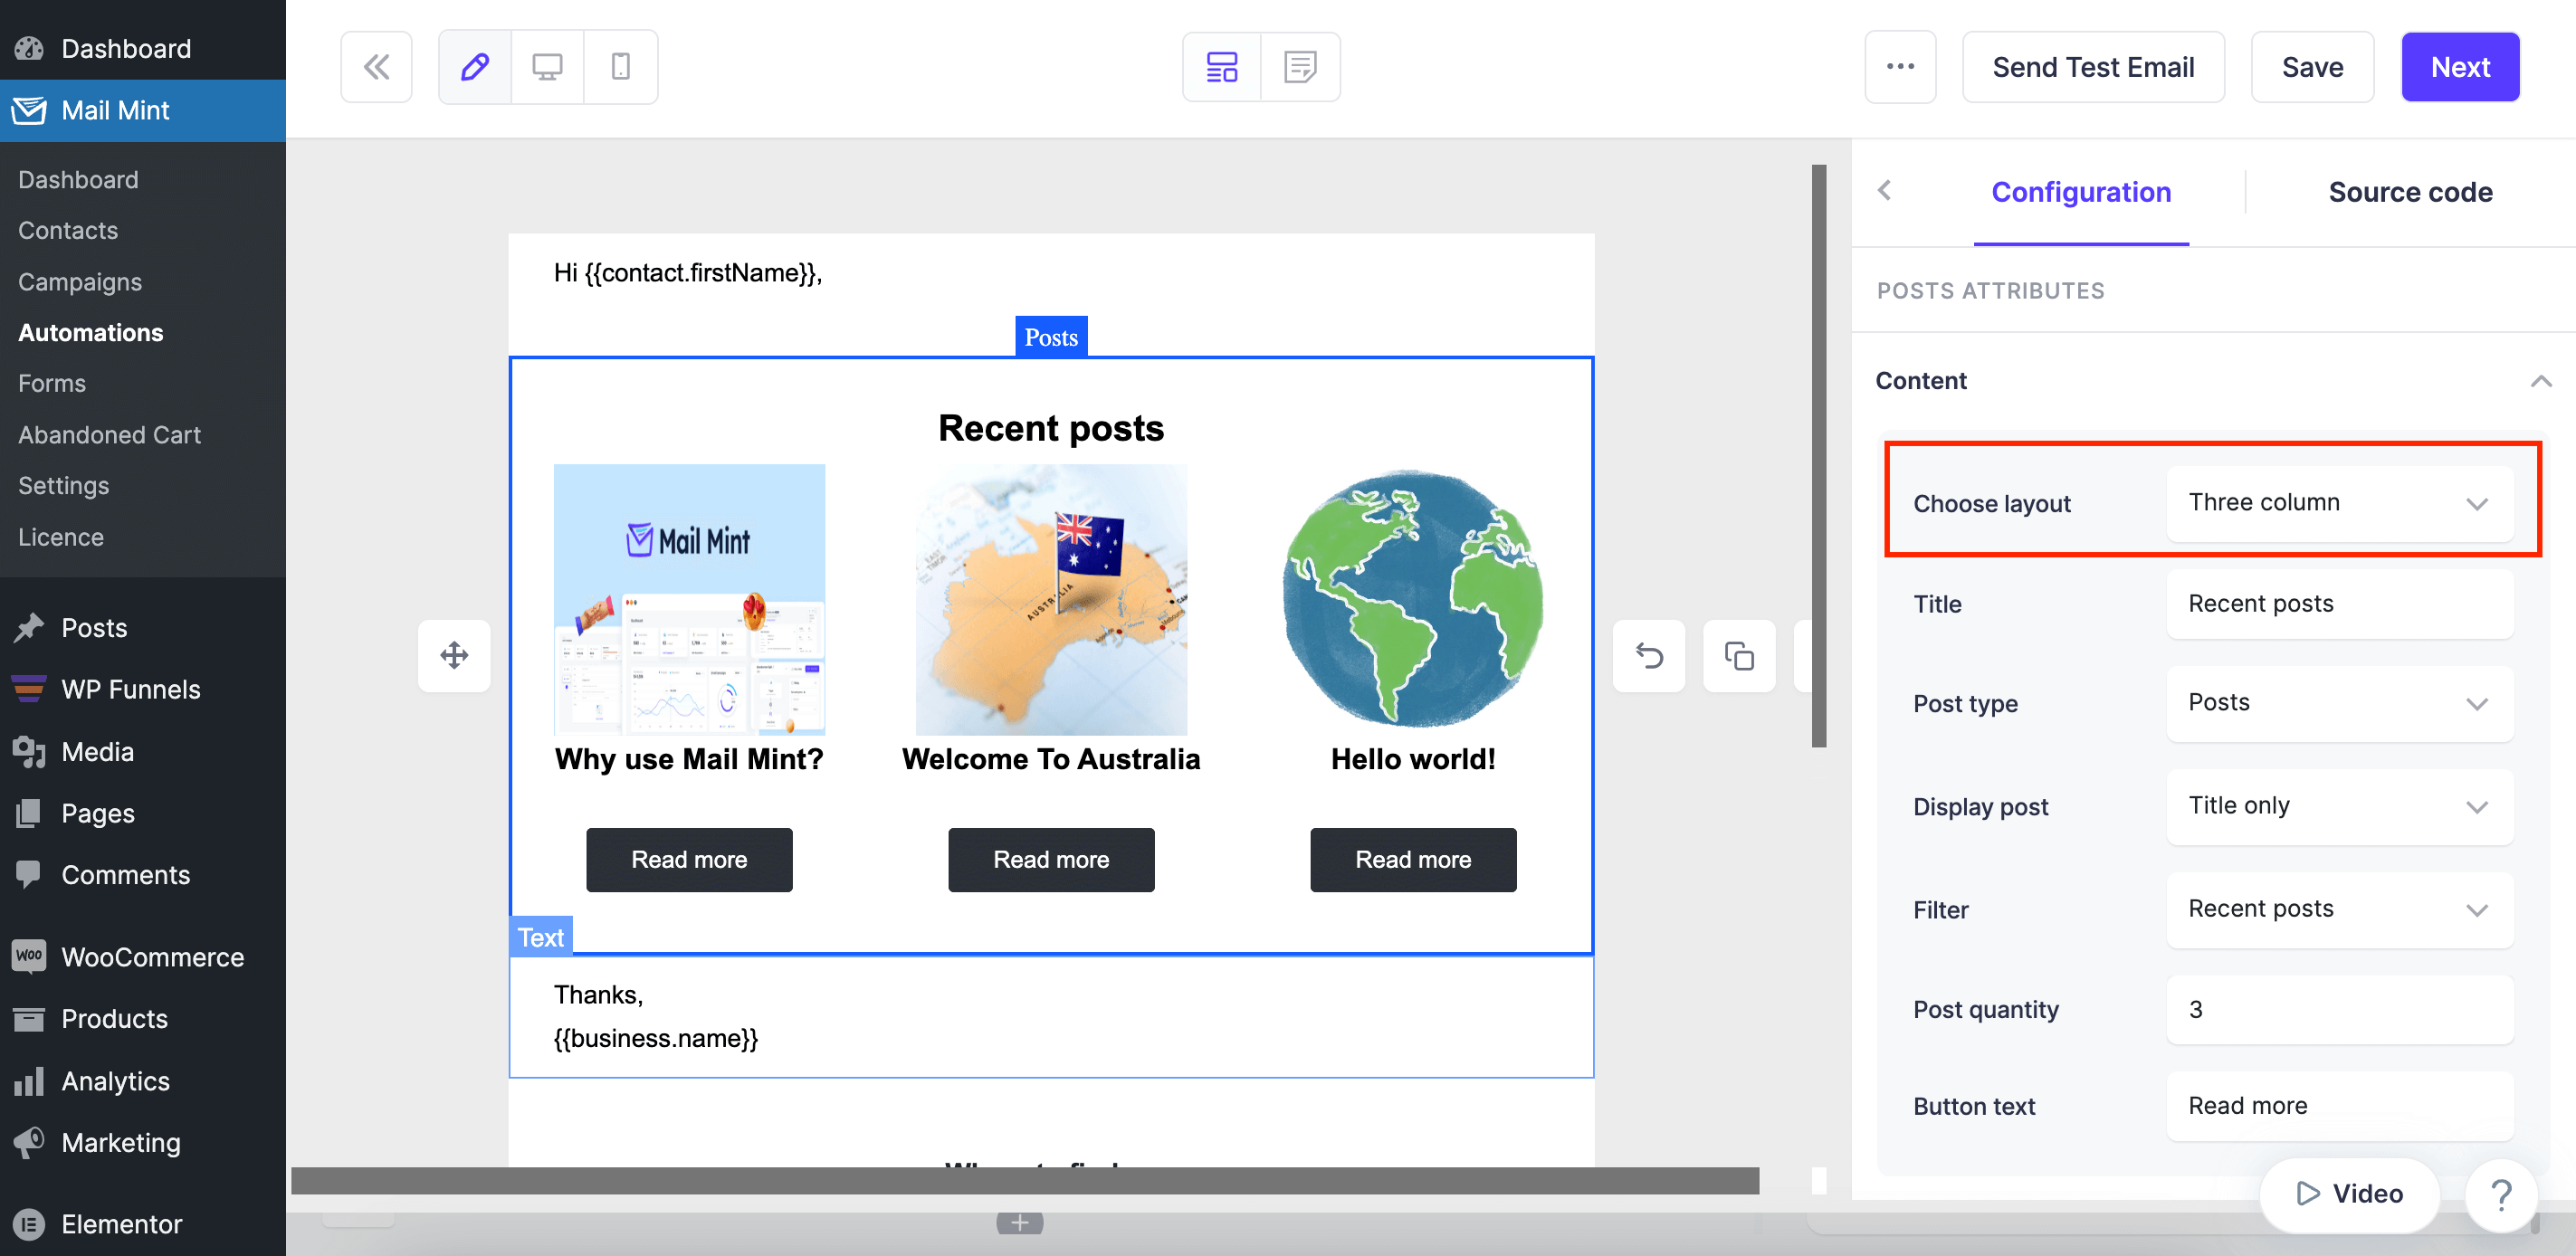
2. Then you will get options to select Post Type
3. If you use Three Column Layout, you will get options to Filter your Post.
- Specific Post
- Posts by category
- Recent Posts
3. Then choose the Specific Post or the Category you want to show.
4. You can choose Post Quantity, which means how many posts you want to show.
5. Configure the rest of the content section and move on to the next section.
Configure Dimension
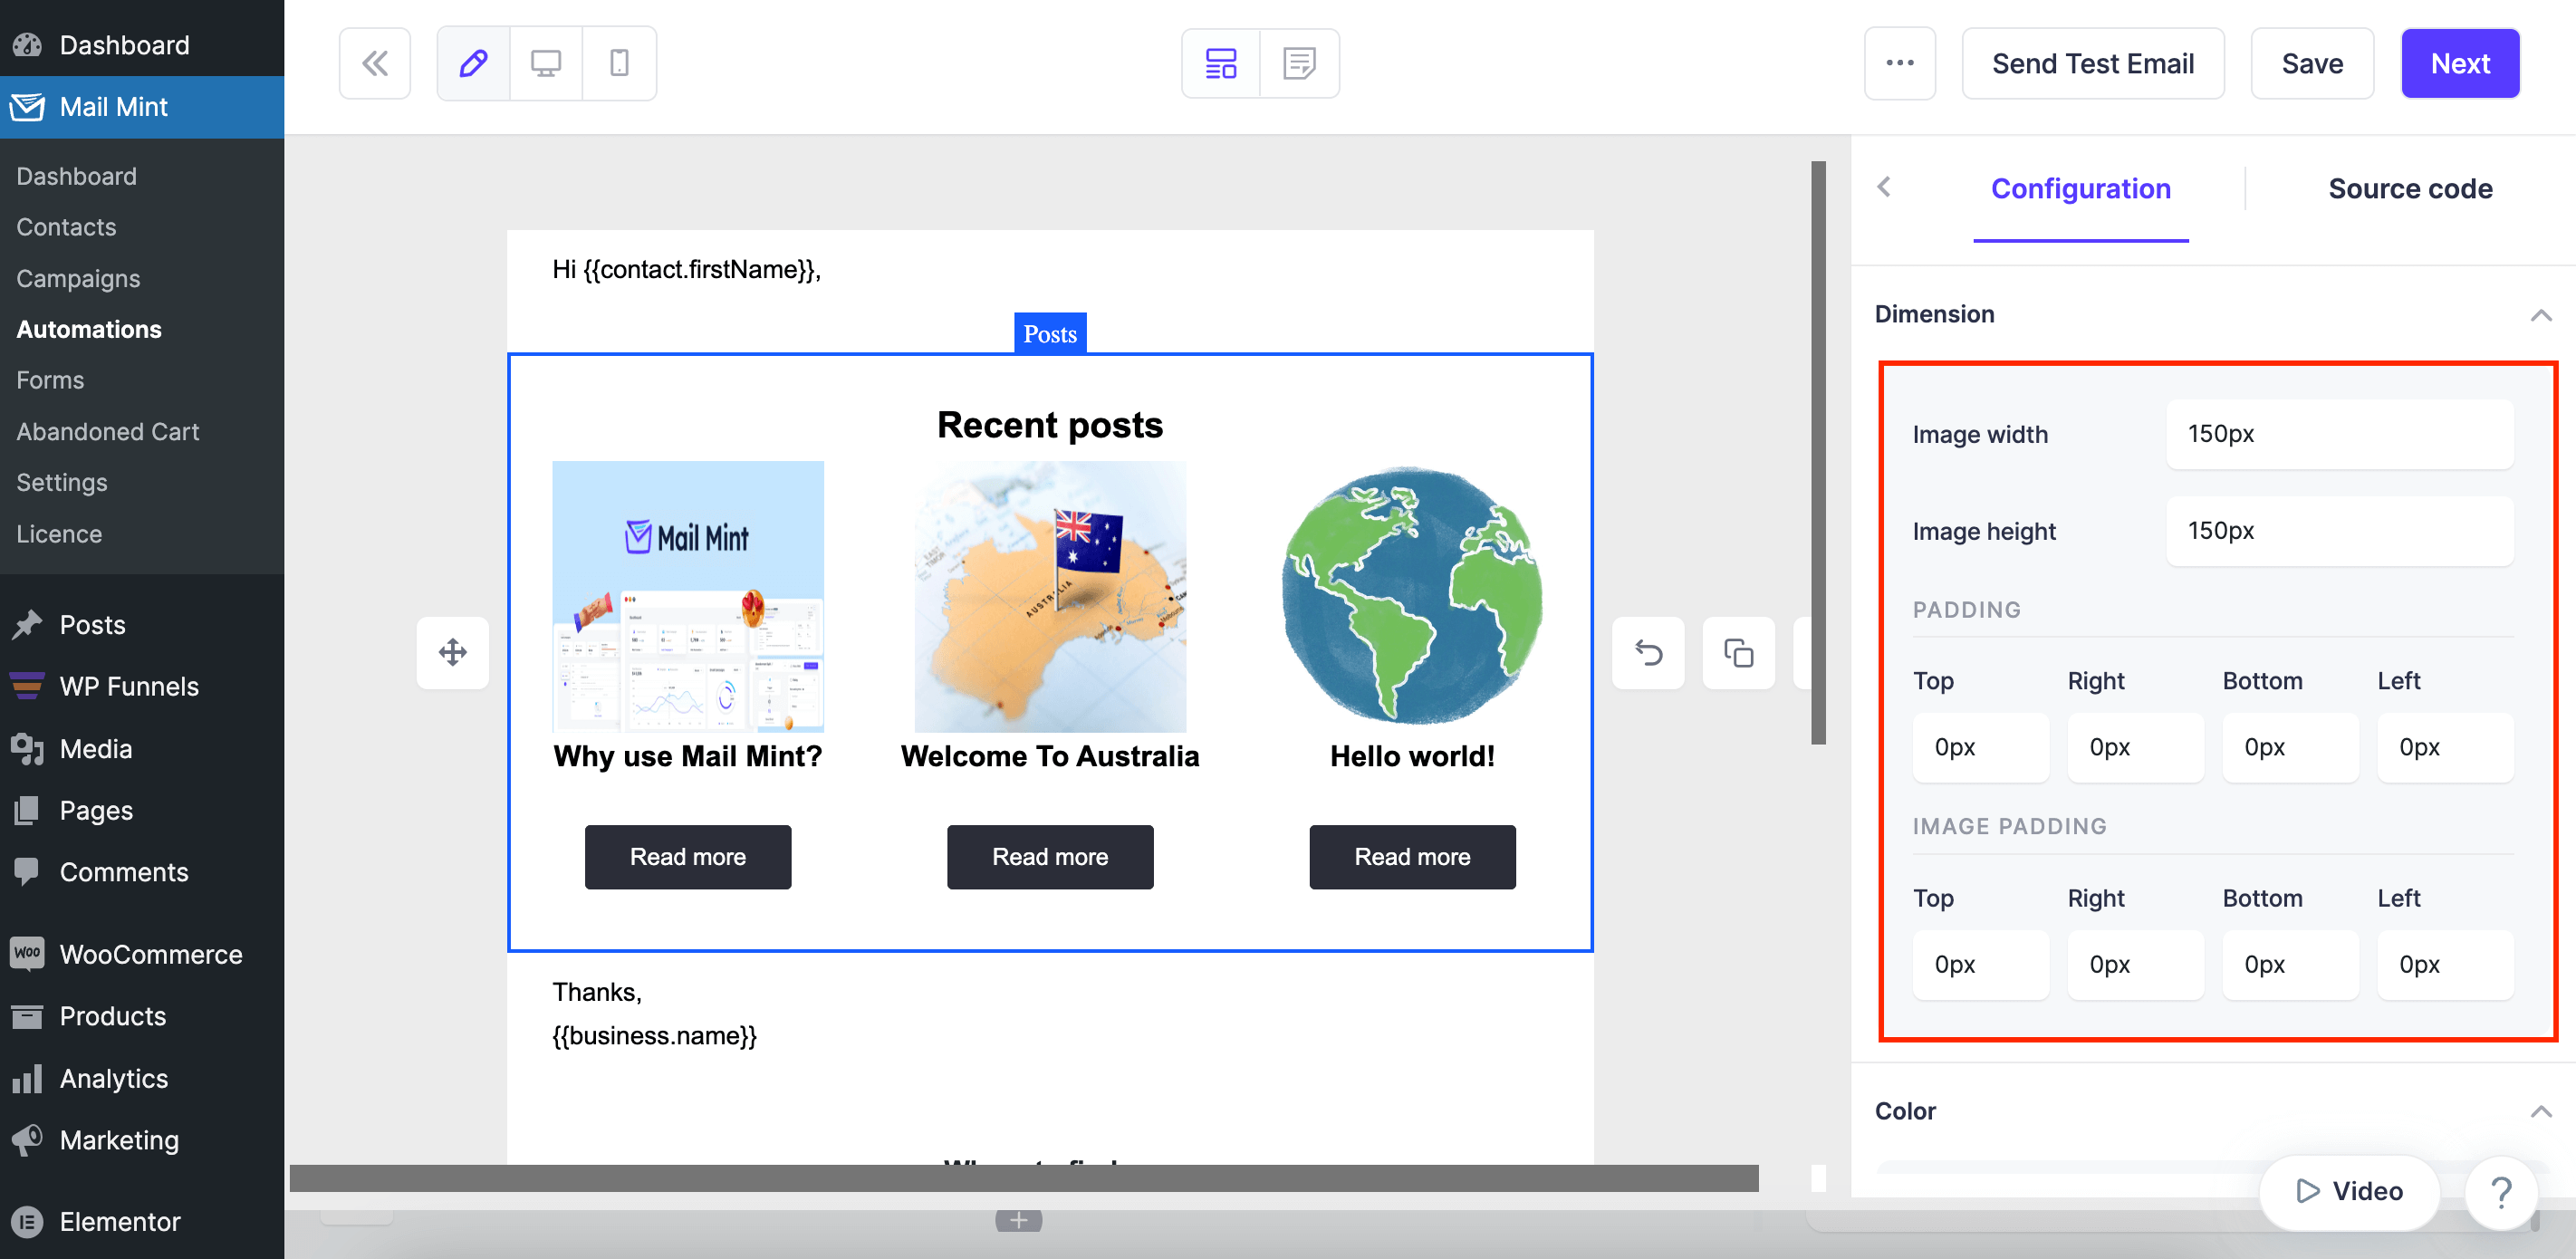
Next, you can configure the Dimensions for the Post block.
Configure Color
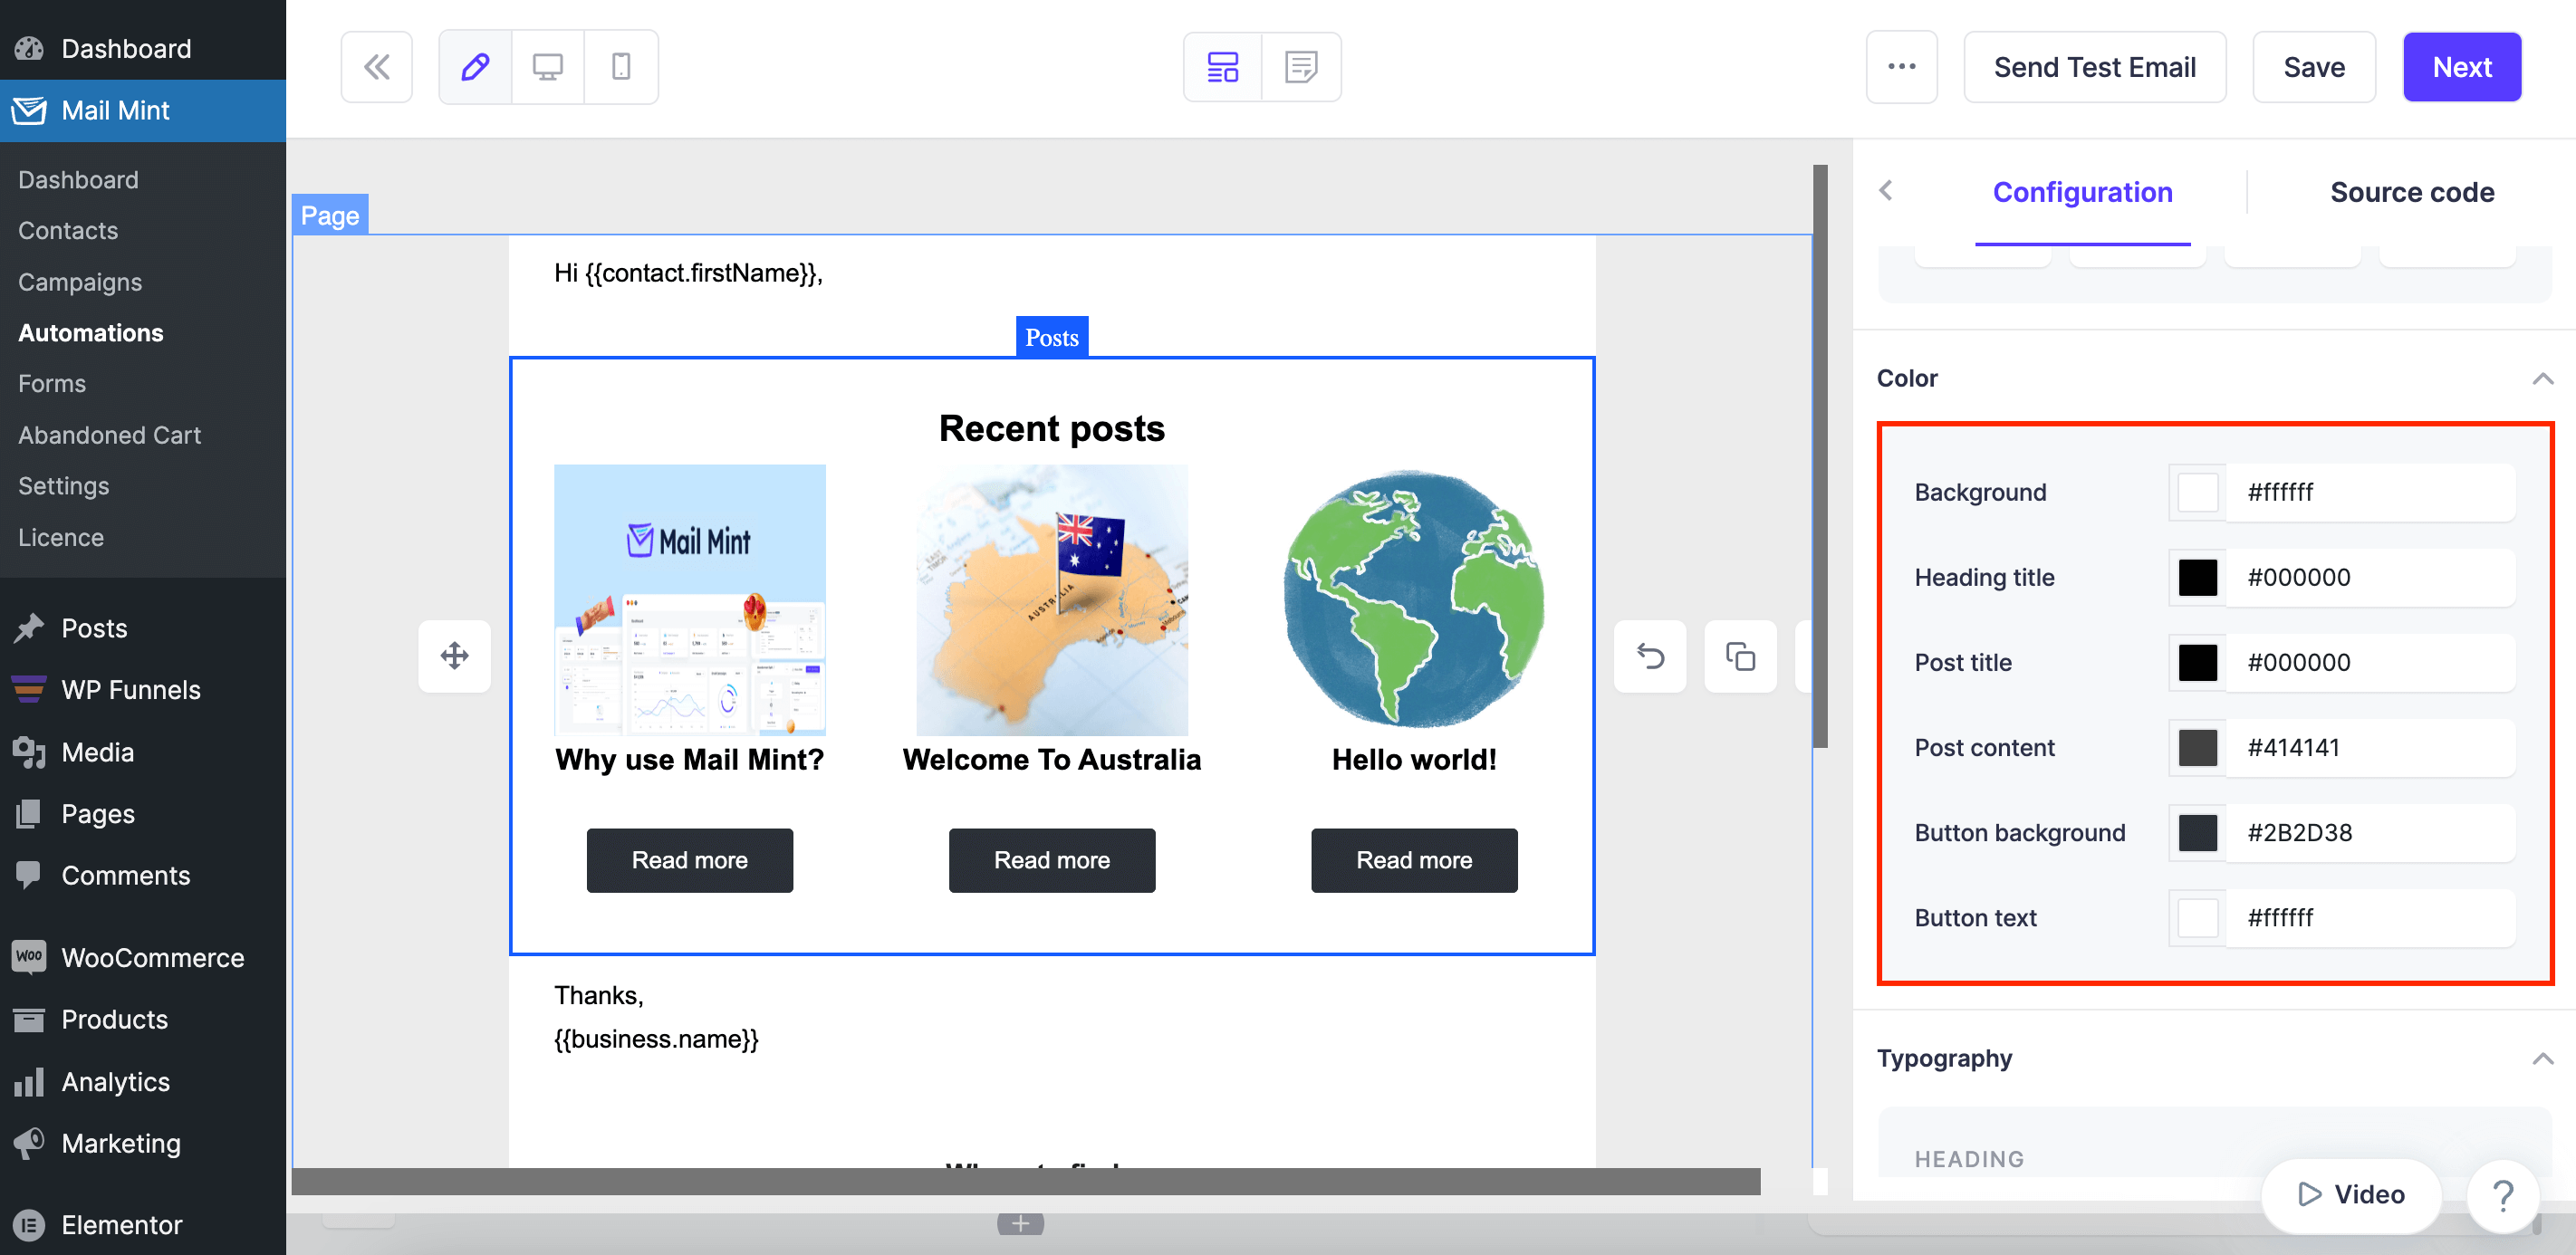
Moving on, customize the colors for your Post block.
Configure Typography
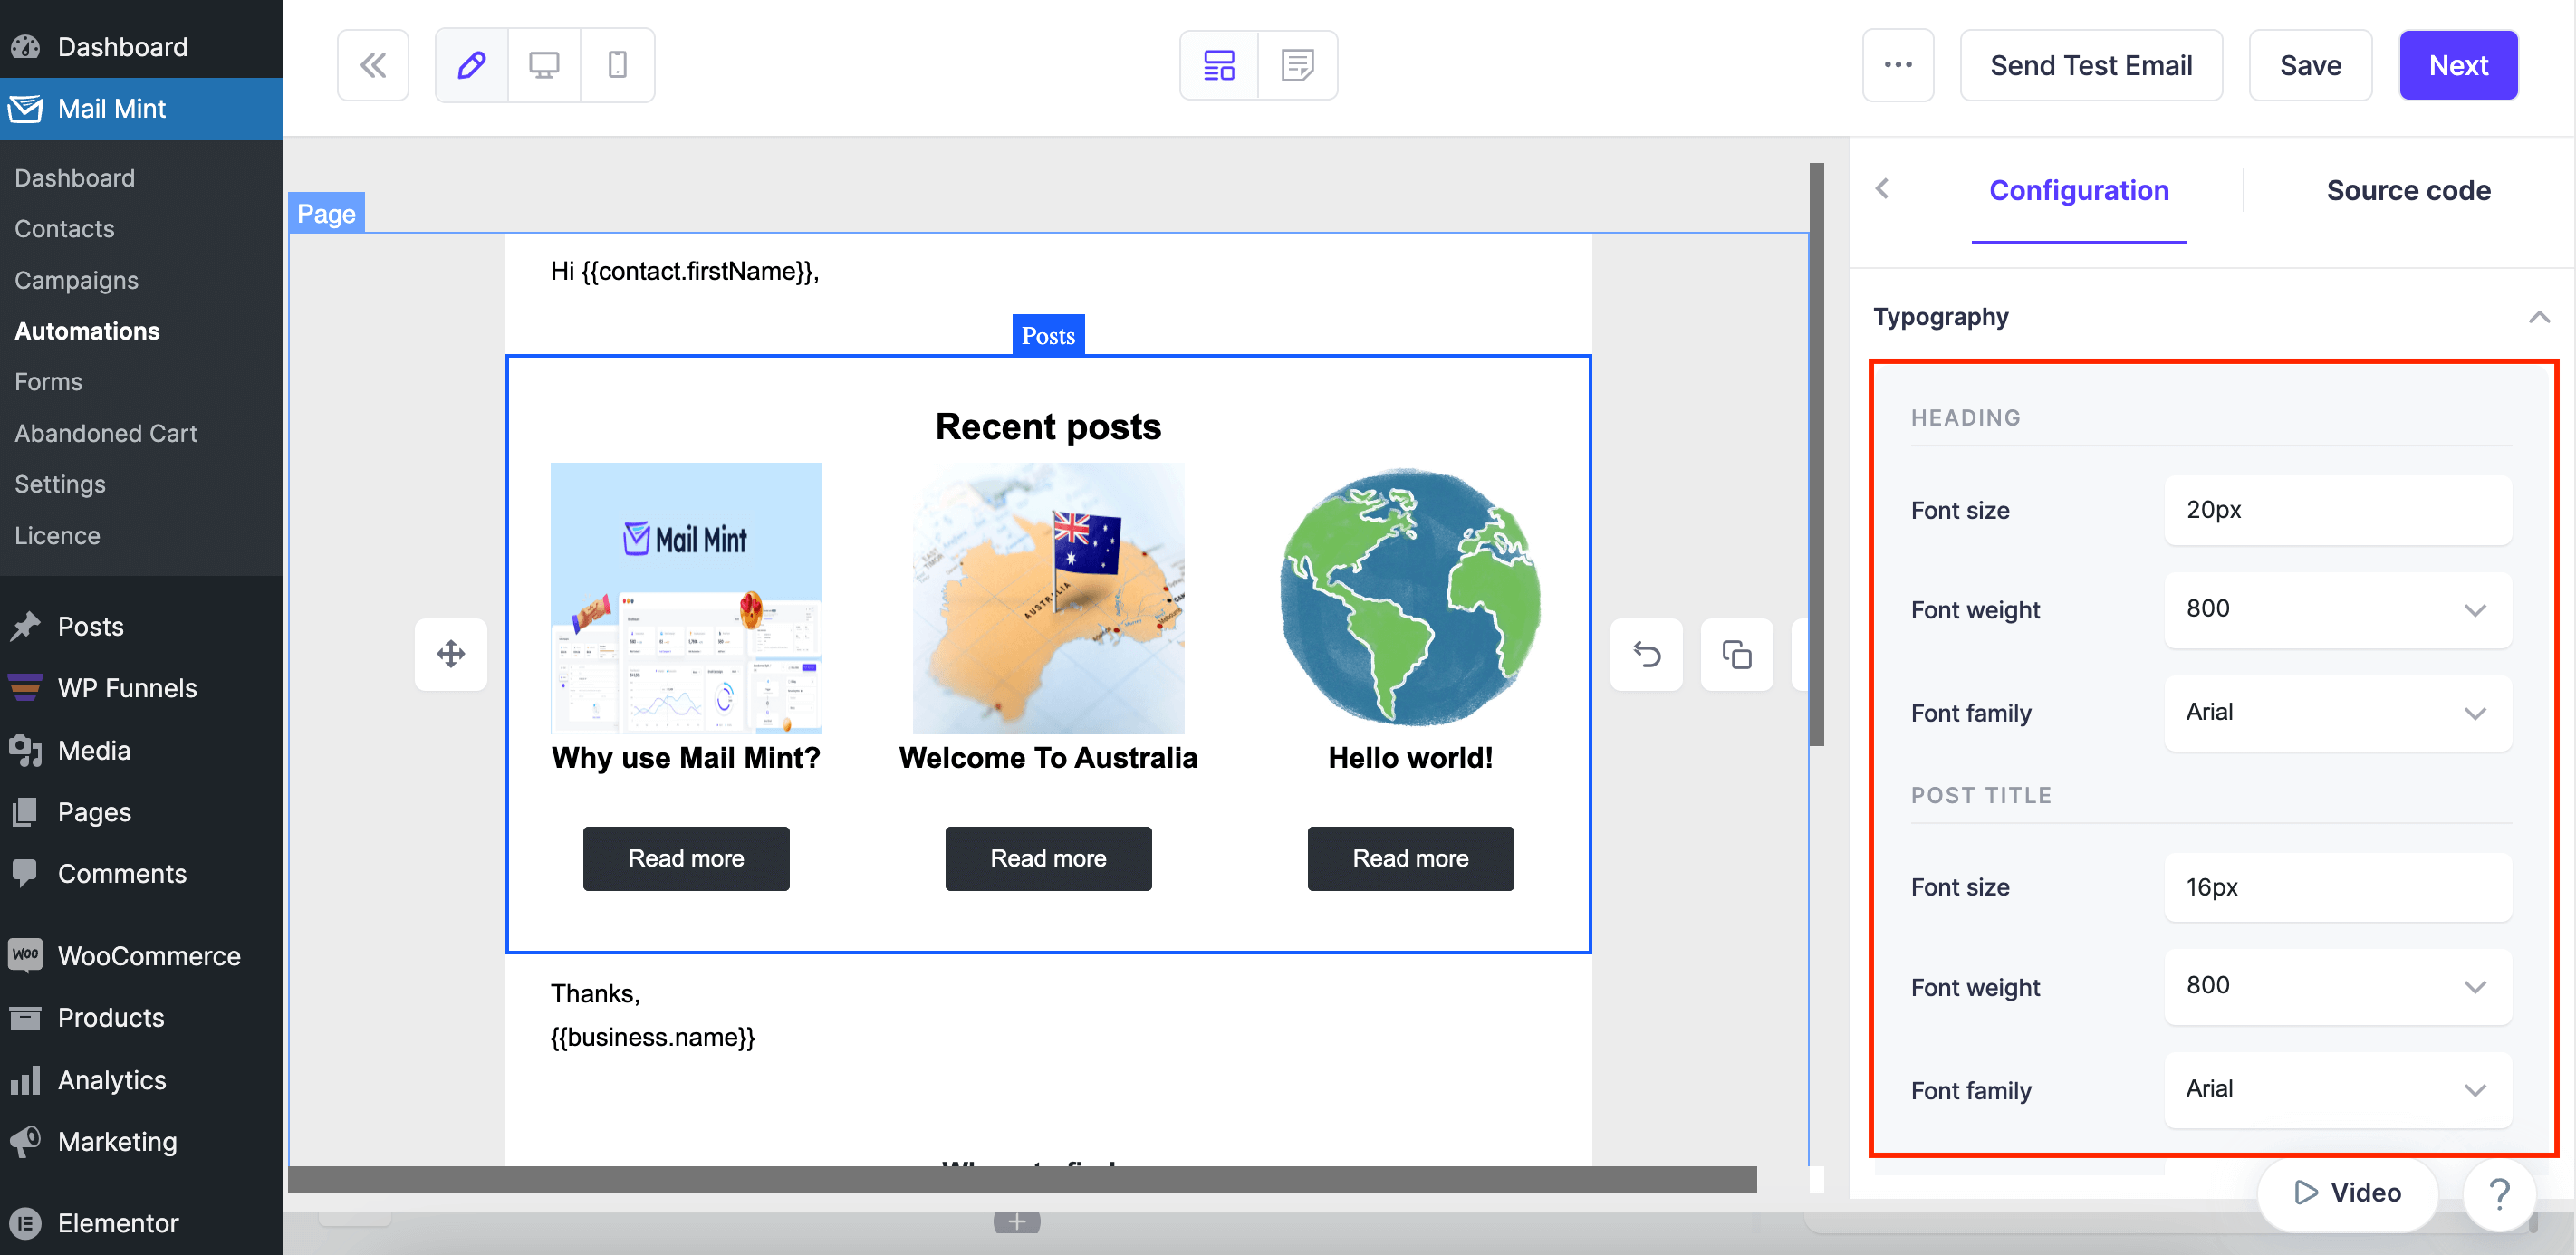
At the end, customize the Typography and your Post block is ready.
That’s it, your Post updates are ready to roll out.
Click on Save to save the changes you made or click on Next to exit the email builder.


