On the Settings tab, you’ll find all the settings for your Email campaigns, Forms, Automation, and for the entire plugin.
1. Business Settings
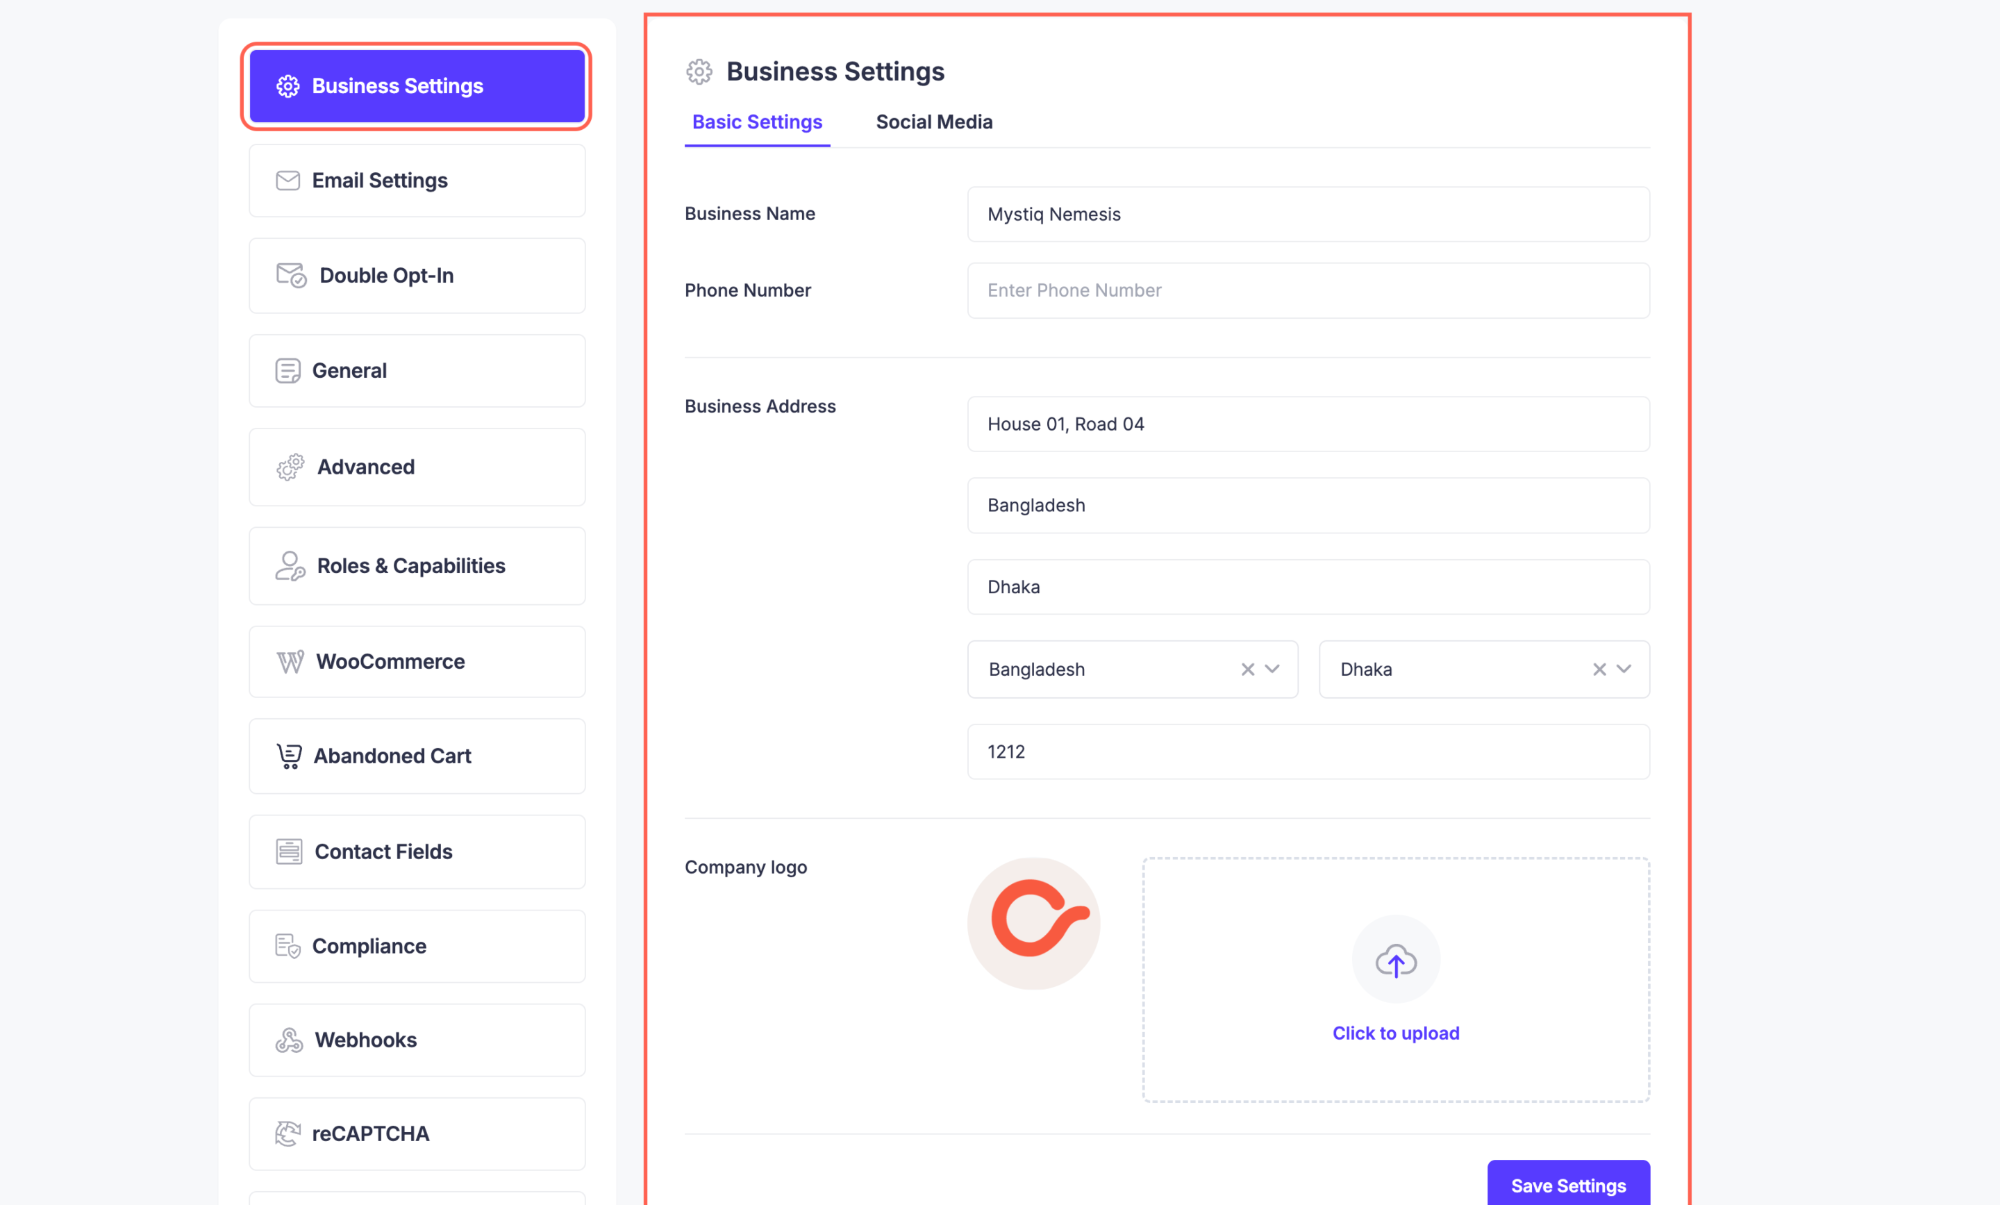
Here you’ll set the Basic Details of your business:
- Business Name.
- Phone Number.
- Business Address.
- Your Logo.
You can also set up your Social Media Profiles here.
2. Email Settings
The Email Settings section allows you to configure how your emails are sent and tracked. These settings ensure proper delivery, response handling, and email reputation management.
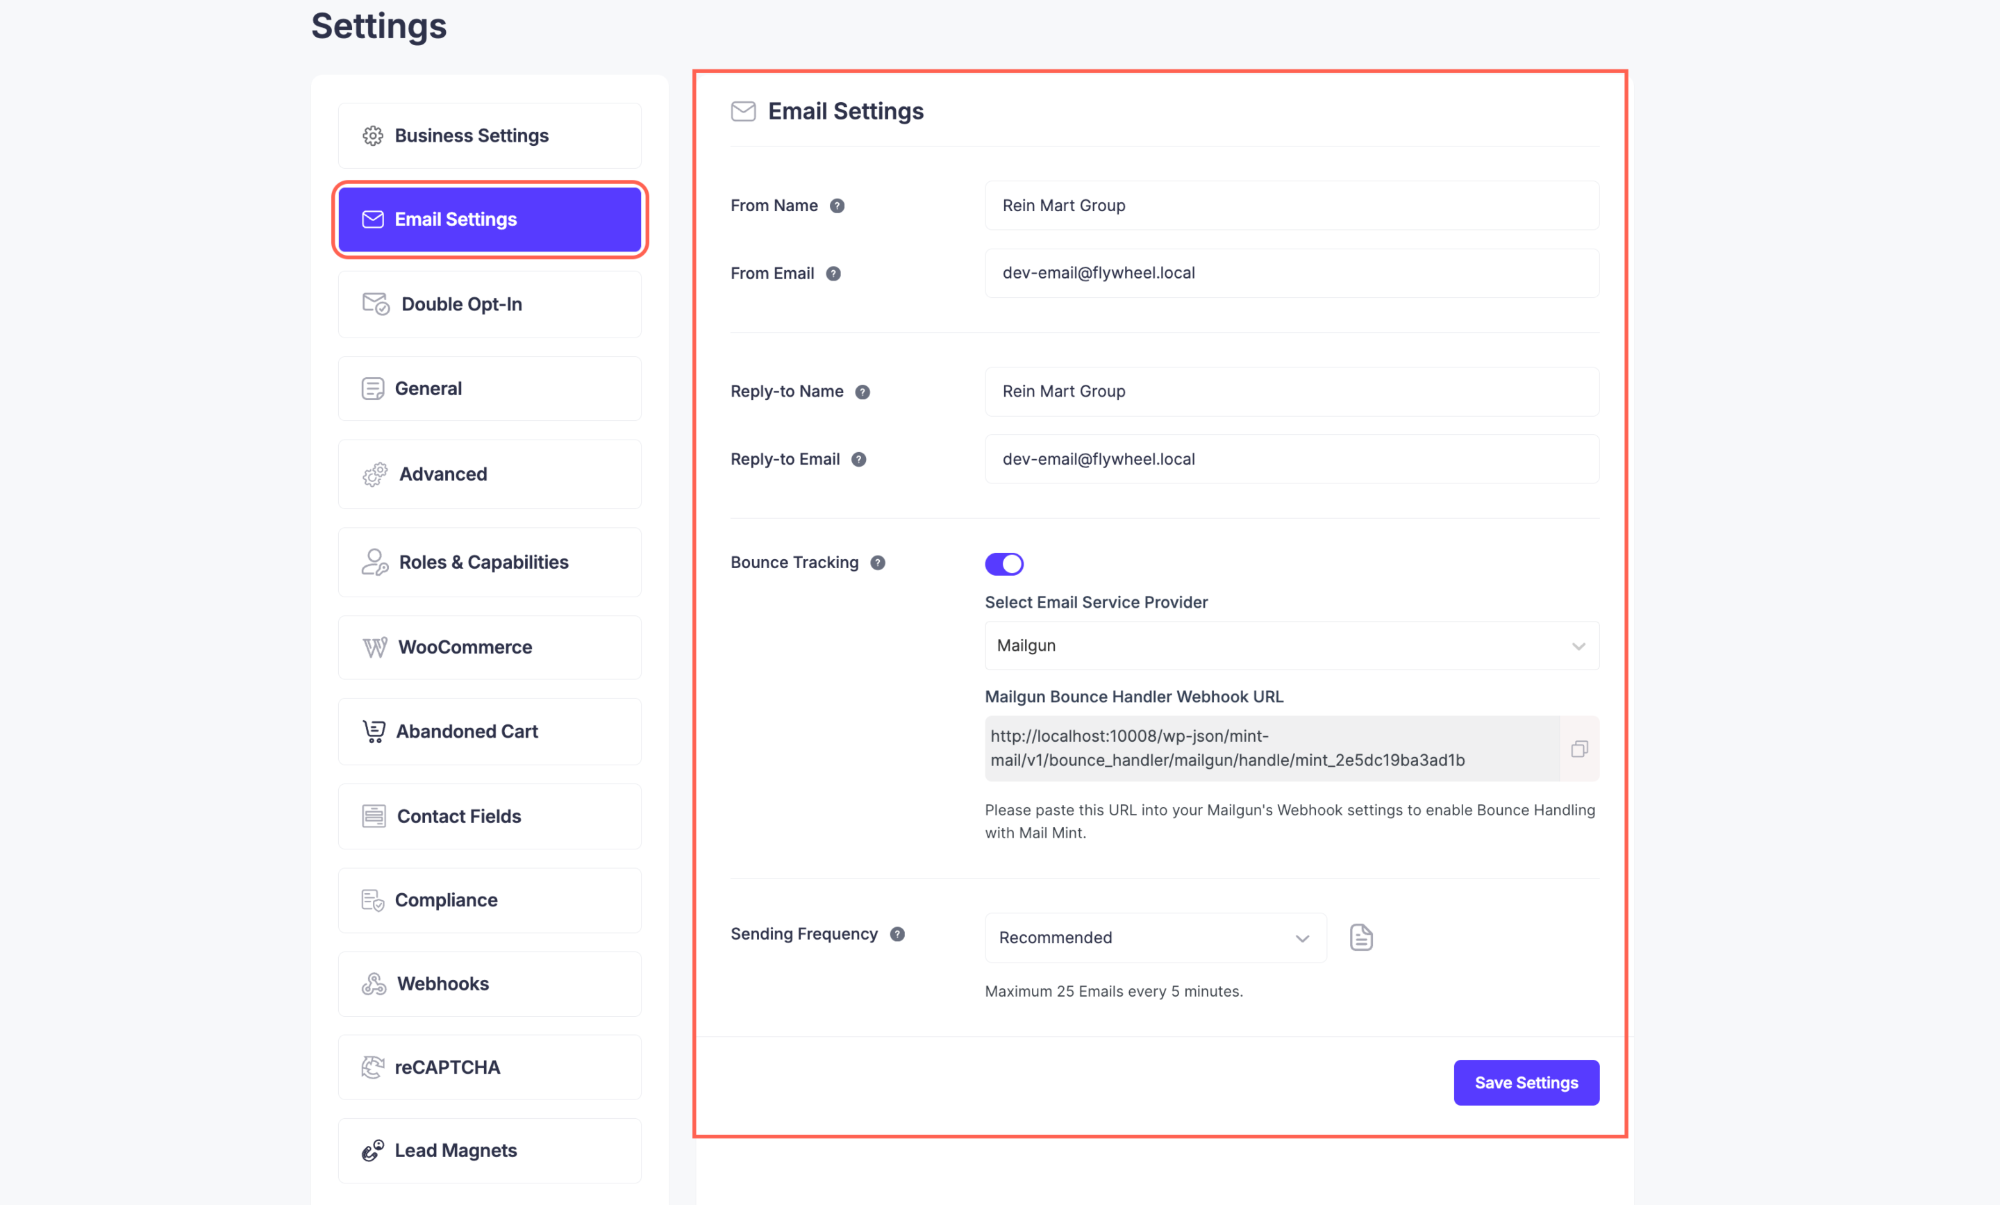
In this Email Settings tab, you can set these for all of your campaigns:
- From Name: Name that appears as the sender of your emails.
- From Email: Email address from which campaigns are sent.
- Reply-to Name: Name shown when recipients reply.
- Reply-to Email: Email address where replies are received.
- Bounce Tracking: Enable tracking of bounced or undeliverable emails.
- Sending Frequency: Maximum 25 emails every 5 minutes (recommended).
- Save Settings: Click to save all changes made.
3. Double Opt-in Settings
In this section, you can set up a simple confirmation email for your subscribers and obtain permission from your users to contact them in the future.
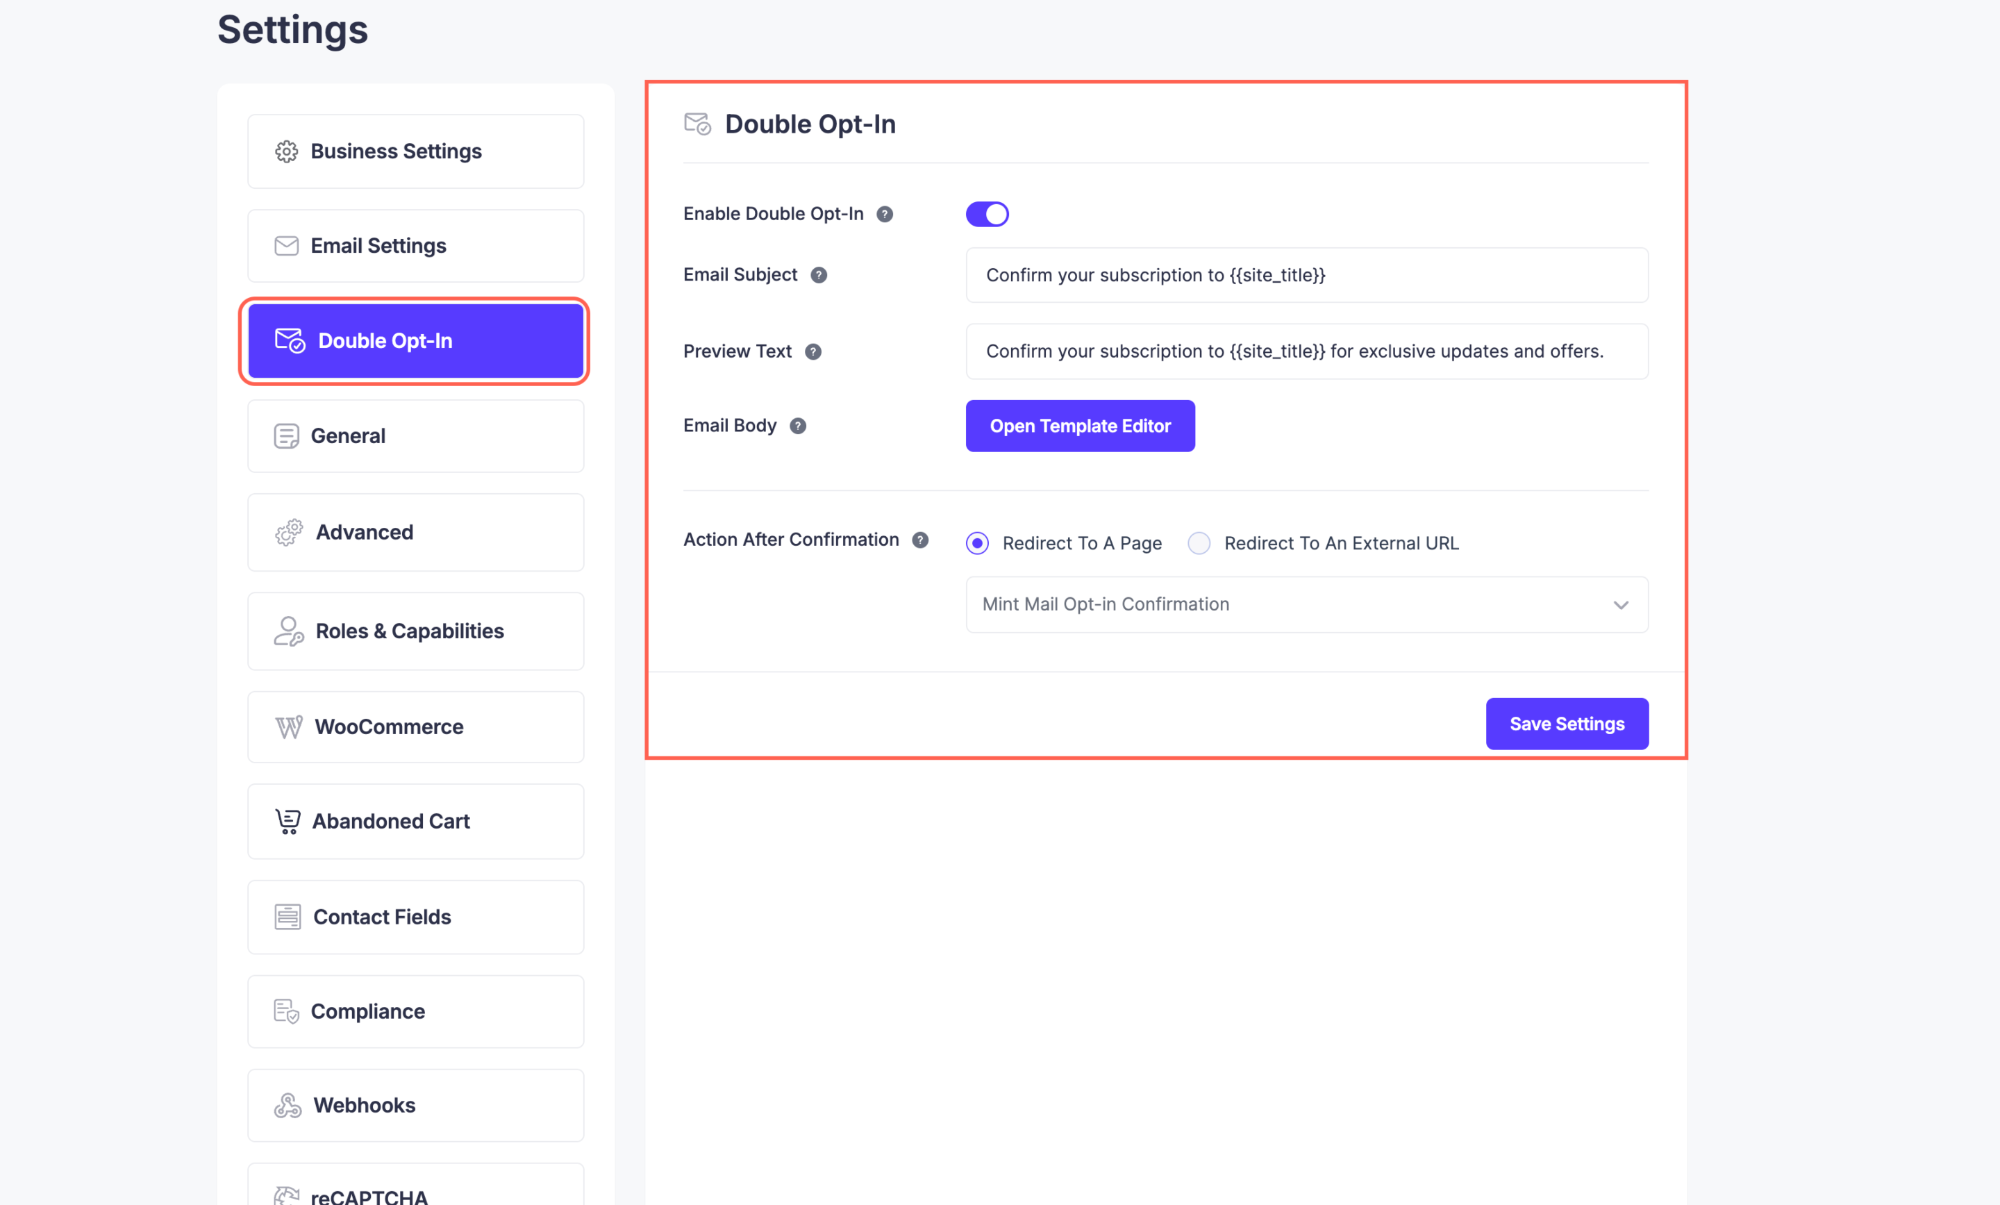
For this, you can use:
- Enable Double Opt-In: Turn on to send a confirmation email to new subscribers.
- Email Subject: Subject line for the opt-in confirmation email.
- Preview Text: Short text shown in the email preview.
- Email Body: Content of the confirmation email.
- Open Template Editor: Edit the email template visually.
- Action After Confirmation: Choose what happens after confirmation.
- Redirect to a page: Send users to an internal page.
- Redirect to an external URL: Send users to an external link.
- Mint Mail Opt-in Confirmation: Enable sending the confirmation via Mail Mint.
4. General Settings
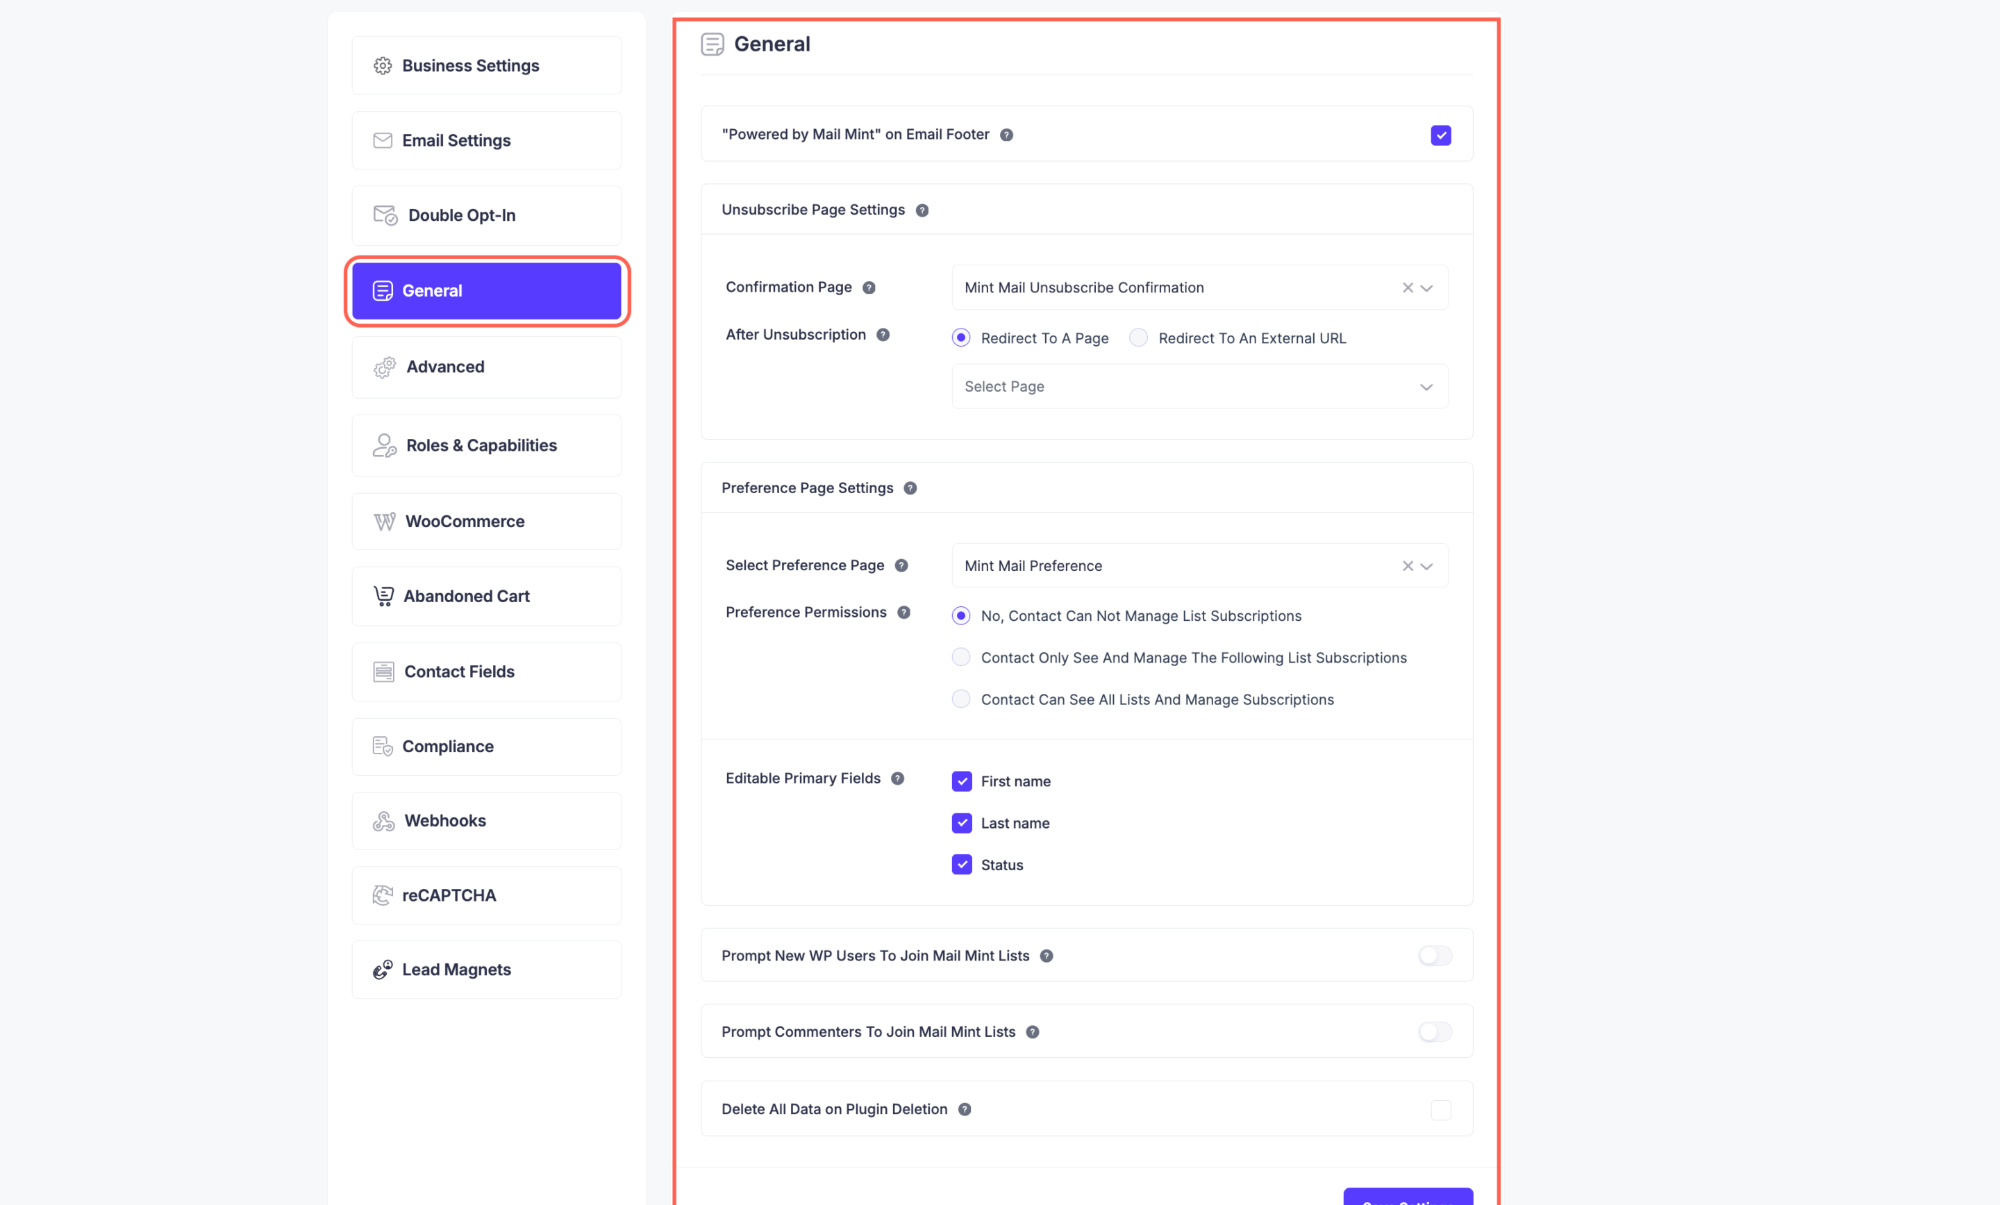
The General Settings tab has all the Advanced Options that you can change & optimize in your favor.
5. Advanced Settings
Here, you can manage plugin cache, delete transients, and enable or disable 3rd-party libraries.
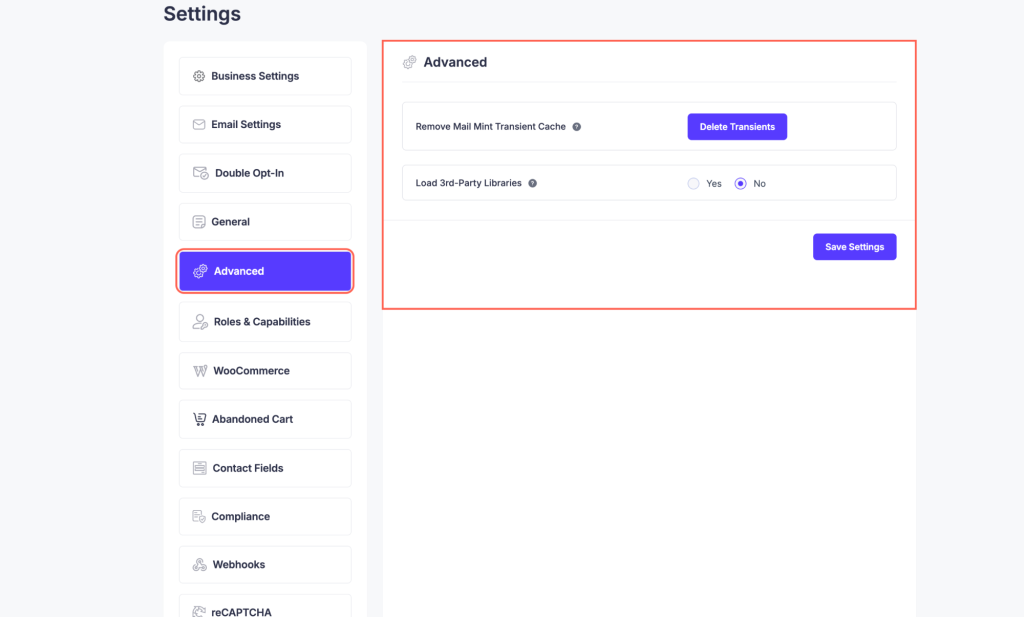
- Remove Mail Mint Transient Cache: Clear cached plugin data.
- Delete Transients: Delete all stored transients.
- Load 3rd-Party Libraries: Enable or disable external libraries (Yes / No).
- Save Settings: Click to save changes.
6. Roles & Capabilities
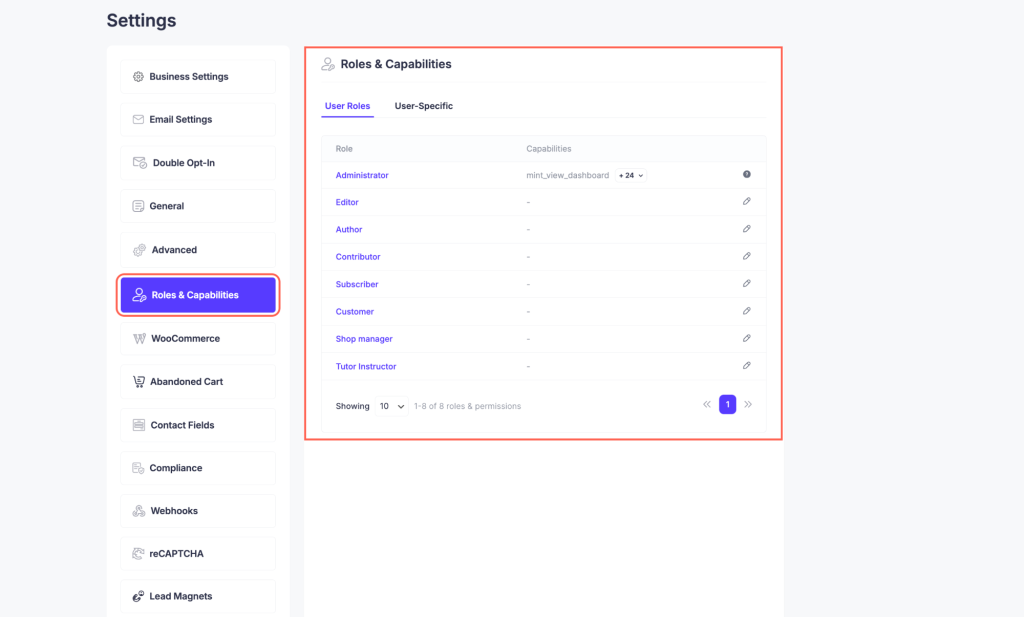
In Mail Mint, you can manage user roles and their permissions to control access and actions within the plugin. The Administrator role has full access, including mint_view_dashboard and 24 additional capabilities.
Other roles, such as Editor, Author, Contributor, Subscriber, Customer, Shop Manager, and Tutor Instructor, have limited or no permissions by default. You can view and adjust the capabilities for each role to ensure appropriate access. Currently, there are 8 roles, and their permissions are displayed.
7. WooCommerce
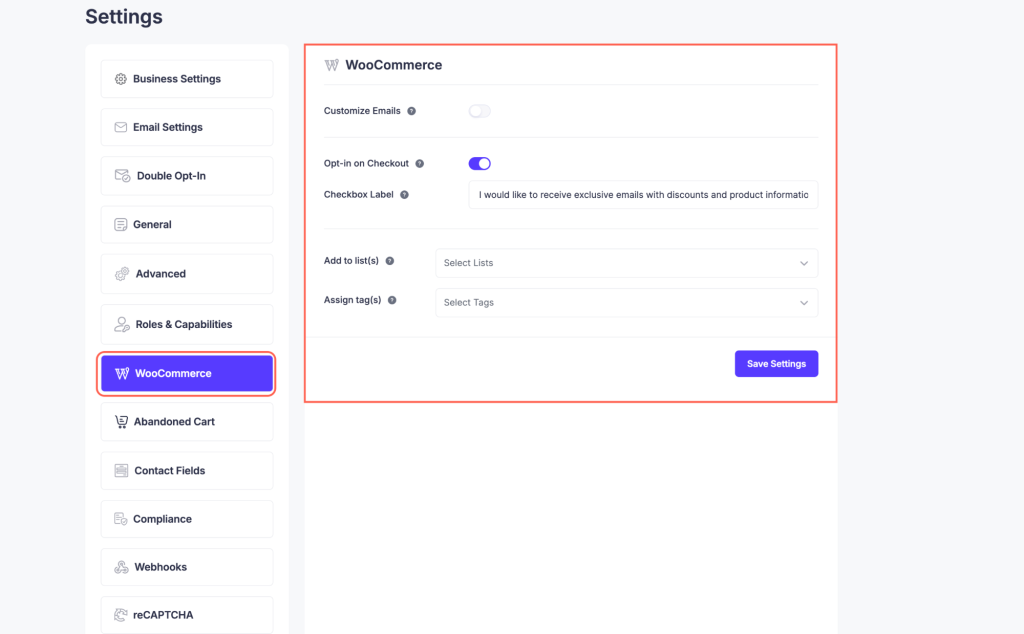
In Mail Mint, you can customize emails and enable Opt-in on Checkout to collect subscribers during the purchase process.
Add a checkbox with a label such as, “I would like to receive exclusive emails with discounts and product information” in the checkout page. You can assign subscribers to specific lists and tags for better segmentation and targeted email campaigns.
8. Abandoned Cart
Track and manage abandoned carts to send timely email reminders while complying with GDPR.
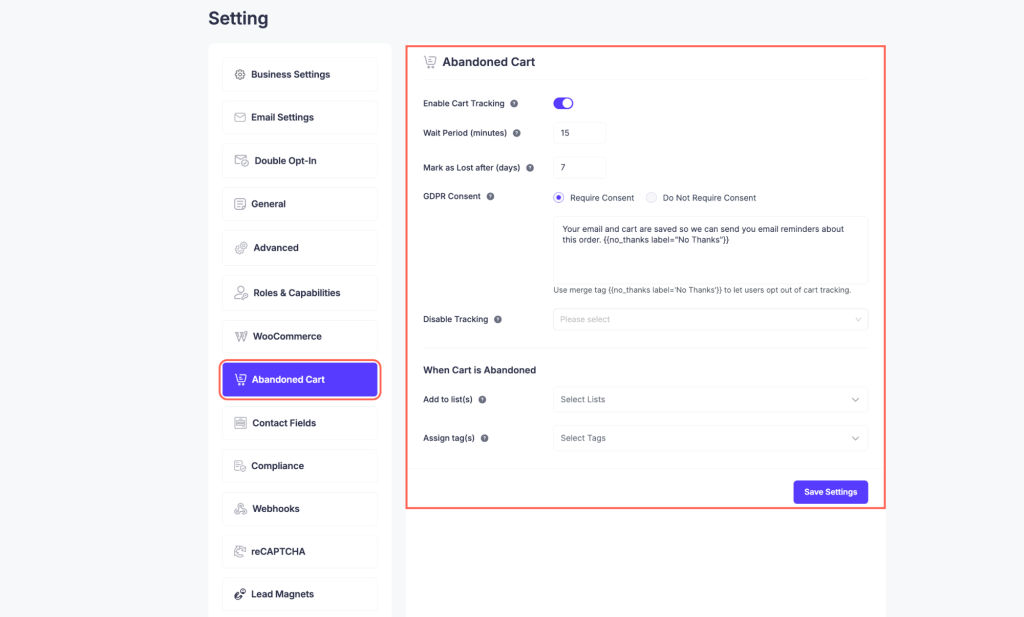
Here you will find different options like;
- Enable Cart Tracking: Activate to track abandoned carts and send reminders to users.
- Wait Period (minutes): Set how long to wait before considering the cart abandoned (default: 15 minutes).
- Mark as Lost after (days): Automatically mark carts as lost after a specified number of days (default: 7 days).
- GDPR Consent: Choose whether to require user consent before saving their email and cart details.
- Example consent text: “Your email and cart are saved so we can send you email reminders about this order.”
- Use the merge tag
{{no_thanks label='No Thanks'}}to allow users to opt out of cart tracking.
- Disable Tracking: Option to disable cart tracking under specific conditions.
- Add to list(s) / Assign tag(s): Assign users to specific lists or tags for follow-up emails.
This setup ensures abandoned carts are effectively tracked and users receive timely email reminders while complying with GDPR.
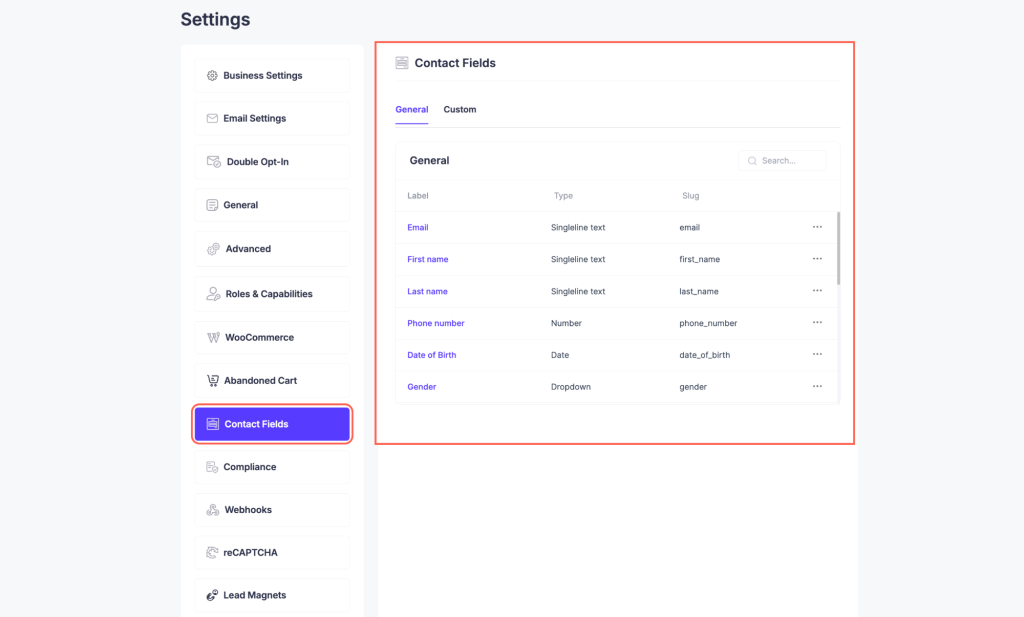
9. Contact Fields
Mail Mint allows you to manage both general and custom fields for your subscribers. These fields help you collect and organize information about your contacts efficiently. Here, you will find different contact fields available by default, which you can use or customize according to your needs.
10. Compliance Settings
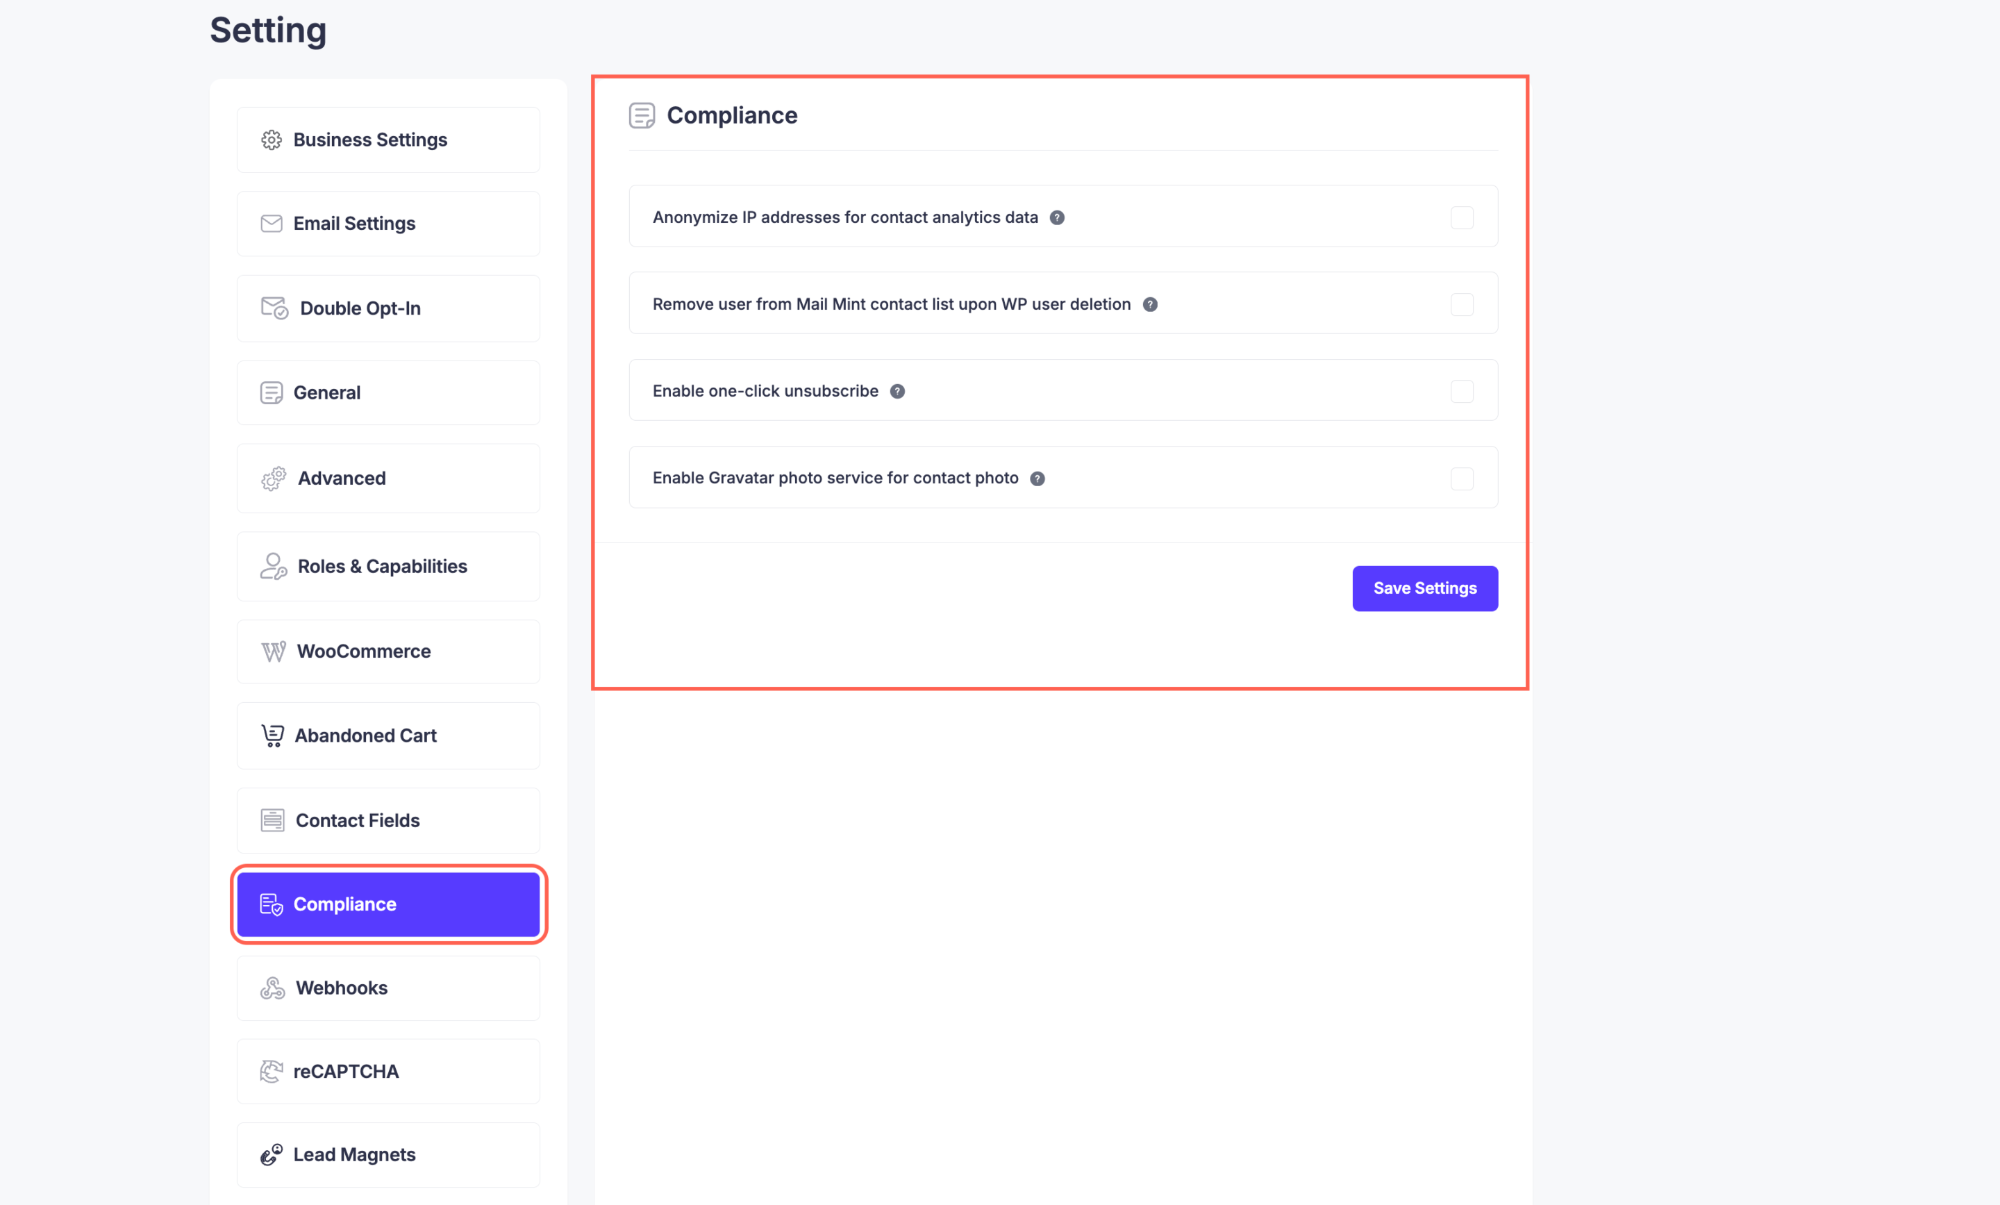
In this section, you can manage privacy and data protection options for your contacts. You can:
- Anonymize IP addresses for contact analytics data
- Remove users from the Mail Mint contact list upon WordPress user deletion
- Enable one-click unsubscribe for easy opt-out
- Enable Gravatar photo service to display contact photos
These settings help ensure GDPR compliance and improve contact data management.
11. Webhook Settings
In this section, you can create and manage webhooks to integrate Mail Mint with other applications. You can:
- Add Webhook – Create a new webhook for automation
- Title – Give a name to your webhook
- Assigned Lists – Select which contact lists will trigger this webhook
- Assigned Tags – Assign tags to contacts when the webhook is triggered
- URL – Enter the endpoint URL where data should be sent
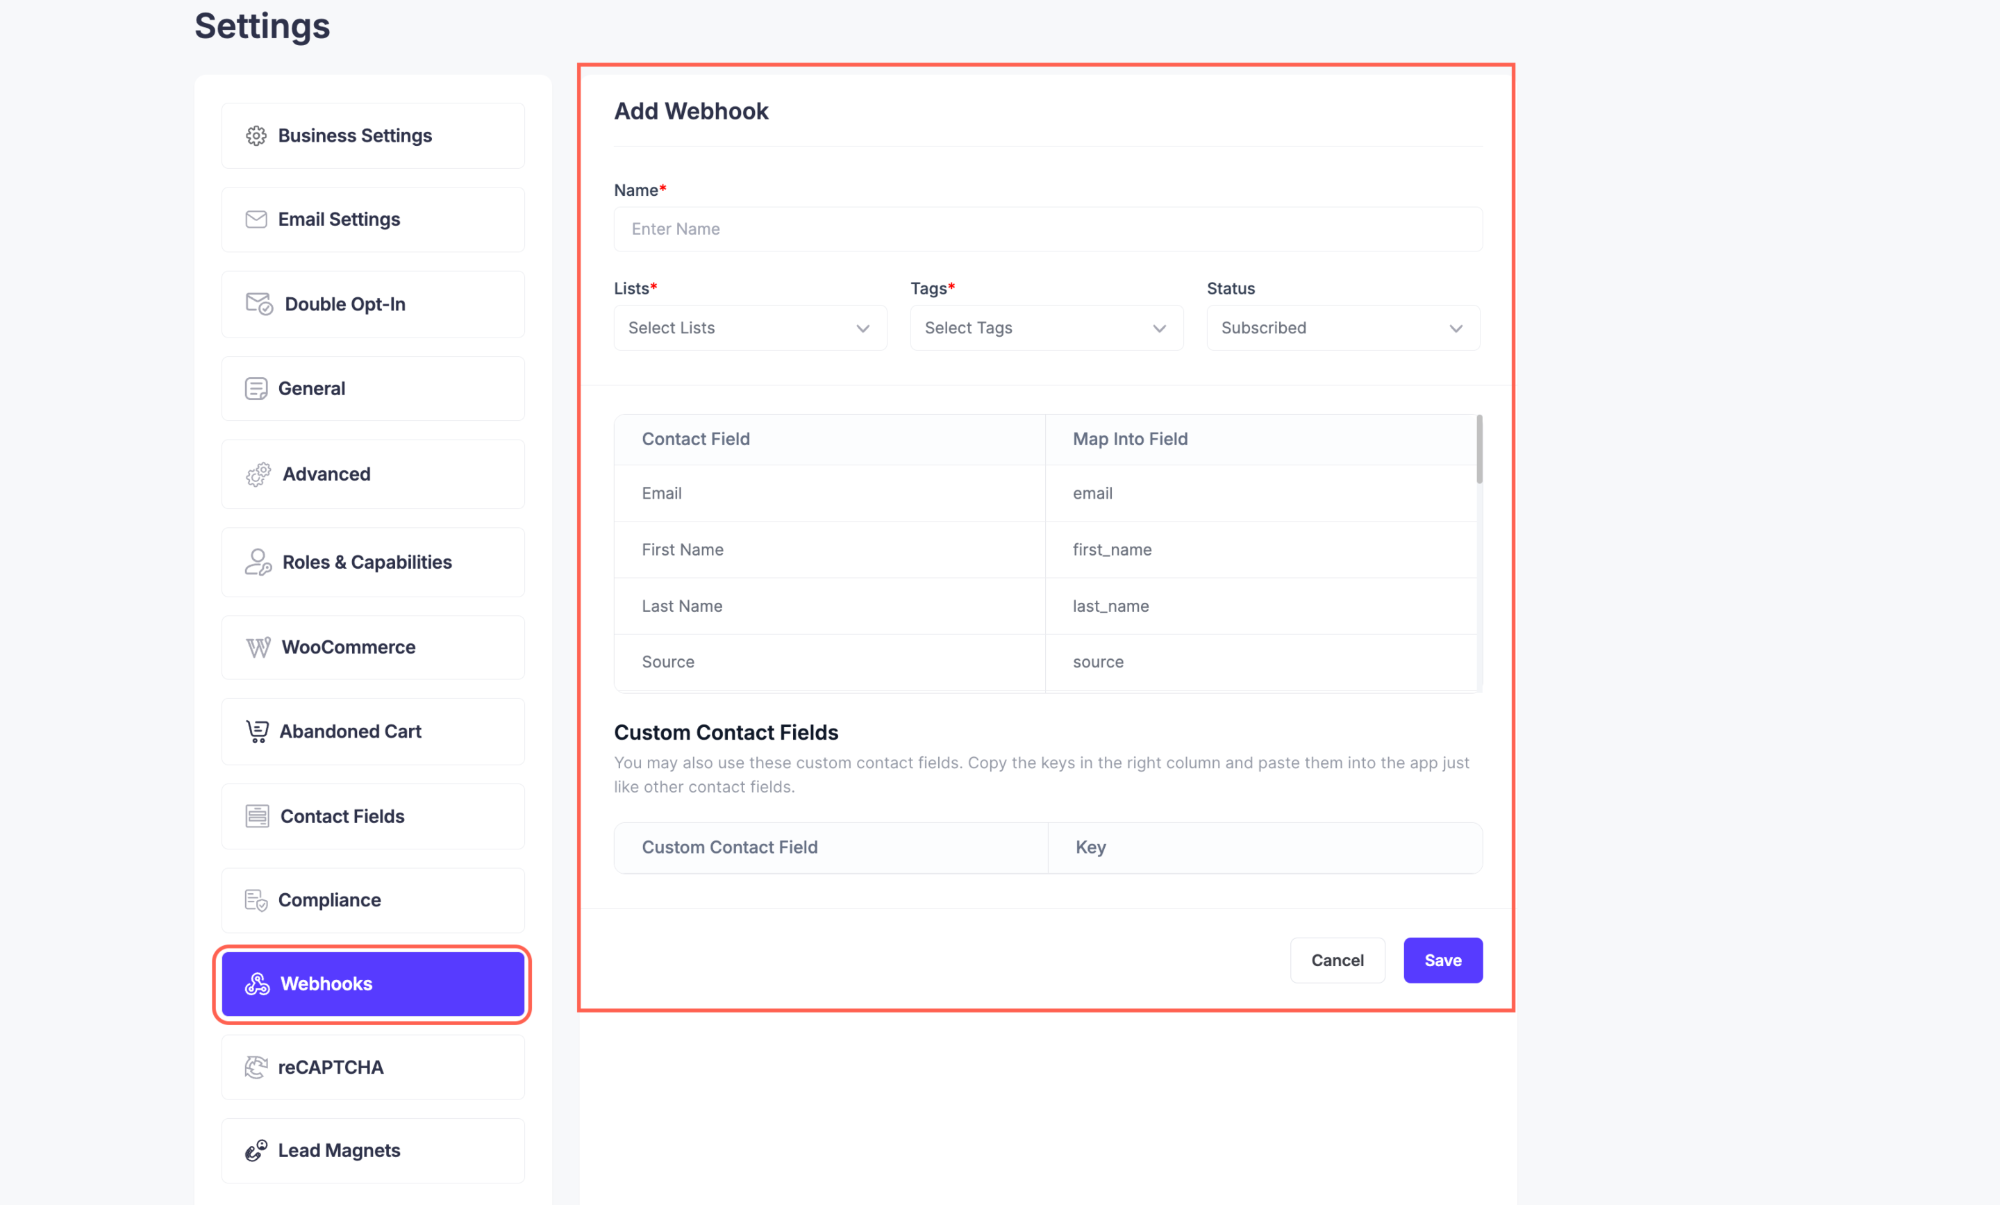
Webhooks allow you to send real-time contact data to external services for automation and integration.
12. reCAPTCHA Setting
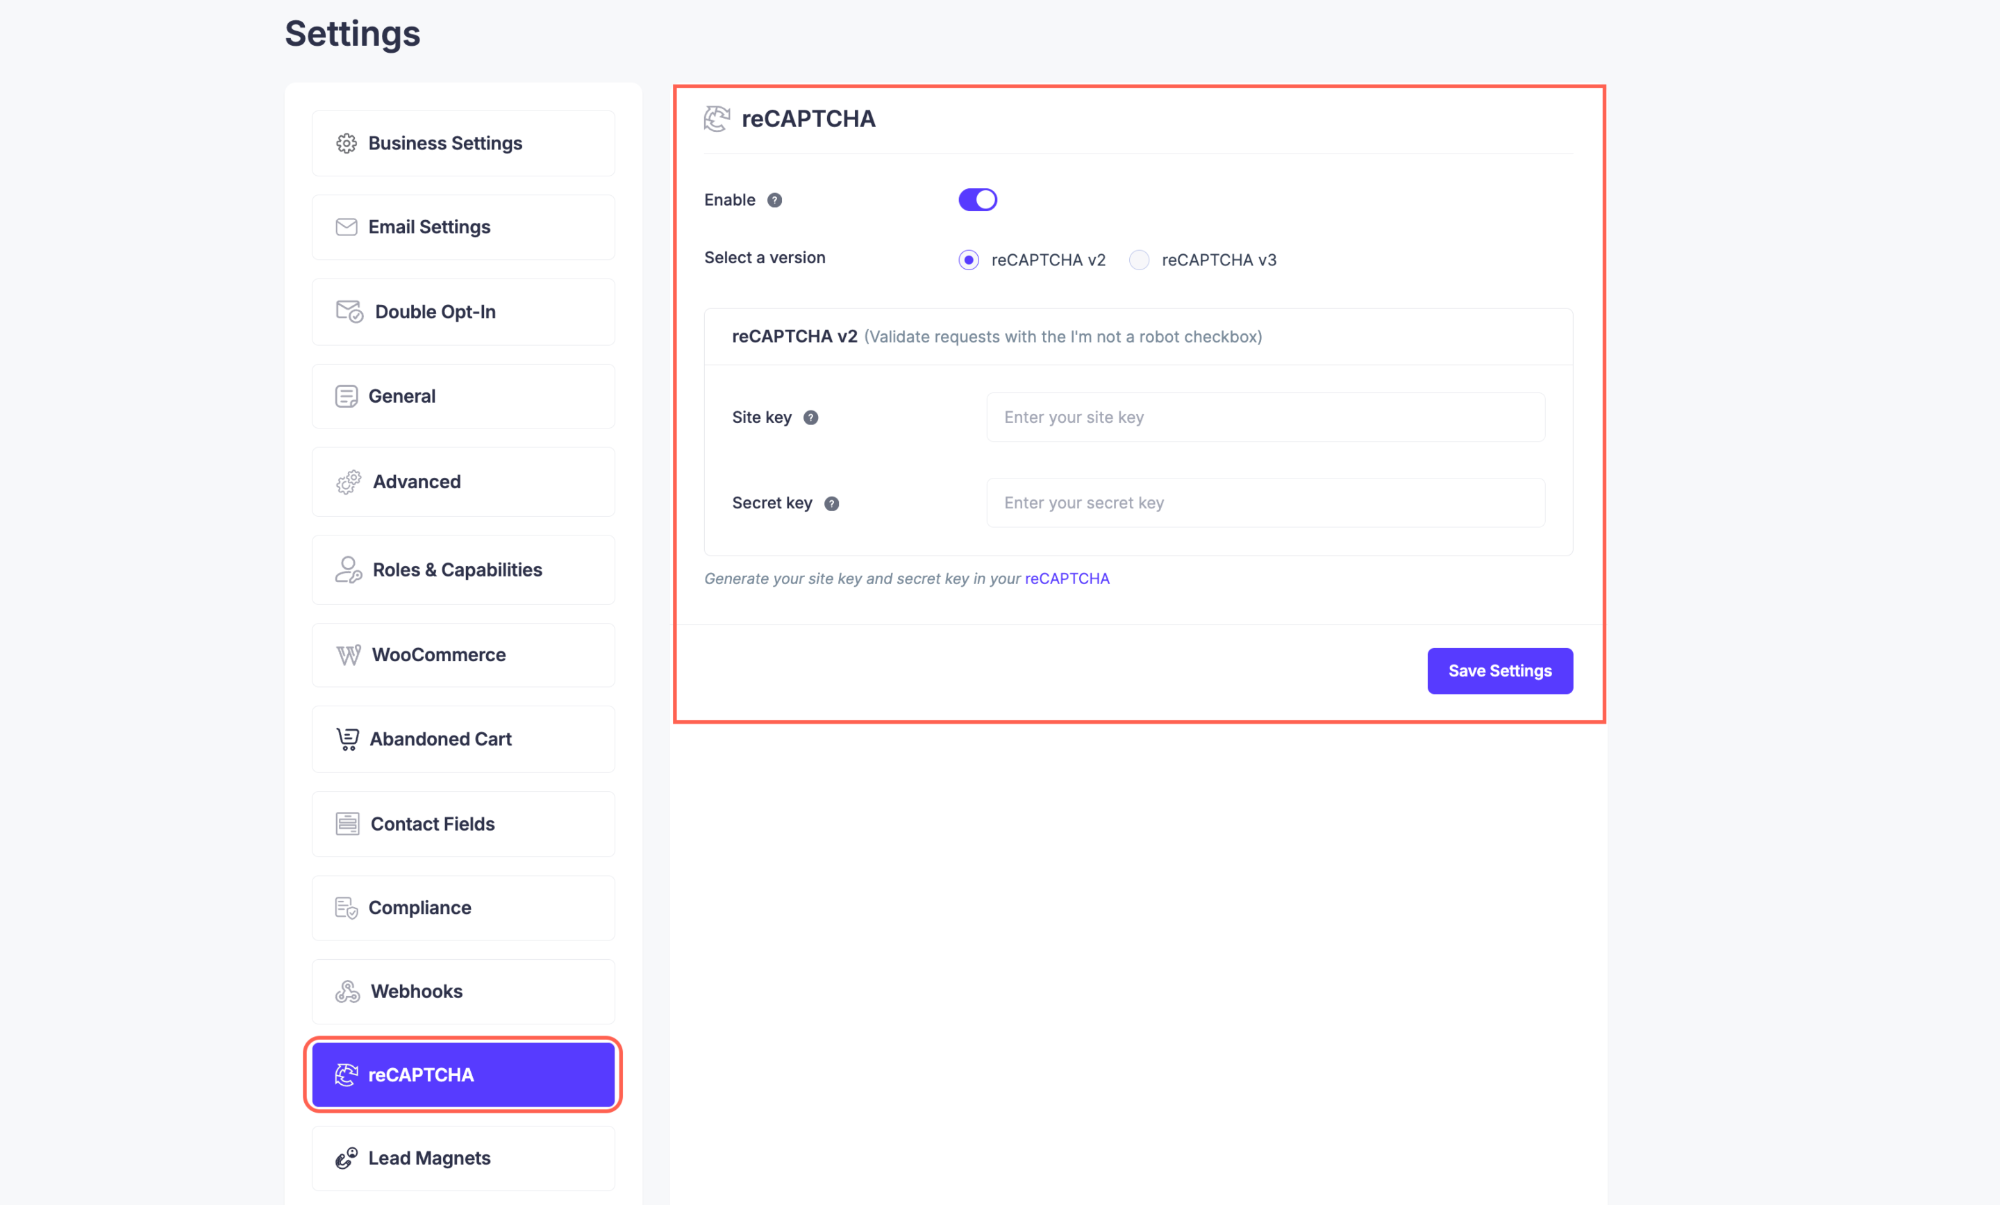
This section helps protect your forms and sign-ups from spam and bots.
- Enable – Turn reCAPTCHA on or off
- Select a Version – Choose between reCAPTCHA v2 (checkbox) or v3 (invisible)
- Site Key – Enter the site key generated from Google reCAPTCHA
- Secret Key – Enter the secret key from Google reCAPTCHA
- Save Settings – Save your configuration
Use this to ensure only real users can submit forms and join your mailing lists.
13. Lead Magnets
This section allows you to create and manage lead magnets to grow your subscriber list.
- Add Lead Magnet – Click to create a new lead magnet
- Title – Enter a name for your lead magnet
- URL – Provide the link where the lead magnet can be accessed
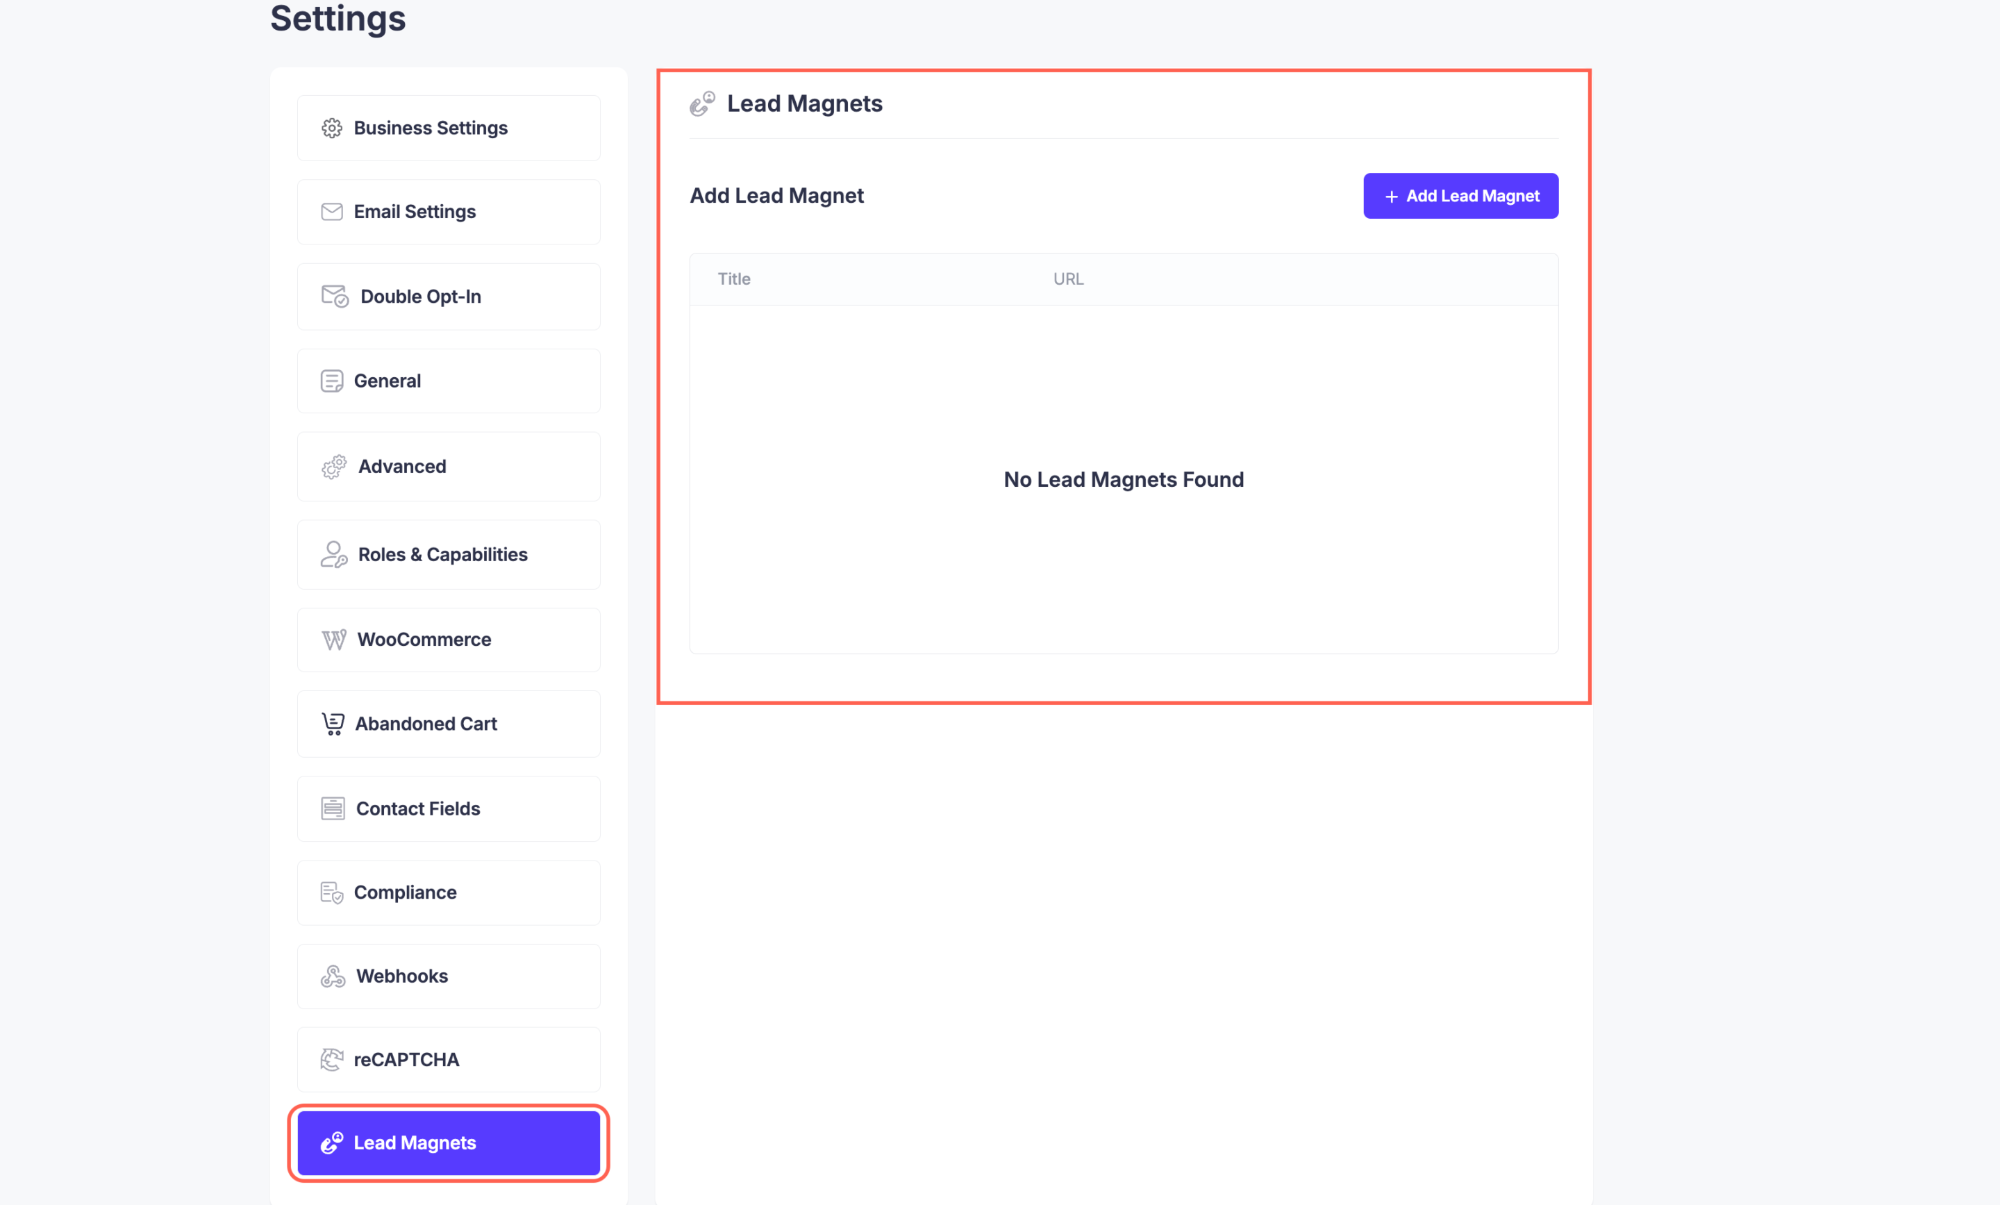
Lead magnets help attract and convert visitors into subscribers by offering valuable content in exchange for their email.
