How To Integrate With Mail Mint – SureTriggers
You can connect Mail Mint with Suretrigger to set up automation based on different triggers.
In this guide, you’ll learn how to create automated workflows by integrating Mail Mint with Suretrigger.
Step 1: Install & activate Mail Mint and Mail Mint pro
To Integrate Mail Mint with SureTrigers, first, you need to make sure that the following plugins are installed and activated on your site:
- Mail Mint
- Mail Mint – Pro (activate with license key)
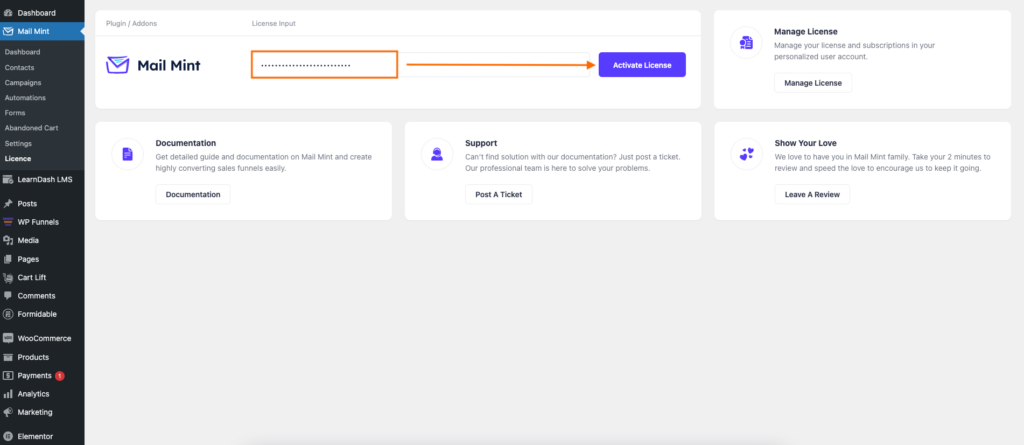
Once the plugins are installed & activated, you can go to the next step.
Step 2: Install & setup SureTriggers
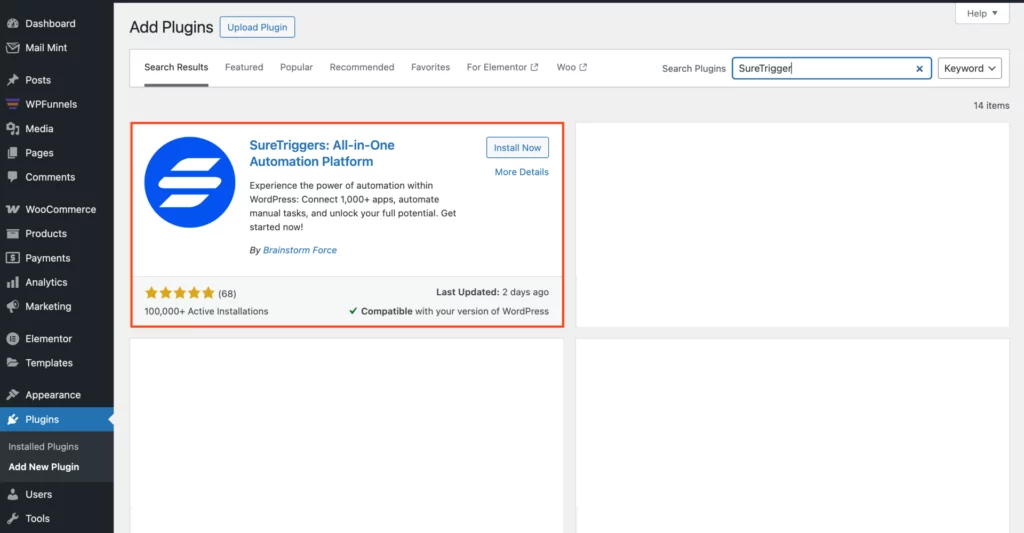
1. First, download and install the SureTrigger plugin from the WordPress Plugin Repository, then create an account.
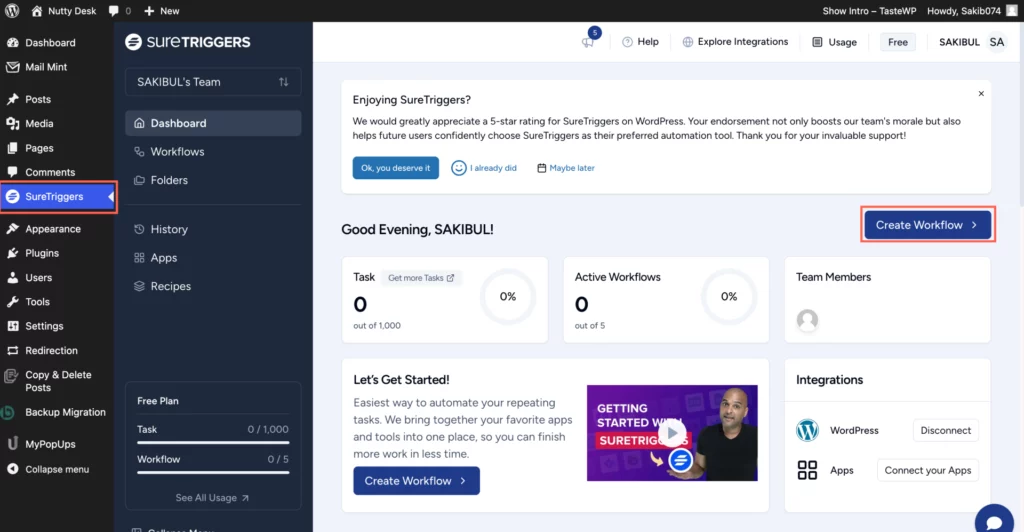
2. After logging in, go to the SureTrigger dashboard and click “Create Workflow.”
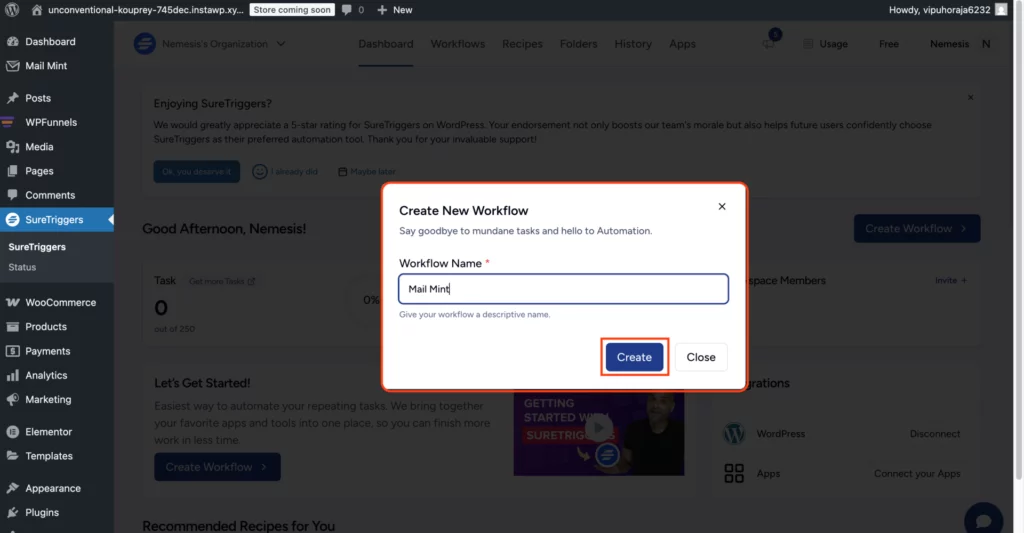
3. Now, create a workflow by naming it “Mail Mint” and then click Create.
4. After that, you’ll be taken to a blank canvas where you can set up your desired workflow.
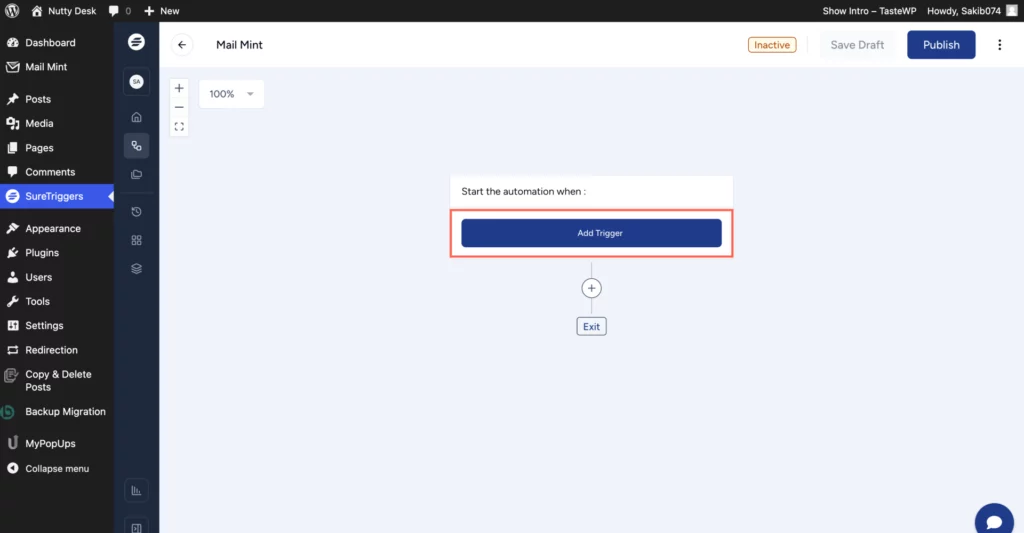
Step 3: Configure Your Workflow and Add Triggers with SureCart
In this doc, we implement test automation using Mail Mint and SureCart via SureTrigger.
1. Click on Add Trigger and choose Mail Mint from the app options.
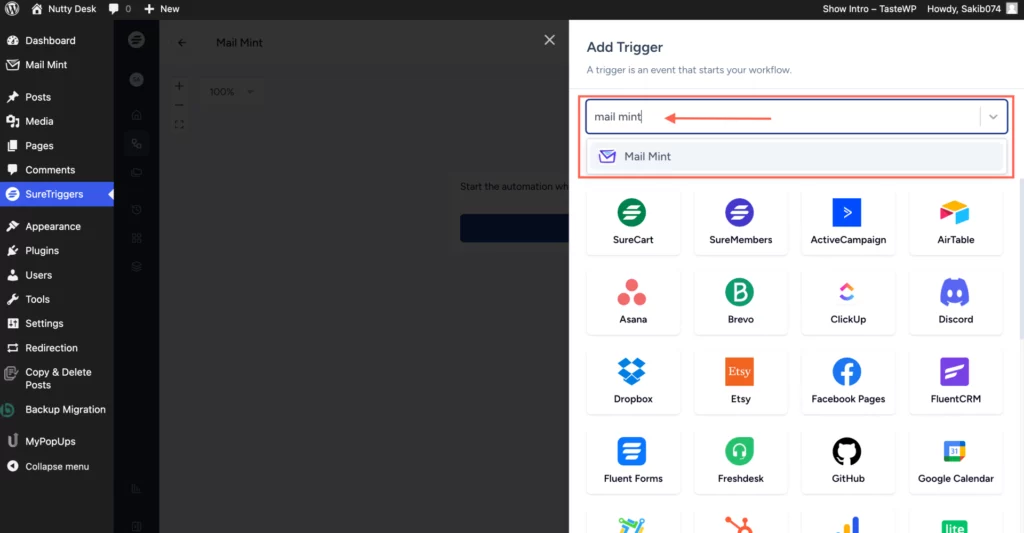
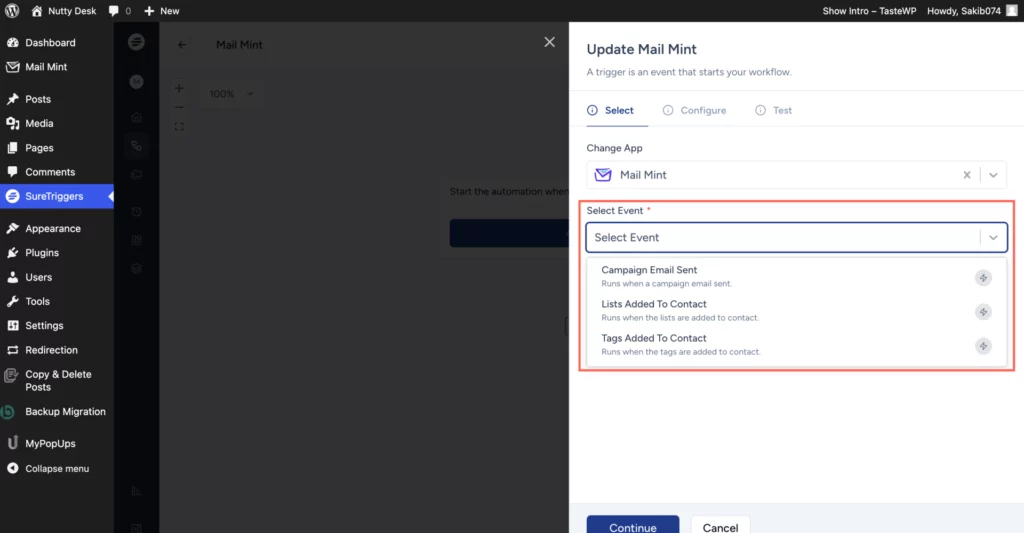
2. After selecting Mail Mint, you’ll see three trigger options: Campaign Email Sent, List Added to Contact, and Tag Added to Contact.
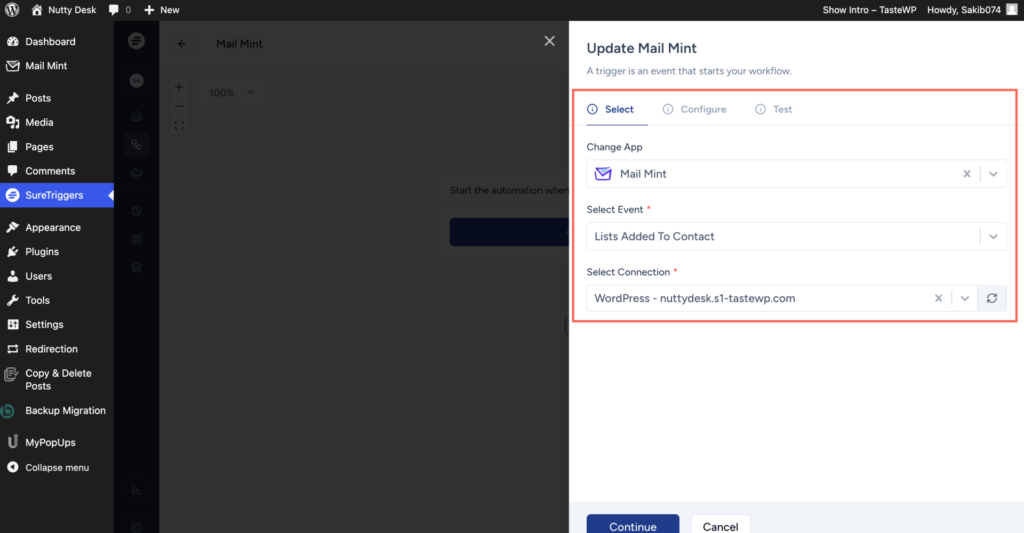
3. Now, choose ‘List Added To Contact’ as the trigger, select the connection you set up in SureTrigger’s connection authorization domain, and then click Continue.
4. After that, it takes you to the Configure section, where you select the contact and then click Continue.
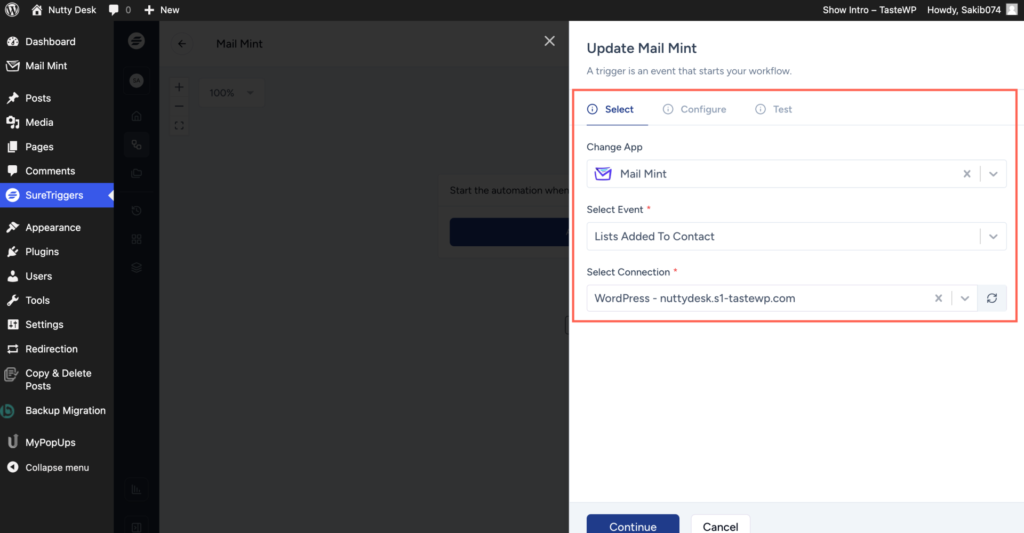
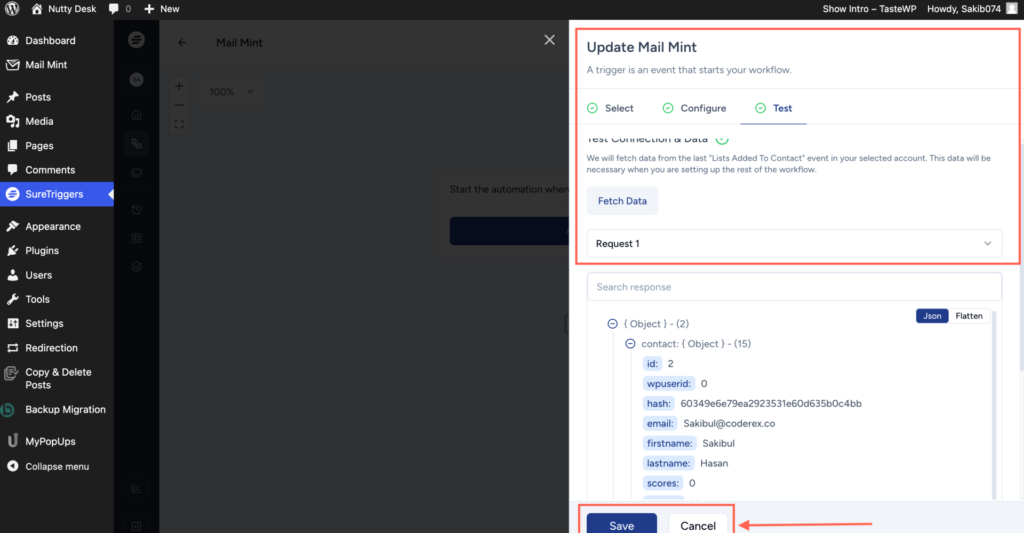
5. If everything is set up correctly, go to the Test section, click Fetch Data, and it will display the fetched data. This confirms that Mail Mint is successfully connected to this automation.
Step 4: Add Actions and Connect SureCart
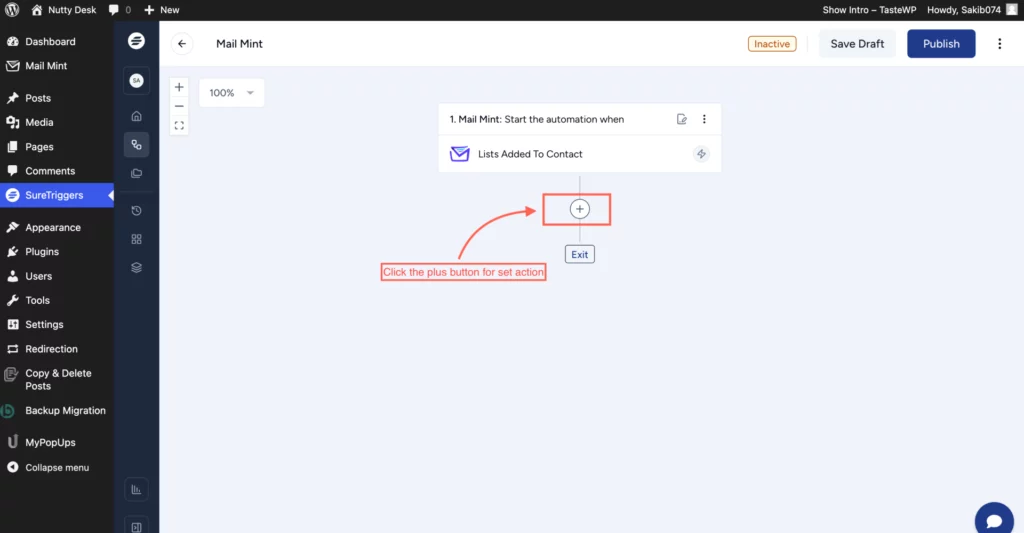
1. Next, connect SureCart as the action following your Mail Mint trigger. SureCart will perform actions based on the data it receives. Click the Plus (+) icon in the workflow canvas to add a new action.
2. In the app search bar, type SureCart and select it. Ensure SureCart is already installed on your site, as it will handle customer-related events. Based on Mail Mint data, you can choose from various events in SureCart, such as updating customer records or triggering a purchase action. After selecting the event, click Continue.
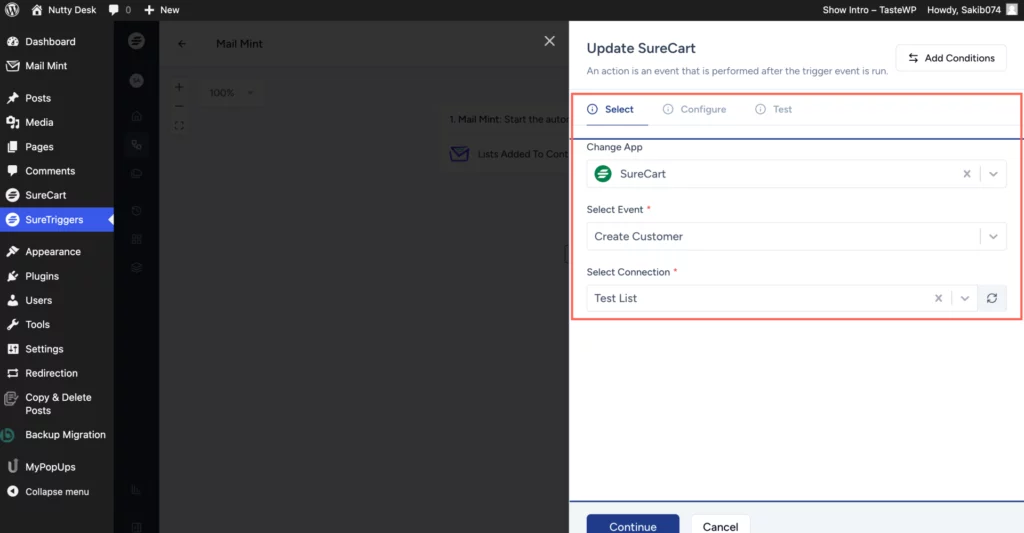
3. SureCart will prompt you to map mandatory fields, linking the fields in SureCart with the relevant data from Mail Mint. This ensures the accurate flow of customer data into SureCart.
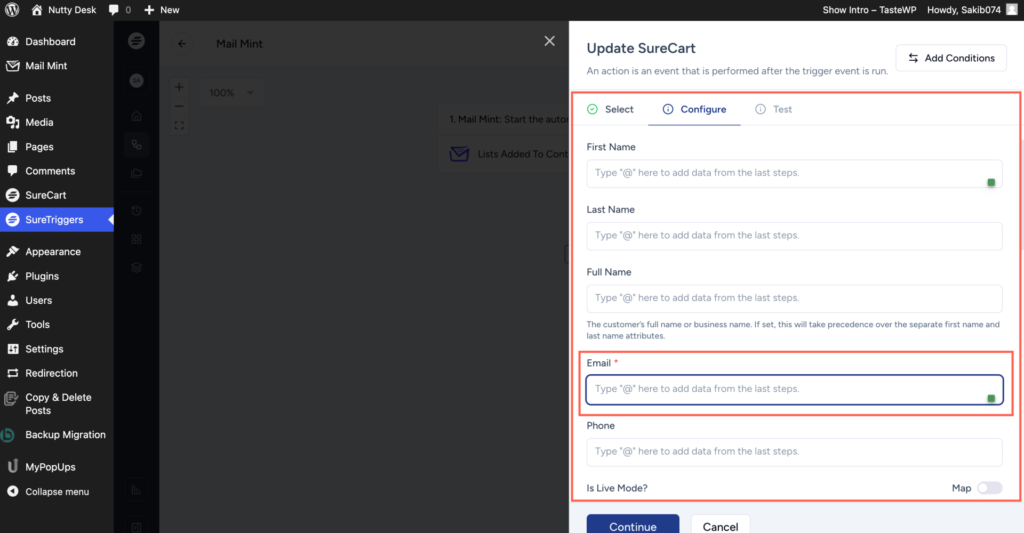
4. After configuring, run a test to confirm that the data passes smoothly from Mail Mint to SureCart. Once the test is successful, click Save.
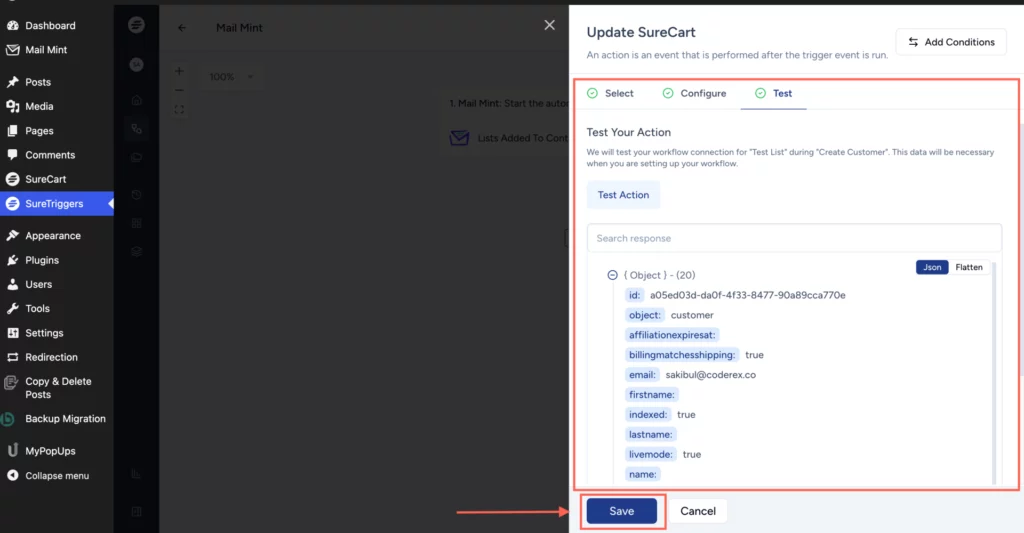
Step 5: Finalize and Test the Integration
With everything set up, your automation is ready to run. SureTrigger will automatically send new contact data from Mail Mint to SureCart for further action. To verify, go to SureCart -> Customer in your
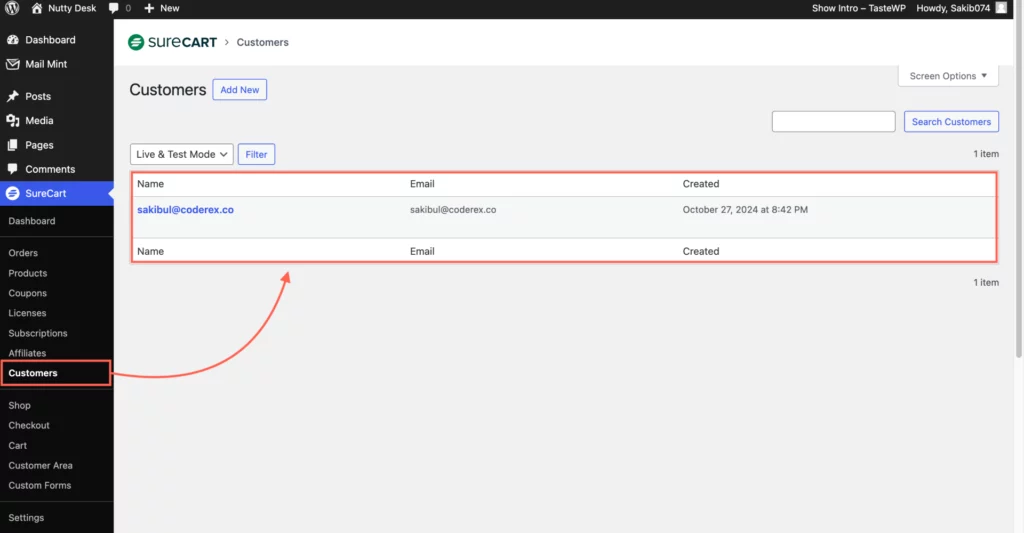
WordPress dashboard, where you should see the updated customer list with data passed from Mail Mint.