Creator LMS offers a centralized settings panel where you can control how your learning platform works, looks, and behaves—globally. Here’s a quick overview of the 5 main settings sections.
How to Access Global Settings
Navigate to your WordPress Dashboard → Creator LMS > Settings. You will find the following five settings tabs:
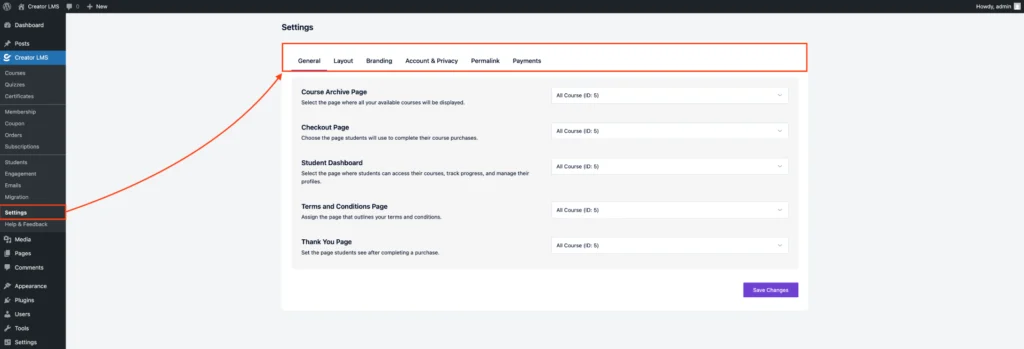
1. General Settings
This section allows you to configure essential behaviors of your LMS and link important pages for a seamless user journey.
- Course Archive Page – Select the page where all published courses will be listed.
- Checkout Page – Set the page students use to complete their enrollment or purchases.
- Student Dashboard – Choose the page where learners can manage their enrolled courses, progress, and profiles.
- Terms and Conditions Page – Assign the page that outlines your platform’s terms and conditions.
- Thank You Page – Set the page students will land on after a successful purchase.
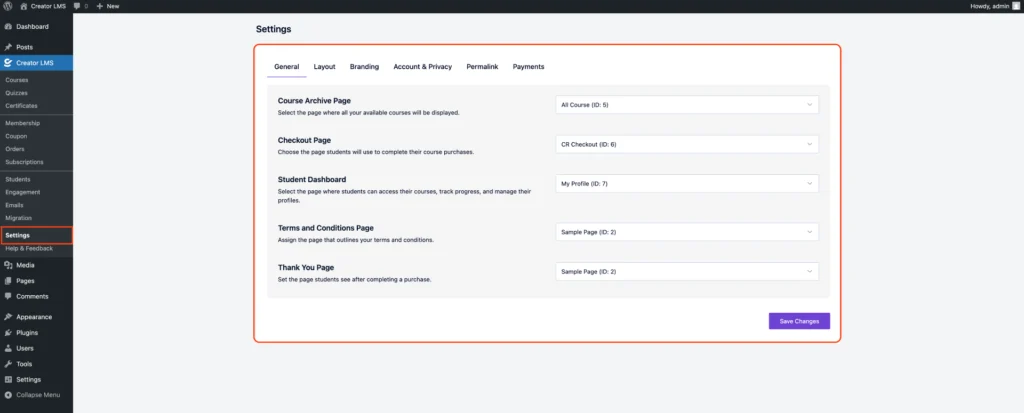
These settings ensure your LMS flows smoothly between course browsing, purchasing, and learning.
2. Course Layout Settings
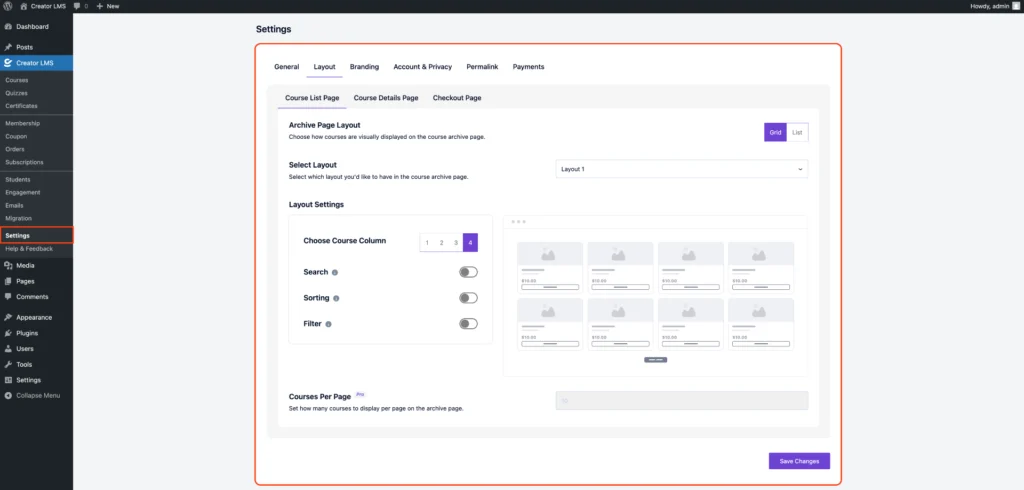
In this section, you can control how your courses appear to students on both the listing and individual course pages.
– Course List Page
- Archive Page Layout: Choose between a Grid or List view for how your courses appear.
- Select Layout: Select a specific layout style to control the visual presentation.
- Layout Settings – Choose Course Column: Decide how many columns (1–4) to display in the course grid.
- Search, Sorting, and Filter: Enable or disable features that allow students to easily find and sort courses.
- Courses Per Page (Pro): Set how many courses will be shown on each page.
– Course Details Page
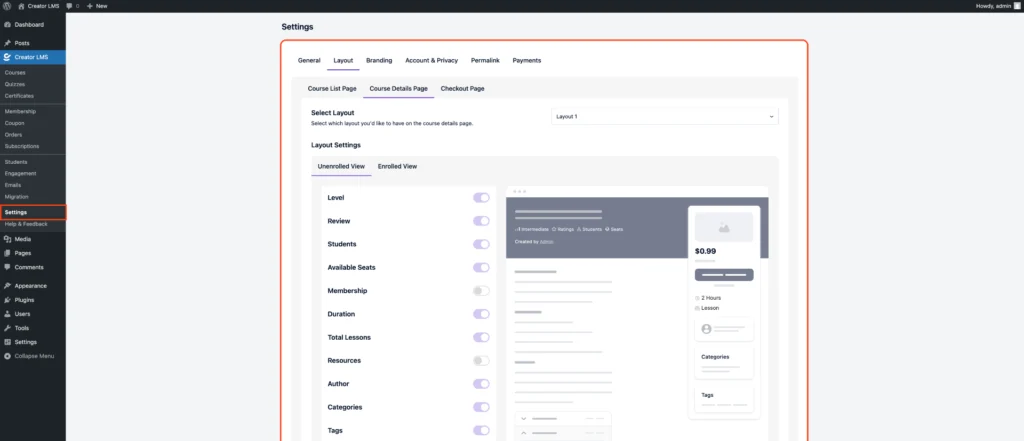
This section controls how the individual course pages are displayed for your learners.
- Select Layout: Choose the preferred layout style for the course details page.
- Layout Settings(Pro): Customize which elements to show based on the user’s enrollment status.
- No Enroll View / Enroll View: Display different information for non-enrolled vs. enrolled users.
- Display Options: Toggle on/off key course info, such as:
- Level (e.g., Beginner, Intermediate)
- Ratings and Reviews
- Total Students
- Available Seats
- Membership status
- Duration (e.g., hours)
- Total Lessons
- Resources
- Author details
- Categories & Tags
– Checkout Page
In this section, you can customize the design of your checkout page and enable different layout options to match your brand or user experience preferences.
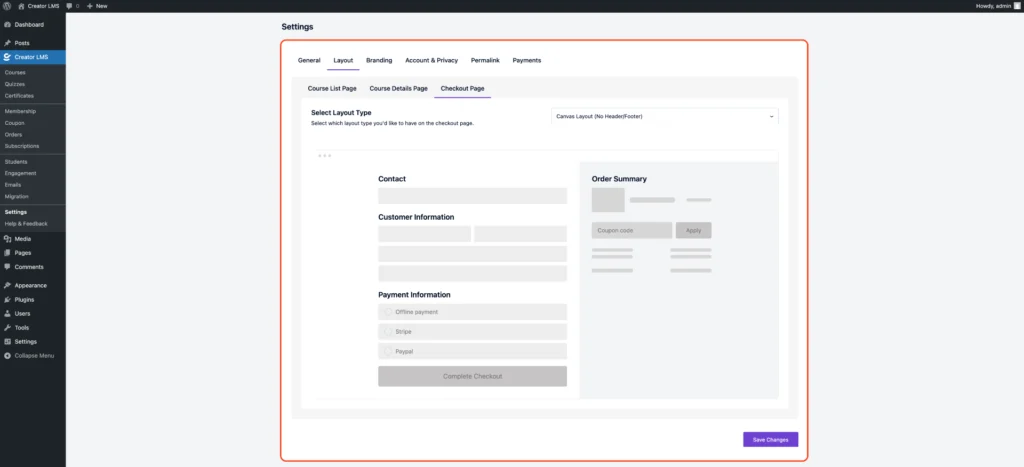
These settings help you design an informative and engaging course page that suits your content and audience.
3. Branding Settings
The Branding section allows you to personalize the visual identity of your LMS to match your brand.
- Primary Color: Sets the main highlight color used throughout the site, including buttons and active elements.
Example:#1356F0(default blue) - Heading Color: Defines the color for all main headings and titles used across pages.
Example:#000D25 - Text Color: Determines the default color for regular body text.
Example:#52525B - Progress Bar Color: Customizes the color of progress bars shown in course tracking.
Example:#35BD4C(default green)
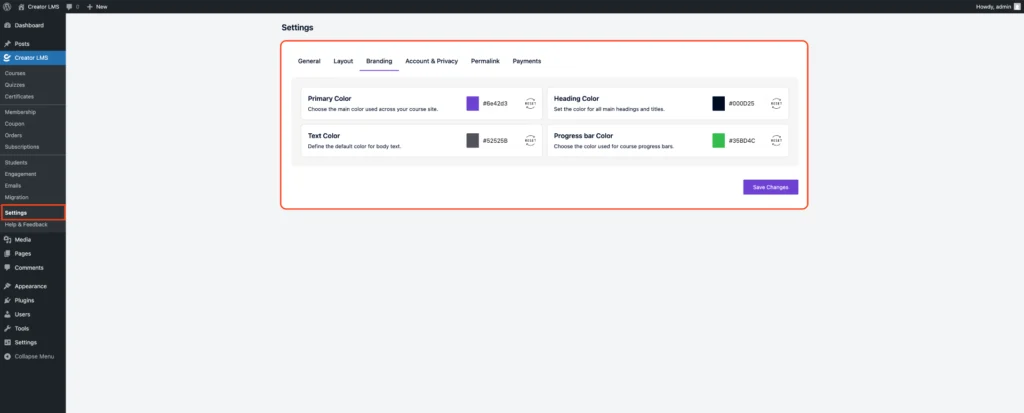
This section helps ensure your course platform reflects your brand style consistently.
4. Account & Privacy Settings
Here, you can control student access options and reinforce privacy measures for your LMS site.
- Guest Checkout: Enable this to allow students to buy courses without creating an account. Simplifies the purchase process and removes barriers to entry.
- Privacy Policy Message: Display a brief note on your checkout page to reassure students about your data handling practices. Helps communicate transparency and build student trust.
- Enable Content Protection (Pro): Restrict actions like copying, inspecting elements, or screen recording to keep your content secure.
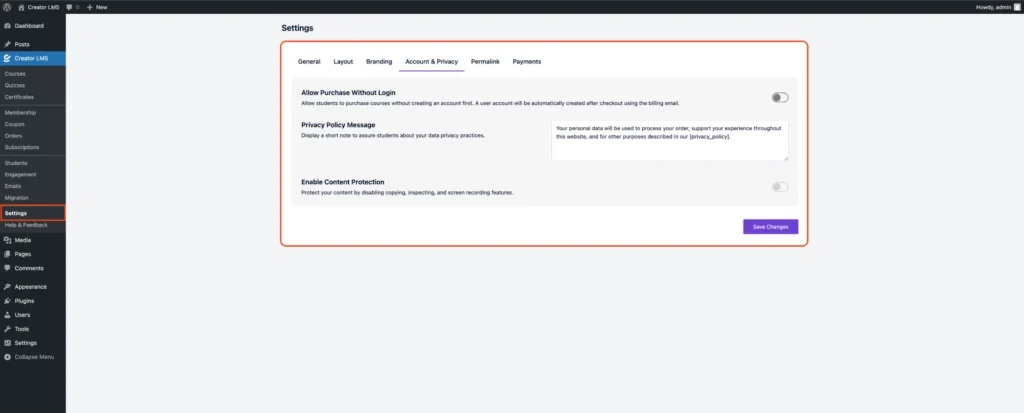
5. Permalink Options
Customize the URLs for different parts of your LMS to make them clean, user-friendly, and SEO-optimized.
- Course Base
- Category Base
- Lesson Base
- Quiz Base
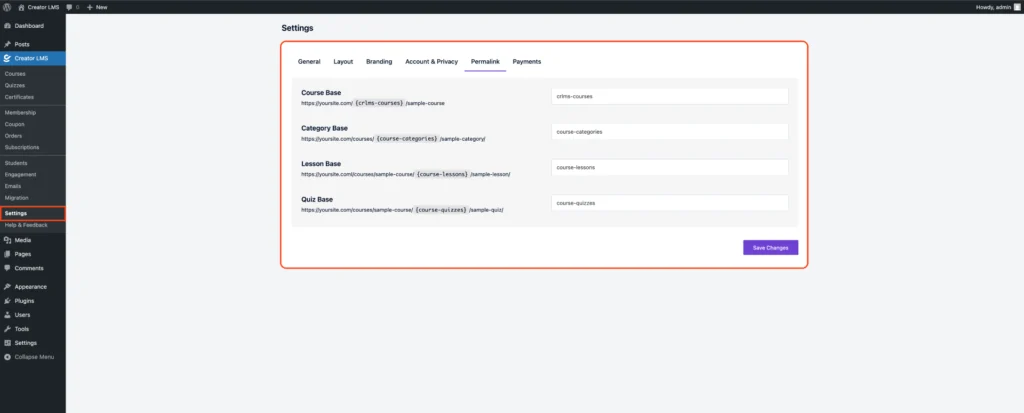
6. Payments
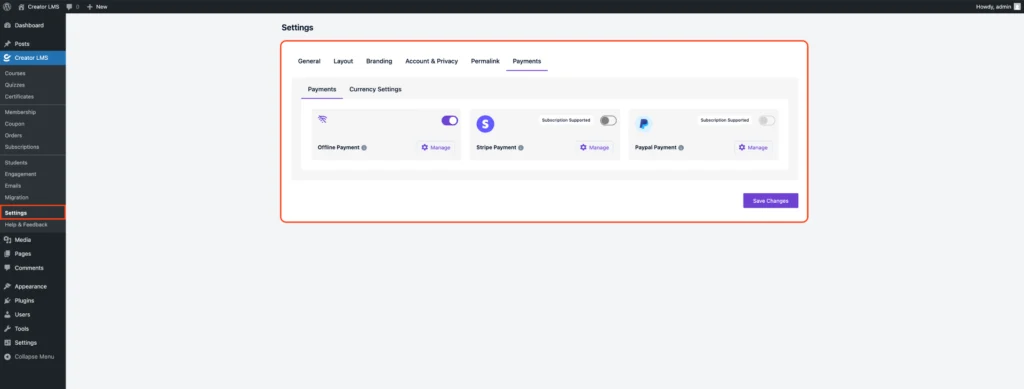
In the Payments tab, you can configure currency settings and manage available payment methods. Creator LMS supports both one-time and subscription-based payments. Also, from the Manage option, you can configure additional settings for each payment method, including subscription support.
Now everything is set up just the way you need. Your Creator LMS platform is ready to deliver a smooth and professional learning experience. You’re all set to start building and sharing your courses!