Creator LMS makes it simple and easy to create and publish courses on your WordPress site. Whether you’re offering free lessons or premium content, this guide will walk you through the steps to set up a course from scratch. Before you begin creating courses, make sure you have the Creator LMS plugin installed and activated on your WordPress site.
Step 1: Navigate to the Course Section
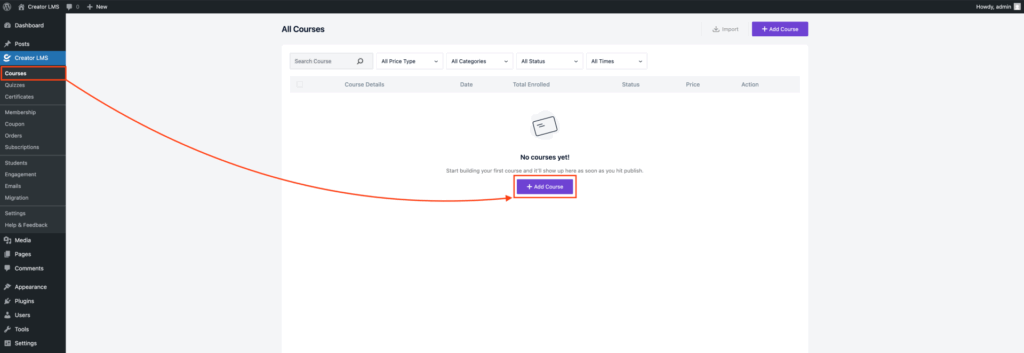
After installing the Creator LMS, go to Creator LMS > Courses from your WordPress dashboard. Here, you will see the All Courses screen. To get started, click the ‘Create a Course’ button to begin building your first course.
Step 2: Enter Course Title, Description & Cover Media
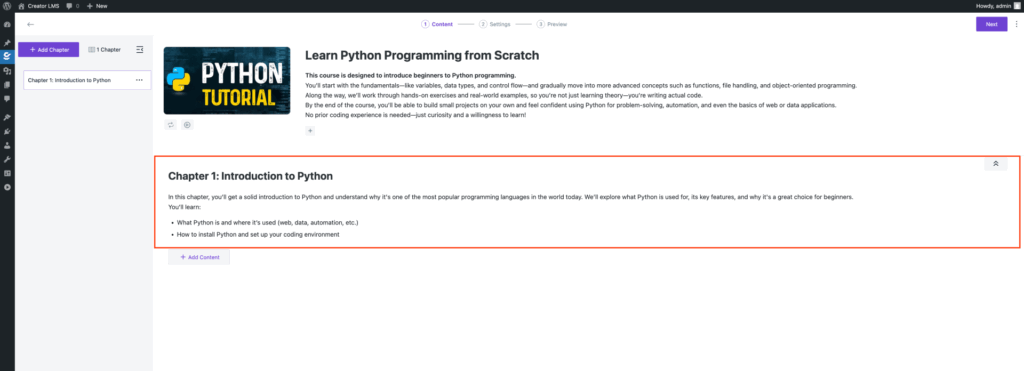
After clicking Create a Course, you’ll be taken to a new dashboard – the course builder. At the top, you’ll see a field labeled “Enter Course Title Here”. This is where you’ll type the name of your course.

Under the title, you’ll find a description field to set the course description here.

At the top (above the course title), you’ll find the option to upload a cover photo or embed a course introduction video.

Step 3: Adding Your First Chapter
After entering the course title and description, proceed to the section where you can add the first chapter and a short description of the course.
Step 4: Add Content to Your Course
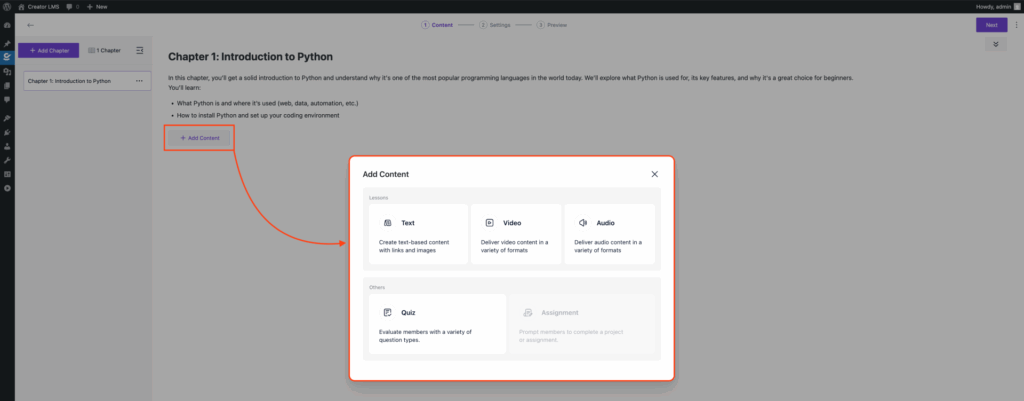
Once you’ve added your first chapter, you’ll see an option to Add Content under the chapter you just created. This is where you’ll add Text, Audio, Video, quizzes, and any other material related to your course.
– Adding a Course Video
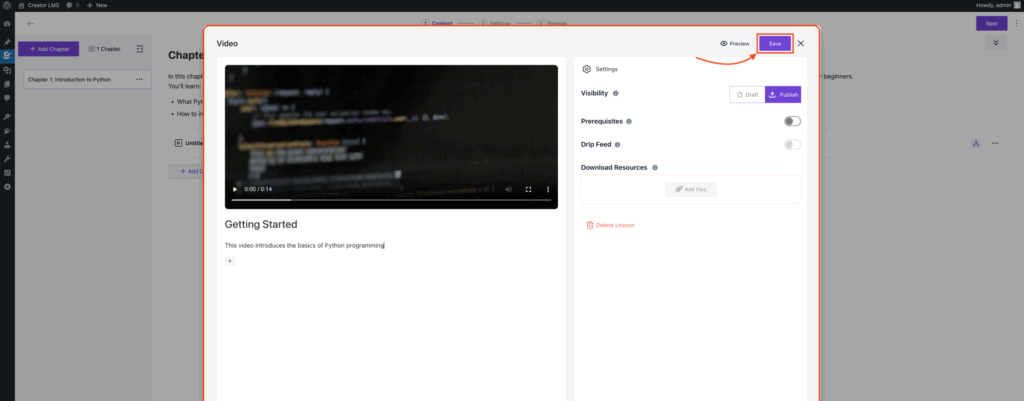
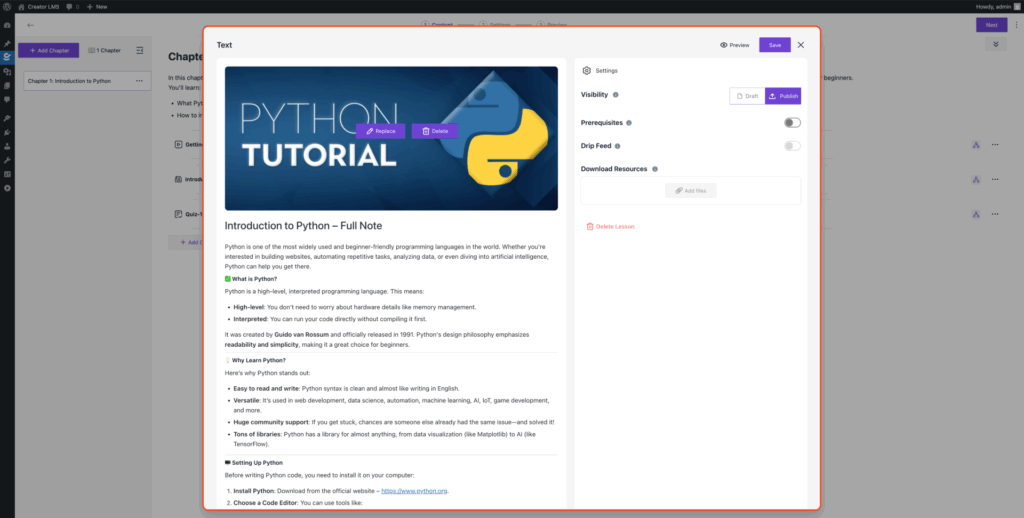
Now, Upload your course video, then enter a title and a brief description below it. After that, click Save to store your changes. You can also configure the following settings:
- Visibility: Choose whether the course is in “Draft” mode or “Published.”
- Prerequisites: Set any course prerequisites, if required.
- Drip Feed: Enable this option to release course content over time (Pro feature).
- Download Resources: Enable students to download any resources you’ve provided (Pro feature).
Once you’ve made the necessary adjustments, click “Save” to finalize your content settings.
-Add Text for Course
Now, if you want to create and add informative text-based content to your course, including headings, paragraphs, links, and images to enhance the learning experience.
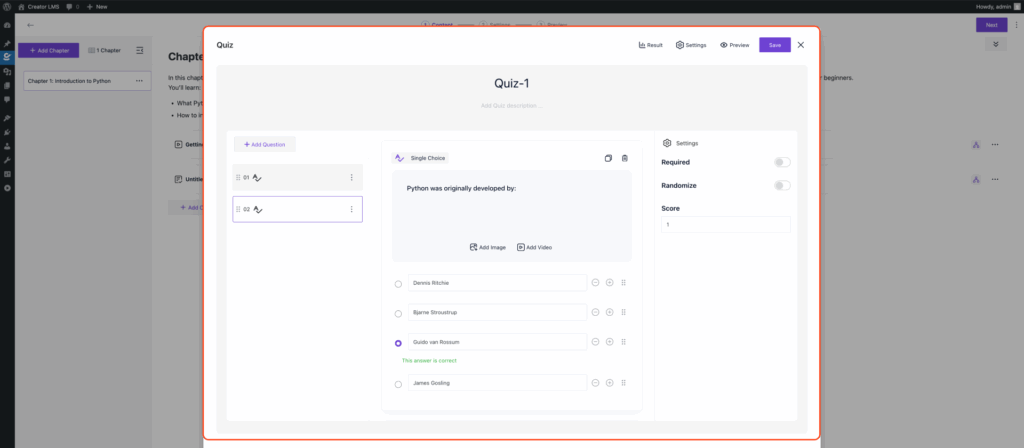
– Add a Quiz Based on the Video Content
After adding the video, click on “Quiz” under the same chapter. Name your quiz (e.g., Python Basics Quiz) and add relevant questions using formats like multiple choice, single choice, true/false, short text, and more. Set correct answers, adjust settings like passing score or time limit, and click “Save” to store the quiz.
Step 4: Repeat the Process to Complete Your Course
Continue adding chapters or lessons using the same process until your course is complete. Create as many sections as needed to structure your content effectively.

Step 5: Configure Course Settings
In the Settings tab, you’ll find 3 main sections — Basics, Resources, and Organize.
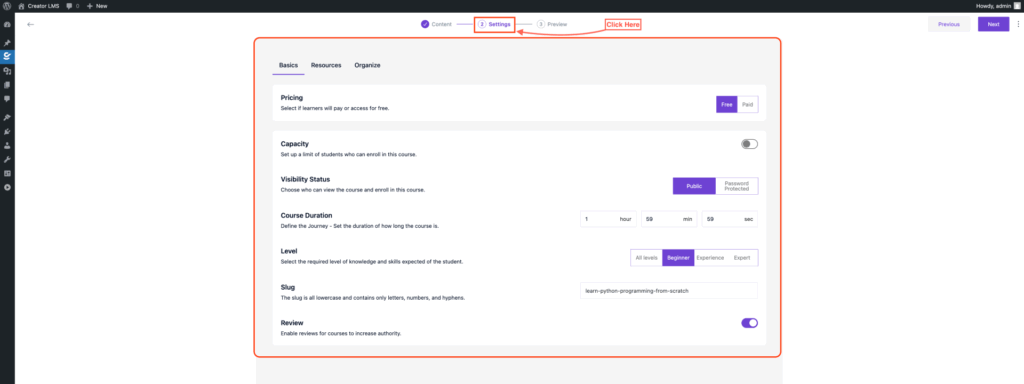
- The Basics section sets your course pricing (Free or Paid), defines student capacity, chooses Visibility (Public or Password Protected), sets the Course Duration, selects the Skill Level, enables Reviews, and sets the course Slug.

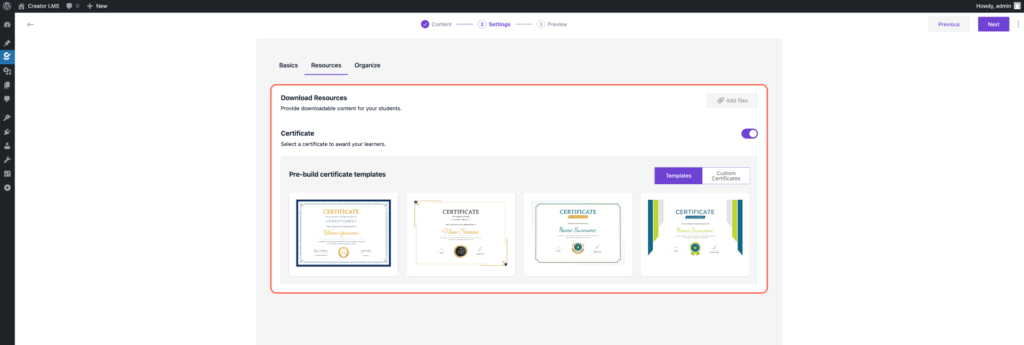
- In the Resources section, you can upload Downloadable Resources (Pro) and assign a Certificate template for course completion.
- The Organize section, add Categories and Tags to structure and identify your course.

Step 6: Save All Changes and Publish Your Course
Now that you’ve added your first chapter with a video and a quiz, follow the same process to add more chapters. Include content like lessons, quizzes, resources, and more for each chapter until your course is complete. Once everything is added and finalized, hit “Publish” to make your course live for students.

Now, you’ve successfully created and published your course. Now, you’re ready to start teaching and share your knowledge with learners worldwide!