This guide will help you understand how to structure and build your courses by adding chapters and different types of lesson content, such as text, audio, and video.
Step 1: Go to the Course Builder
Navigate to Creator LMS → Courses, and either create a new course or open an existing one where you’d like to add chapters and lessons.

Give your course a name like “Learn Python Programming from Scratch” and write a short course description. You can also upload a cover image or video to visually represent your course.

Step 2: Add a New Chapter
Under the Course Title and Dashboard section, locate the “Add Chapter” field. This field allows you to create a new chapter within your course.

Provide a Chapter Title and Description – For example, you can title it “Introduction to Python” and write a short description.
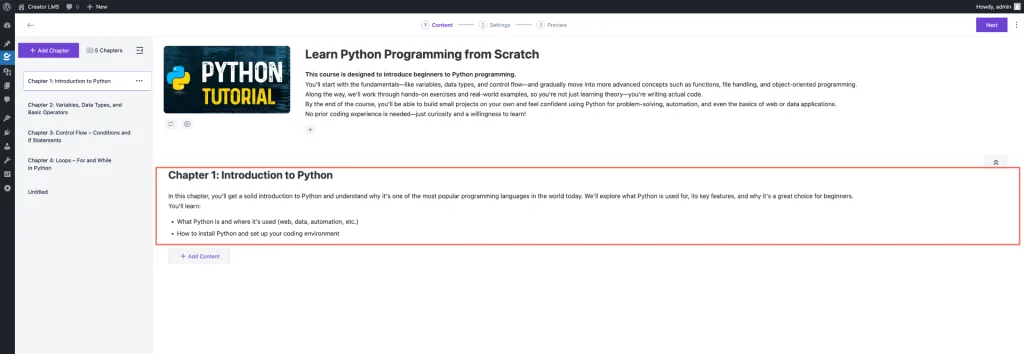
Step 3: Add Lesson Content (Text, Audio, or Video)
After creating your chapter, click on “Add Content” to include a lesson. You can choose from different content types such as:
- Text: Write your lesson content directly.
- Audio: Upload voice-over explanations.
- Video: Add recorded lectures or tutorials. Supported formats include
.mp4,.mov,.avi, etc.
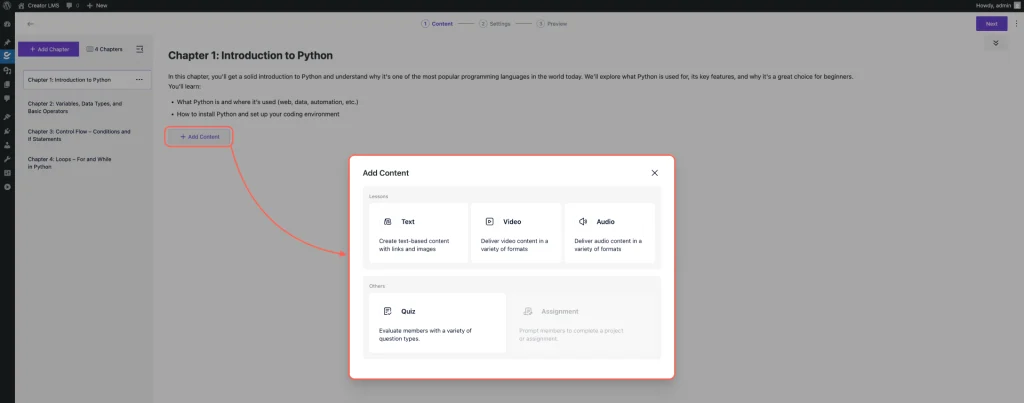
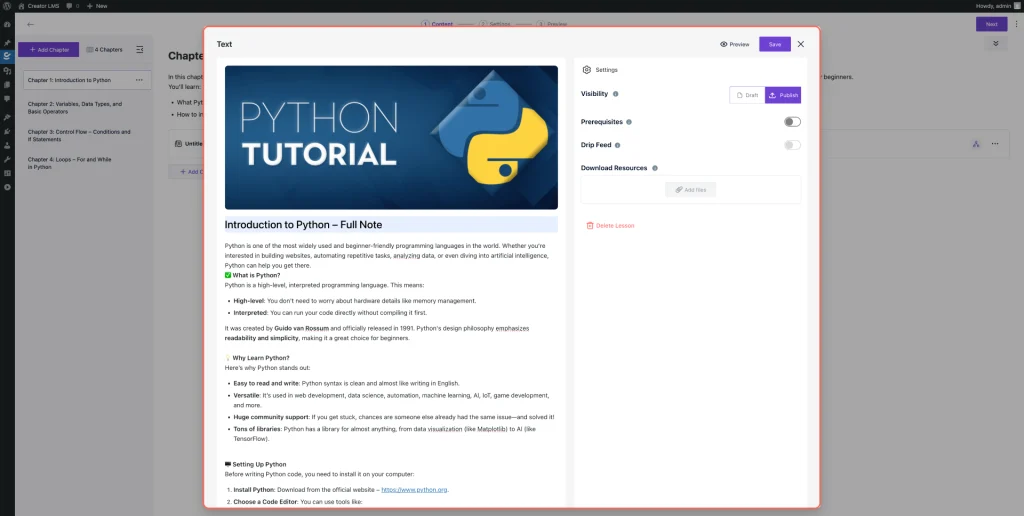
Text Lesson: In this guideline, we first add a text lesson. Click on “Text” from the Add Content section, then enter the Text Lesson Title and write the content in the editor provided.
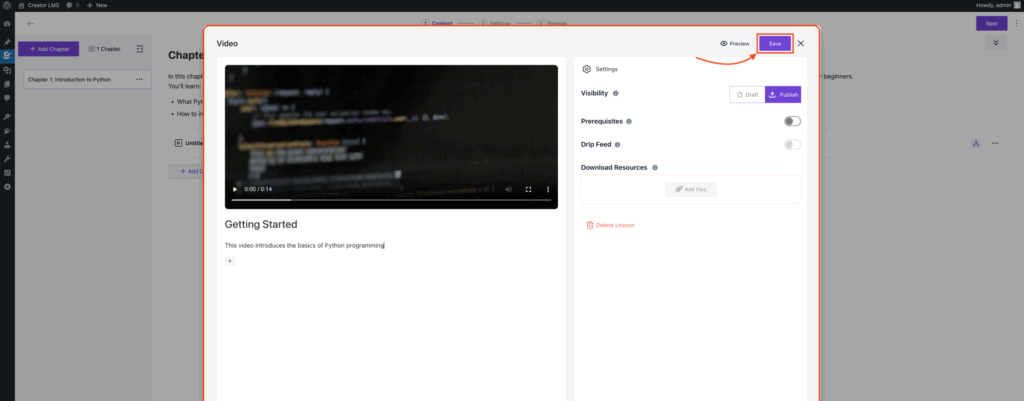
Upload Video: Next, to add a video lesson, click on “Video” from the Add Content section. Upload or select your video file (supported formats include .mp4, .mov, .avi, etc.). After uploading, enter a Video Title and a short description.
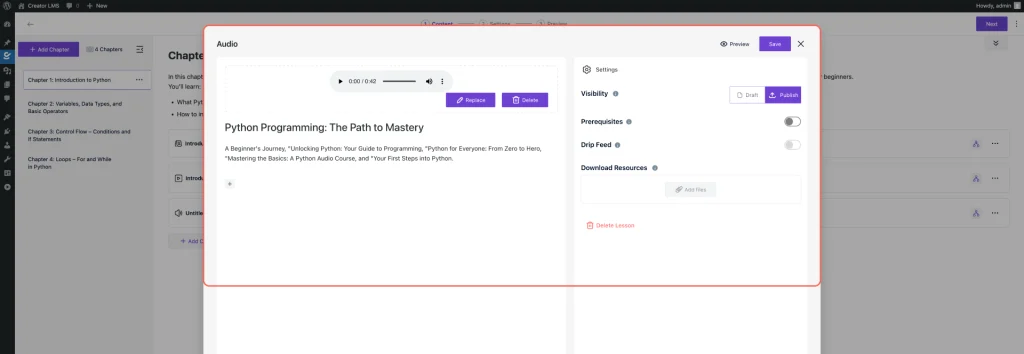
Audio Content: To add an audio lesson, click on “Audio” from the Add Content section. Upload your audio file (supported formats include .mp3, .wav, etc.). Then enter a Title and a short description. For example, title it “Social Media Trends” and describe it as “This audio covers the latest trends in social media marketing for 2025.”
Step 4: Configure Lesson Settings
Each lesson also allows for the configuration of specific settings:
- Visibility: Set whether the lesson is in Draft or Publish state.
- Prerequisites: Specify any required lessons before the current one.
- Drip Feed (Pro version): Set a schedule for releasing lessons over time.
- Downloadable Resources (Pro version): Upload additional materials like PDFs, worksheets, etc.

Follow the same process to add any type of content—whether it’s text, audio, or video—for each lesson in your course. Once all your lessons are added, reviewed, and ready, click “Publish” to make your Digital Marketing course live and available for students to enroll.
