Creator LMS provides the option to accept offline payments, which are useful for students who prefer to pay using methods like bank transfer, cheque, or cash on delivery. Below, we’ll go over the settings and configuration options for offline payments.
Accessing Offline Payment Settings
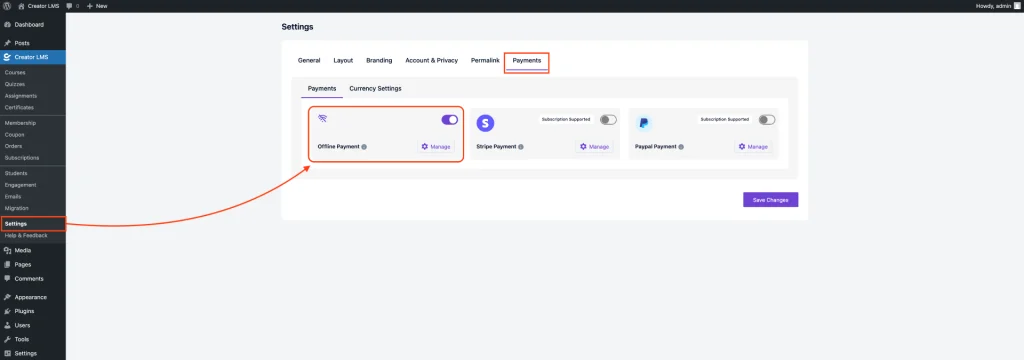
In the admin dashboard, navigate to LMS Settings in the sidebar. Within LMS Settings, you will find the Offline Payment settings. This is where you can configure all offline payment methods.
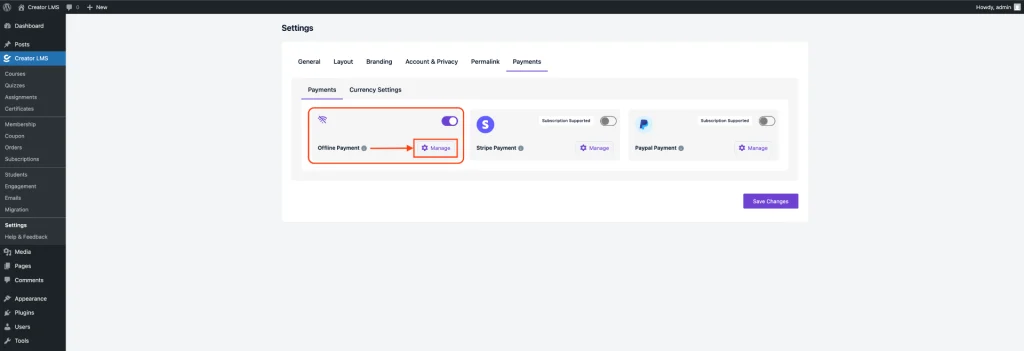
Once in the LMS Settings, click on the “Manage” button next to the Offline Payment section. This will open up all the available options and settings for configuring offline payments.
Offline Payment Settings
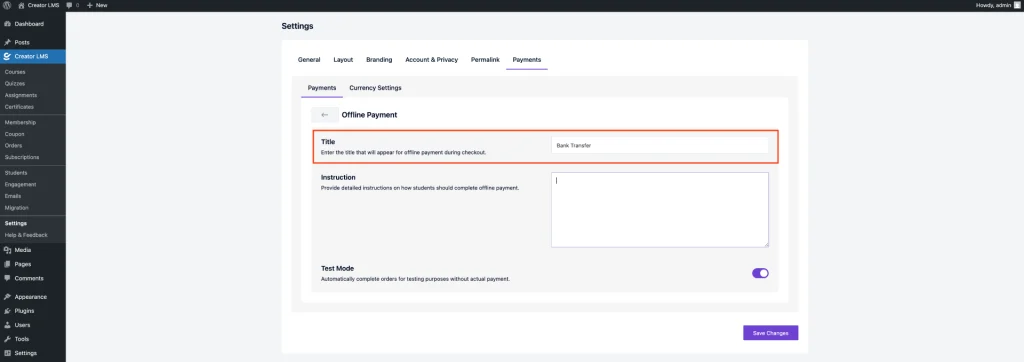
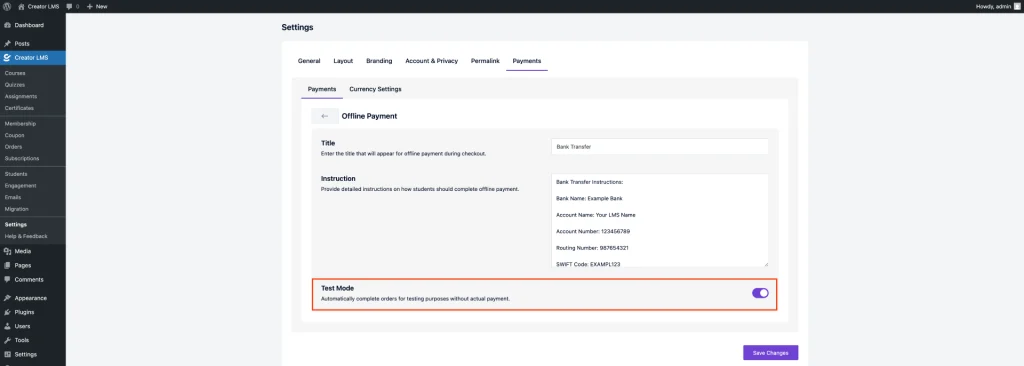
Enter the title you want to appear on the checkout page for offline payment methods. For example, “Bank Transfer” or “Cash on Delivery”. This will be visible to the students when they select the payment option.
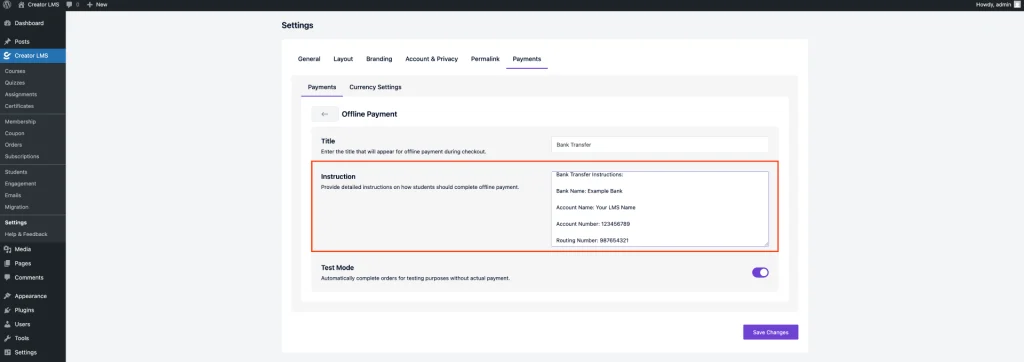
Now, provide clear instructions for your students on how to complete the payment offline. This can include bank details for transfers, mailing instructions for cheque payments, or instructions for cash on delivery.
Enable Test Mode to automatically complete orders during testing without requiring actual payments. This allows you to verify that the checkout and order flow work as expected before going live.
Currency Settings
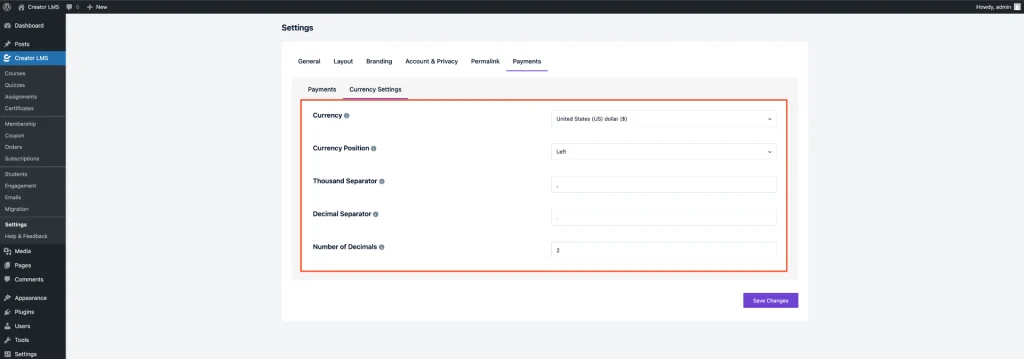
Currency: Select your preferred currency from the dropdown (e.g., USD – United States Dollar).
Currency Position: Choose where the symbol appears (e.g., Left → $50.00, Right → 50.00$).
Thousand Separator: Choose how to separate large numbers (e.g., Comma → 1,000,000).
Decimal Separator: Choose how to separate decimals (e.g., Period → 50.00, Comma → 50,00).
Number of Decimals: Define how many digits to show after the decimal (e.g., 2 → 50.00).
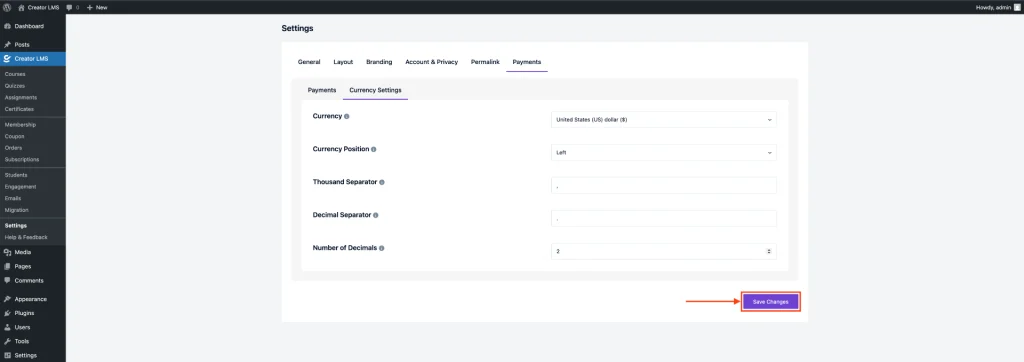
After configuring your currency settings, ensure you click Save Changes at the bottom of the settings page to apply the updates.
That’s it! Your Offline Payment setup is now complete and ready to use.