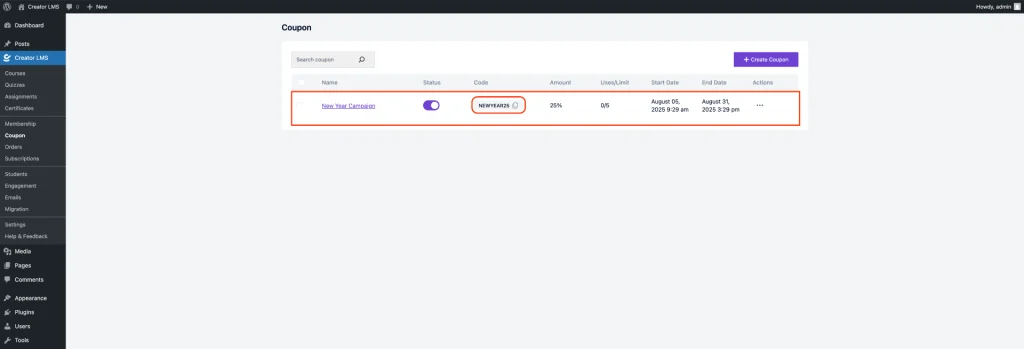
Creating a coupon in Creator LMS allows you to offer discounts or promotions for your courses, memberships, or other products. Here’s a step-by-step guide on how to create a coupon in Creator LMS:
Access Coupon Settings
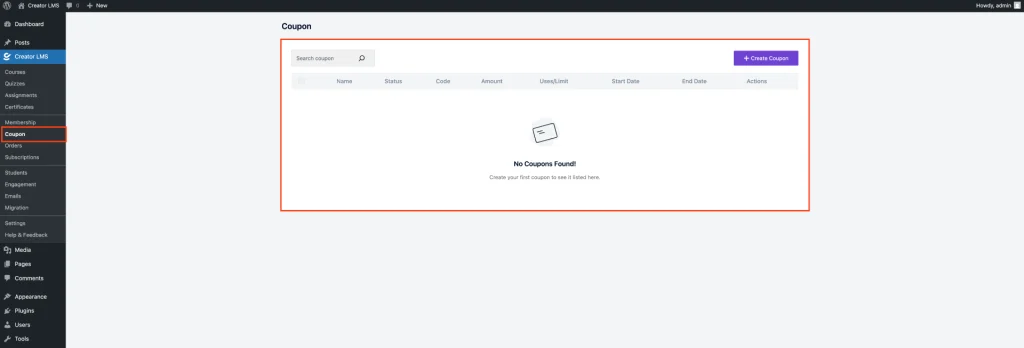
From the left sidebar of your Creator LMS dashboard, locate and click on the Coupons option. This will take you to the coupon management section, where you can view existing coupons or create a new one.
Add a New Coupon
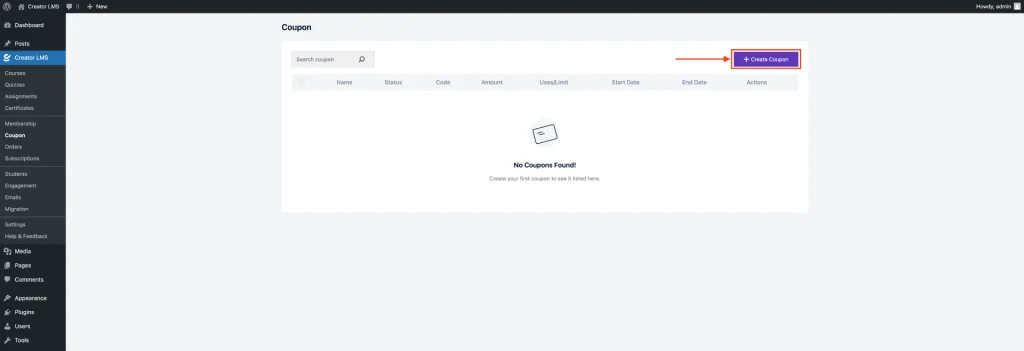
Once you click on the “Add New Coupon” button, a pop-up window will appear. This pop-up allows you to fill in all the required coupon details such as the coupon code, discount type, amount, usage limits, expiration date, and more.
Coupon Settings Overview
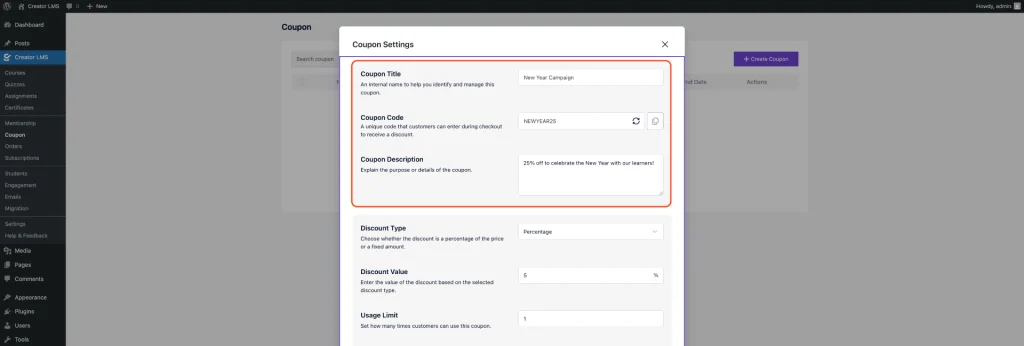
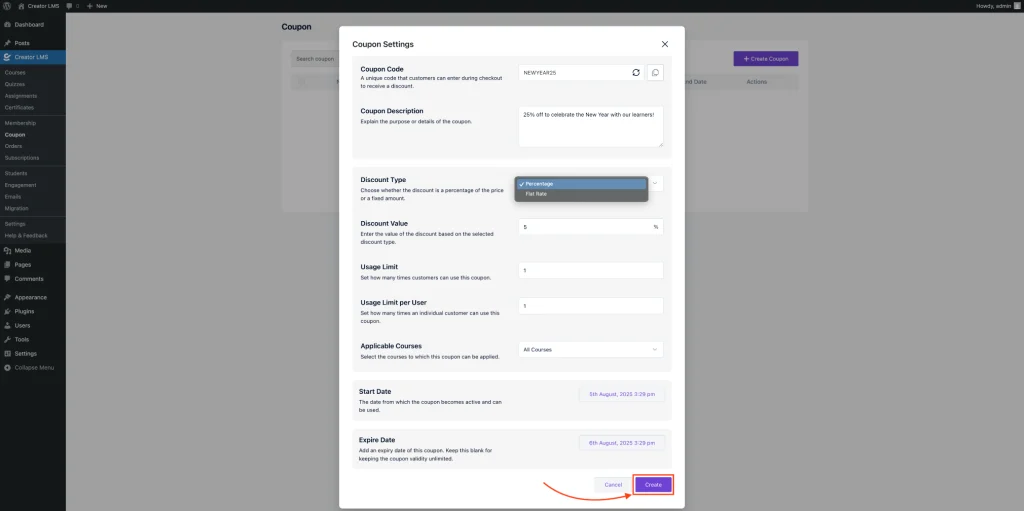
After clicking “Create Coupon,” a pop-up will appear with fields for you to fill in.
- Coupon Title: This is an internal name to help you identify and manage the coupon. Example: “New Year Campaign“
- Coupon Code: A unique code that customers will enter at checkout to get the discount. Example: “NEWYEAR25“
- Coupon Description: Add a short explanation about the purpose of the coupon. Example: “25% off to celebrate the New Year with our learners!“
Now, you can set the Discount Type and Discount Value –
- Discount Type: Choose between Percentage or Fixed Rate for your discount. Example: “Percentage” or “Fixed Amount”
- Discount Value: Enter the value for the discount based on your selected type. Example: “25” for a 25% discount or “10” for a $10 discount.
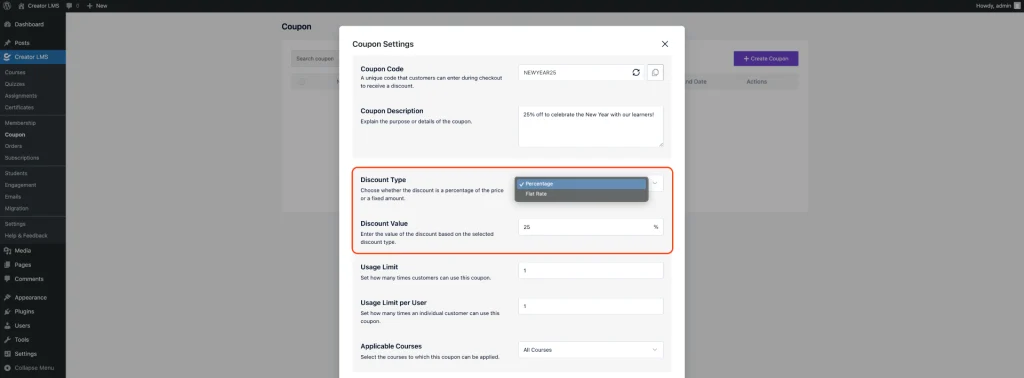
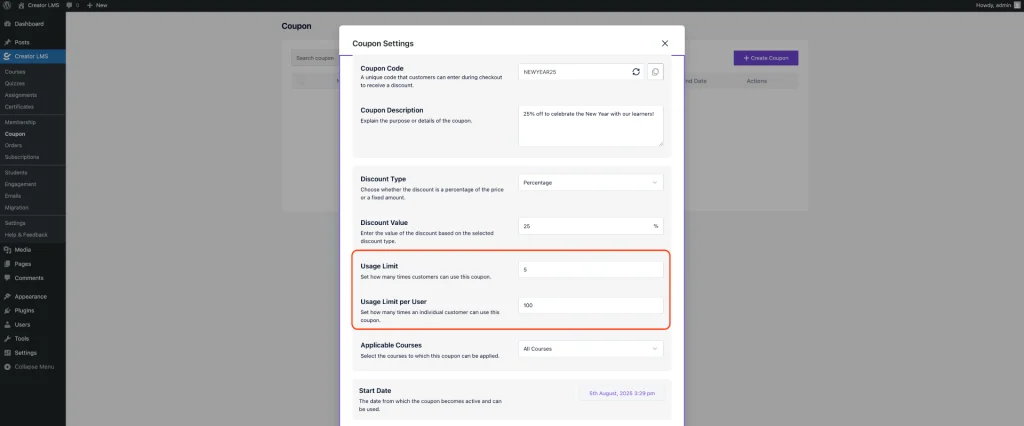
After setting the Discount Type and Discount Value, you can proceed to configure the Usage Limit and Usage Limit per User:
- Usage Limit: Set how many times the coupon can be used in total.
- Usage Limit per User: Set how many times an individual customer can use the coupon.
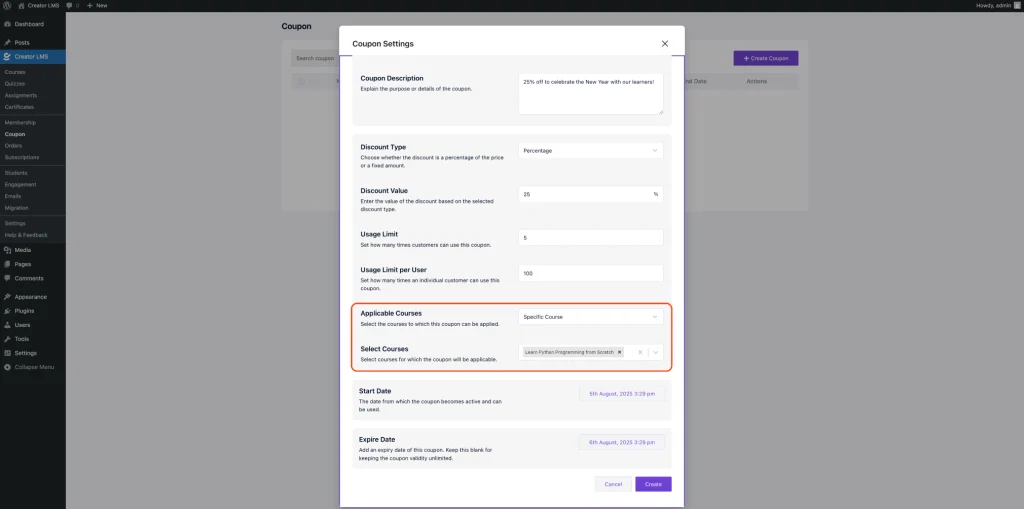
Now, set the Applicable Courses by selecting the courses to which this coupon can be applied. You can choose Specific Courses by searching for and selecting the courses where the coupon will be valid.
Next, set the Start Date for when the coupon becomes active and can be used. You can choose a specific date and time for it to be valid, such as 5th August, 2025, 3:29 pm. Additionally, you can set an Expire Date to limit the coupon’s validity, or leave it blank to keep the coupon valid indefinitely.
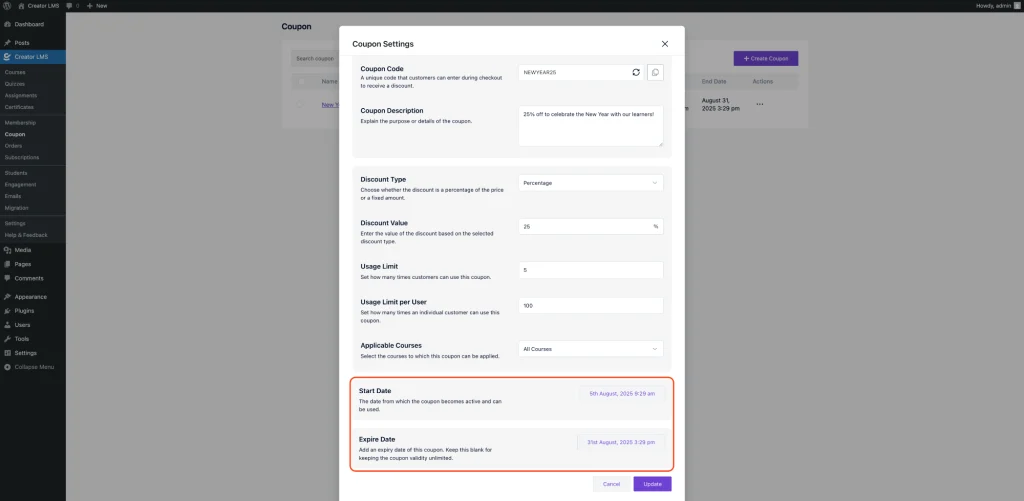
Once all the details are filled in, click Create to save your coupon. Your coupon is now ready to be used by customers!
Now, in the Coupon Dashboard, you can easily share the coupon with your students and members. They can use the coupon code during checkout to enjoy the discount you’ve set up.
