Creator LMS allows you to enable community features for your courses, giving students a space to interact, share ideas, and learn together. This guide walks you through setting up and managing the community feature.
Make sure both Creator LMS Basic and Pro[Business plan] plugins are installed and activated on your site.
Enable Community Feature
- Go to CLMS → Addons and enable the Community option.
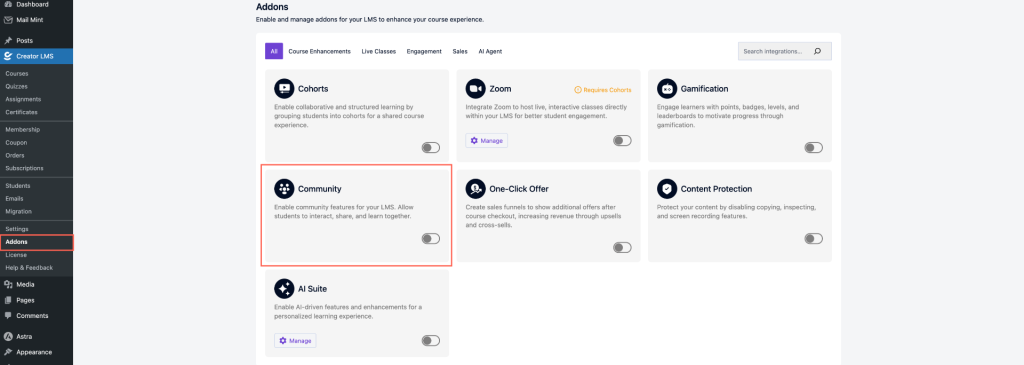
- After enabling, a Community menu will appear in the left sidebar of your WordPress dashboard.
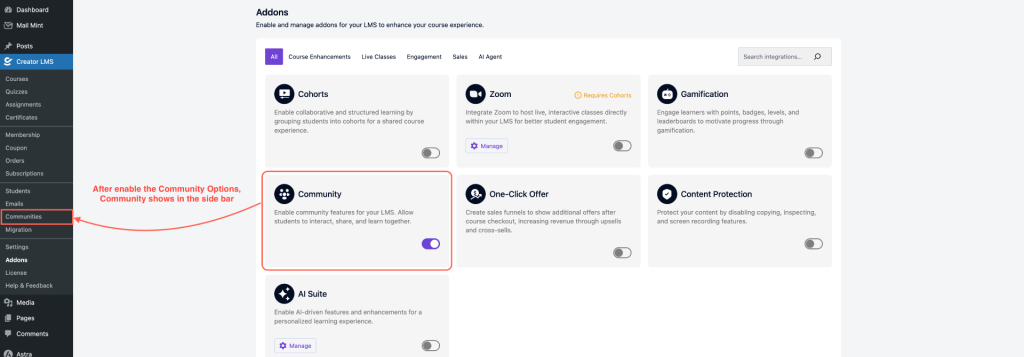
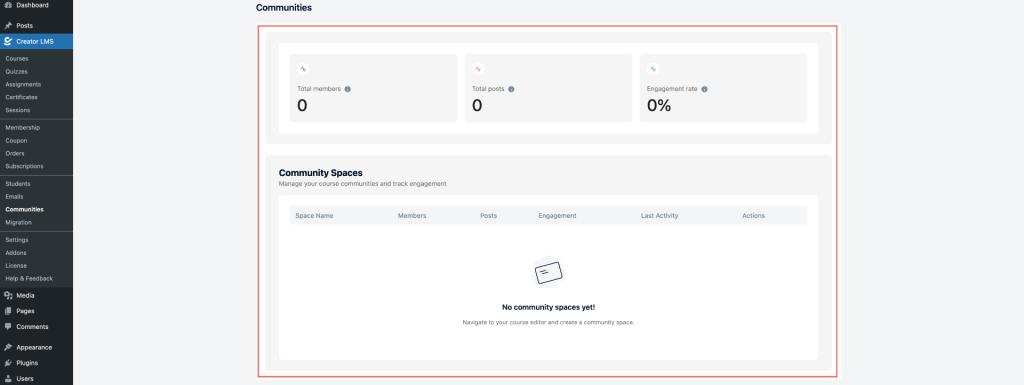
- Click Community to access the dashboard.
Set Up a Community for a Course
- Go to Course Section and select an existing course or create a new one.
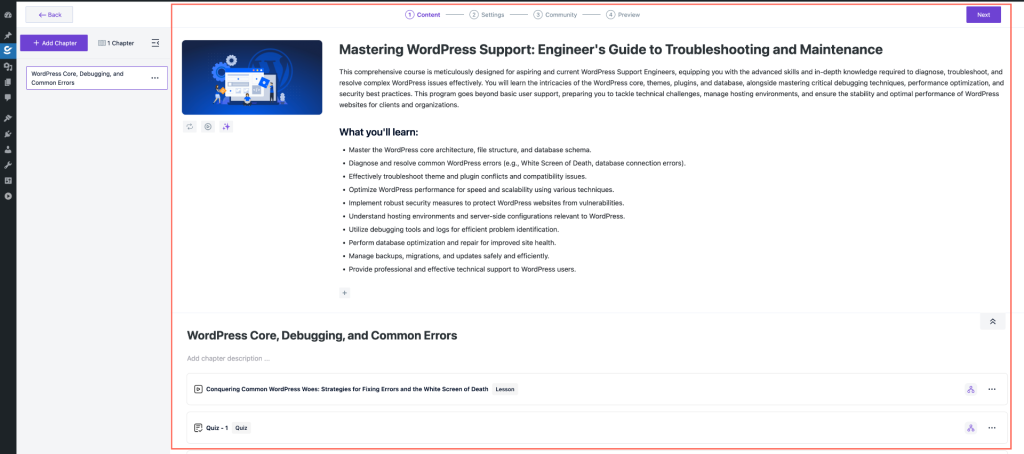
- Open the course dashboard and navigate to Community Options.
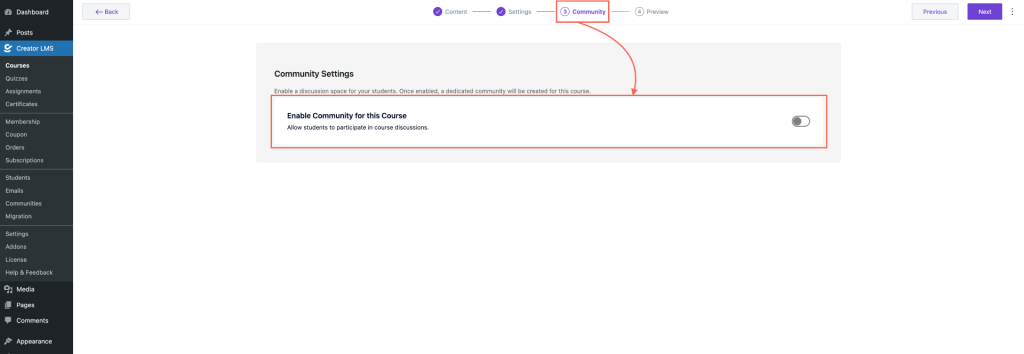
- Enable the community feature for this course, which will generate a unique link.
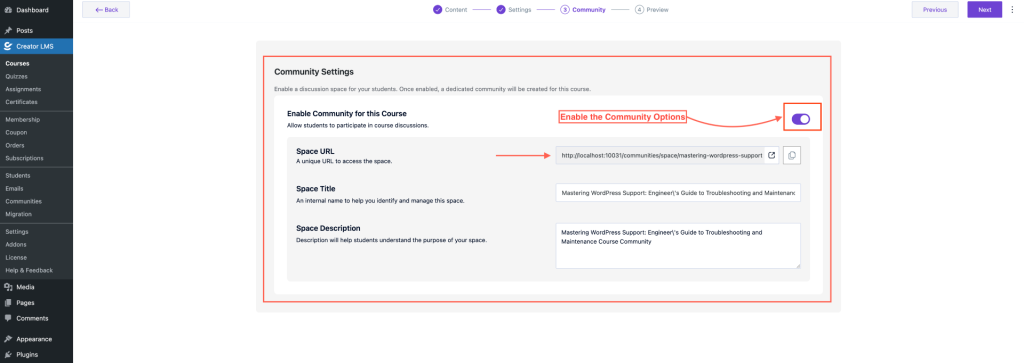
- Fill in the details:
- Space Title: An internal name to identify and manage the space.
- Space Description: Helps students understand the purpose of the community.
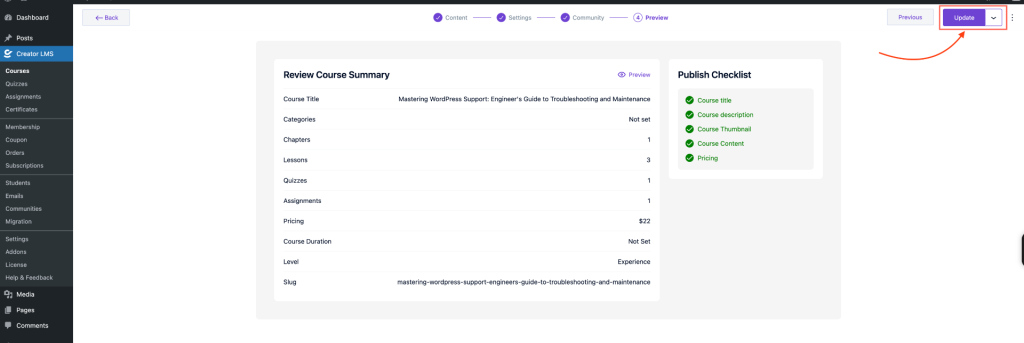
- Save or update the course settings.
Manage Community
- Click Community from the left sidebar to view all community spaces.
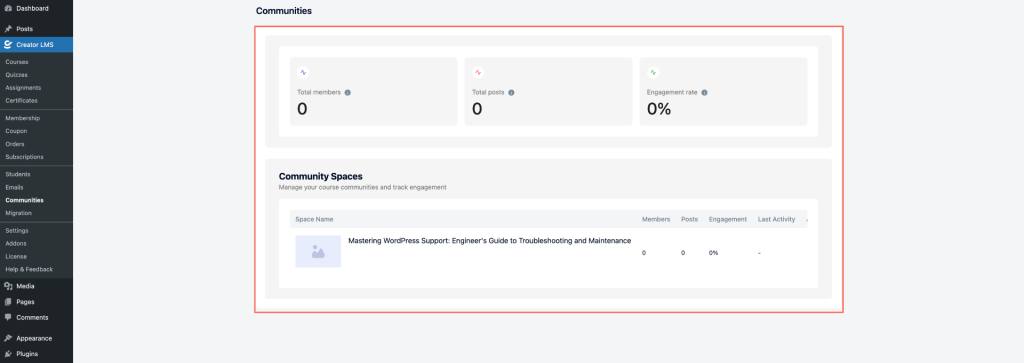
- For each course, you have two actions: View and Settings.
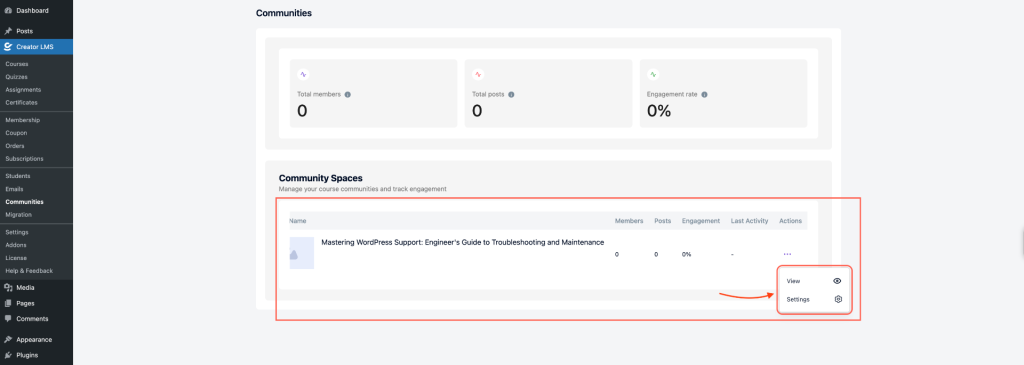
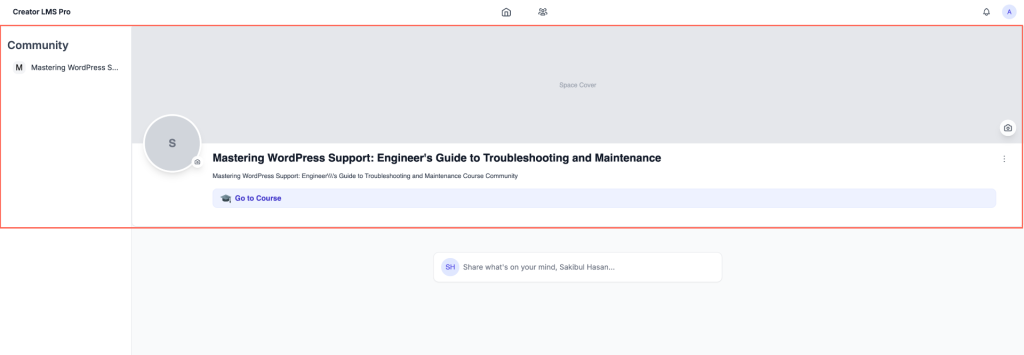
- View: Opens the community group where students can post, comment, and interact.
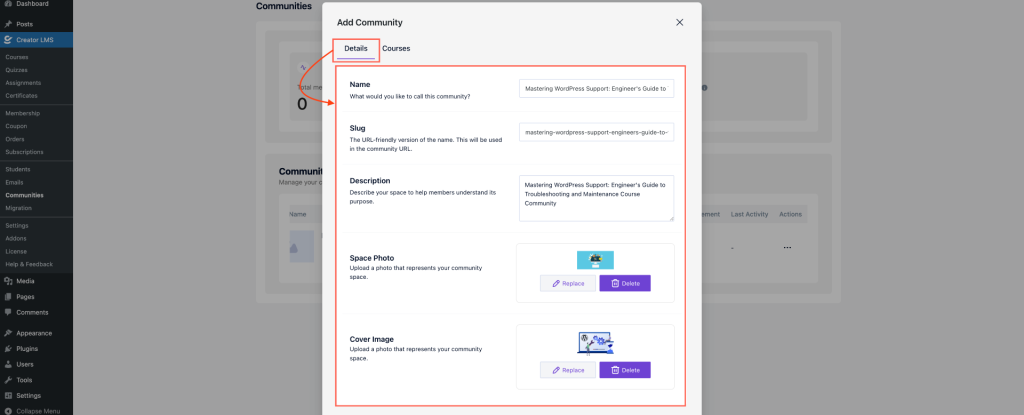
- Settings: Customize your community space by updating:
- Community Name: What would you like to call this community?
- Slug: A short, unique URL identifier for your community (e.g.,
wordpress-beginners). - Description: A brief one-line summary that explains the purpose of this community to students.
- Space Photo: Upload an image representing the community.
- Cover Image: Upload a banner image for the community space.
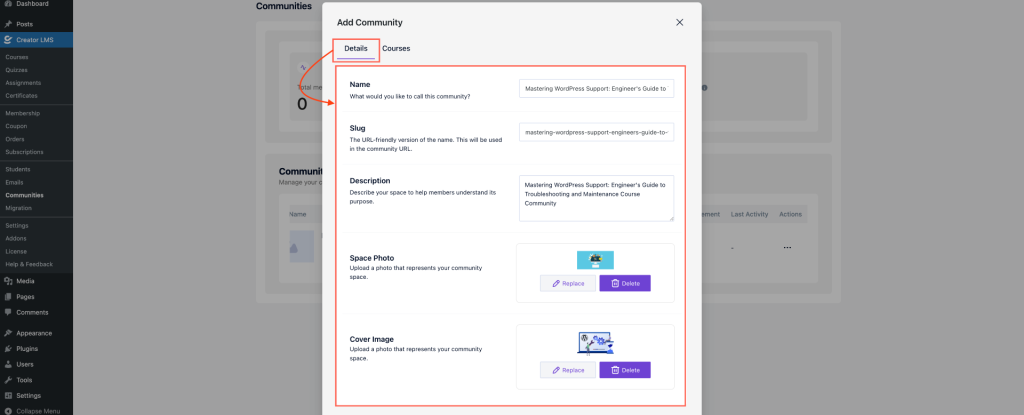
- In the Settings section, there’s another tab named Course. Here, you can select which course the community space is associated with or change the linked course if needed.
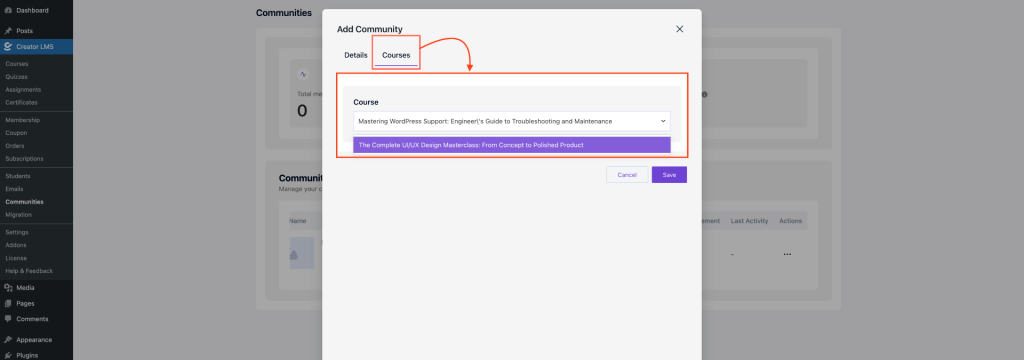
Posting in the Community Group
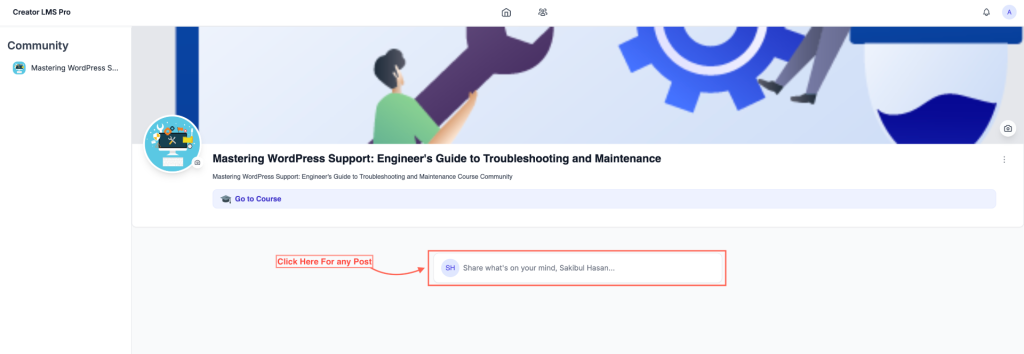
- Go to the community group, click the Post option
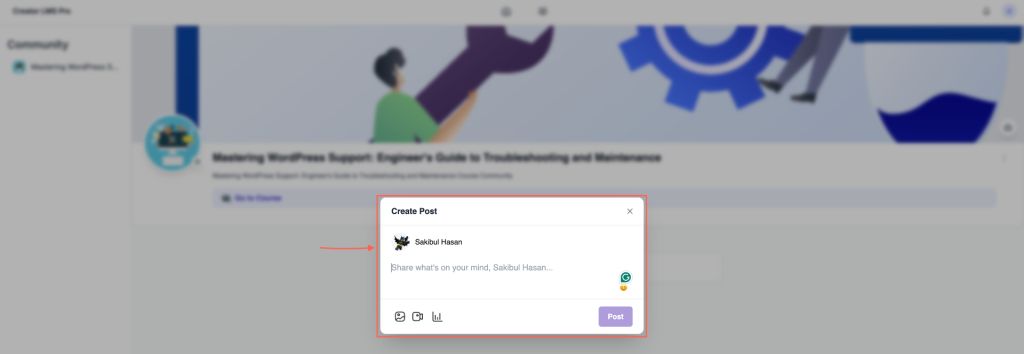
- Within the post editor, you can add text, images, videos, and even polls to engage your community members effectively.
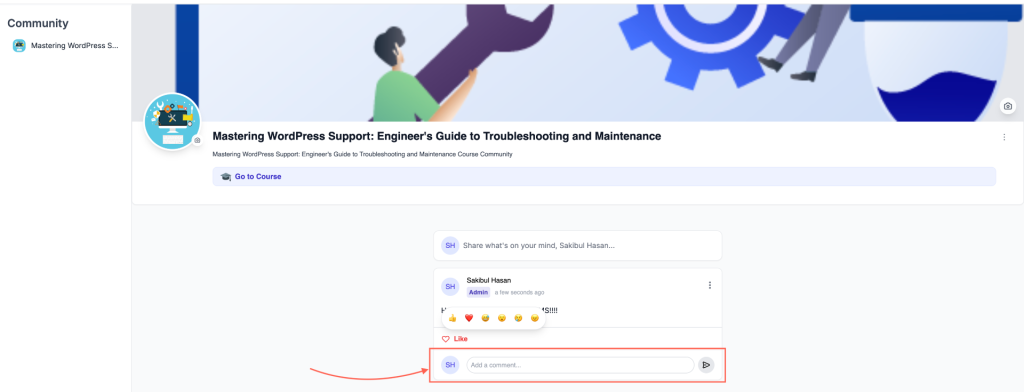
- So, any enrolled students can comment on posts and react using available reaction options, fostering engagement and discussion within the community.
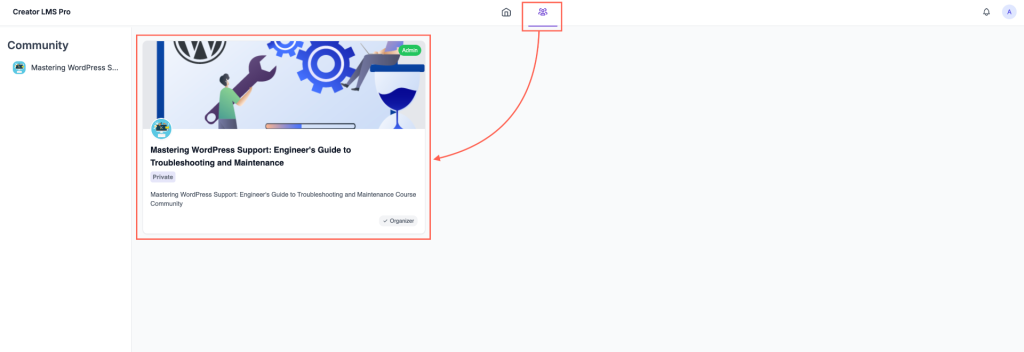
- Now, click the group icon to view all the connected communities. This will display a list of all the communities.
Now everything is set, and your students can actively engage, share, and collaborate within the community spaces you’ve created in Creator LMS.