Managing access and responsibilities just got easier with Mail Mint! Previously, all site users had unrestricted access to Mail Mint’s features, creating potential challenges in managing workflows and responsibilities.
With the newly introduced Roles & Capabilities feature, you can now assign specific permissions to different WordPress roles, ensuring each team member has access only to the tools they need.
The question now is, what makes this a game-changer?
WordPress includes eight default roles: Administrator, Editor, Author, Contributor, Subscriber, Customer, Shop Manager, and Group Leader—each suited for unique responsibilities. For example, you might want:
- Administrators have full access, meaning they can use all features in Mail Mint.
- Shop managers have limited access, allowing them only to create campaigns and automation.
With this new feature, you can easily control who has access to what in Mail Mint, making it simpler to assign tasks and organize your workflows.
Now, let’s take a complete look at how this feature can be implemented on your site:
- Ensure that both the Mail Mint Basic and Mail Mint Pro versions are installed on your site. Please note that this feature is only available in the Pro version.
- Navigate to Mail Mint > Settings in your WordPress dashboard.
- On the left-hand side, you’ll see the Roles & Capabilities option. Click on it to access the feature.
Once you’re in, you’ll find two main sections:
- User Roles
- User-Specific Permissions
User Roles:
In this section, you’ll find the default 8 user roles provided by WordPress. These include Administrator, Editor, Author, Contributor, Subscriber, Customer, Shop Manager, and Group Leader.
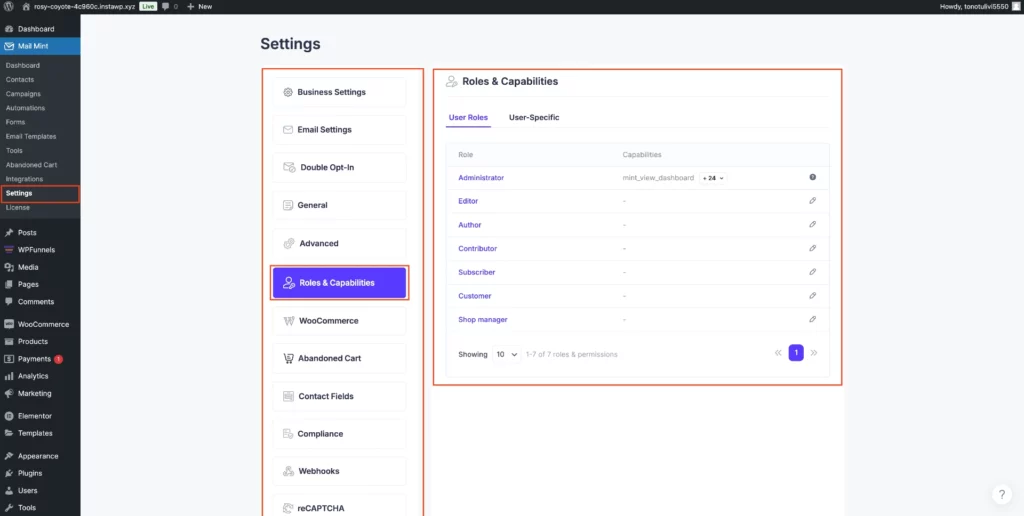
If you want to add additional roles beyond the default ones, you can do so using external plugins like the Members Plugin. After adding a new role, it will automatically appear in this section.
- Administrator Role: By default, the Administrator role has full access to all plugin features, as they have the highest level of authority and can make decisions about the site.
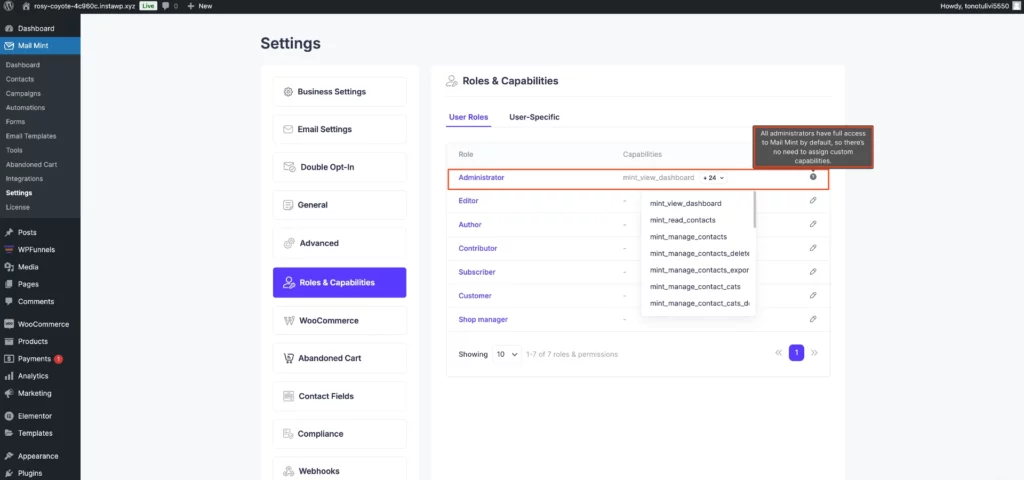
2. Other Roles: You can set specific permissions based on their responsibilities for all other roles.
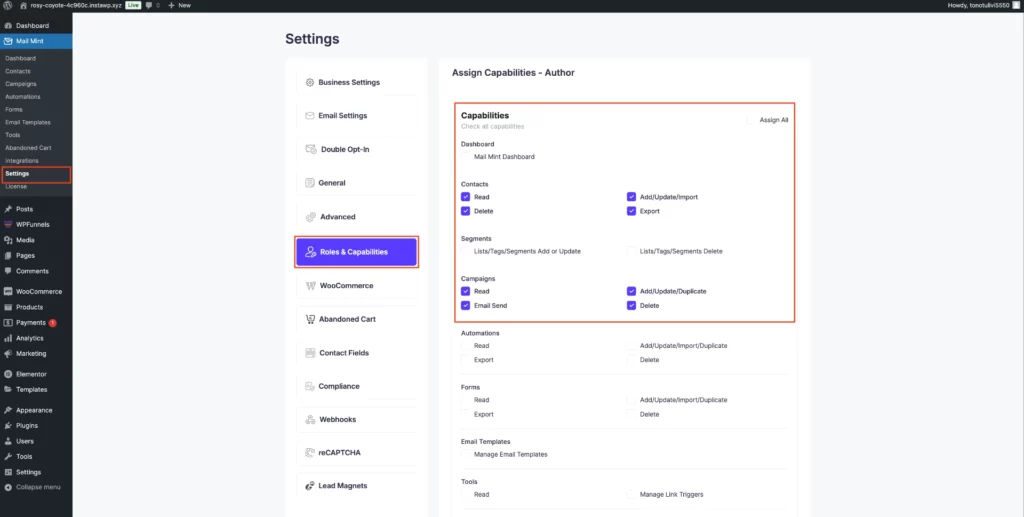
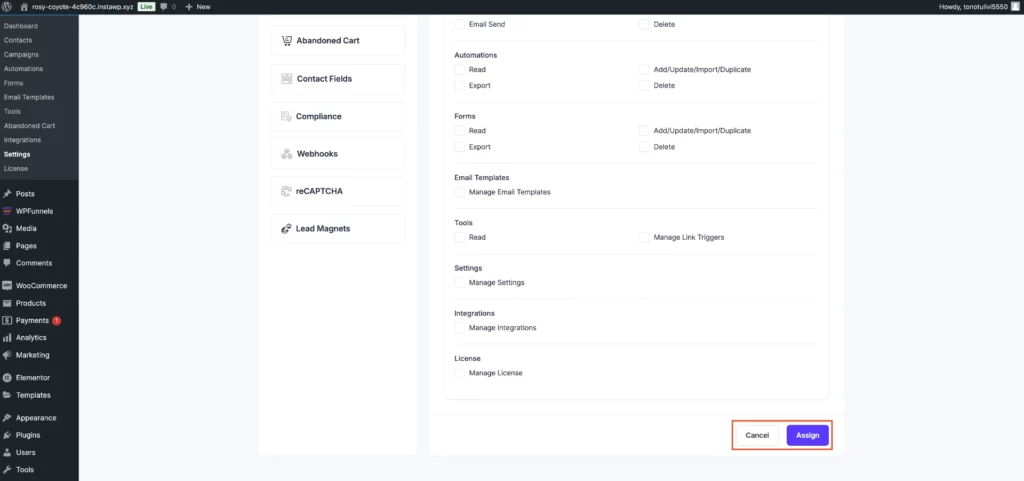
After defining the desired permissions for each role, click the Assign button to apply the changes
User-Specific Permissions
The User-Specific Permissions feature is designed to grant permissions to individual users, allowing you to fine-tune access for specific roles. For example, if you have 5 editors on your site, all of them may have access to the Dashboard, Contacts, and Campings. But, if you don’t want one of the editors to access the dashboard, you can easily adjust this.
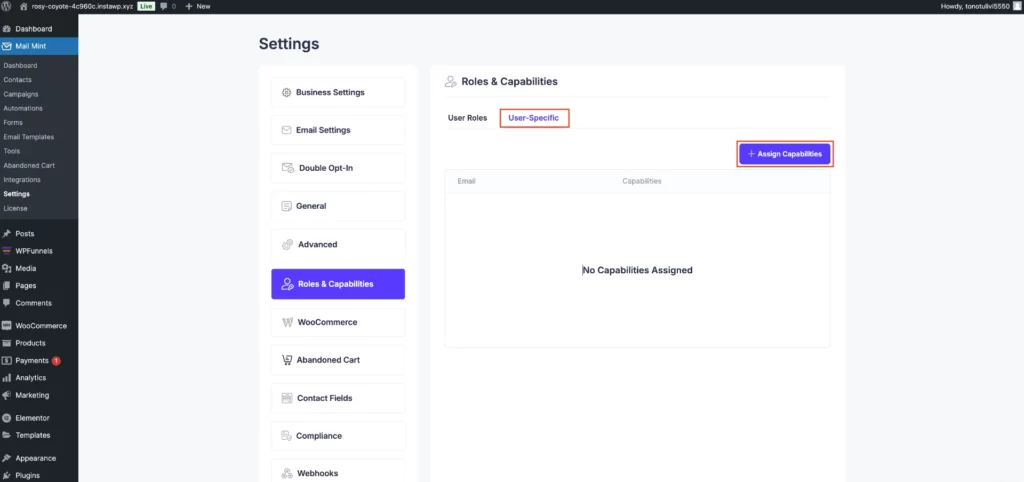
To set specific permissions:
- Enter the email address of the user you want to customize. Choose which permissions you want to grant or revoke for that specific user.
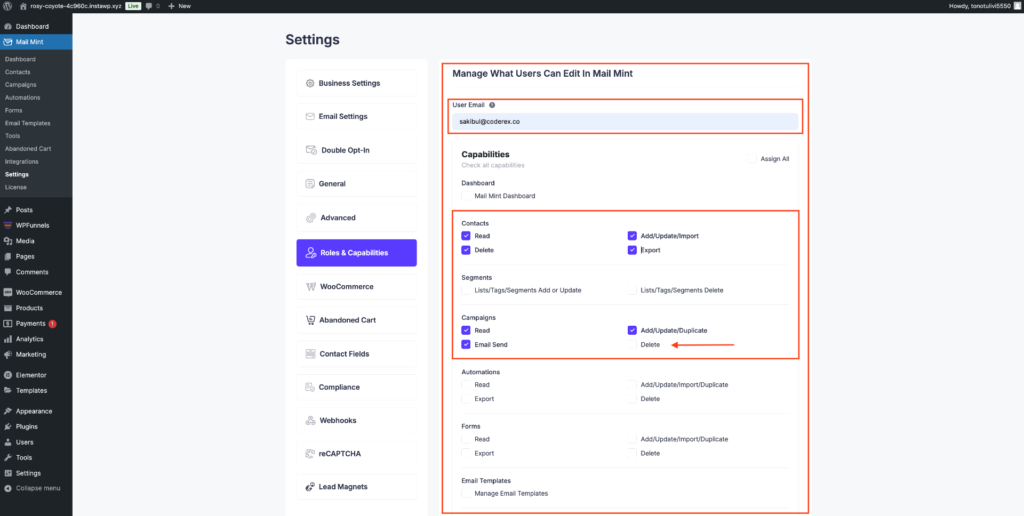
This feature allows you to have more control over individual user access, ensuring that each user has only the necessary permissions for their responsibilities.


