Creator LMS allows you to customize the appearance of your courses and related pages. You can set how courses are displayed on archive pages, individual course pages, and the checkout page to create a professional and user-friendly experience.
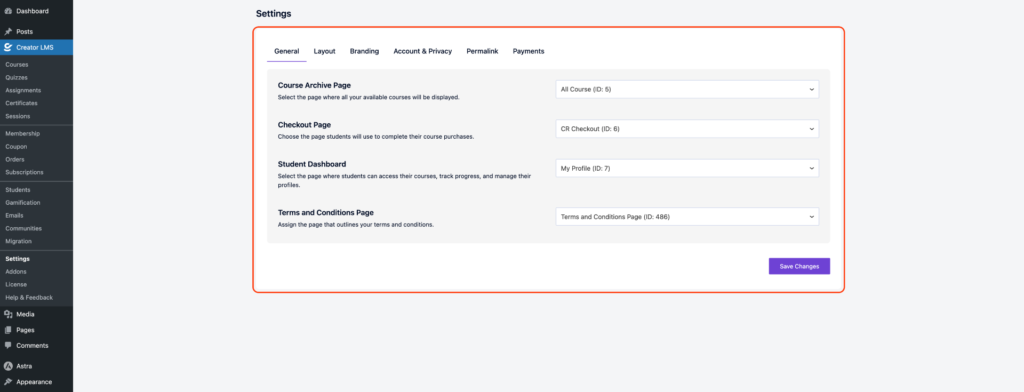
Step 1: Access Layout Settings
- First, log in to your WordPress Dashboard, go to Creator LMS → Settings, and click on the Layout tab.
Step 2: Customize Course List Page / Archive Page
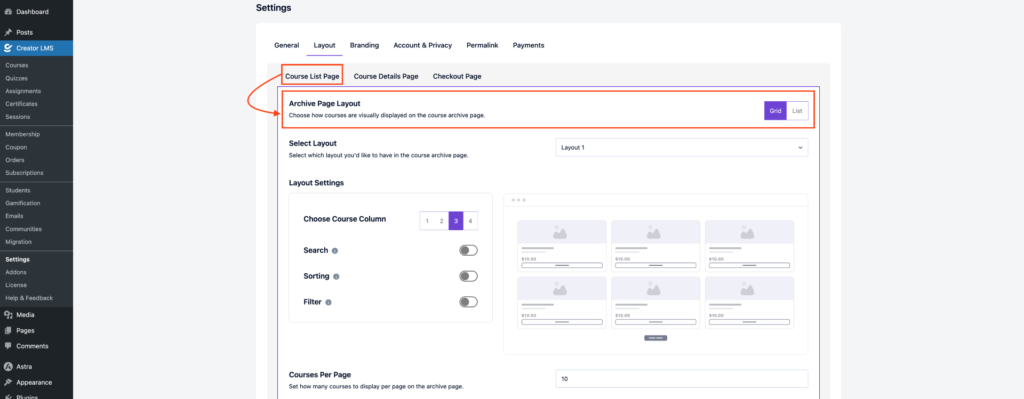
In the Layout tab, open the Course List Page or Archive Page Layout section.
- Choose how courses are displayed on the archive page. The available options are:
- Grid View – displays courses in a visual grid layout.
- List View – shows courses in a simple vertical list.
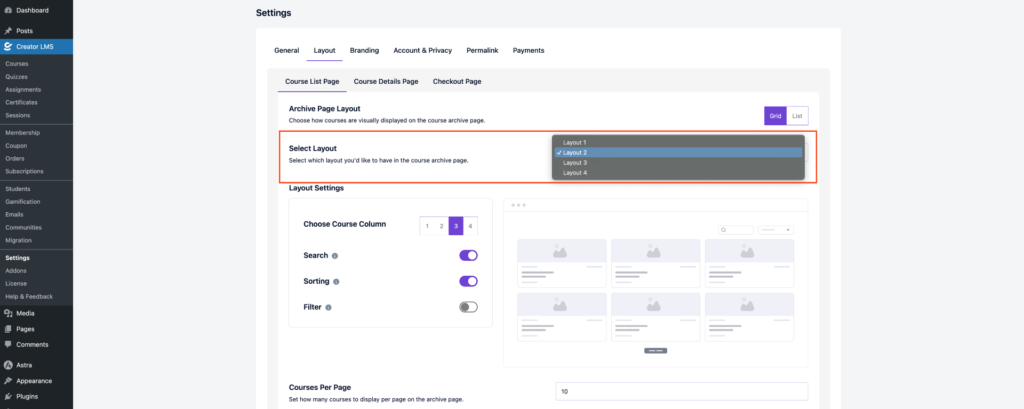
- Pick from four layouts for how courses appear on the archive page.
- After choosing the layout, you can set the layout settings, including course columns, search bar, sorting, filters, and number of courses per page.
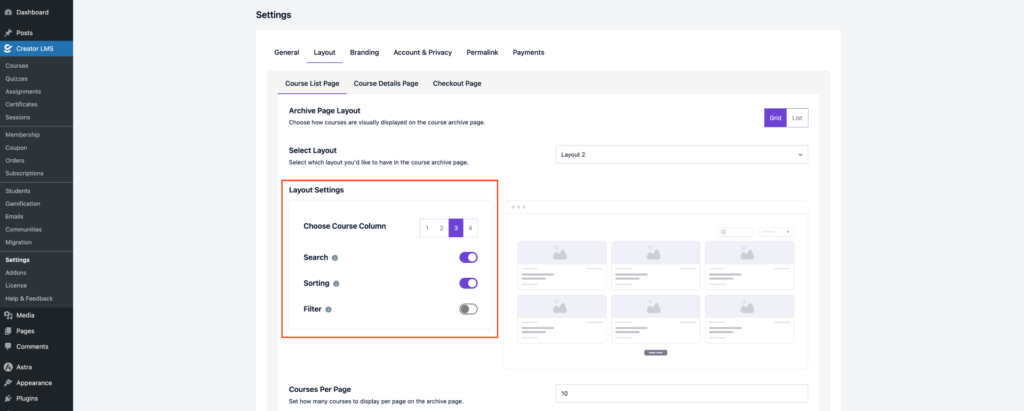
Click Save Changes to apply your selections.
Step 3: Customize Course Details Page
In the Layout tab, open the Course Details Page section to choose how your courses appear on your site.
- From here, you can choose from three different layout options for displaying your course details page.
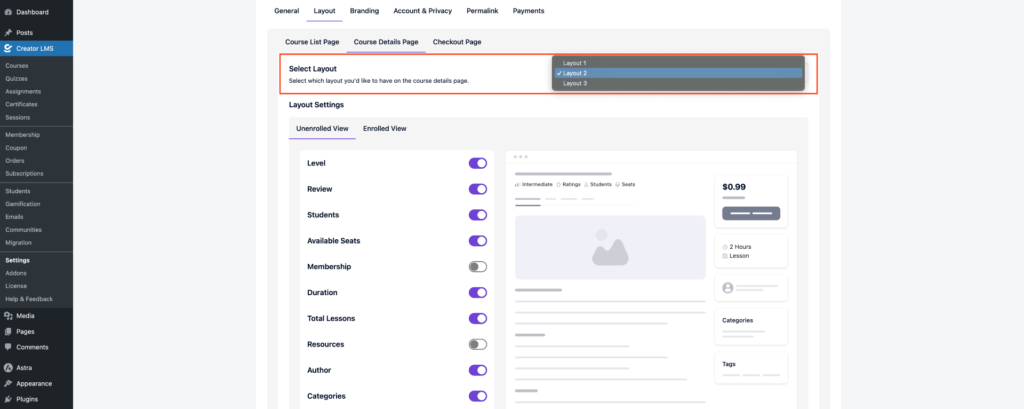
- After choosing the layout, configure options for enrolled and unenrolled students.
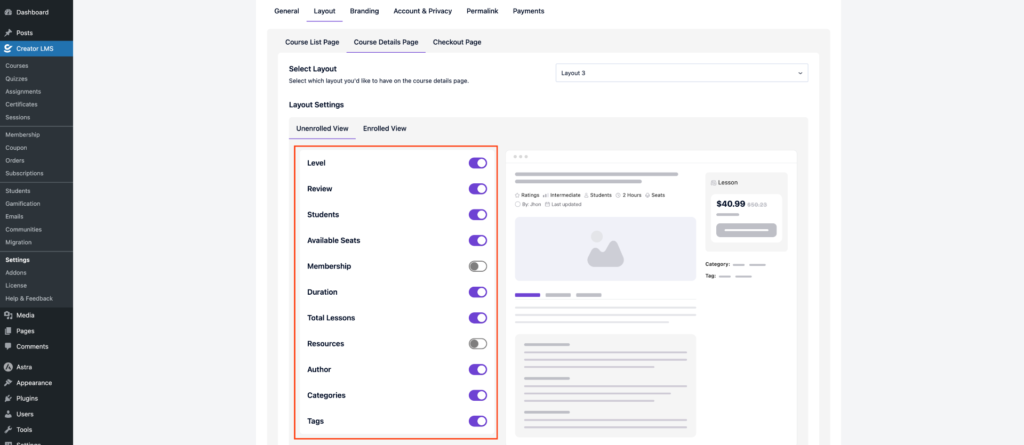
- You can now enable or disable details like Level, Reviews, Students, Seats, Membership, Duration, and more to control what information is shown to students.
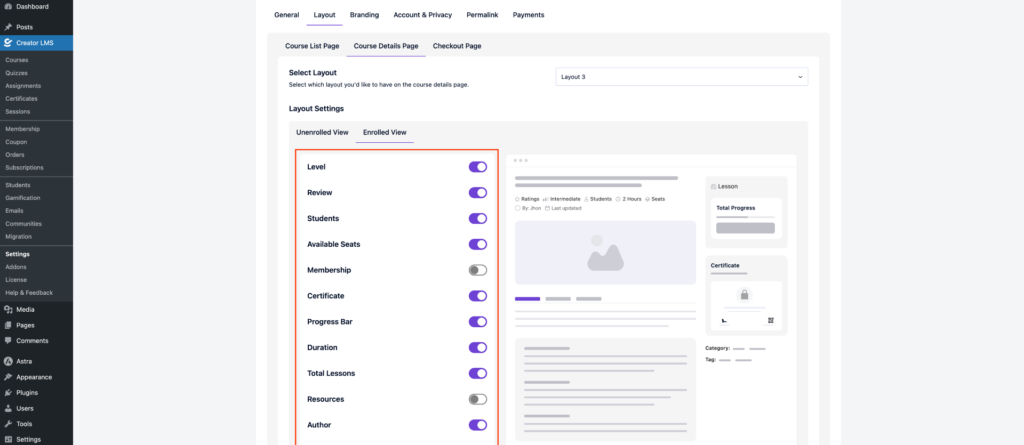
Click Save Changes to apply your settings.
Step 4: Customize Checkout Page
- Go to the Checkout Page section under the Layout tab.
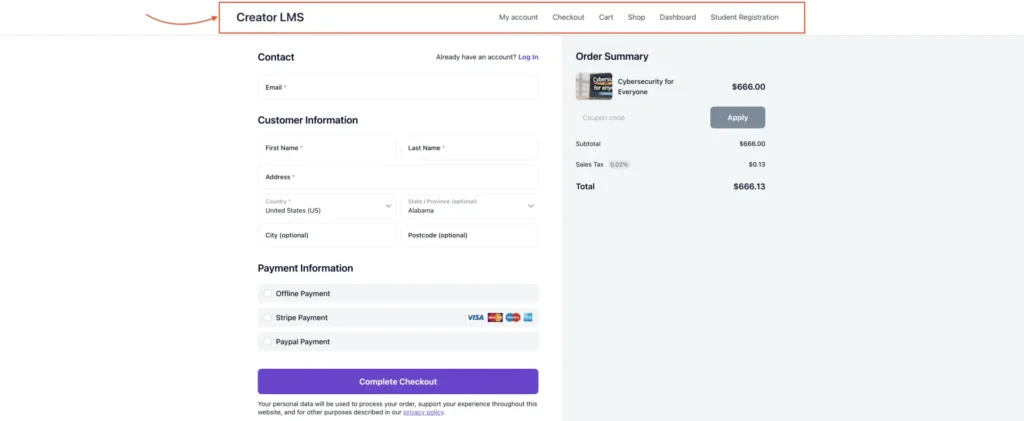
- Choose a layout style: Default( with header and footer) or Canvas Layout(No Header and Footer), and then click Save Changes to apply your settings.
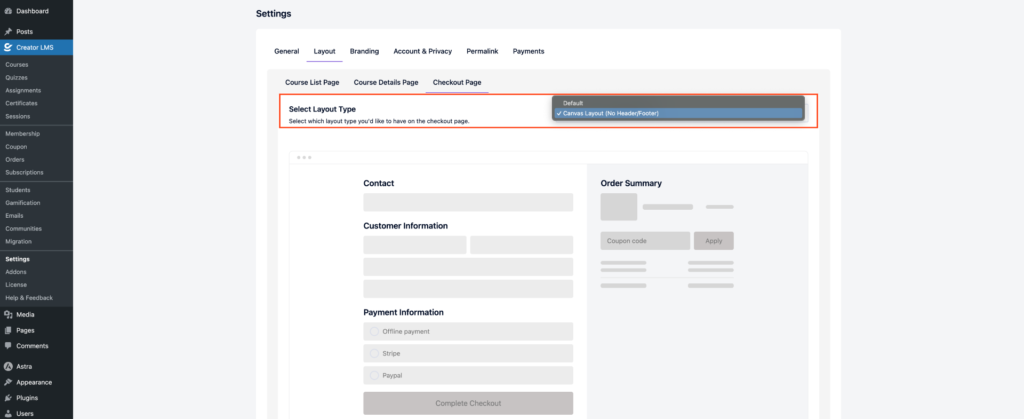
- Once saved, the checkout page will display according to your chosen layout, including header and footer if selected.
Now, after setting up all the layout options for your course list, course details, and checkout pages, your courses are ready to go live on your site. Students will see the content exactly as you’ve designed, with all selected elements and layouts in place, providing a smooth and engaging learning experience.