Creator LMS lets you design responsive and customizable course pages using your preferred page builder.
If you use Bricks Builder, this guide will show you how to easily create pages like the Course Dashboard, Checkout, Sales, or Offer Details using Creator LMS widgets inside Bricks.
Before you begin, ensure both Bricks Builder and Creator LMS are installed and activated.
With the free version, you’ll find 2 widgets available in Bricks, while Creator LMS Pro unlocks 4 widgets for more flexible and advanced page designs.
Steps to Design Course Pages with Bricks Builder
Step 1 – Go to the Page Section
- Go to your WordPress dashboard and navigate to: Pages → All Pages
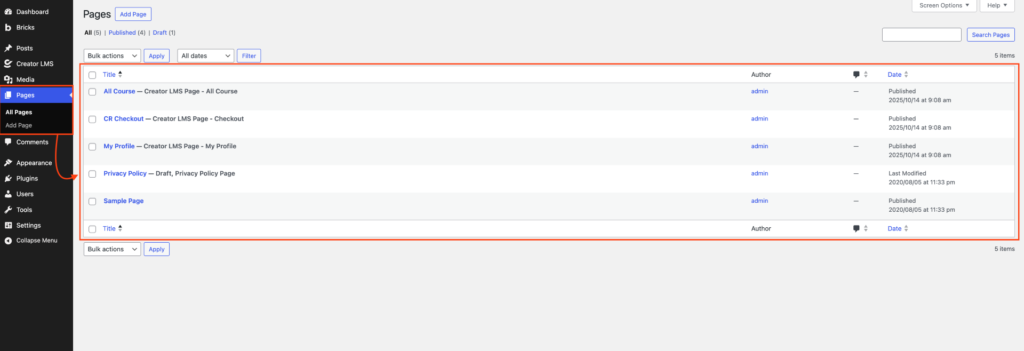
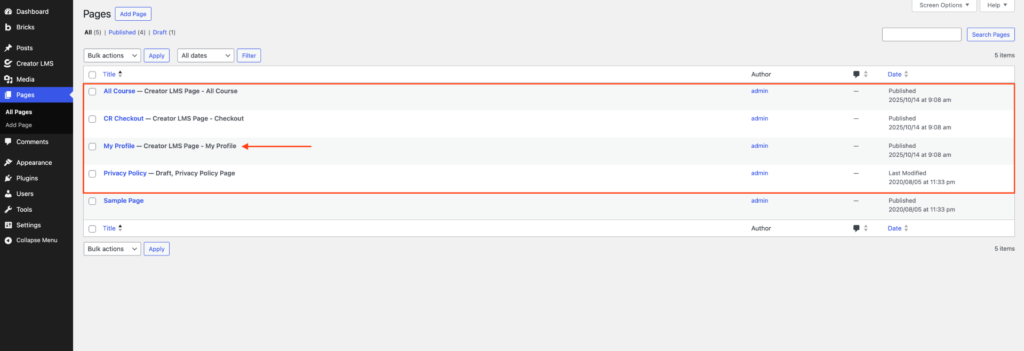
When you install Creator LMS, some pre-built pages — like the Course Dashboard, Checkout, and Cart page, etc — are automatically created and saved under your Pages list.
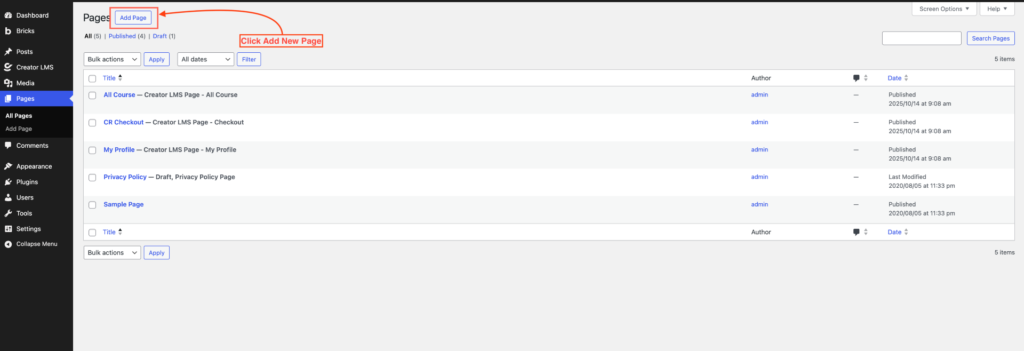
If you want to design a custom page (for example, a new checkout page), click Add New Page.
Step 2 – Edit with Bricks Builder
- Click Add New Page or edit any existing page.
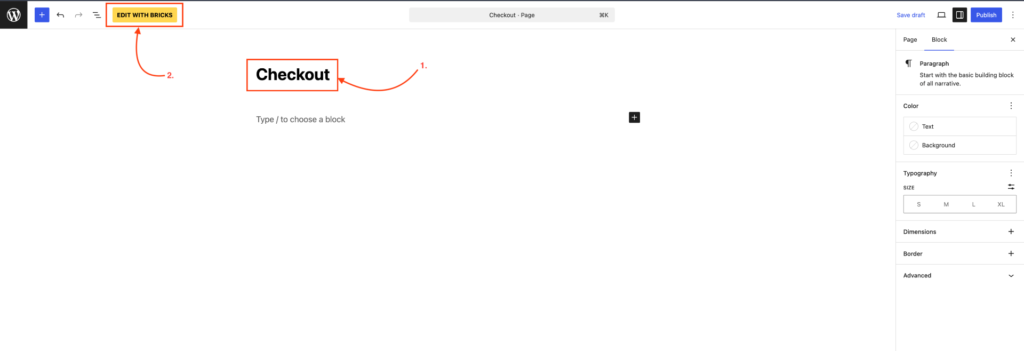
- Now, add a title—for example, ‘Checkout’—then click Edit with Bricks. The page will open in Bricks Builder.
Step 3 – Access Creator LMS Widgets
- Scroll down the Bricks Elements Panel on the left side. Here, you’ll find Creator LMS widgets. If you are using:
- Creator LMS (Free) → You’ll see 2 widgets.
- Creator LMS Pro → You’ll see 4 widgets
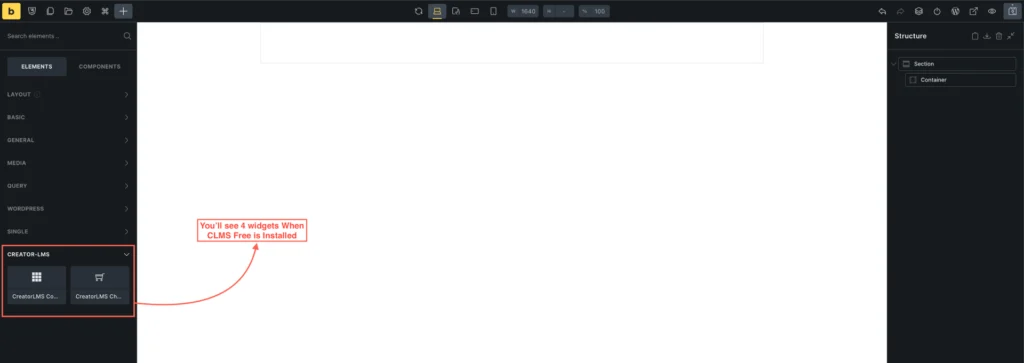
Step 4 – Add a Widget (Example: Checkout Page)
- Let’s say you’re designing a Checkout Page. Simply drag and drop the Checkout Widget from the Creator LMS section into your layout.
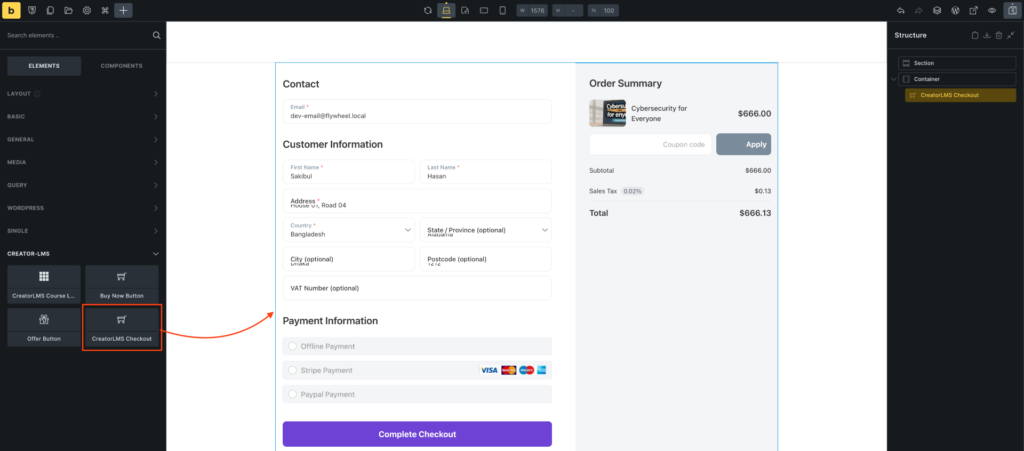
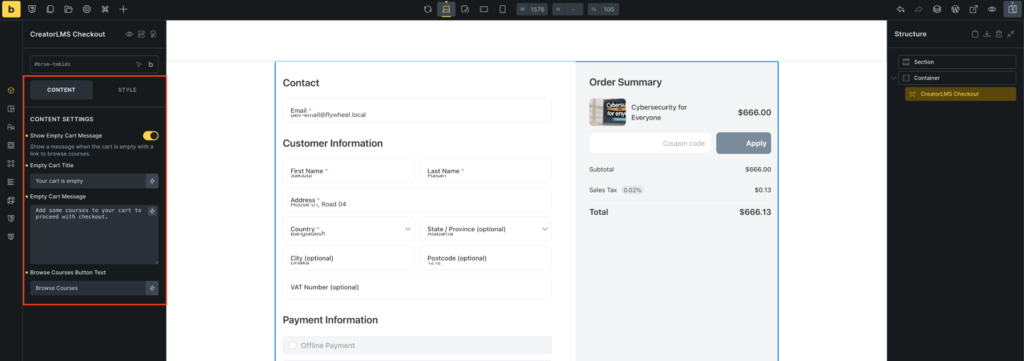
- Once the widget is added, you can configure additional Content Settings:
- Show Empty Cart Message → Enable to display a message when the cart is empty.
- Empty Cart Title → Customize the title shown when the cart is empty (e.g., “Your cart is empty”).
- Empty Cart Message → Add a descriptive message with a link to browse courses, guiding users back to your course catalog.
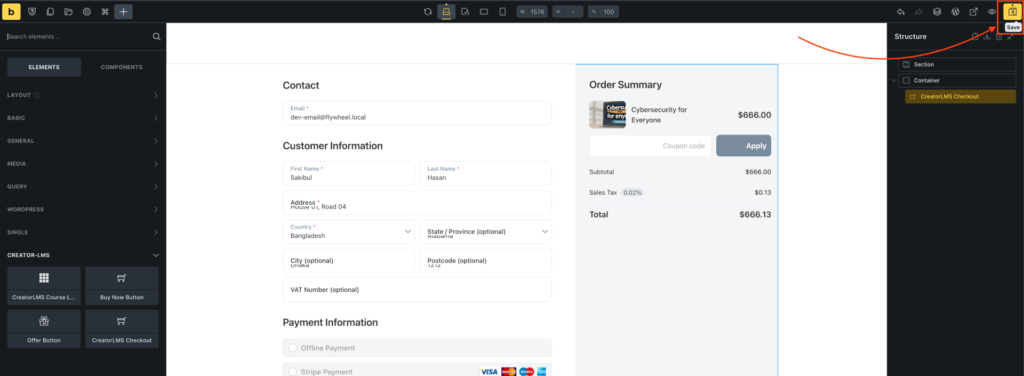
Step 5 – Customize and Save
- Adjust the layout and styles to match your brand’s look — including colors, typography, and button styles. Once you’re satisfied, click Save in Bricks to publish your page.
Additional Tips:
In the same way, you can use the other Creator LMS widgets to enhance your pages:
- Course List Widget → Show all your courses on a page or archive.
- Buy Now Button → Add to your Sales Page. When clicked, it will send users directly to the cart.
- Offer Button → Add upsell or downsell offers on your course pages.