When you are planning your funnel, the first thing to do is to add the three basic steps, Landing, Checkout, and Thank you.
The next thing to do is to decide the main funnel sales product.
**Now, I’m calling it the “main funnel sales product” but you might have a different funnel plan where you want to offer the main product as an upsell offer. In that case, this will be the initial offer product.
In this guide, you will learn how you can assign the main funnel sales product easily in just two quick steps.
Step 1: Go To The Checkout Settings Drawer
Initially, if you haven’t added a product to your checkout step, you will see a red label called “No Product Added.” This will be removed when you assign the main product to your funnel.
On the checkout step, click on the Settings option (cart icon) to open the checkout step settings drawer.

Step 2: Add The Main Product(s)
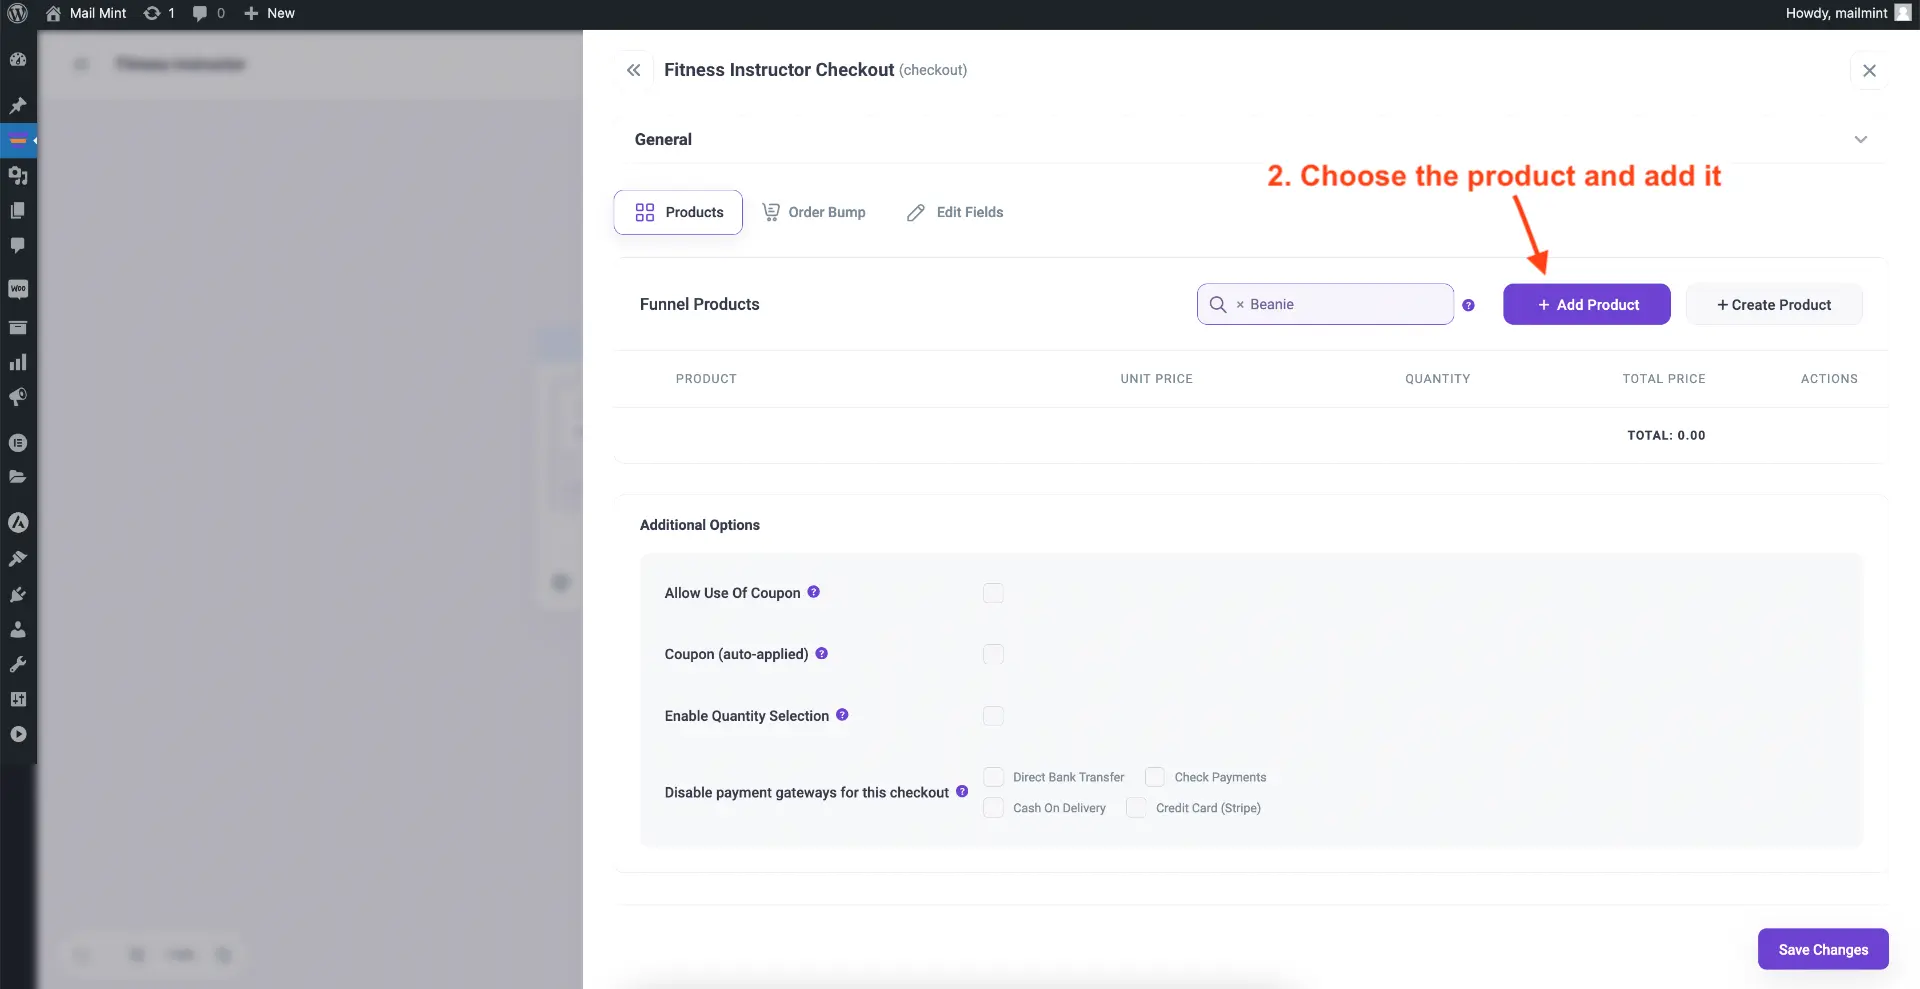
Now, on the search bar on the right side, search for the product that you want to mainly offer in this sales funnel. Select it & click on the “+ Add Product” button and the product will be added.


**If you want you can add multiple products.
Once you add the product(s), click on Save Changes.
That’s it. You have the main funnel sales product added to your funnel. You can then proceed with designing your funnel pages, deciding on the extra funnel offers such as order bumps and upsells, customizing the checkout fields, etc.


