The WPFunnels settings menu provides a range of options to help you configure the plugin according to your needs.
If you’ve already completed the setup wizard, some of these settings might have been configured based on your preferences. However, if you skipped the setup wizard, don’t worry – you can easily adjust these settings later.
Under the Settings tab, you’ll find eight different sub-tabs, each offering specific configuration options to fine-tune your funnel experience. Like,
- General Settings
- Permalink
- Opt-in Settings
- Offer Settings [Pro]
- Event & Other Integrations [Pro]
- Advanced Settings
- Role Management
- Logs
Let’s look at the options in detail.
1. General Settings
The General Settings menu allows you to customize your funnel preferences. Below are the key options you can configure:
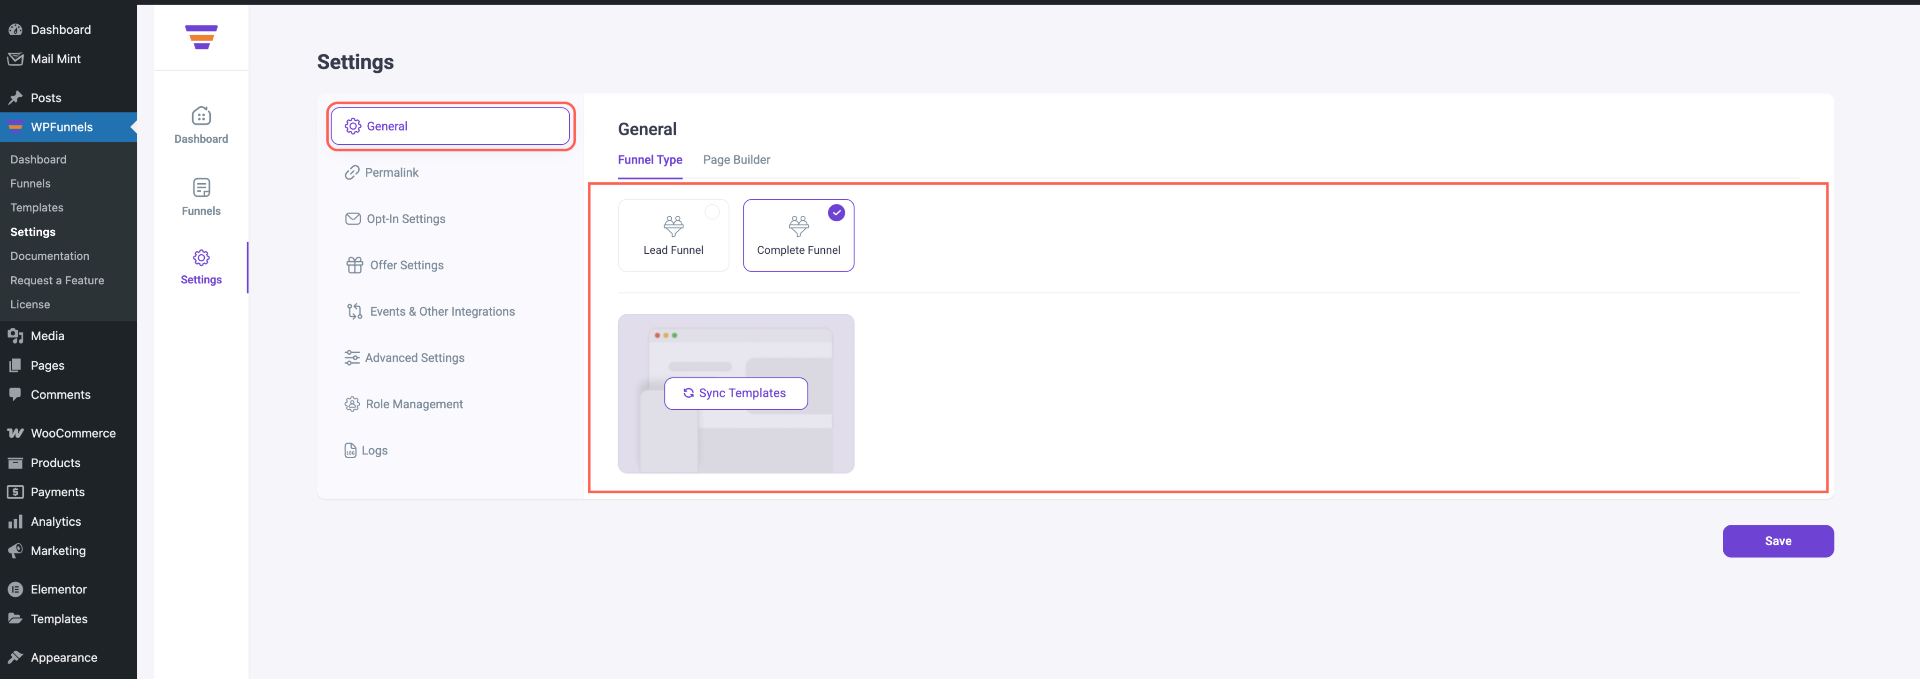
Funnel Type
This option lets you choose the type of funnels you want to create with WPFunnels. You have two options to select from:
- Lead Funnel: Opting for this type enables you to create lead-generation funnels without the need for WooCommerce or sales/offer steps. The primary focus here is collecting leads. You can create funnels using landing pages, custom landing pages (Pro), and thank you pages.
- Complete Funnel: Choose this option if you intend to run full sales funnels, in addition to lead generation. This setup requires WooCommerce for handling payments and products. You can create complete funnel journeys, mixing lead generation and sales, or create separate funnels for each. This will allow you to design a wide range of pages, including Landing Pages, Custom Landing Pages (Pro), Checkout Pages, Order Bumps, Upsells (Pro), Downsells (Pro), and Thank You pages.
Page Builder
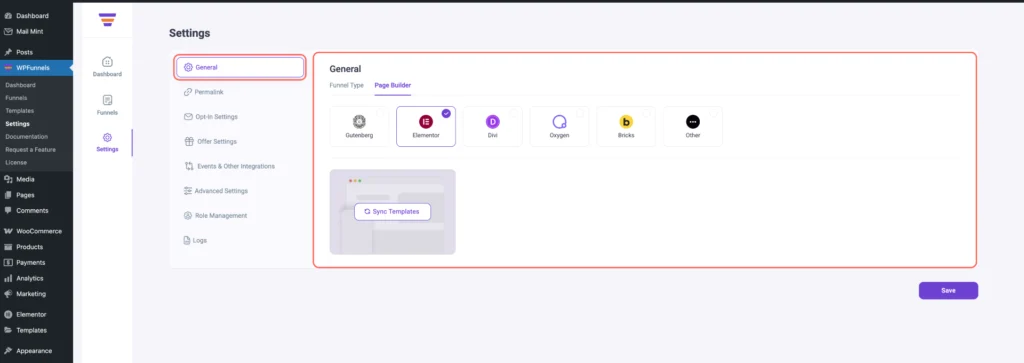
Select your preferred page builder or editor for designing funnel steps. Currently, you can choose from Gutenberg, Elementor, Divi, Oxygen, Bricks, or any other compatible page builder.
Sync Template
The Sync Templates button enables you to sync pre-made funnel templates based on your selected page builder. After selecting your preferred page builder, simply click on the Sync Templates button. This action will sync the template collection for that particular builder to your site. When creating a funnel, you’ll have the option to import one of these templates if you’d like.
Once you have selected the required options, click on the Save button below.
2. Permalink
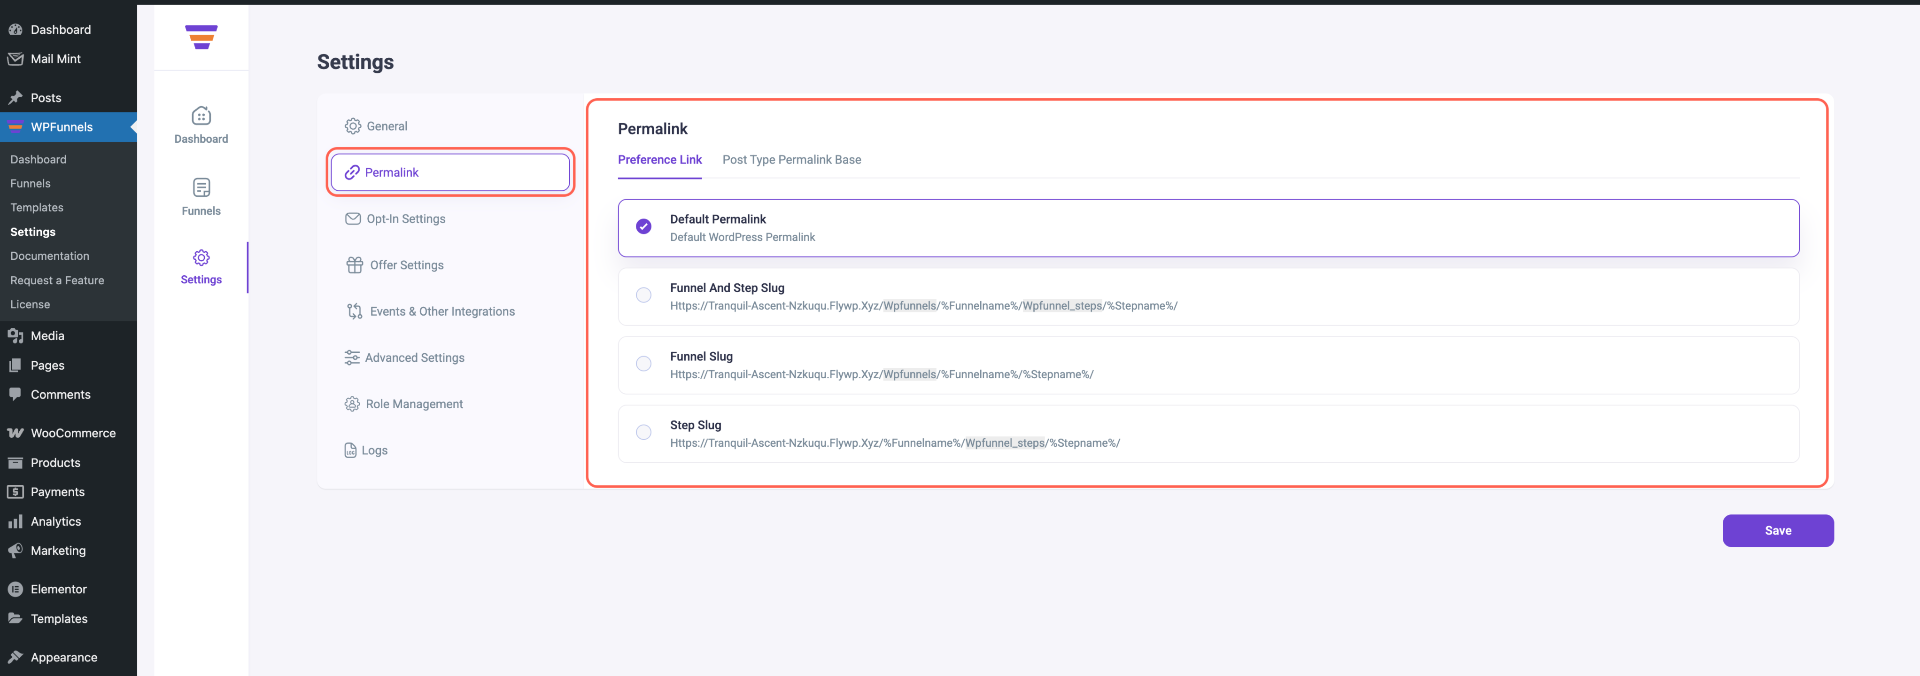
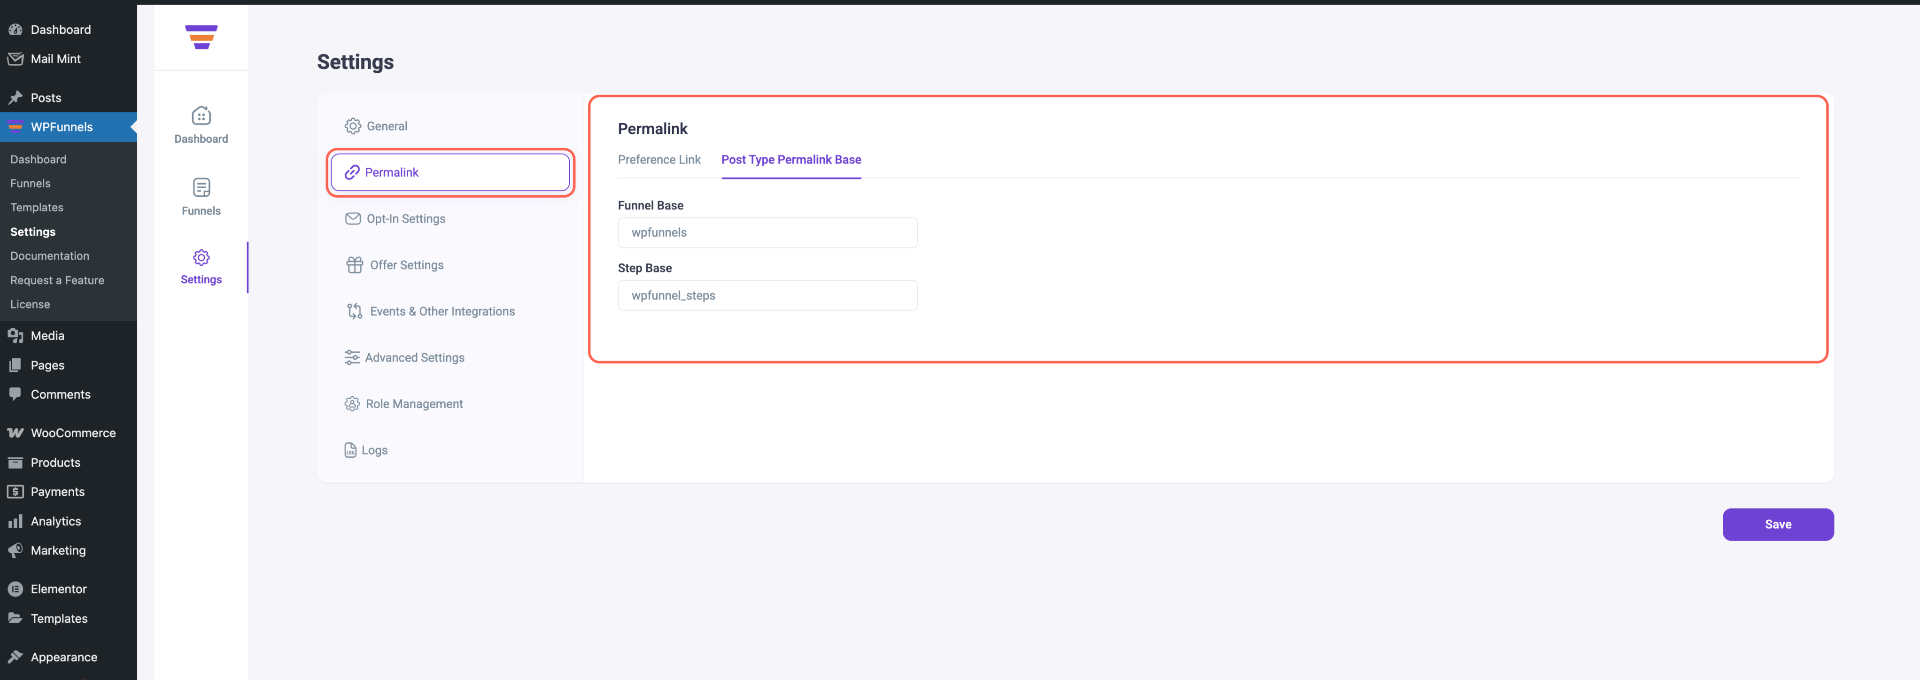
In the Permalink tab, you can customize the URL structure for your funnel steps. You have the option to either stick with the default permalink structure provided by WordPress or choose a custom slug structure for better URL optimization. There are three custom options available for you.
- Permalink Settings
(i) Default Permalink
(ii) Funnel and Step Slug
(iii) Funnel Slug
(iv) Step Slug
- Post Type Permalink Base
(i) Funnel Base
(ii) Step Base
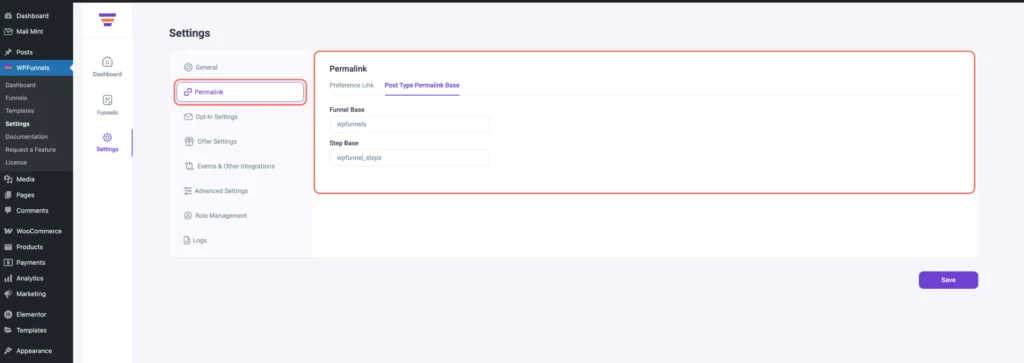
For example, let’s say you selected the Funnel and Steps slug. Then below in the input fields, the text you enter will be part of the slug in the previewed structure.
So, if I use the Funnel base as Offer and the Step base as OfferSteps, the permalink structure will be
https://www.yourwebsite.com/Offer/%funnelname%/OfferSteps/%stepname%FYI: The best practice for sales funnels is to use the Funnel and Step slug permalink structure.
If you have made any required changes, click on the Save button.
3. Optin Settings
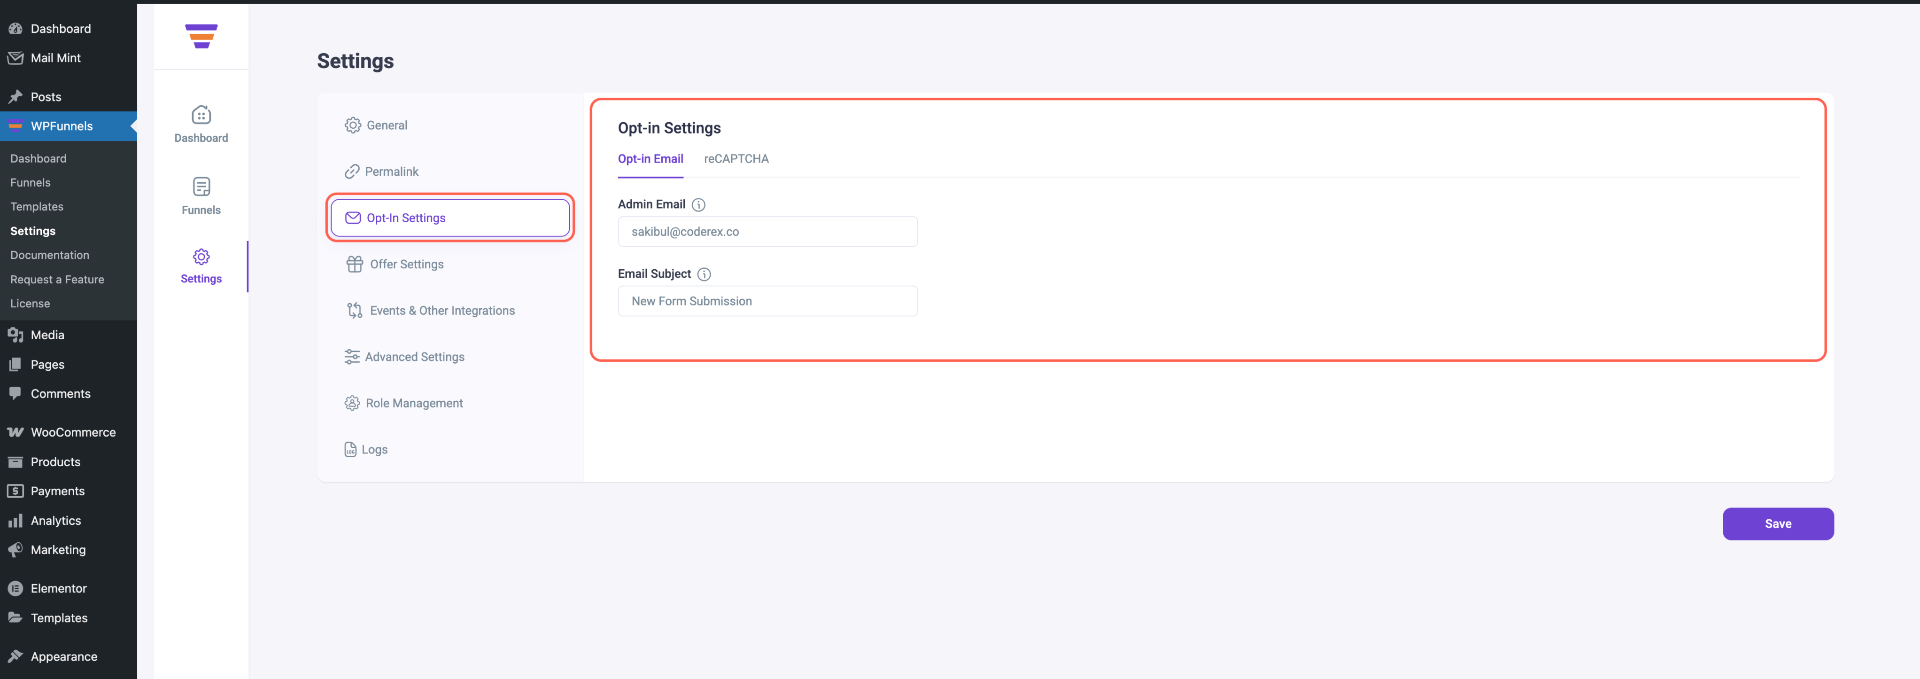
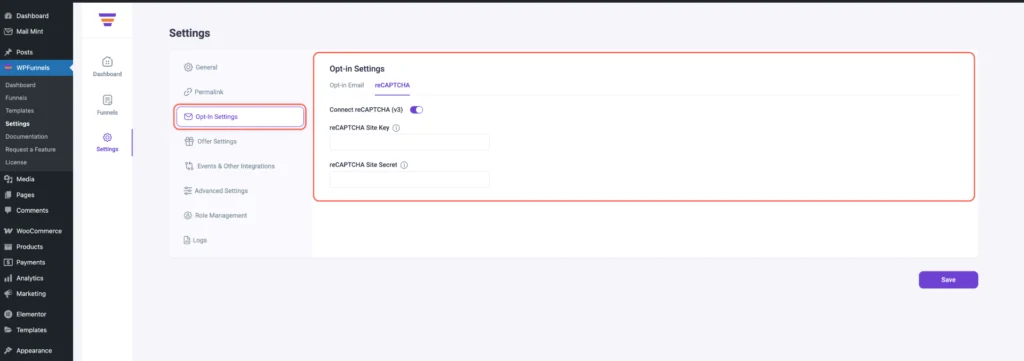
The Opt-in Settings section allows you to configure the foundational aspects of your opt-in forms within your funnels. These settings are essential for managing how users interact with your forms and how you capture leads effectively.
- Opt-in Email Settings
When someone opts in using the WPFunnels opt-in form, the lead is typically sent to the admin email. You can update that email address here and customize the subject line.
- ReCAPTCHA Settings
You may connect reCAPTCHA v3 here, which will help with spam detection on your opt-in forms.
Make sure to click on the Save button after you make any changes.
4. Offer Settings [Pro]
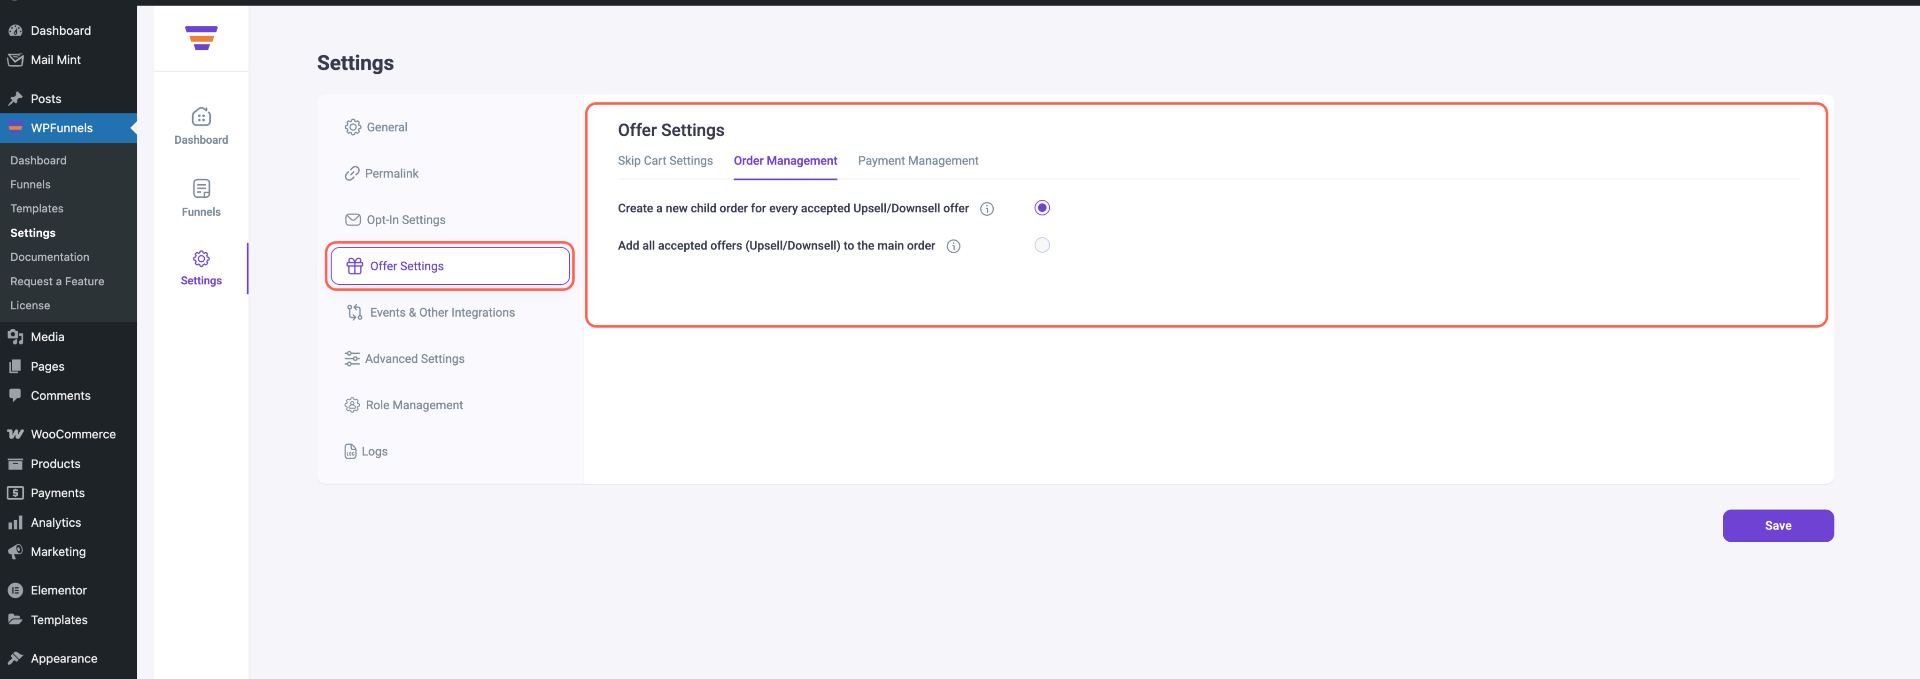
In the offer settings, you can choose if your funnel offers (i.e., upsell & downsell) will be considered as separate orders, or as part of the main order. You will have the following two options to choose from:
- Skip Cart (Pro and only available when you have Global Funnels Add-on enabled)
Enabling this will mean that when a person tries to add a product to the cart, it will take the user directly to the checkout page. You will get two options when you enable it:
(i) Skip cart for the entire WooCommerce store.
(ii) Skip cart for global funnels only.
- Order Management For Upsell/Downsell Offers
(i) Create a new child order for every accepted Upsell/Downsell offer
(ii) Add all accepted offers (Upsell/Downsell) to the main order
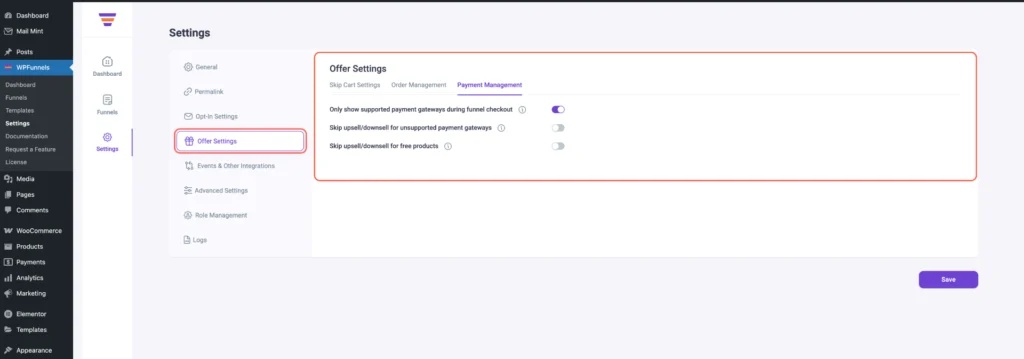
- Payment Management For Upsell/Downsell Offers
(i) Only show supported payment gateways during funnel checkout
(ii) Skip upsell/downsell for unsupported payment gateways
(iii) Skip upsell/downsell for free products
Click on the Save button after you make any changes.
5. Event & Other Integrations [Pro]
The Events & Other Integrations tab in WPFunnels allows you to connect powerful tools like Facebook Pixel, Google Tag Manager, and Google Maps API to enhance tracking, analytics, and user experience.
Here, you will get to connect with 3 important tools:
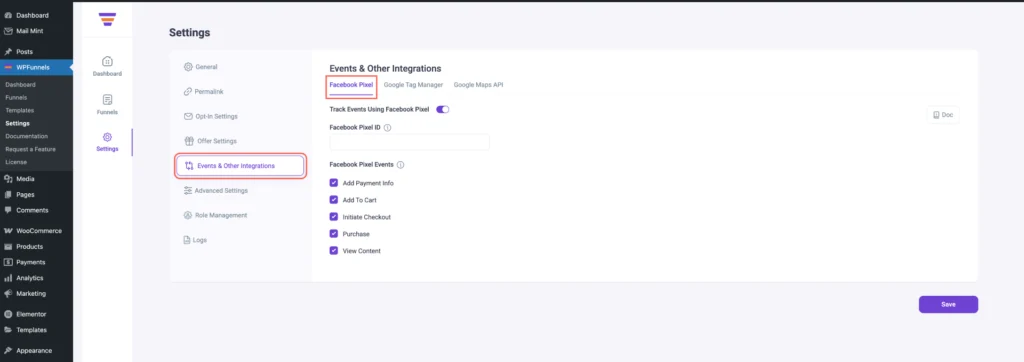
- Facebook Pixel Integration
You can connect your Facebook Pixel ID to WPFunnels and set up the specific events you want to track. Once enabled, you can apply this to your funnels when creating them. After enabling this option, you will see. several settings, such as Facebook Pixel ID and Facebook Pixel events (e.g., Add Payment Info, Add to Cart, Initiate Checkout, Purchase, View Content).
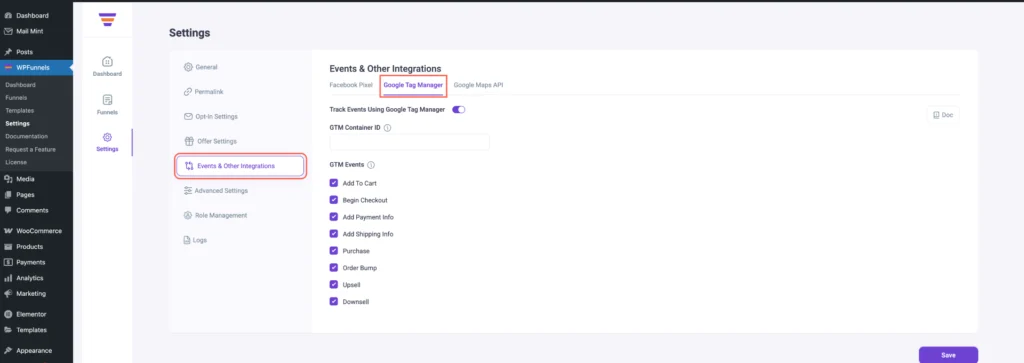
- Google Tag Manager (GTM) Integration
You can connect your GTM Container ID to WPFunnels and set up the specific events you want to track. Once enabled, you can use this feature for your funnels during their creation. After enabling this option, you will see three settings:- Track Events using Google Tag Manager
- GTM Container ID
- GTM Events (e.g., Add to Cart, Begin Checkout, Add Payment Info, Add Shipping Info, Purchase, Order Bump, Upsell, Downsell)
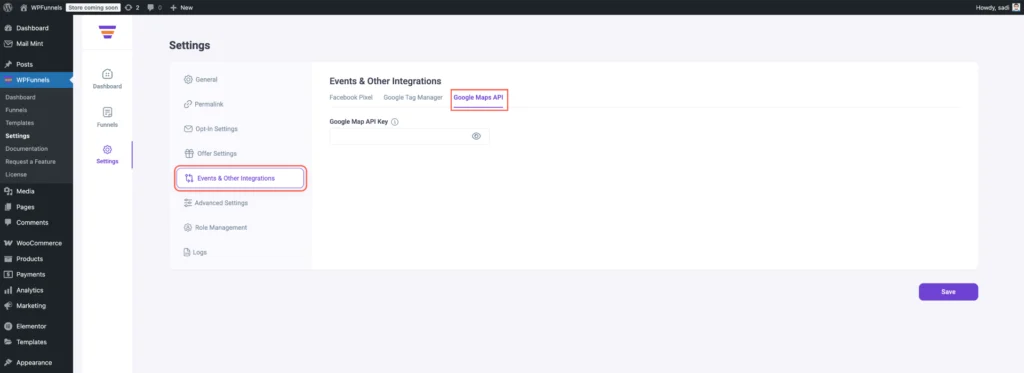
- Google Maps API Integration
Connect your Google Maps API to WPFunnels to enable address auto-complete during funnel checkout.
Always remember to click on the Save button after you make any changes here.
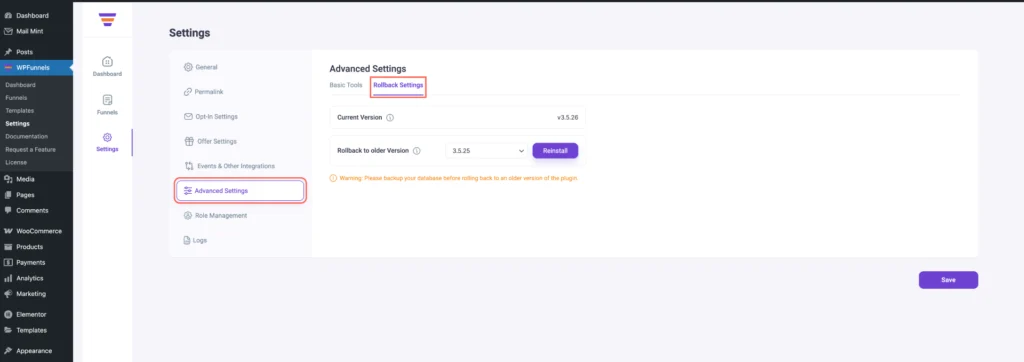
6. Advanced Settings
The Advanced Settings tab includes essential tools for managing plugin behavior, optimizing performance, and safely handling uninstall actions.
Here, you will get the following options:
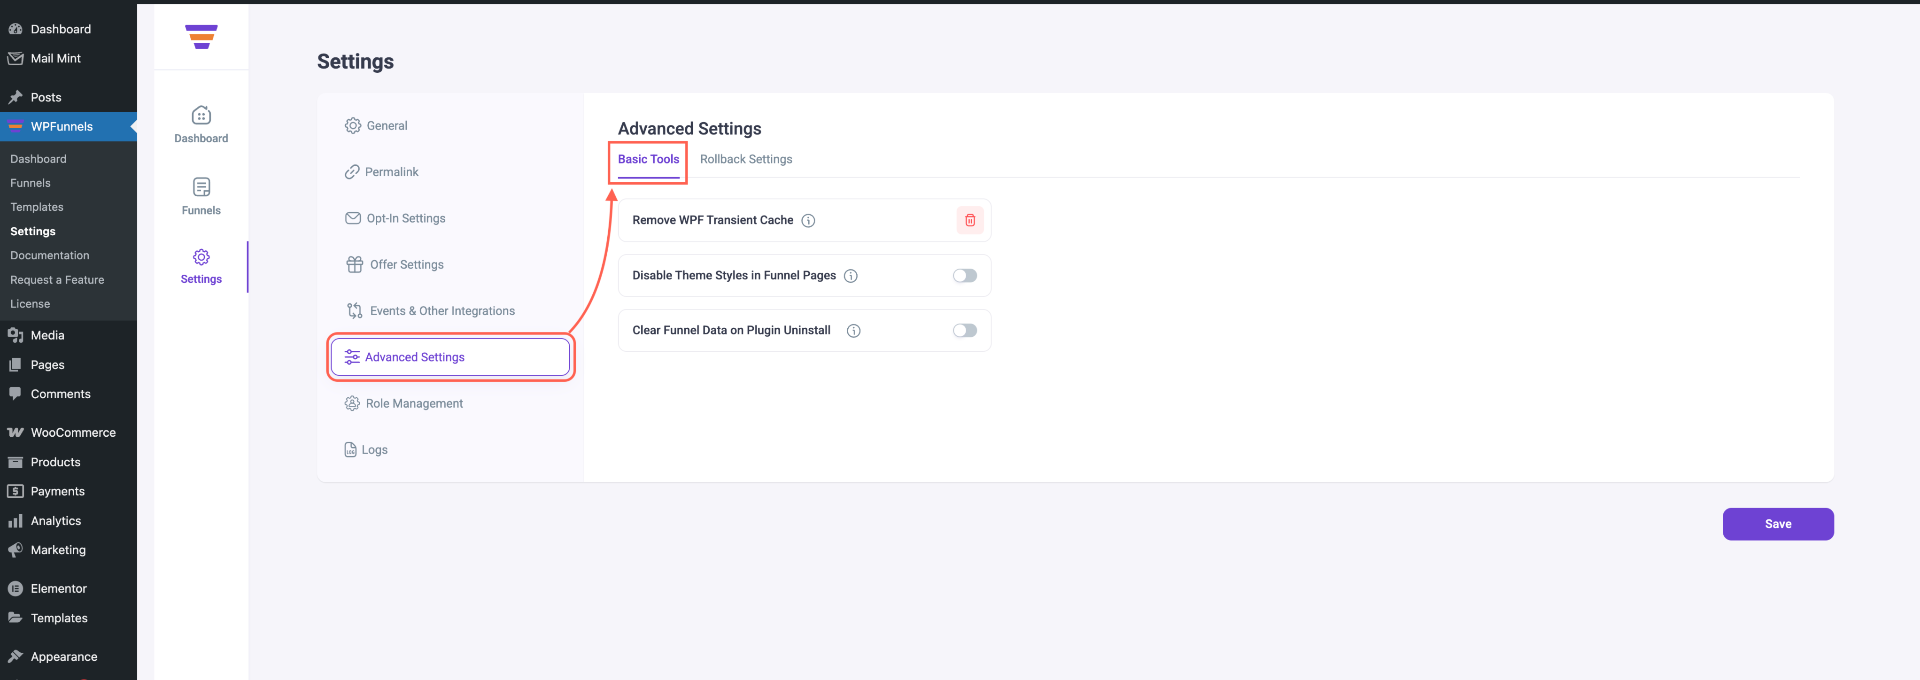
- Basic Tools
(i) Remove WPF Transient Cache
(ii) Disable Theme Styles in Funnel Pages
(iii) Enable log status – enabling this will add the “Logs” tab on your Settings dashboard
(iv) Clear Funnel Data on Plugin Uninstall
- Rollback Settings
You may roll back WPFunnels (basic/free version) to any of its older versions from here.
7. Role Manager (Pro)
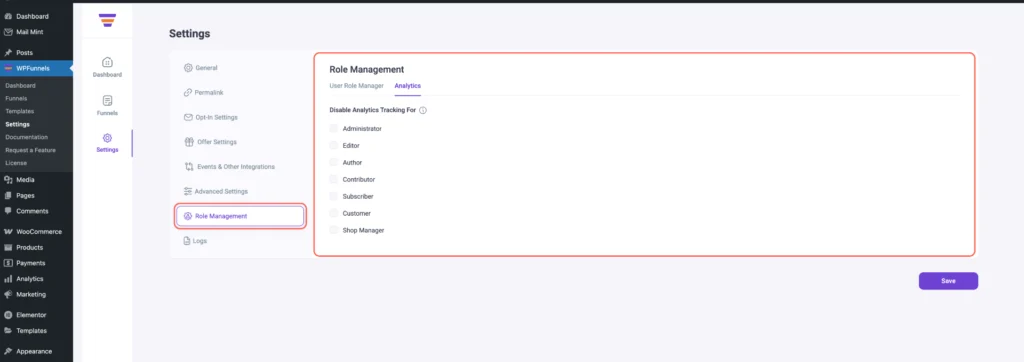
The Role Management settings let you control access levels to WPFunnels based on different user roles on your WordPress site. This ensures only the right people can view or edit funnel-related content.
Here you get two options:
(i) User Role Manager:
In the User Role Manager, you can manage roles such as Editor, Author, Contributor, Shop Manager, Shop Accountant, Shop Worker, Shop Vendor, Tutor Instructor, and Group Leader, and assign access permissions.
(ii) Analytics:
Allows control over tracking and data analytics permissions.
8. Logs
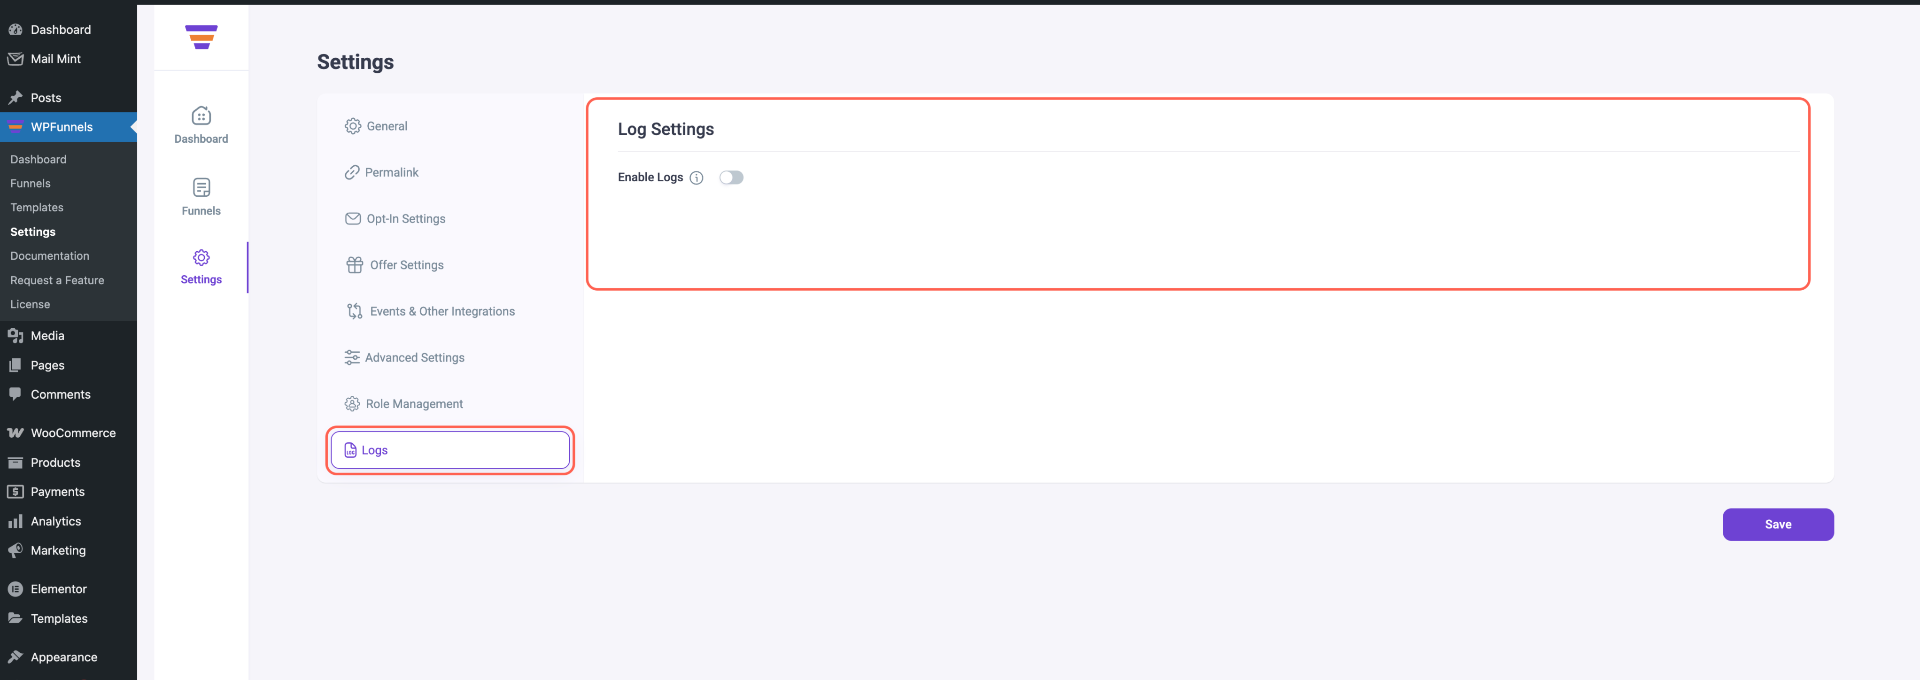
The Log Settings tab allows you to manage logging activity for WPFunnels.
This tab will only appear if you enable log status in Advanced Settings. Here, you get:
- Log Settings
On the drop-down, you will be able to choose recent logs and view them.
That’s all for the WPFunnels Settings overview. You may need to change any of the settings later, just don’t forget to hit “Save” after that.