Mail Mint makes it easy for you to plan and create email marketing automation for your business.
These email marketing automations will start with specific trigger points as you want.
In this guide, you’ll learn how you can plan and create email marketing automation with Mail Mint Triggers.
Let’s get started.
Create Email Marketing Automaton – Mail Mint Triggers
Follow these steps to create an automation that’ll start with Mail Mint triggers.
Step 1:
Go to Mail Mint Dashboard and click on the Automation tab.
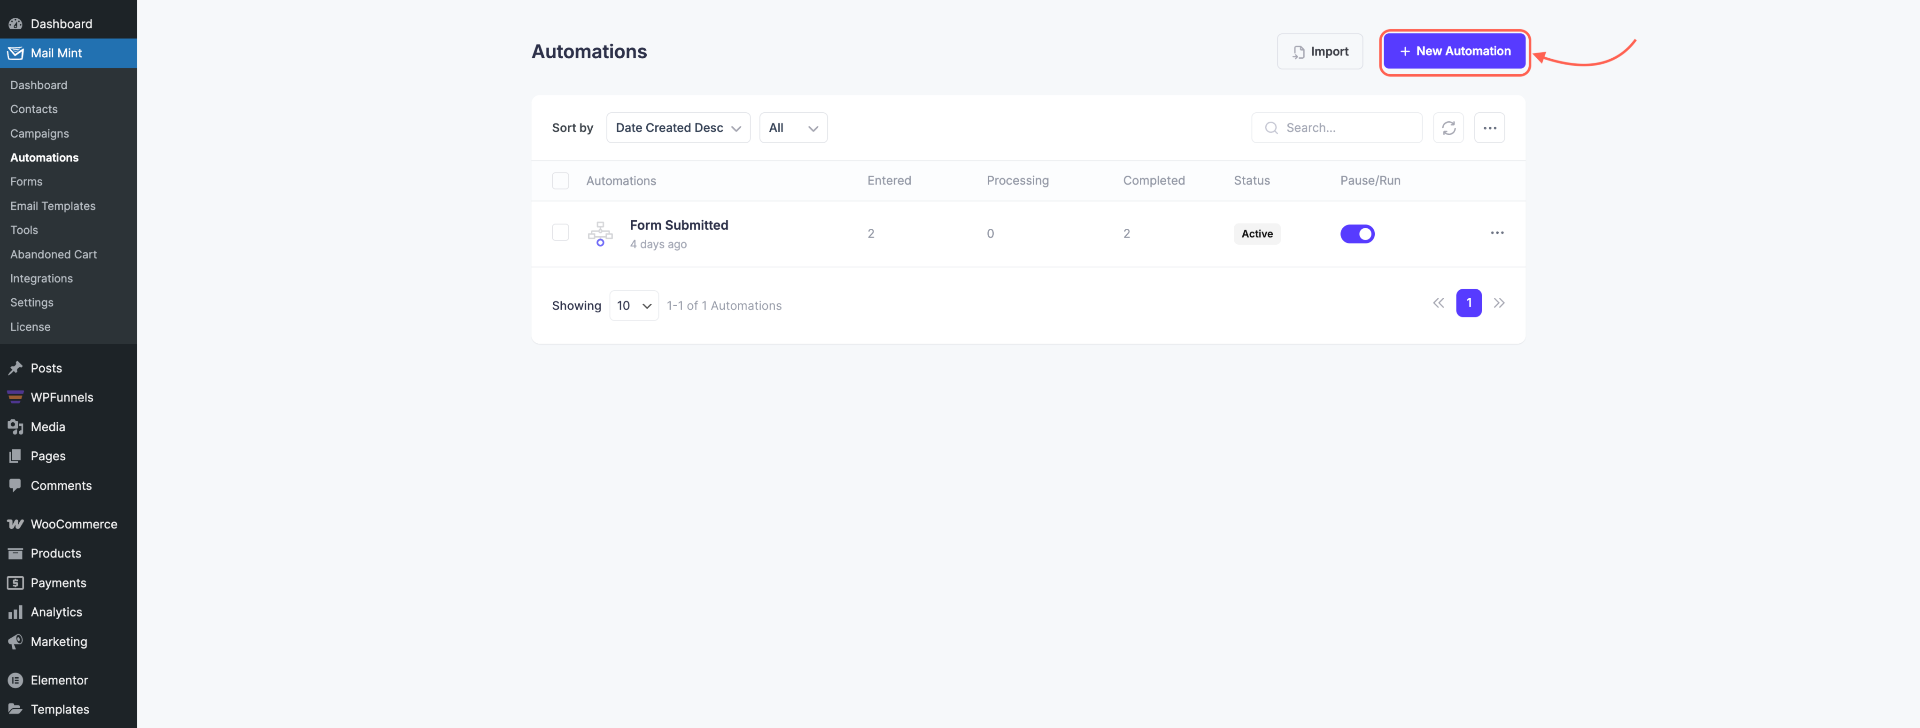
Here you’ll find the list of the automations you already have created and made active.
Or if it’s the first time you’re creating automation, you’ll only find the option to create an automation.
Click on the + New Automation button.
Step 2:
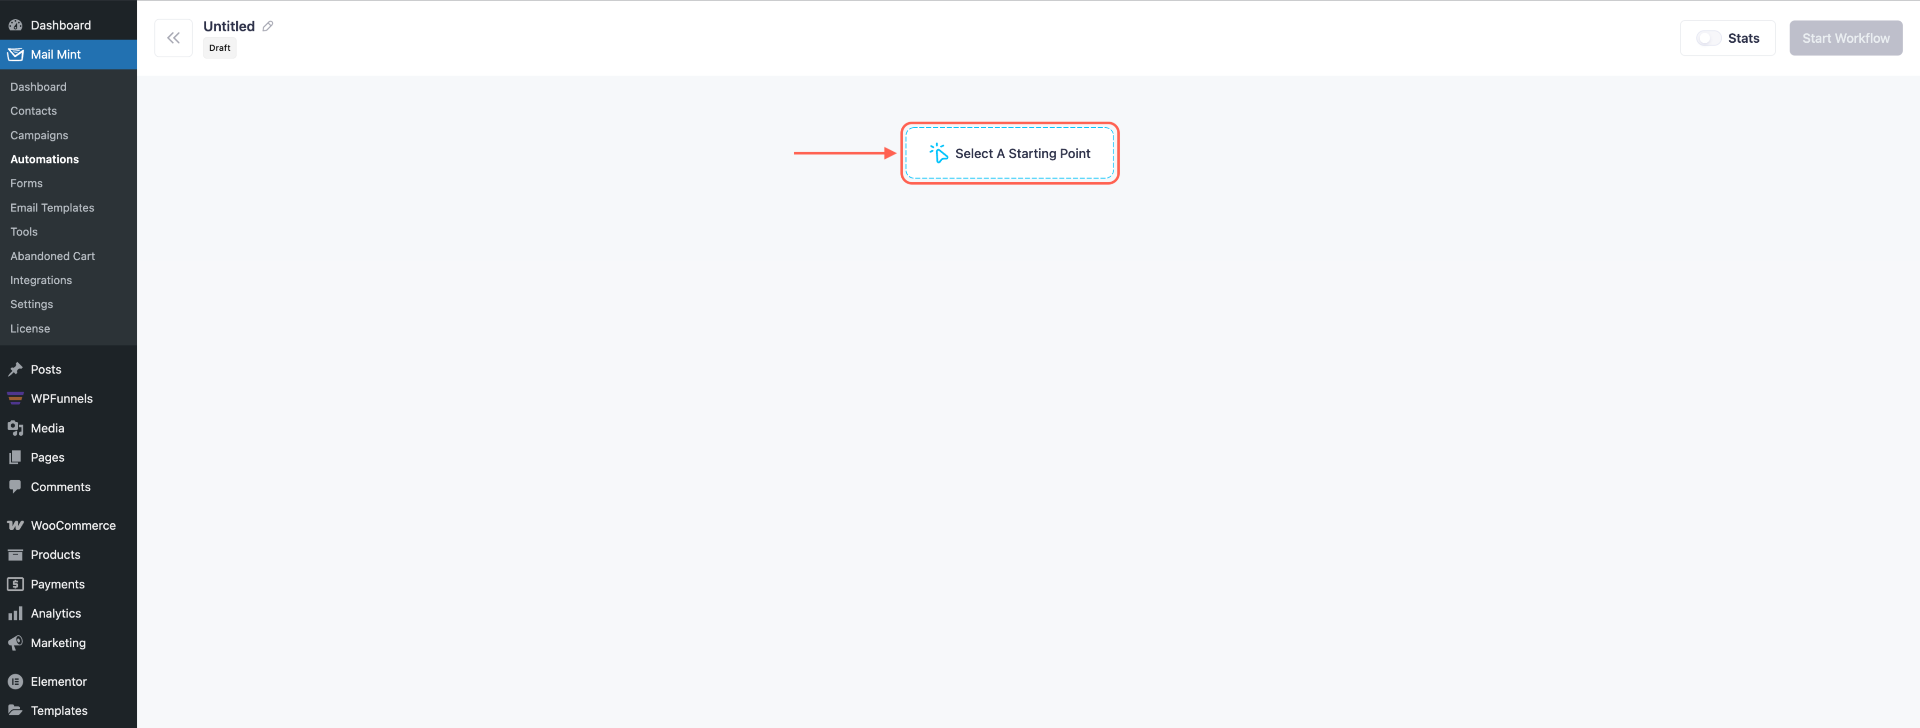
You’ll be landed on the visual planner for planning & creating the automation.
Click on the Select A Starting Point tab.
Step 3:
The list of triggers will pop up now.
Since we’re creating automation for Mail Mint triggers, you’ll find different triggers for it:
- Form Submitted
- Added to List
- Tag Assigned
- Removed From List
- Tag Removed
- Webhook Received
- Anniversary
- Added to Segment
- Contact Clicks a Link in Email
Here’s a brief description of what these triggers are:
Form Submitted: This Trigger will be activated when a user submits their information in an opt-in, pop-up, or lead generation form.
You can start your automation journey just after a visitor or user has signed up for your newsletter.
Added to List: This Trigger will be activated when you’ve added any user or contact to a specific user list.
This is perfect for running targeted automation plans.
Tag Assigned: This Trigger will be activated when you’ve assigned a tag to any user or contact.
This is suitable for running automation journeys based on specific user characteristics.
Removed from List: This trigger activates when a contact is removed from a specific list.
Useful for stopping automation flows or initiating follow-up actions for contacts who are no longer part of a certain list.
Tag Removed: This trigger activates when a tag is removed from a contact.
You can use this to end an existing journey or start a new one based on changing user characteristics.
Webhook Received: This trigger activates when an external app or system sends data to Mail Mint via webhook.
Great for connecting third-party tools and syncing real-time activity with your automation workflows.
Anniversary: This trigger activates on the anniversary of a specific date (like signup date or purchase date).
Ideal for sending yearly greetings, special discounts, or loyalty rewards.
Added to Segment: This trigger activates when a contact is added to a saved segment based on filters or dynamic rules.
Perfect for automating actions tailored to evolving user behavior or profile data.
Contact Clicks a Link in Email: This trigger activates when a contact clicks any link inside an email campaign.
Use it to follow up with engaged users or trigger interest-based automation flows.
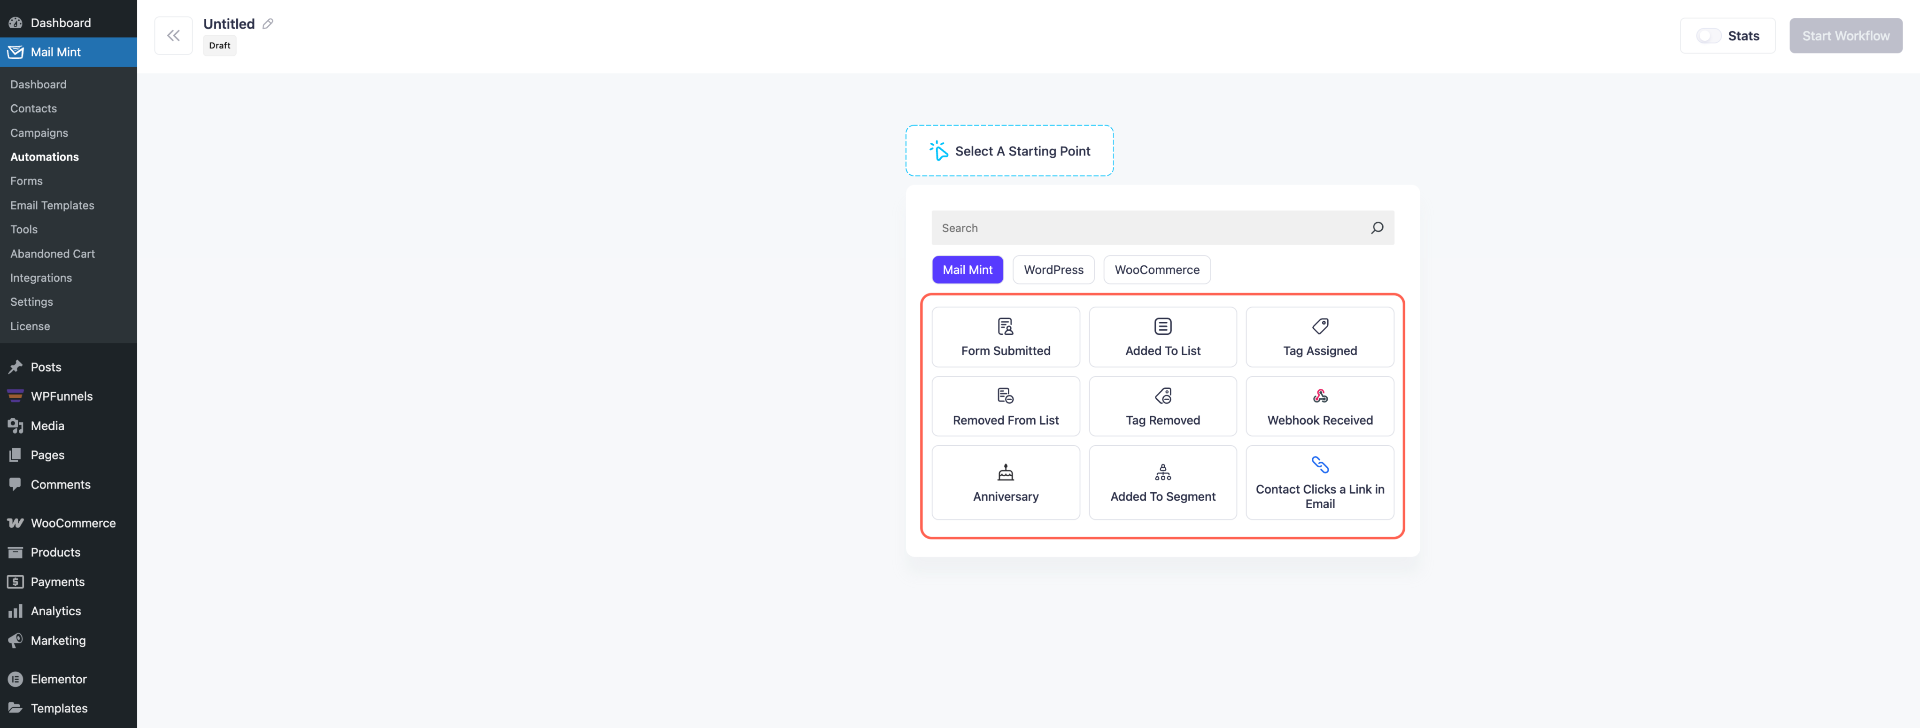
We’ll be choosing the Form Submitted trigger for this.
Step 4:
Now choose the form you want to use for this automation plan.
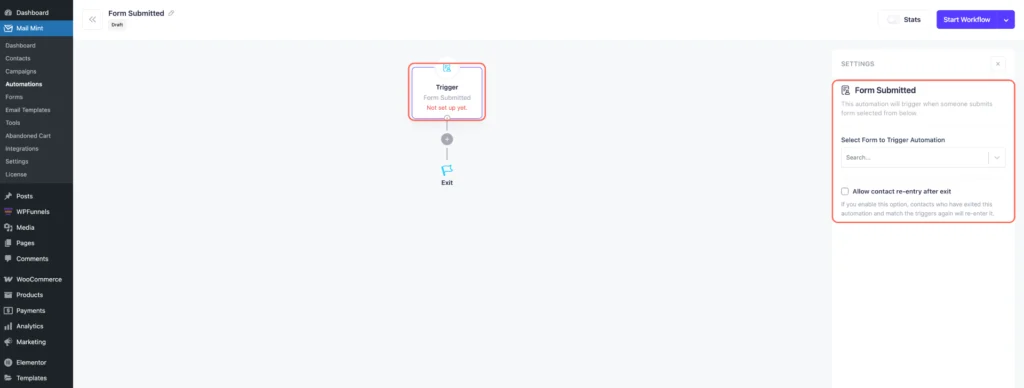
On the Select a Form option, click on the dropdown and select the form you want to work with.
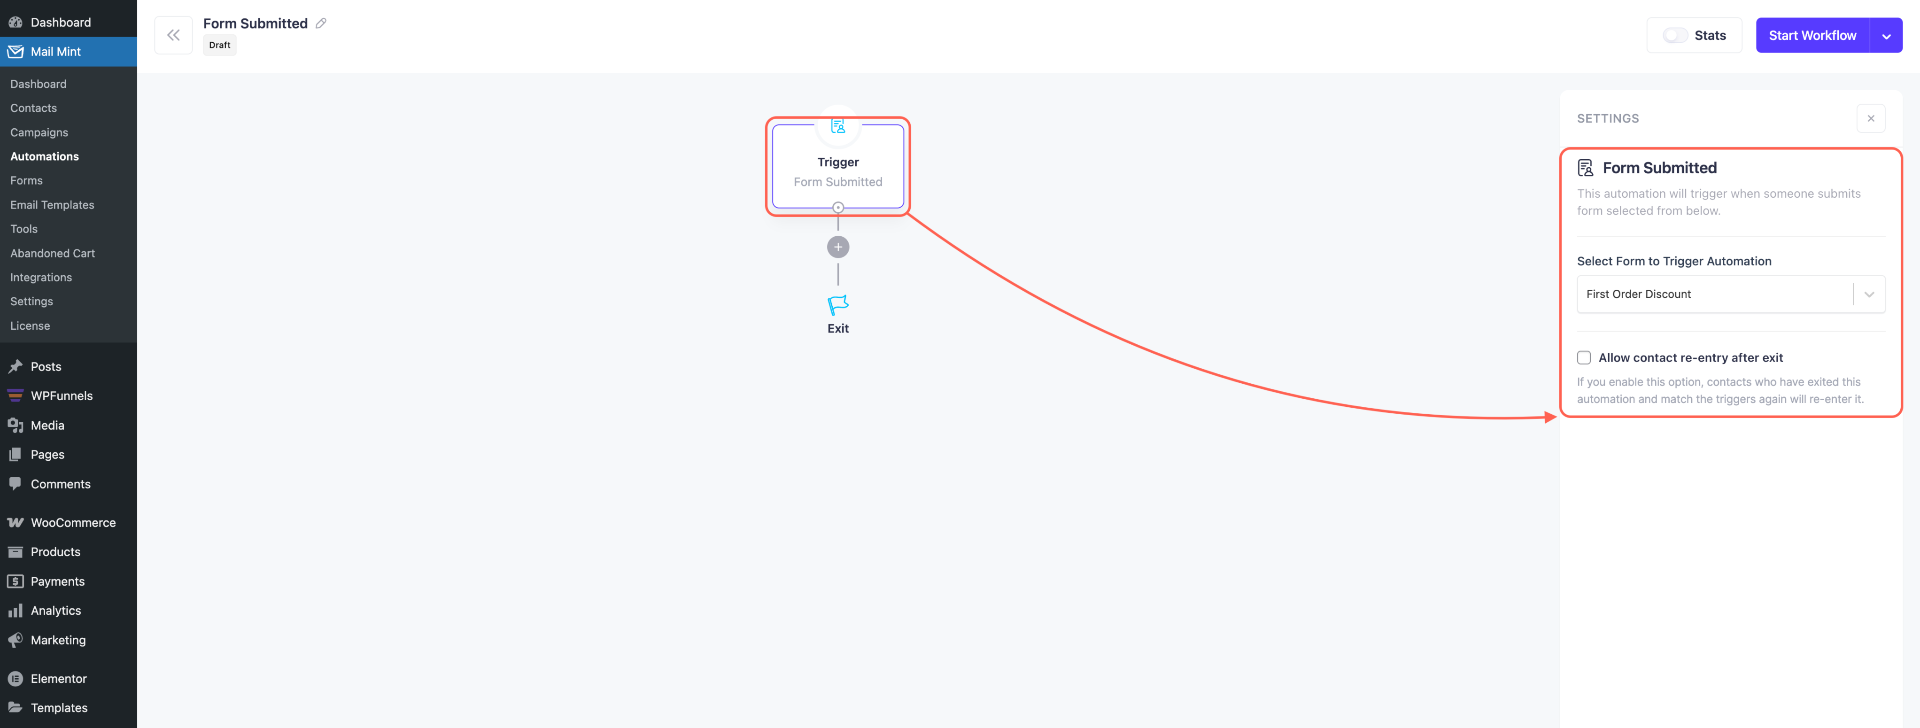
After that, click on the (+) button. It’ll help you plan what will happen after that.
Step 5:
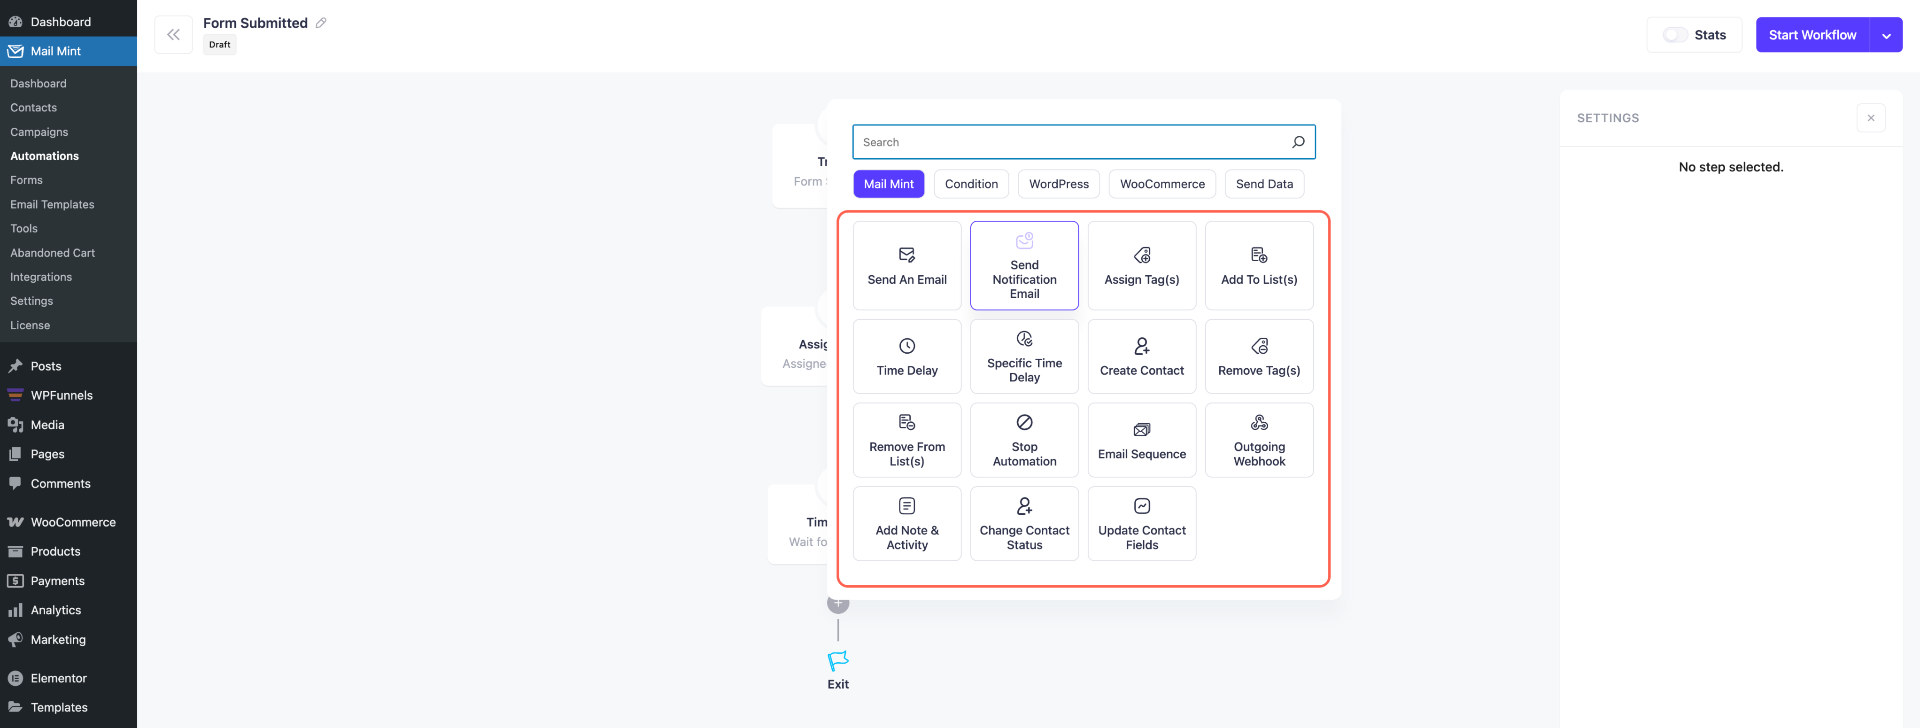
Now you’ll find the list of actions you want to apply.
- Send an Email
- Assign Tag(s)
- Add to List(s)
- Time Delay
- Remove Tag(s)
- Remove from List(s)
- Email Sequence
- Outgoing Webhook
- Send Notification Email
- Specific Time Delay
- Create Contact
- Stop Automation
- Add Note & Activity
- Change Contact Status
- Update Contact
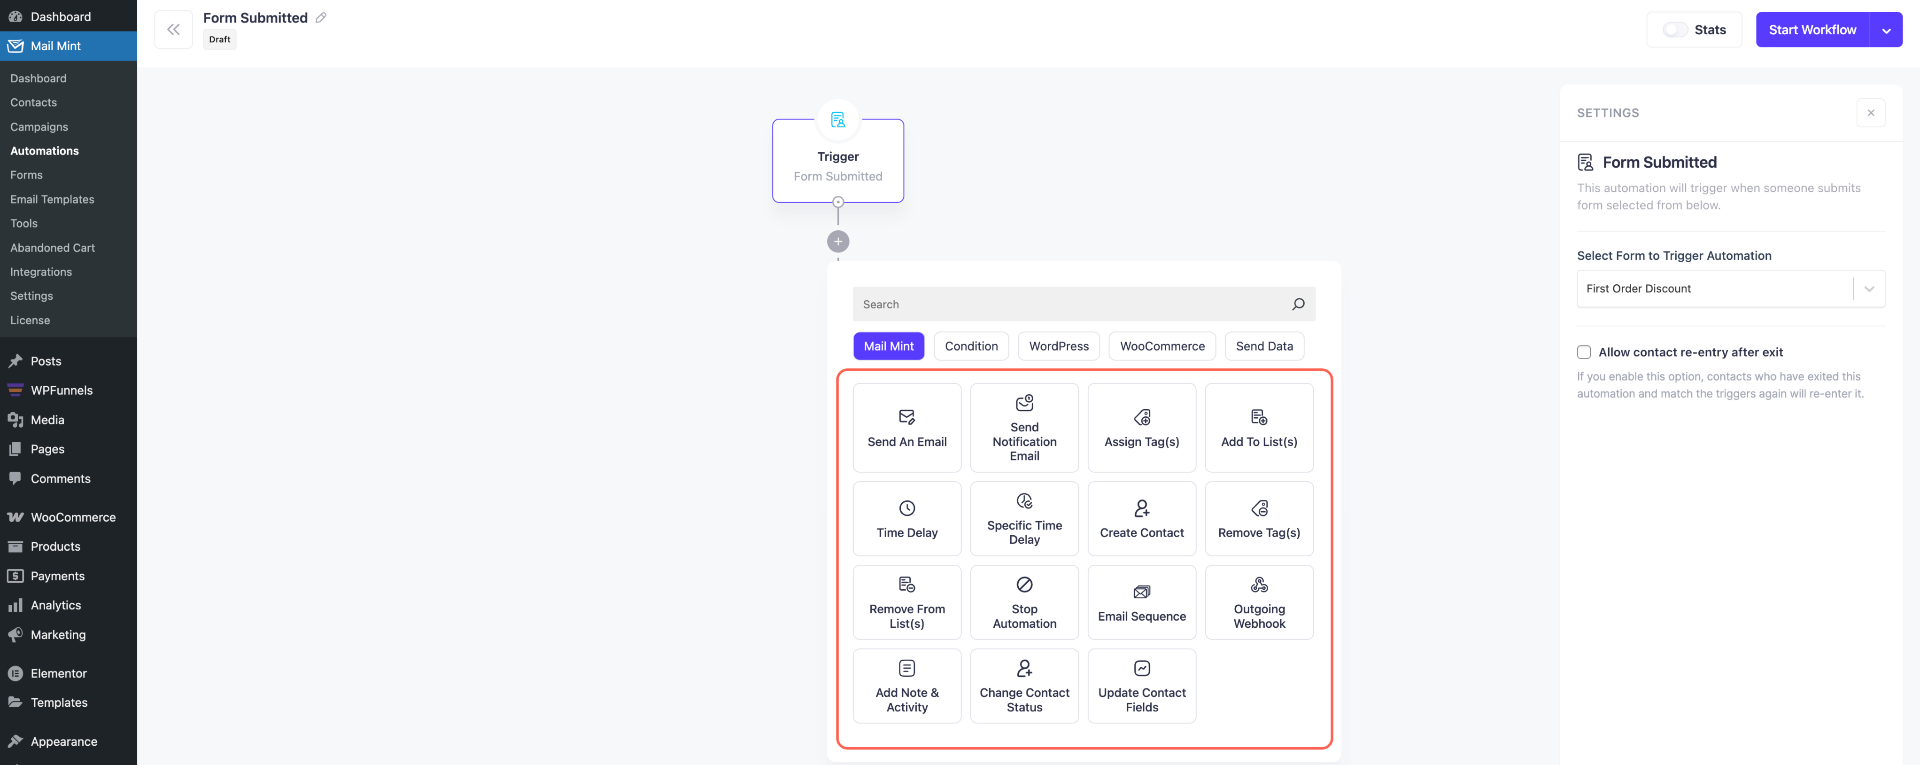
We’ll choose the Select Tag(s) action.
That means, once a user signs up for your newsletter, they’ll be assigned a suitable Tag automatically.
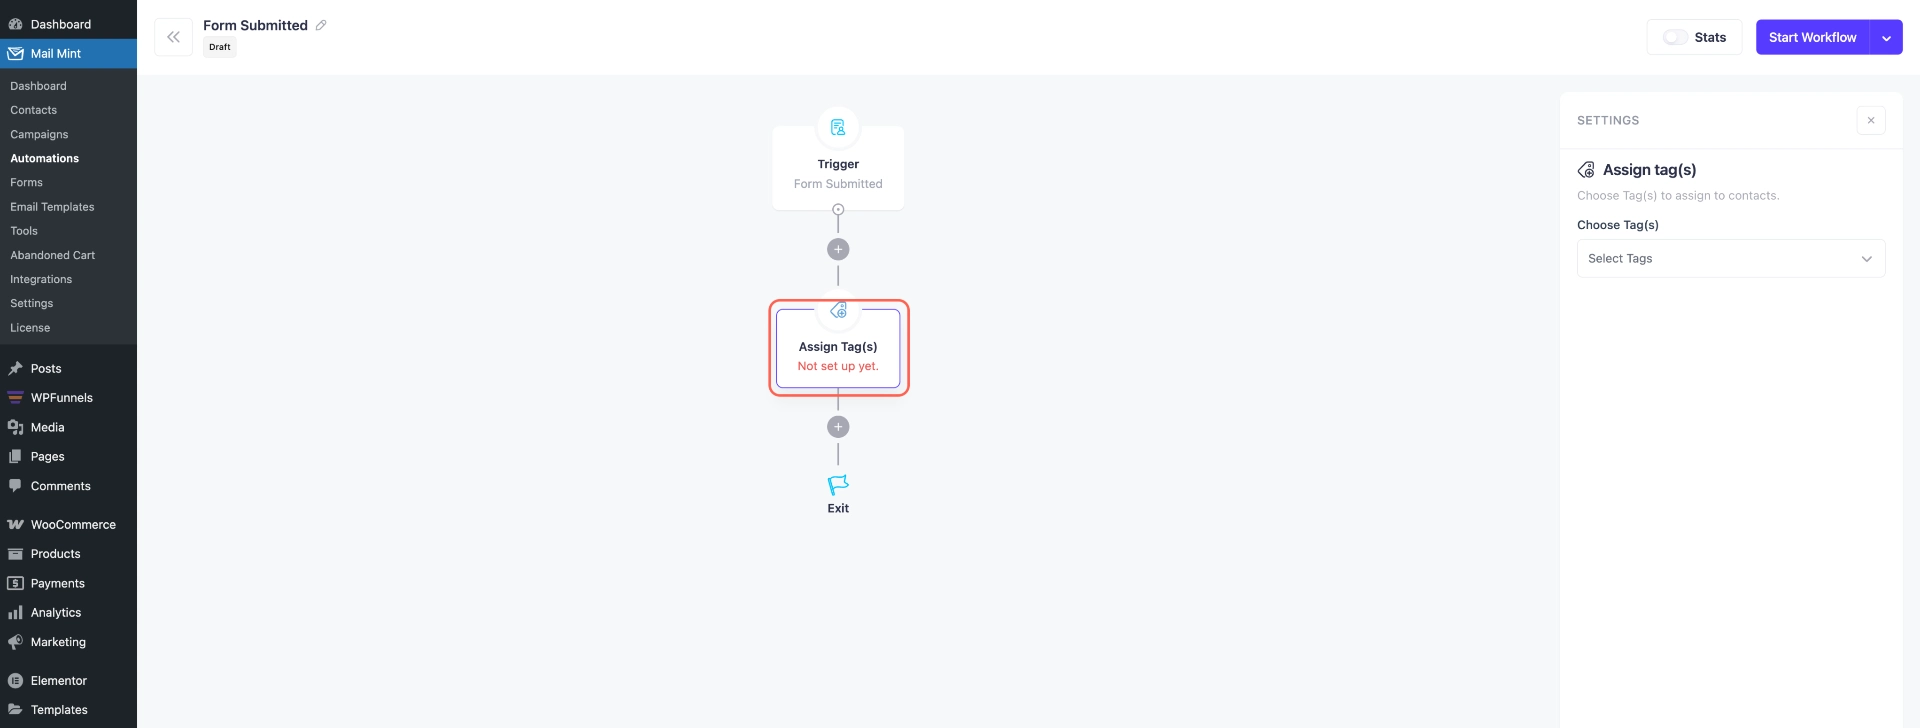
On Choose Tag(s) dropdown, select the suitable Tag or create a new Tag and set it here.
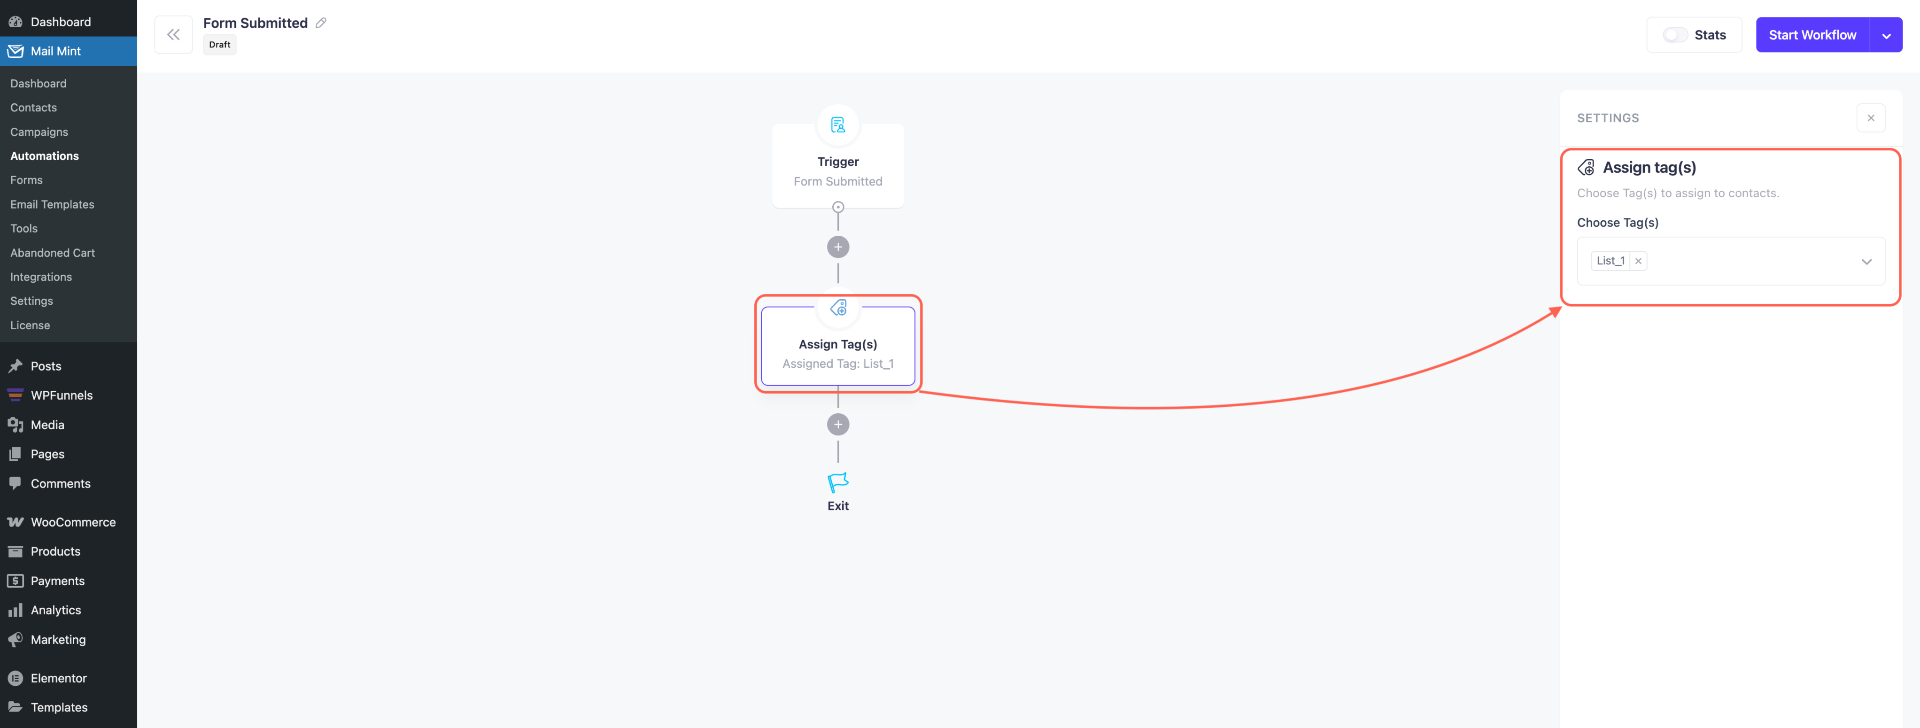
Here you can see that the Tag is added to the automation plan.
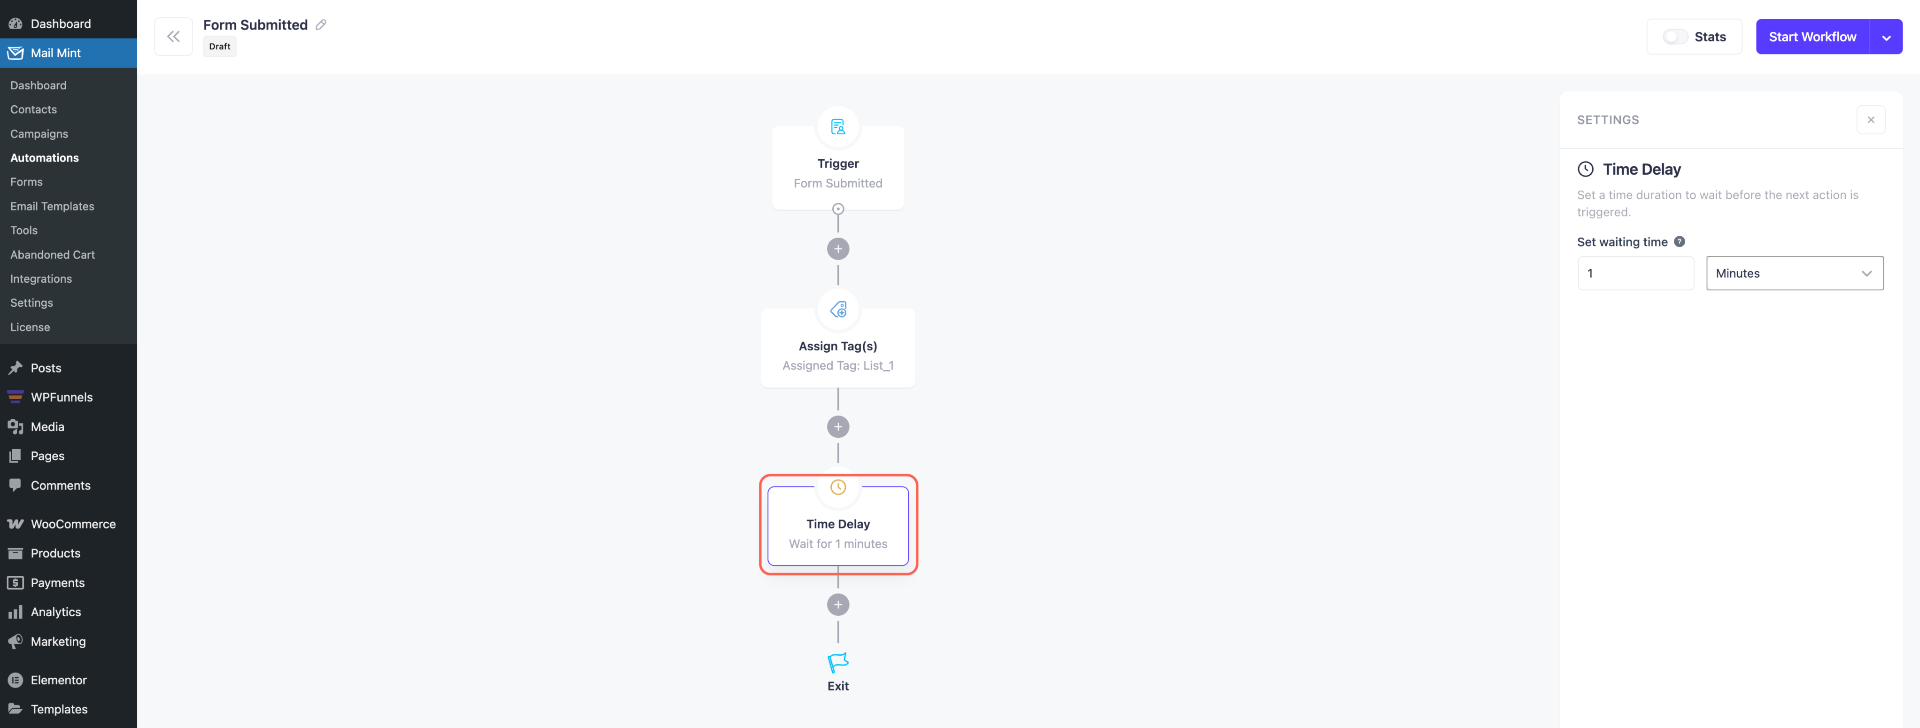
We’ll also set a decent Time Delay of 2 hours before taking any other action.
Step 6:
Now for the next Action, choose to Send An Email.
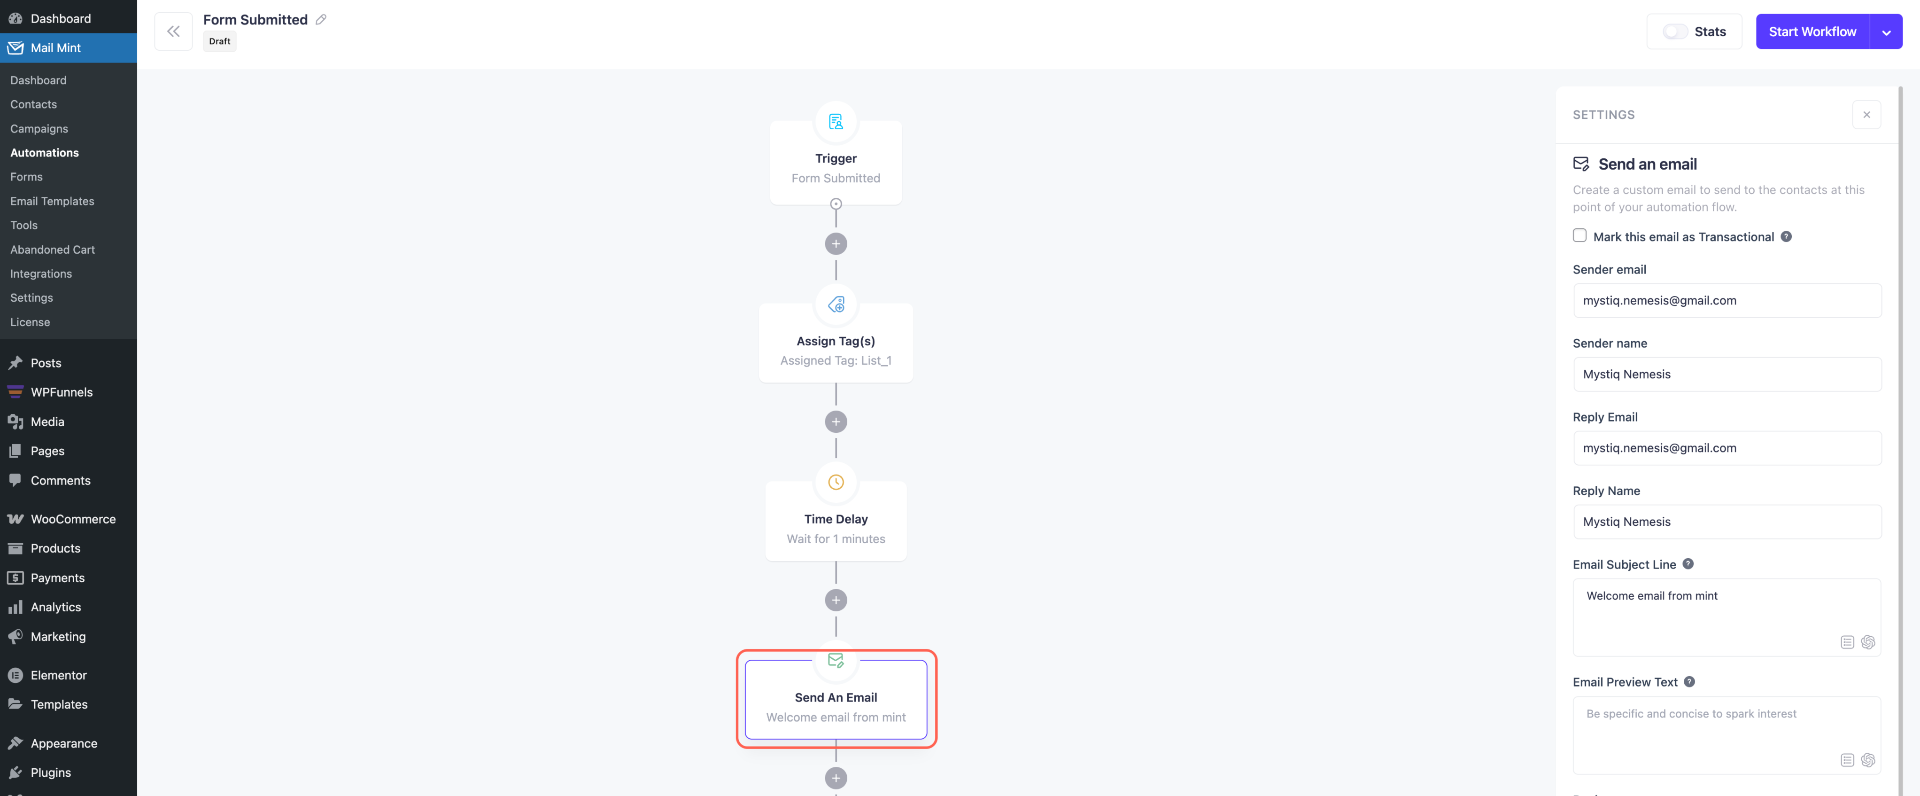
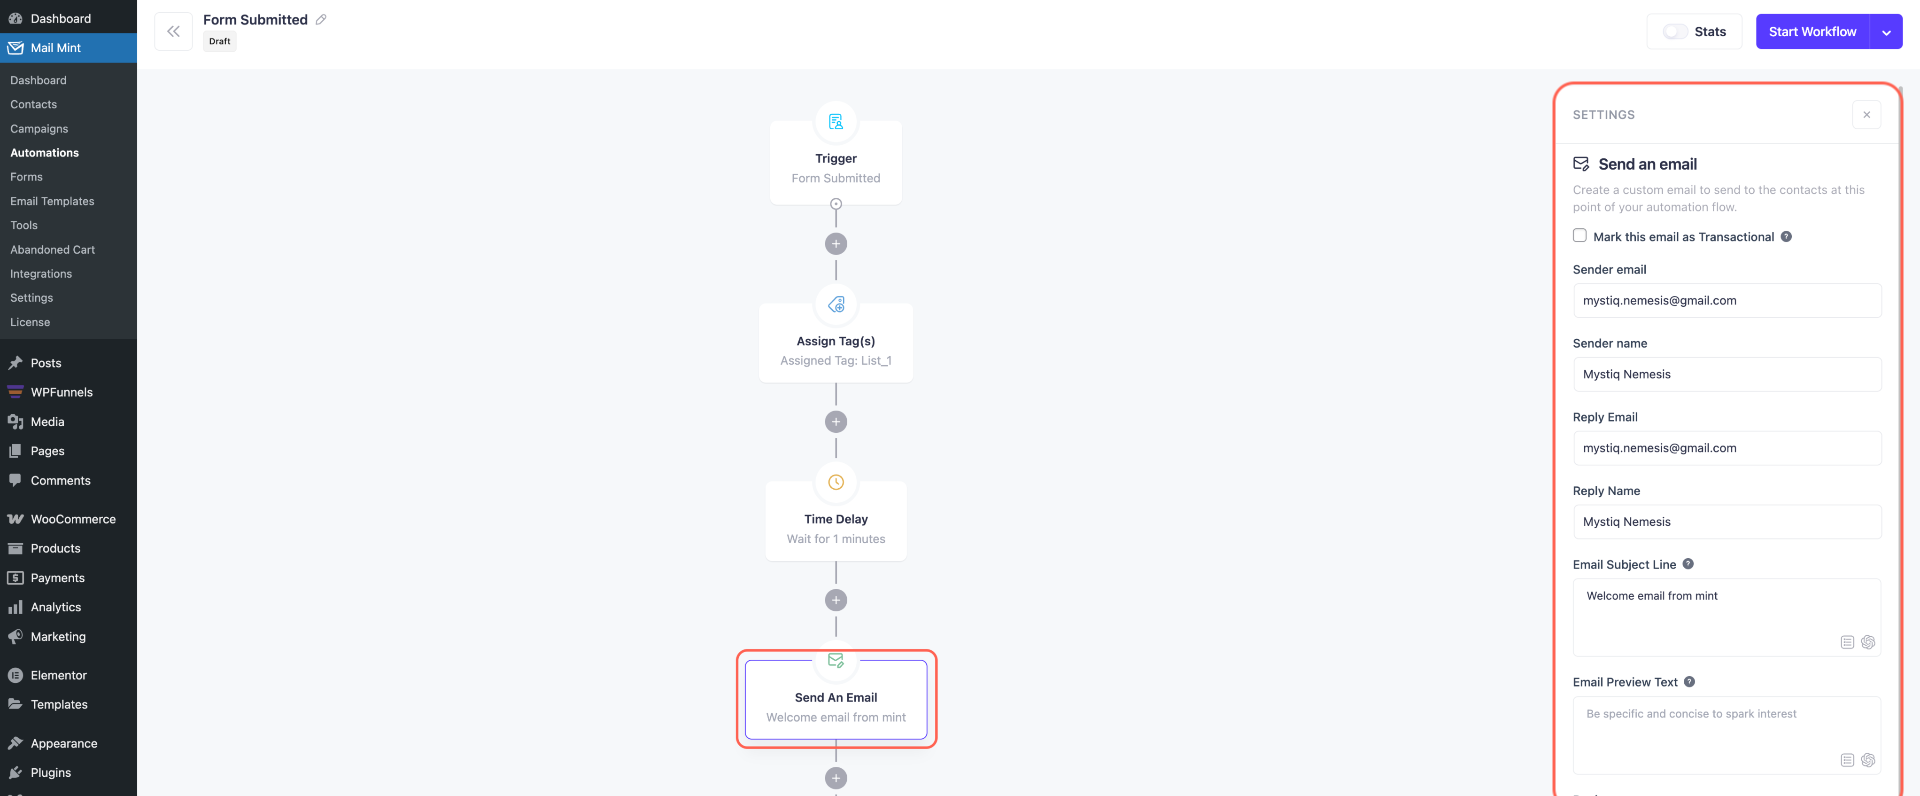
You’ll find the options to finalize email settings like:
- Sender Email.
- Sender Name.
- Reply Email.
- Reply Name.
- Email Subject Line.
- Email Preview Text.
Then you’ll have the option to design the email.
Just like designing any other email campaign on Mail Mint, you can choose an email template or design it from scratch using the drag & drop editor or the text editor.
Once you’re done, you can start the automation workflow right away.
And that’s it, you’ve planned and created an automation using Mail Mint trigger.
