JetForm Builder is a powerful form plugin for WordPress, and when combined with Mail Mint, you can easily collect leads and add them to your email marketing lists for automation, segmentation, and campaign targeting.
This guide will walk you through connecting JetForm Builder with Mail Mint to start capturing and managing leads effectively.
Before starting, make sure you have the necessary tools installed and ready. You’ll need the JetForm Builder plugin installed and activated on your WordPress site. Additionally, ensure that the Mail Mint Basic and Pro plugin is also installed and activated.
Step 1 – Create & Configure JetForm
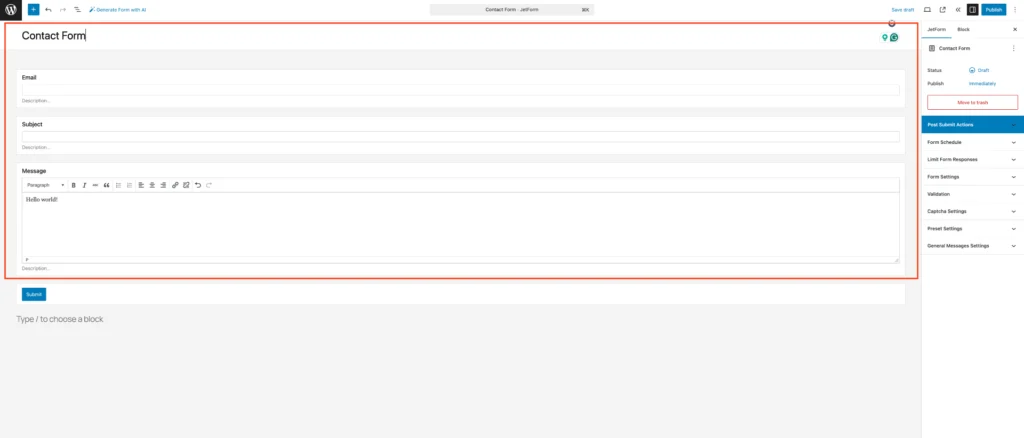
1. Create a Form with JetForm from scratch or use an existing one. Add form fields as you need.
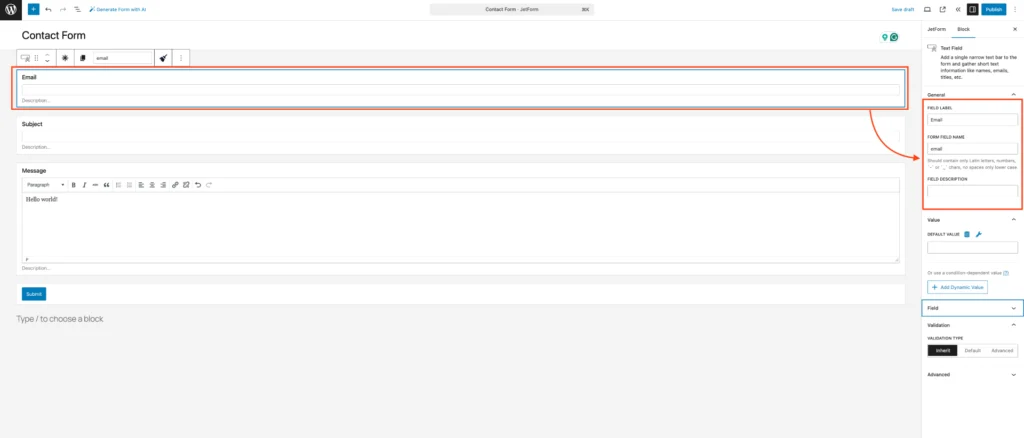
2. Click on the form field and set the Field Label & Form Field Name on the right sidebar.
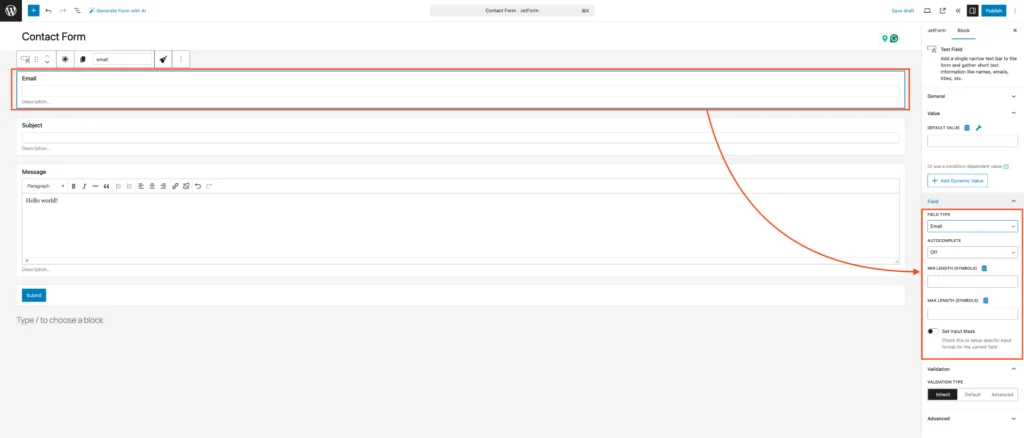
3. Now, set the Form Field Type.
Step 2 – Set Up Automation in Mail Mint
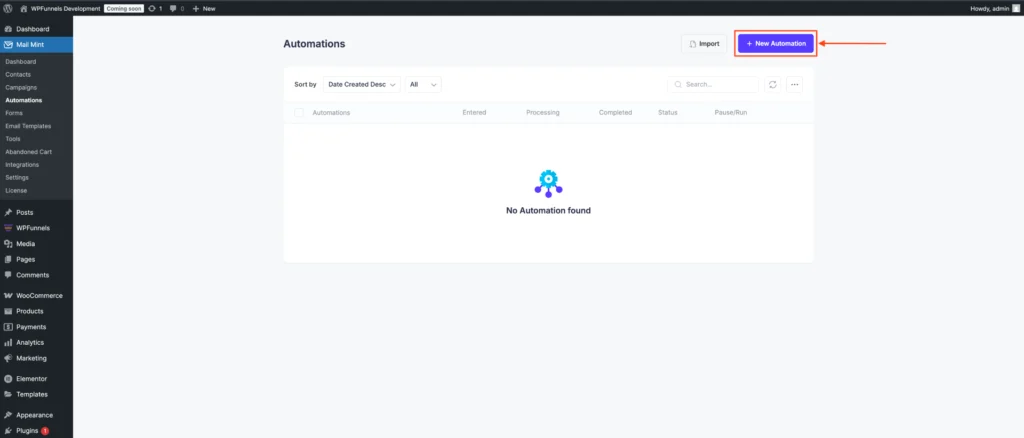
1. Go to Mail Mint > Automations and click on the “+ New Automations“.
2. Click on “Start From Scratch“.

3. After setting your automation name, and then click on “Select A Starting Point“.

4. Click on the JetForm tab to view the JetForm triggers. Let’s select the Form Submitted trigger for this automation.
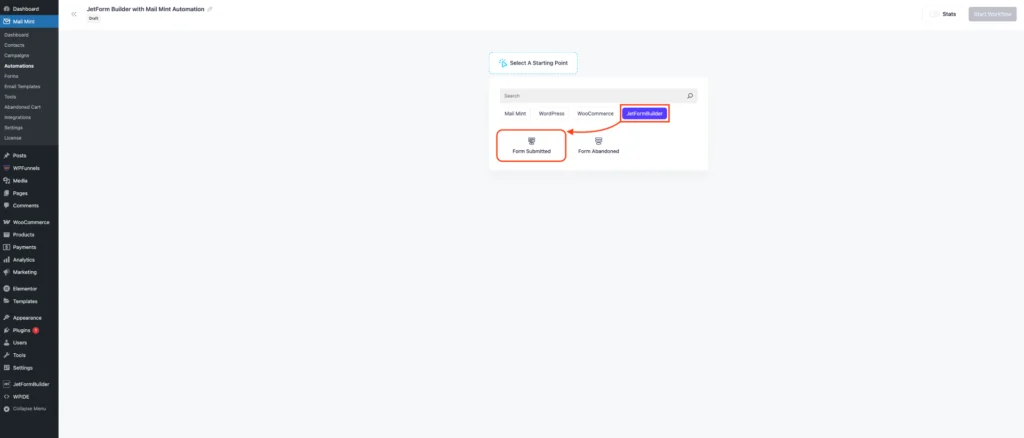
5. Now, on the right sidebar, select a form to trigger the automation.

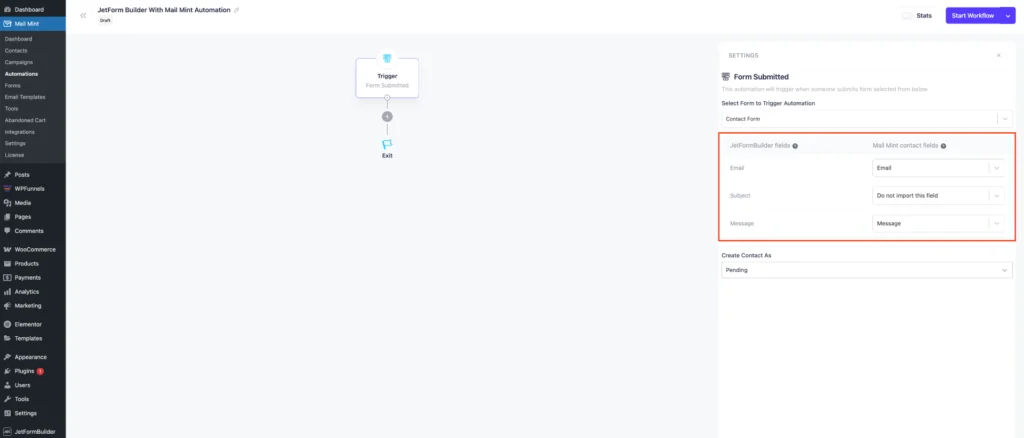
6. Now map the Jetform field to the Mail Mint field. If needed, you can also map any custom field to the Mail Mint field.
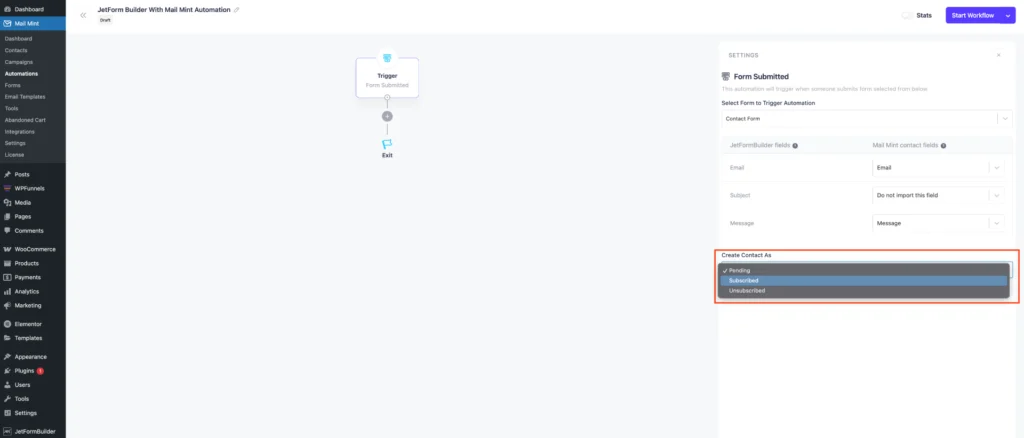
7. After mapping, you can set the contact status when anyone submits the form. This status can be stored as subscribed, pending, or unsubscribed.
8. Click on the “+” sign to add new actions. Let’s select Add To List.
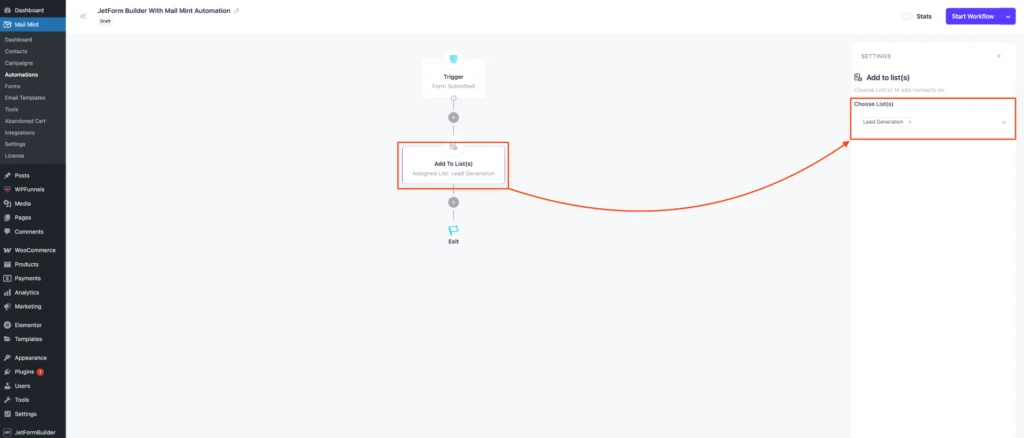
9. Your automation is now ready. Click “Start Workflow” located in the upper right corner.
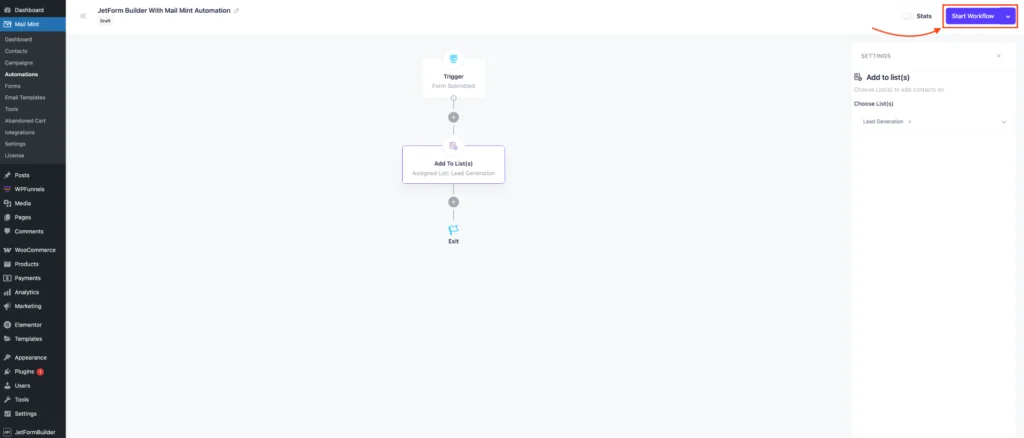
After using the form anywhere and submitting it, the contact data will automatically be added to the Mail Mint Contact List.