The Link Trigger feature in Mail Mint allows you to initiate automated actions when a user clicks on a specific link in an email. This is a useful feature for personalizing email marketing campaigns and tracking user engagement.
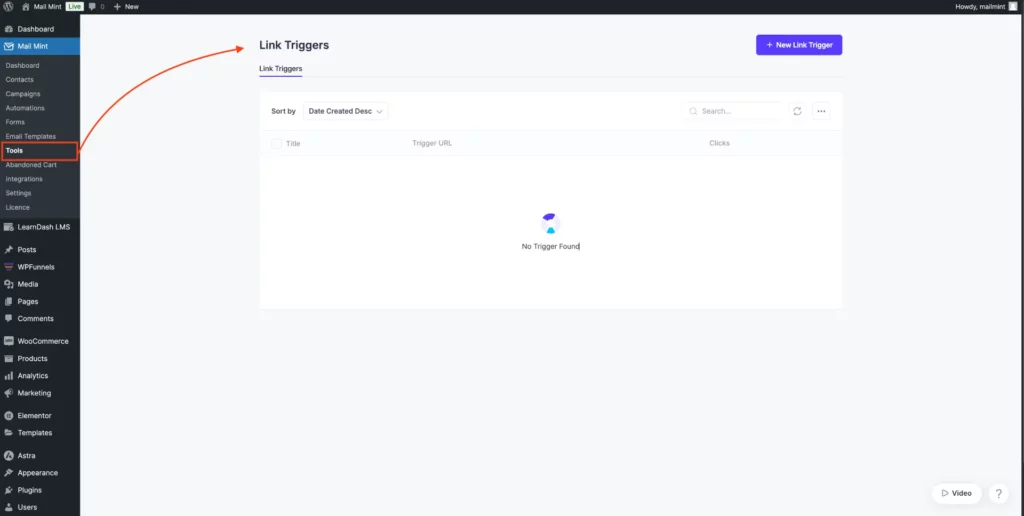
To access the Link Trigger feature in Mail Mint, first log in to your Mail Mint account. Once you’re in the dashboard, look to the left-hand sidebar, where you’ll find the Tools menu. Click on Tools, and then you can see the Link Trigger dashboard.
Step 1: Creating a New Link Trigger
1. To create a new Link Trigger in Mail Mint, first click the New Link Trigger button. This action will take you to a new prompt where you can set up the link trigger with various options.
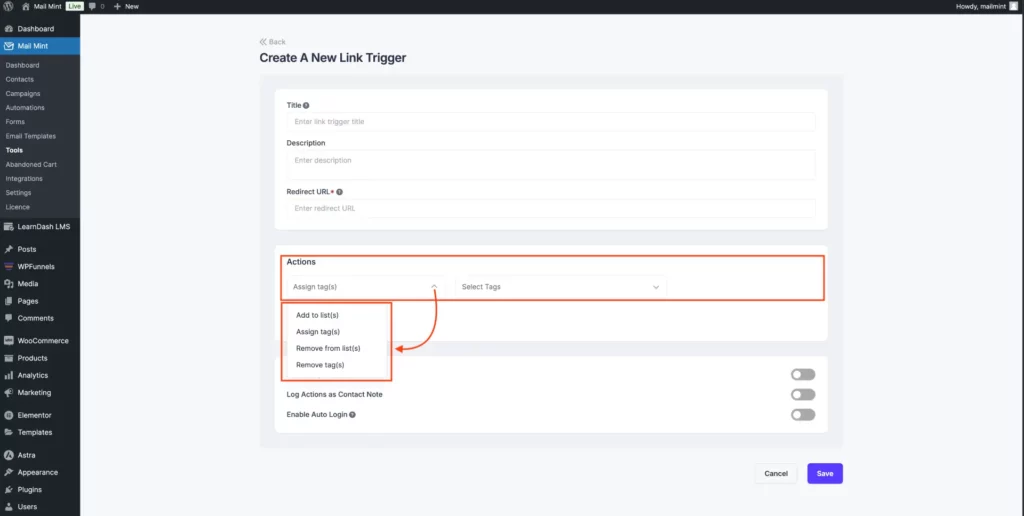
2. Start by entering a Title for your link trigger, which will appear on your dashboard, so choose something descriptive (e.g., “Exclusive Offer Click”). You can also add a Description (optional) to explain the trigger’s purpose. Finally, input the Redirect URL, which is the link users will be directed to after clicking, and this field is required (e.g., http://mail-mint.com/preference_page/).

3. Now, define what happens when a user clicks the link by setting actions based on your strategy. Select a list, assign tags, and add or remove actions as needed using the Add Action or Delete options.
4. Enable Run multiple times to apply the action repeatedly for a user and Log Actions as Contact Note to keep records. For Auto Login, set a custom duration (default: 7 days) in hours, days, weeks, or months.
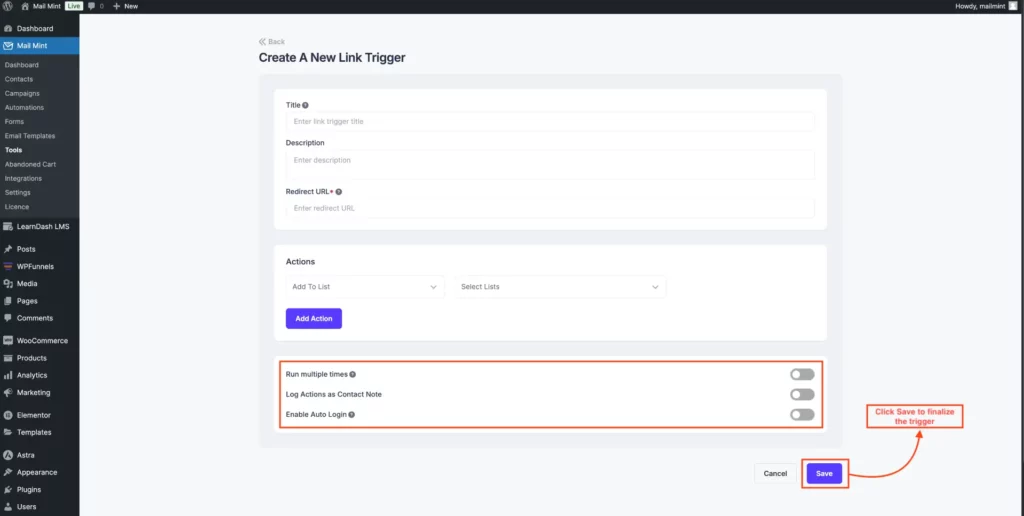
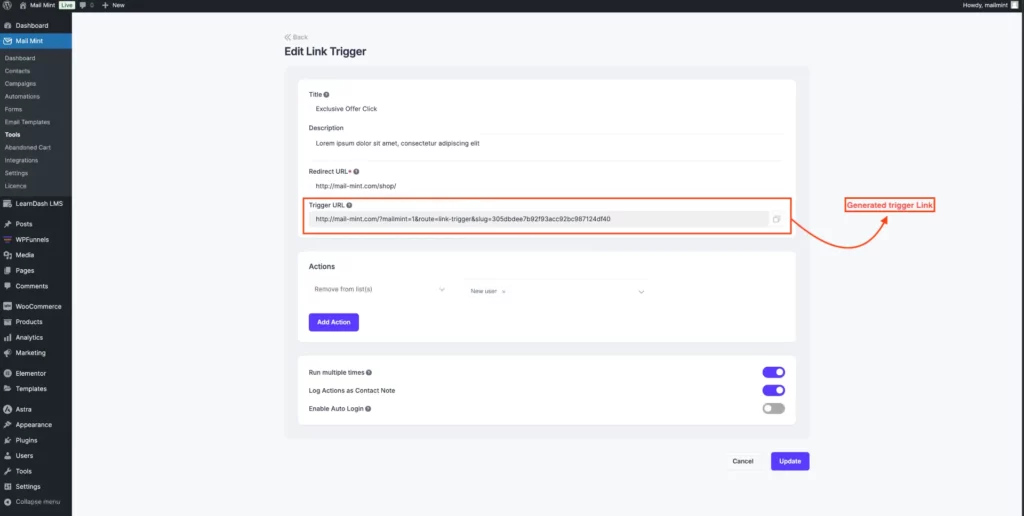
5. After configuring the settings, don’t forget to click Save to finalize the trigger. Once saved, your generated trigger will be ready for further use.
Step 2: Viewing Your Created Link Triggers
Once you’ve created your link trigger, you can easily view and manage it in the Link Triggers section of Mail Mint. Navigate back to the Link Triggers Dashboard, where you’ll see a list of all your created triggers.
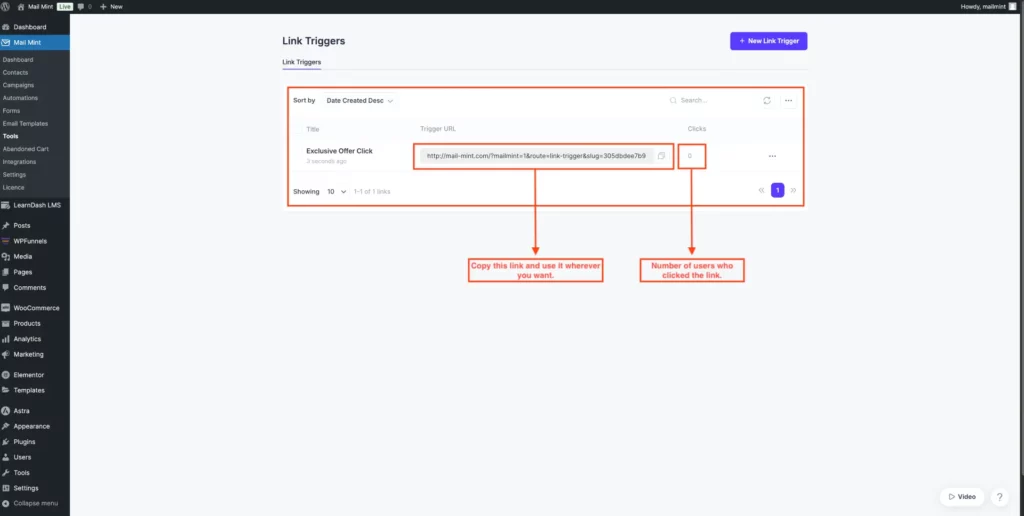
You can organize your triggers by various criteria, such as Date Created Descending (default), Title (A-Z), and more. The Link Trigger Dashboard also lets you track the performance of each trigger, including the number of clicks. To edit or delete a specific trigger, click the three dots (…) on the right side of the trigger, and you’ll find options to Edit or Delete it.
Step 3: How to Use a Link Trigger in Email
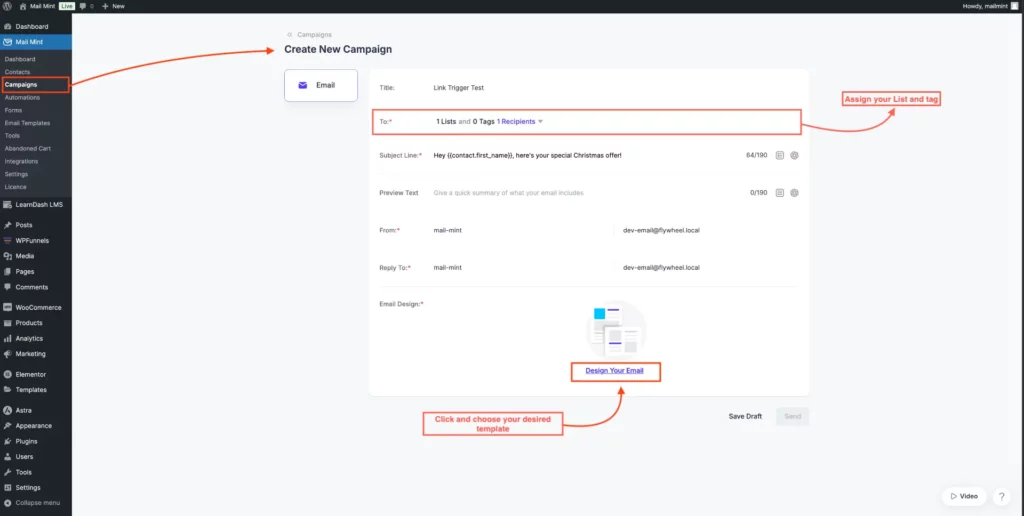
1. After creating your first trigger, you can now use it in a campaign. First, go to Mail Mint -> Campaign, and create a new campaign. Enter the necessary details in camping, like the title, subject line, etc. Next, click Edit Template and select your preferred template, or start from scratch.
2. When editing the template, click on a button or text where you want to add the link. On the left side, you’ll find the option to insert a link. Paste the link you copied from the trigger, then save your changes and move on to the next step.
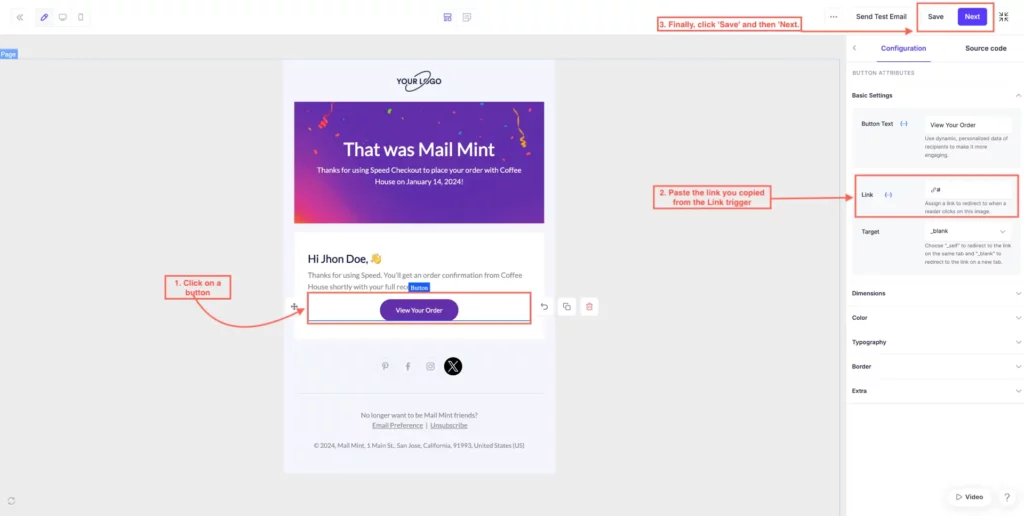
Now everything is set, and you can send this email to your selected users. When they click the link, the actions you defined in the trigger will be performed.