Mail Mint is a powerful email marketing and automation plugin built specifically for WordPress websites. It serves as your complete email marketing toolkit, enabling you to run campaigns, create automations, manage segmentation, design newsletters, and much more – all from within your WordPress dashboard.
This all-in-one email marketing solution lets you manage campaigns, build subscriber lists, create automated workflows, and track your marketing performance without needing external platforms. Whether you’re a WooCommerce shop owner, course creator, small business owner, blogger, or running an enterprise-level organization, Mail Mint provides everything you need to create professional email marketing campaigns and build lasting relationships with your audience.
With built-in integrations for various tools and platforms, Mail Mint seamlessly connects with your existing WordPress ecosystem to deliver a unified marketing experience.
A Basic Plugin Overview of Mail Mint – for Email Marketing Automation
First, make sure that you have Mail Mint installed and activated on your website.
If not, you can follow this simple guide to install and activate Mail Mint on your site.
Once you have it running on your site and you’ve gone through the Setup Wizard, let’s have an overview of it.
Got to your WordPress Dashboard > Mail Mint.
You’ll land on the Dashboard.
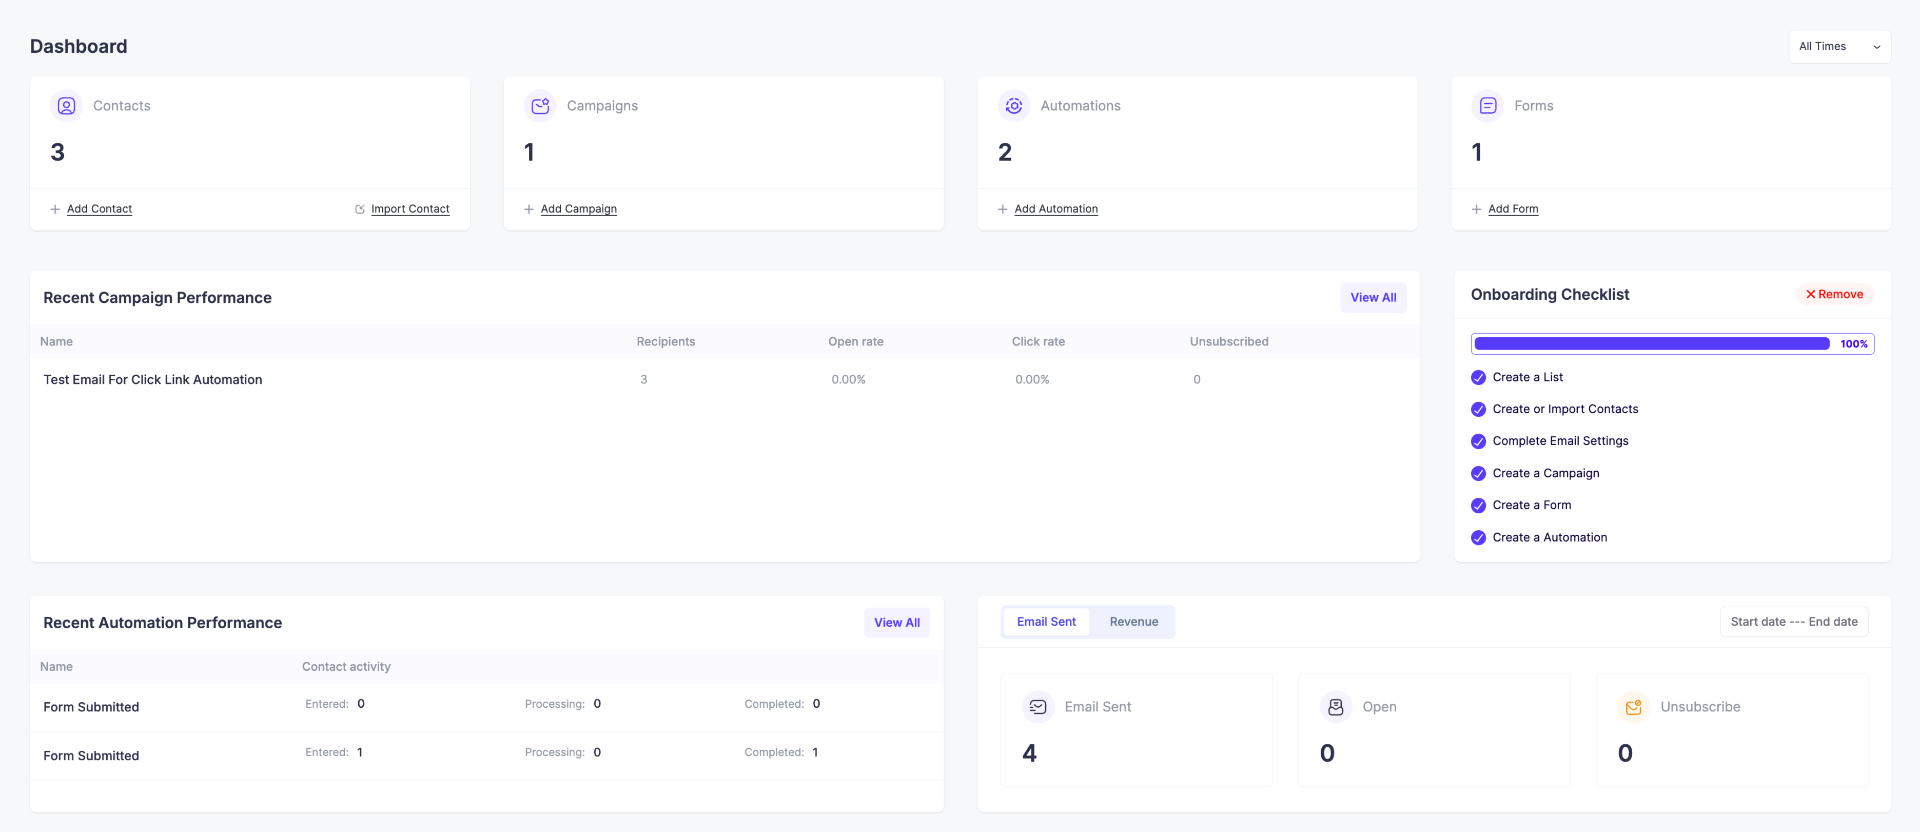
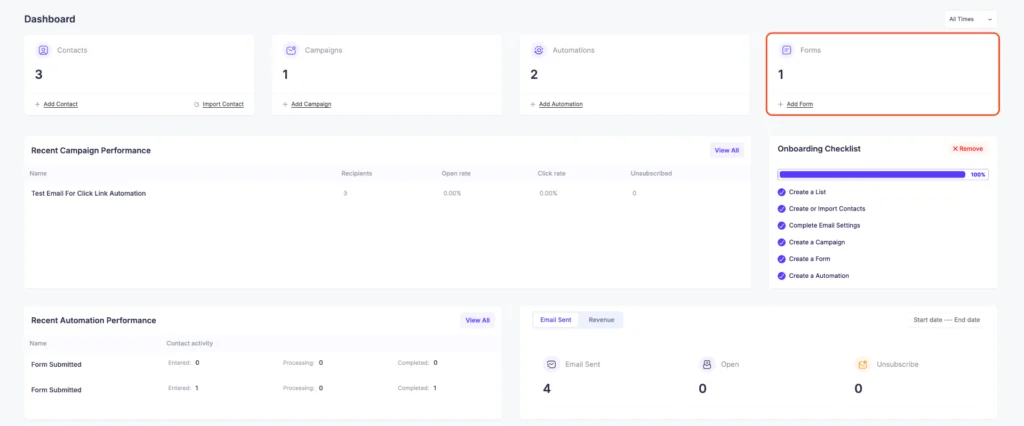
Here, you’ll have a brief overview of your email campaigns, lead generation forms, & some useful analytics.
In this Dashboard, you’ll get to learn about:
-> Your total Contact numbers.
-> Your total Campaigns.
-> Your total Automations.
-> Your total Lead Generation Form.
->Recent Campaign Performance.
->Onboarding Checklist.
-> Recent Automation Performance
-> Total number of emails sent, opened, and the unsubscribe rate within a specified range.
-> Revenue report for a specific period.
->Onboarding Checklist
Today, in this short guide, you’ll go through these:
- Contacts.
- Email Campaigns.
- Automations.
- Lead Generation Forms.
- Mail Mint Advanced Settings.
Let’s get started.
1. Contacts
Click on the Contacts tab and you’ll get a preview of your contact list.
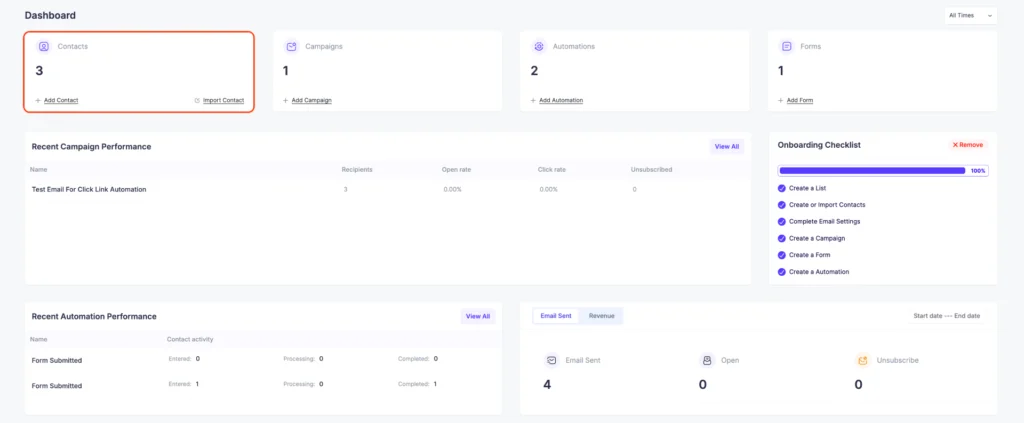
Here you can see these details about your contact list:
- Your total Contact number.
- The number of your subscribed contacts.
- The number of your Unsubscribed contacts.
- The number of your Pending contacts.
- The Lists you’ve created for your contacts.
- The Tags you have to identify your specific groups among contacts.
- Segments to seek out really specific contacts.
You’ll also see your entire Contact list, and you can search by Statuses, Tags, Lists, or keywords and work with the results.

You can also easily choose to Add A New Contact.
You’ll find these options:
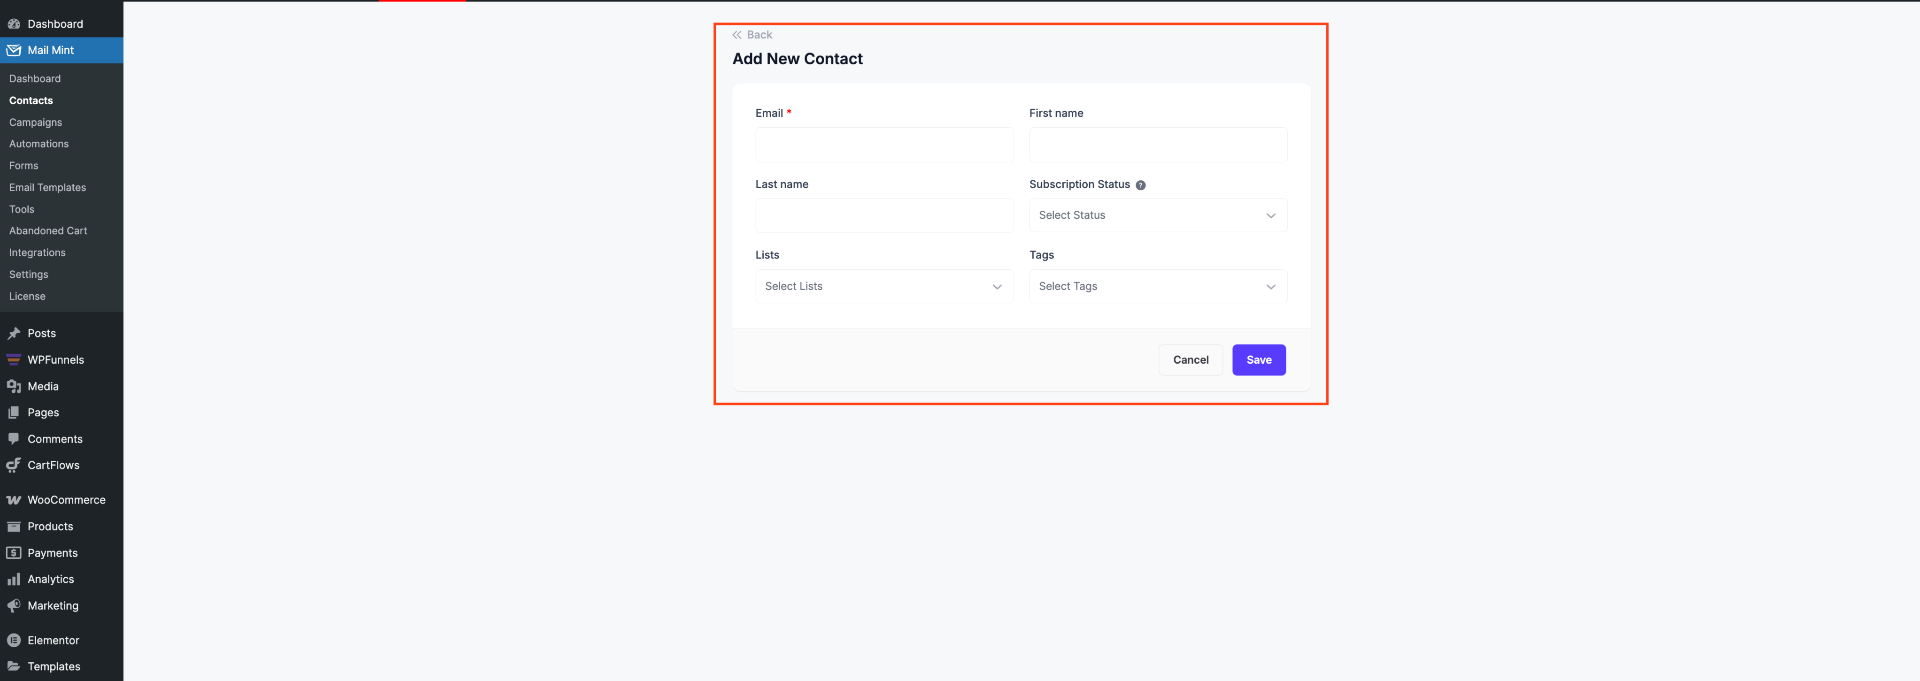
- Manually add a contact.
- Import your Contact List with a CSV file.
- Import your Contact List with Raw Data.
- Import your WordPress Users.
- Import your WooCommerce users.
Here’s how you can manually add a contact:
2. Campaigns
For camping, you can click directly from the dashboard or find the camping option on the left side menu, which takes you to the camping section.
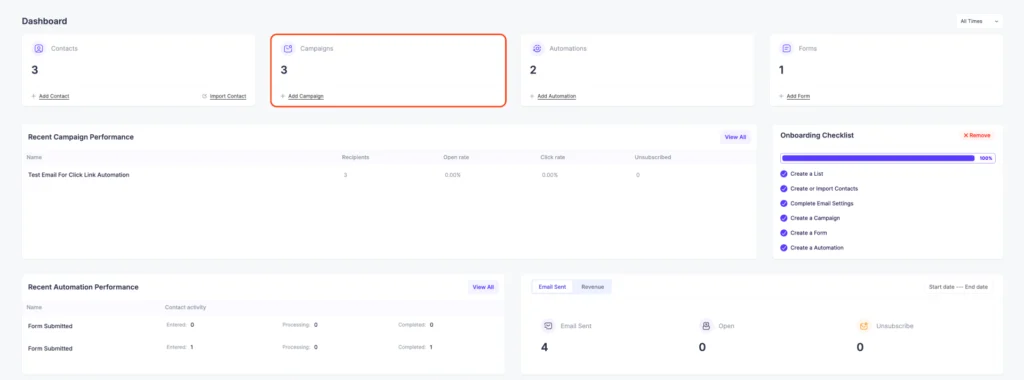
In the Campaigns tab, you’ll find your running, archived, and draft email campaigns.
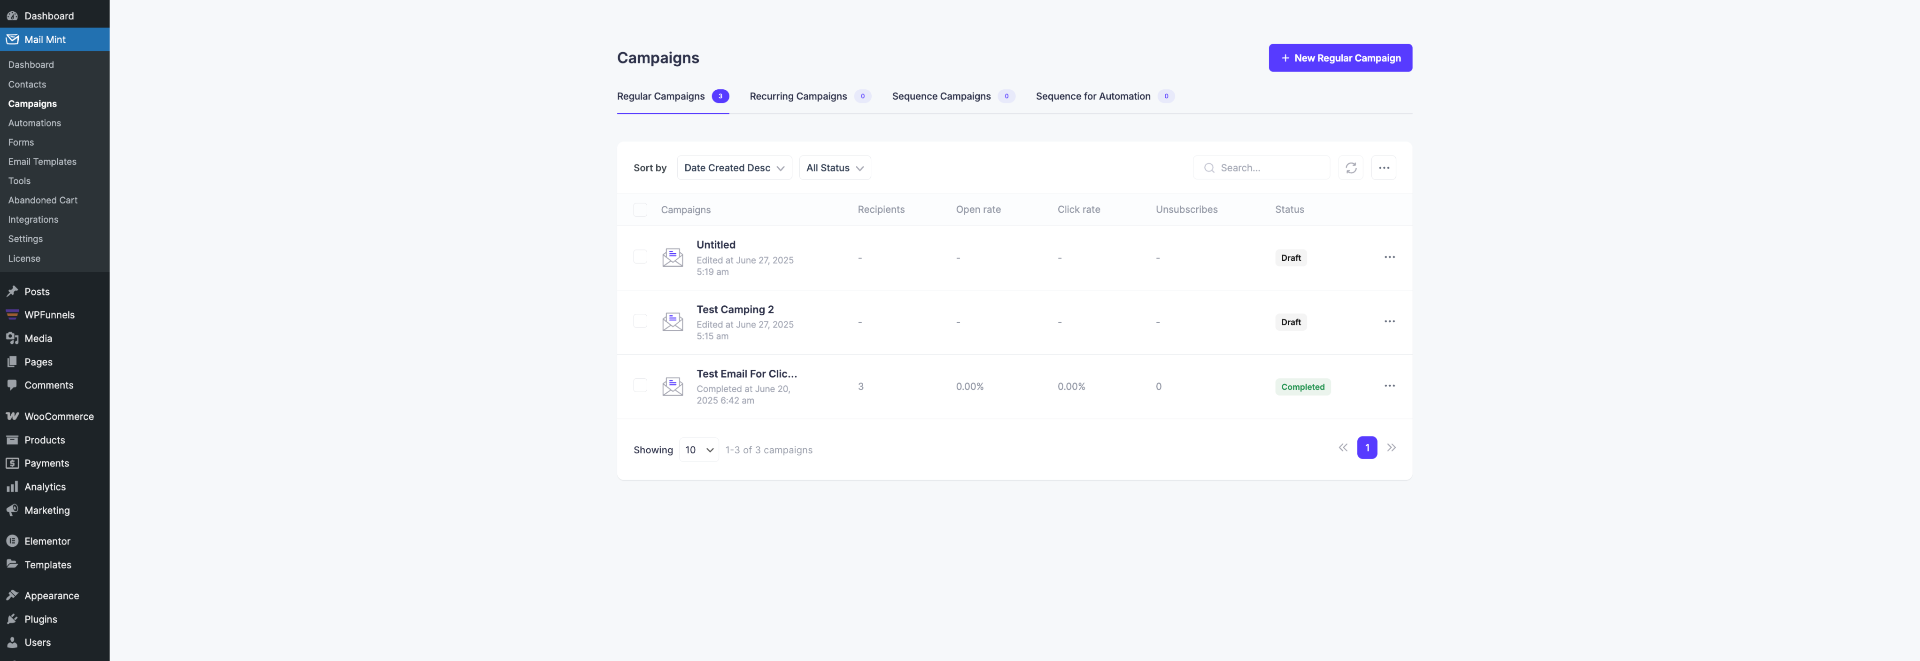
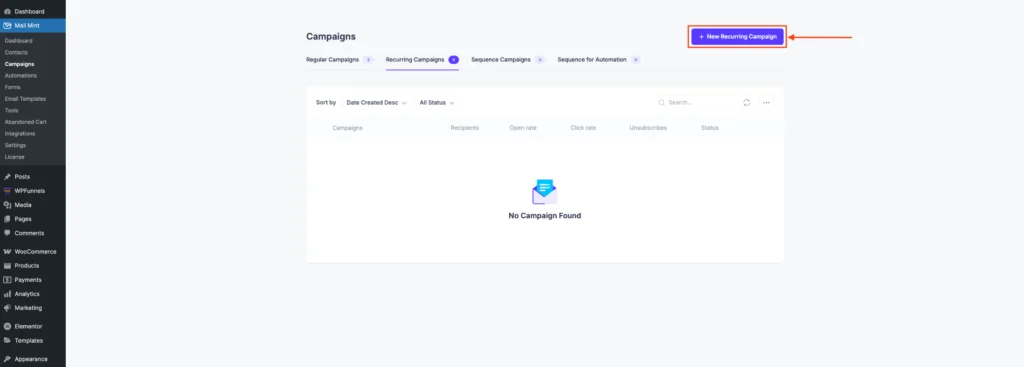
In the Campaign Dashboard, you’ll find different types of campaign options to match your marketing goals. Mail Mint currently supports the following campaign types:
- Regular Campaigns – One-time email blasts for announcements, offers, or updates.
- Recurring Campaigns – Emails sent on a repeating schedule, such as weekly tips or monthly newsletters.
- Sequence Campaigns – A series of emails sent one after another based on a set delay or schedule.
- Sequence for Automation – Email sequences triggered as part of an automation workflow, ideal for onboarding, lead nurturing, or post-purchase follow-ups.
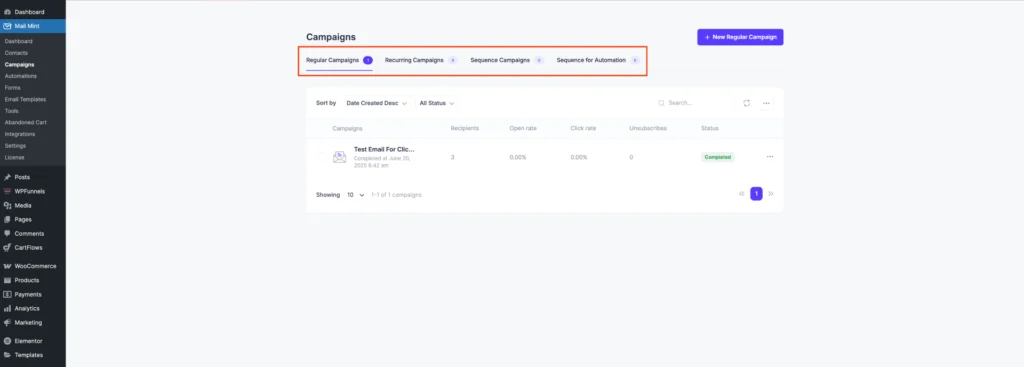
Creating a new Regular campaign is really easy; just click on the + New Campaign button. Once you choose to create any email campaign, you’ll be taken to the settings page for that campaign.
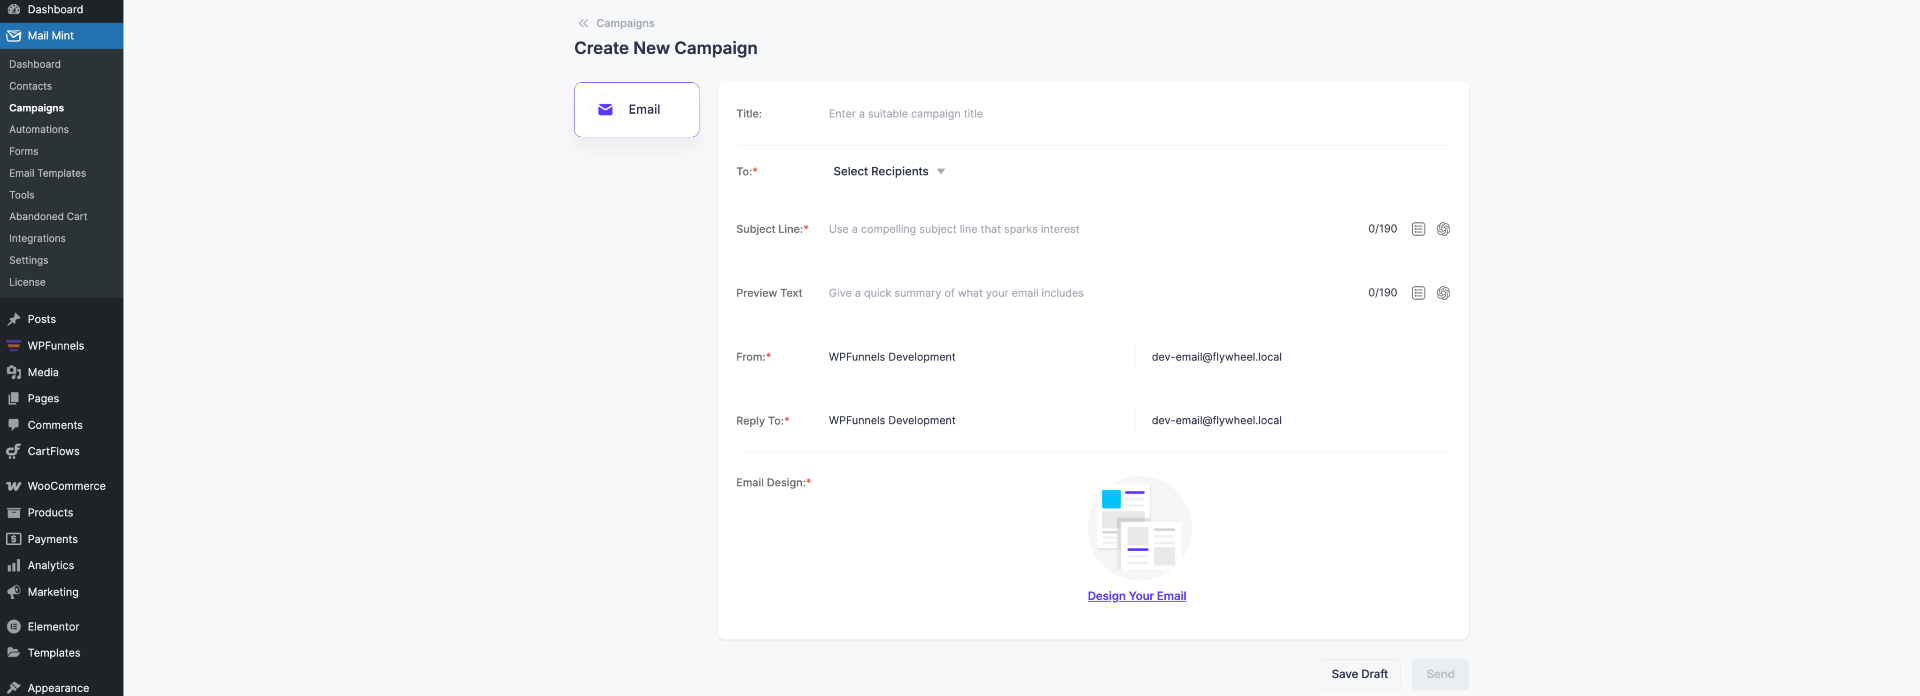
Where you can set:
- Email Title.
- Email Receiver List (you can choose by Lists, Tags, or Segments).
- Subject Line.
- Preview Text.
- Sender Name.
- Sender Email.
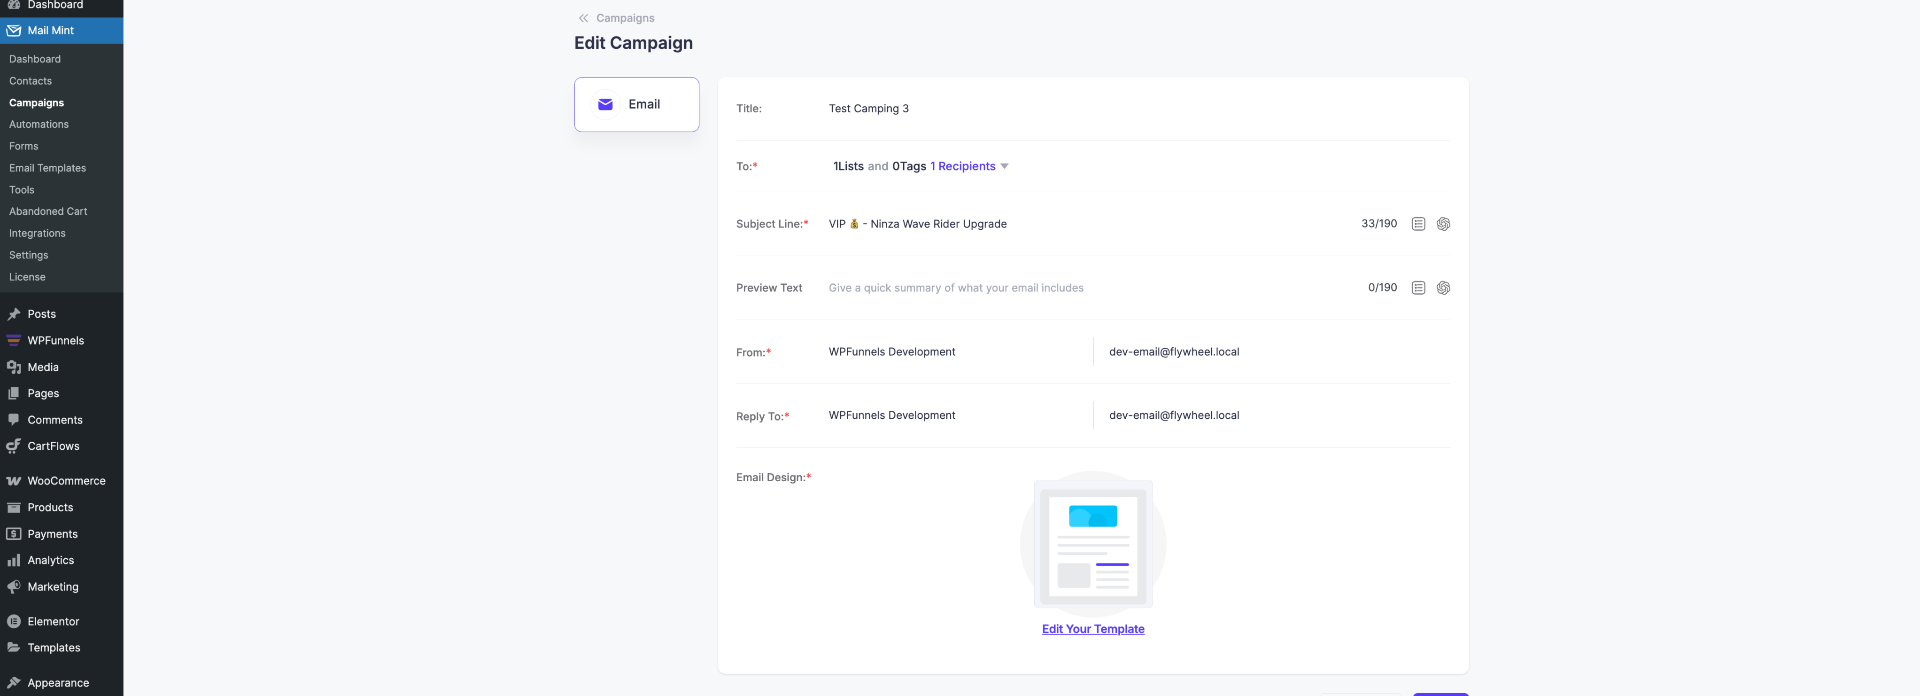
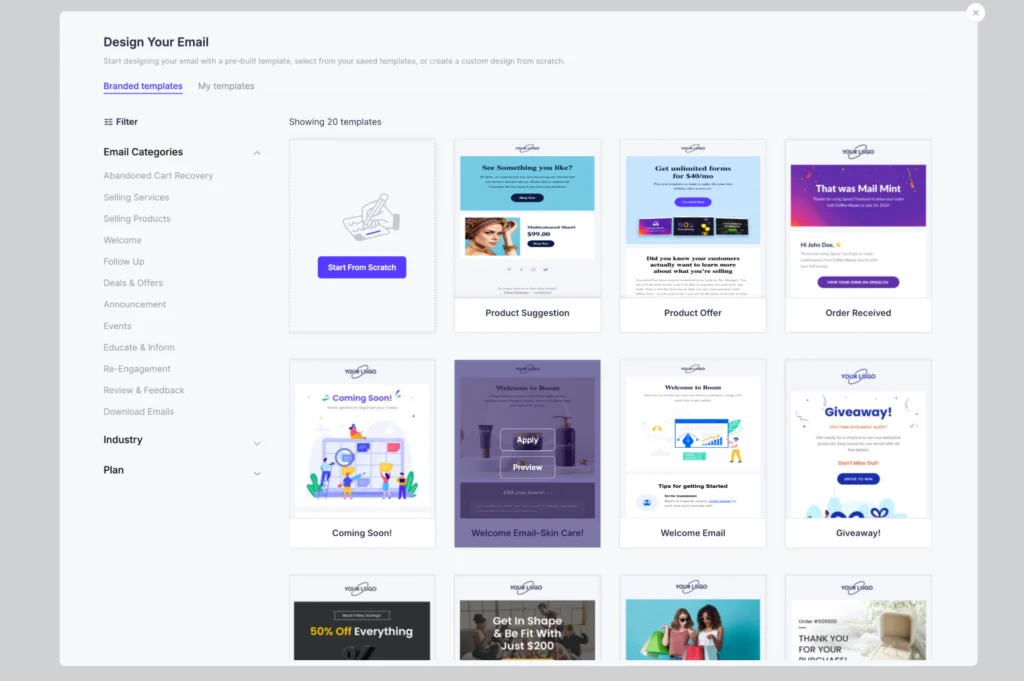
For the email design, you can create one from scratch. Or, you can choose to import the ready-to-use Mail Mint email templates with just one click. These templates are designed from real-life use cases. You can just choose the most suitable one for you and get to work.
To create other types of camping, simply go to your desired camping section and click on ‘New Camping.’ This will open the camping settings where you can set the fields like a regular camping.
3. Lead Generation Forms
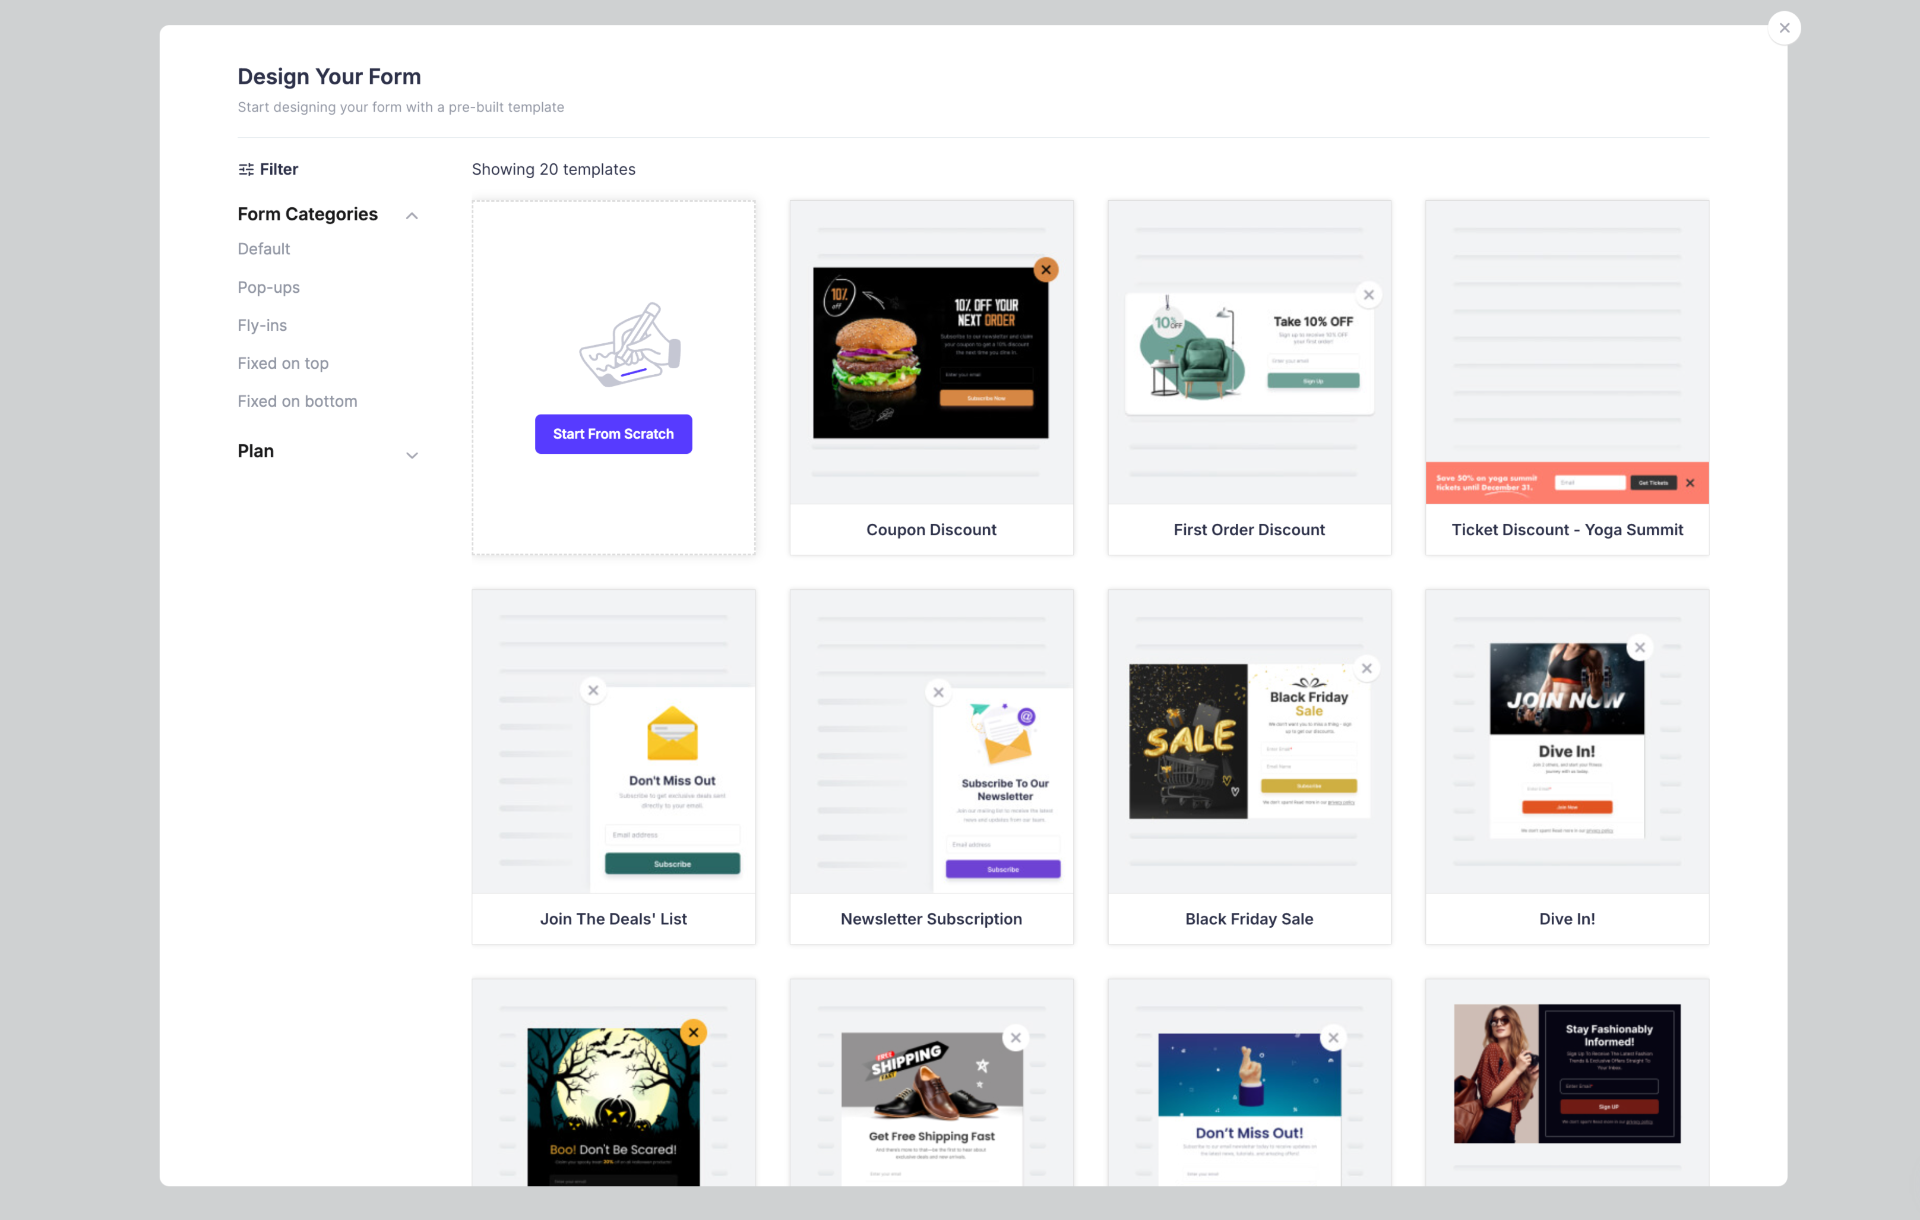
Click on the Forms tab to view the list of your lead generation forms.
You’ll find your running, draft lead gen, or opt-in form for lead generation. Then, Creating new forms is easy as well; just click on the + New Form button.
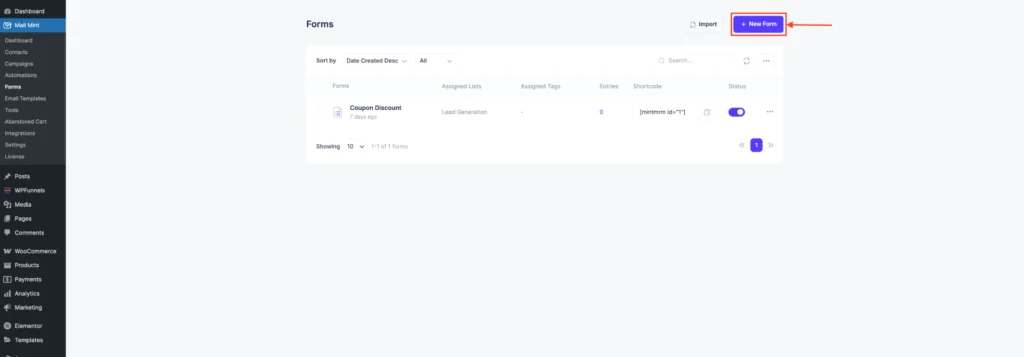
You can choose to create from scratch or import a Mail Mint template with just one click.
4. Automations
To access Automation, click on Automation from the Dashboard or select Automation from the left side menu.
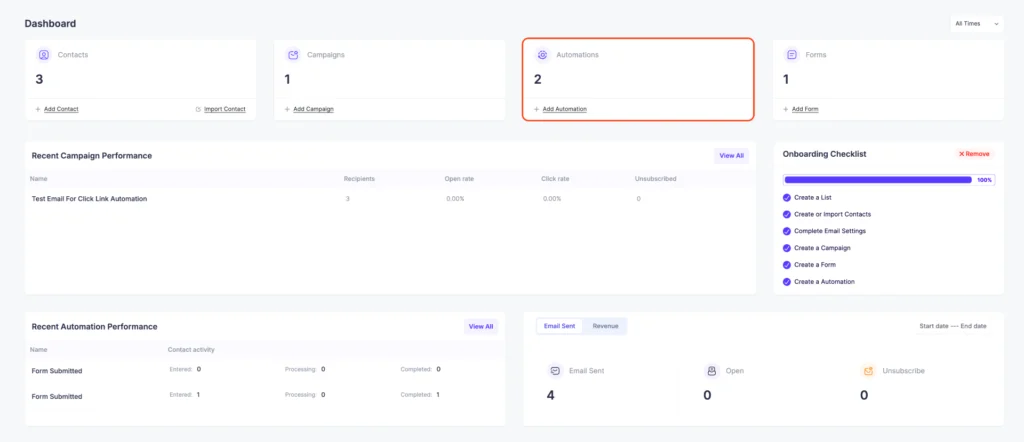
In this tab, you’ll be planning your entire automation map, every step, every trigger, and every action you want automatically to happen for each trigger.

Here’s what simple automation will look like:
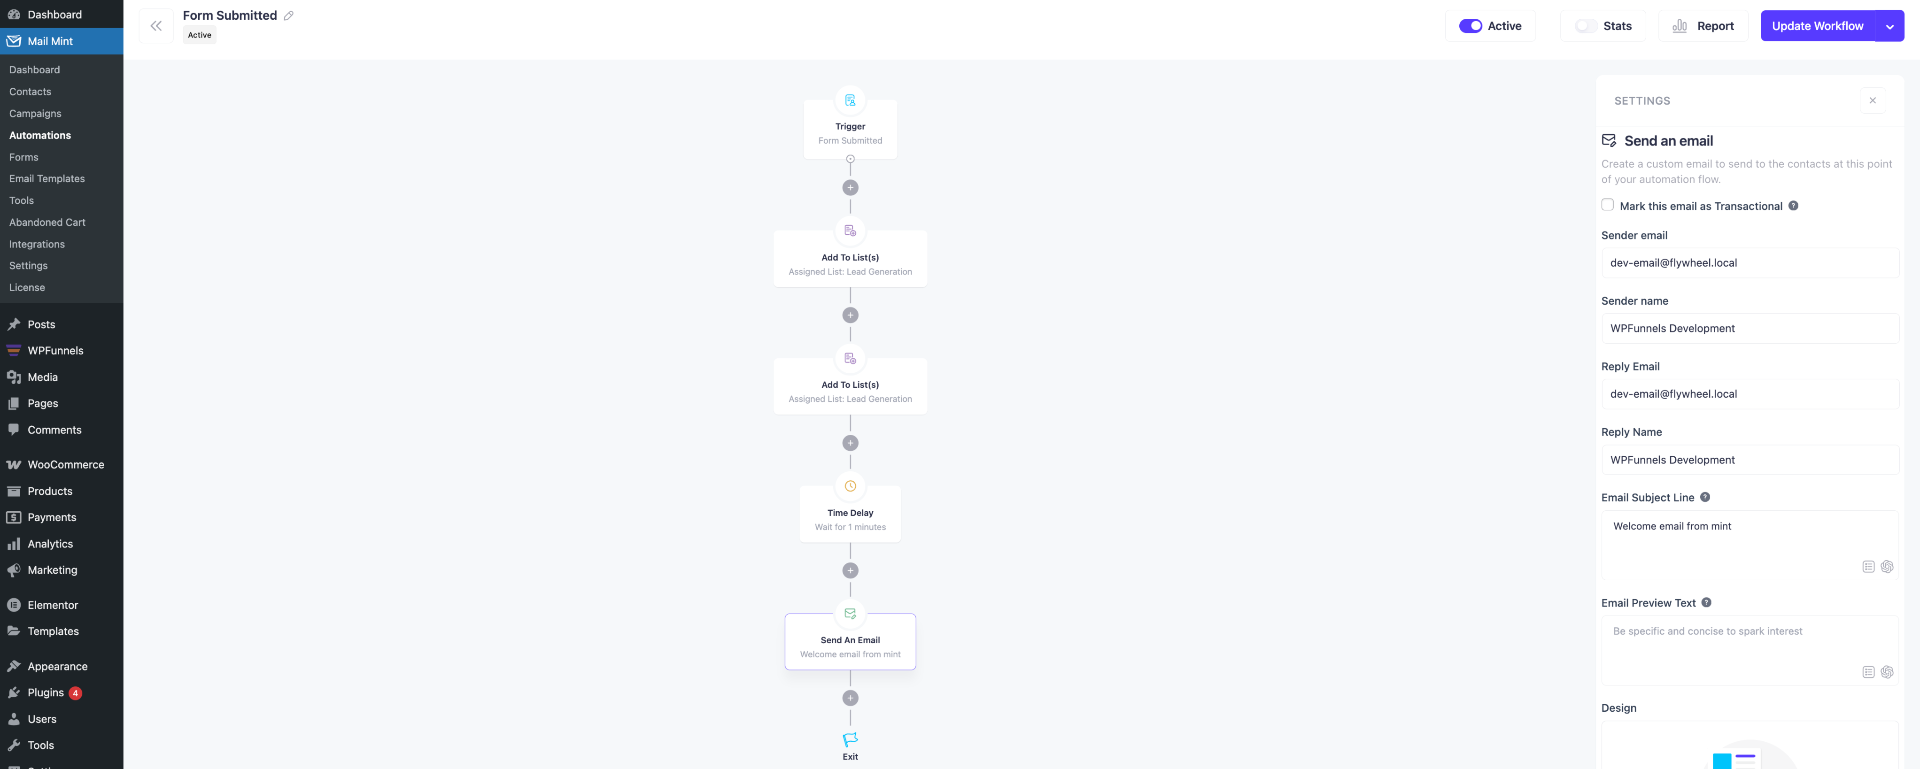
Once a new user registers on your site, you delay for 15 minutes and send them a targeted email.
You can choose other actions based on your flow.
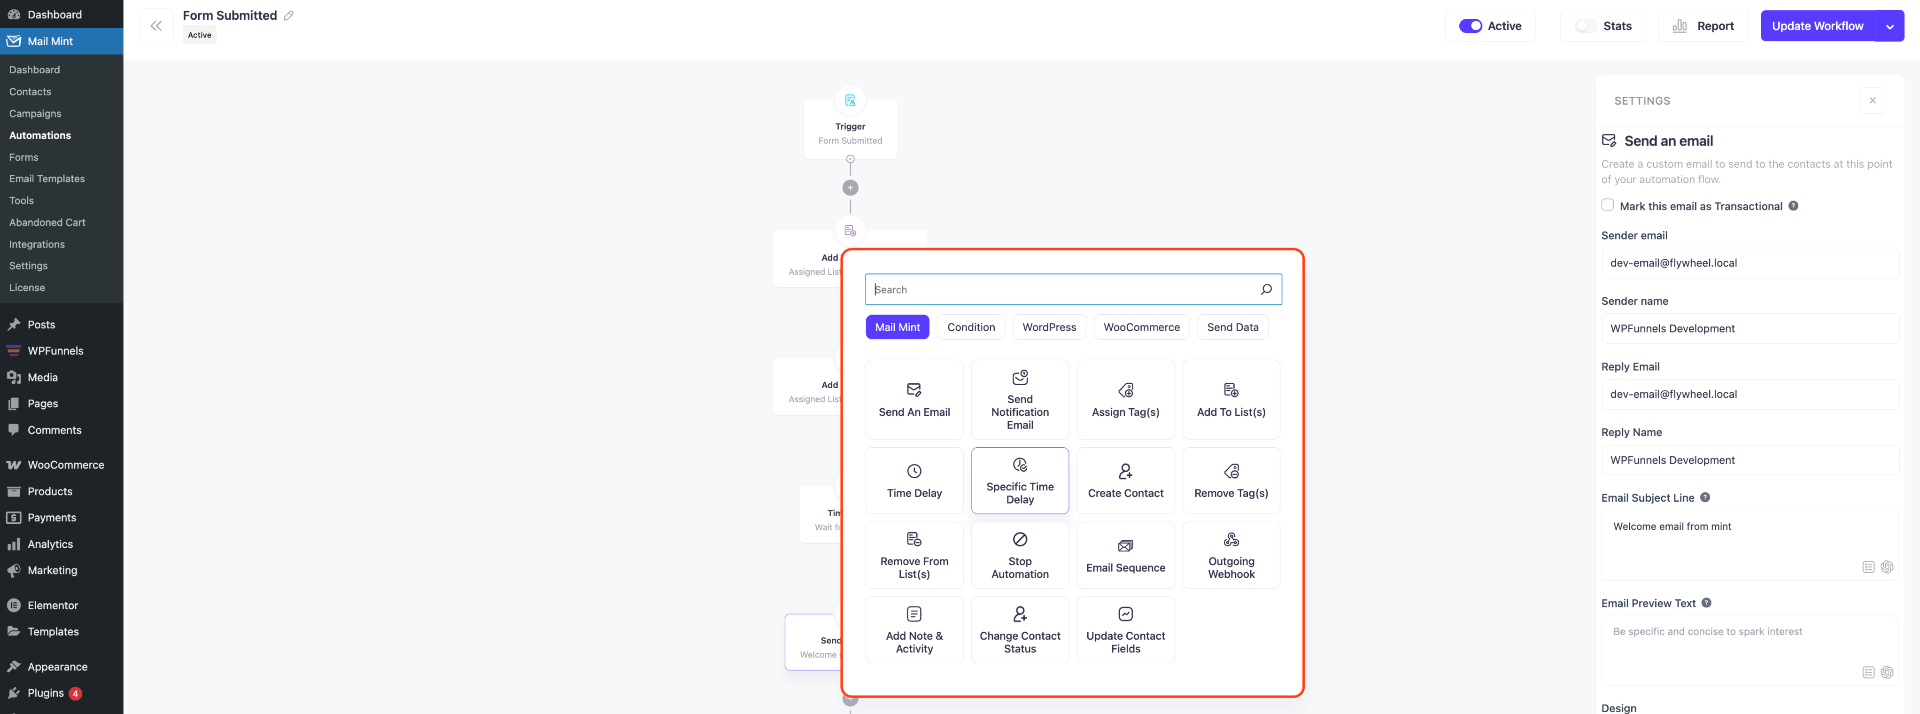
These automations will be completed on your behalf without any intervention.
You just have to plan them smartly and set them once.
5. Mail Mint Advanced Settings
On the Settings tab, you’ll find all the settings for your Email campaigns, Forms, Automations, and the entire plugin.
i. Business Settings
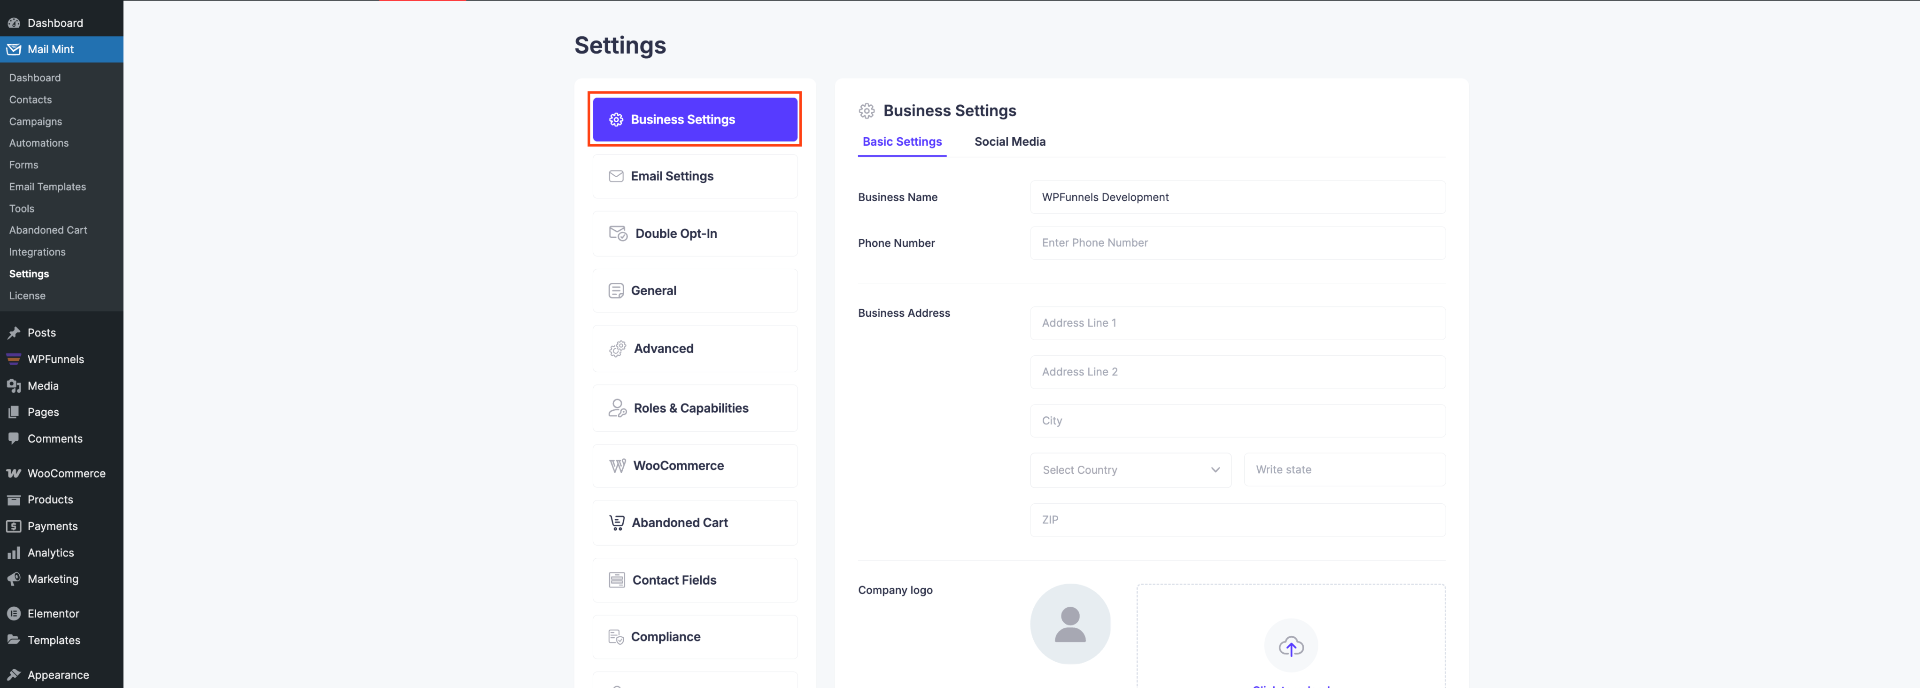
Here you’ll set the Basic Details of your business:
- Business Name.
- Phone Number.
- Business Address.
- Your Logo.
You can also set up your Social Media Profiles here.
ii. Email Settings
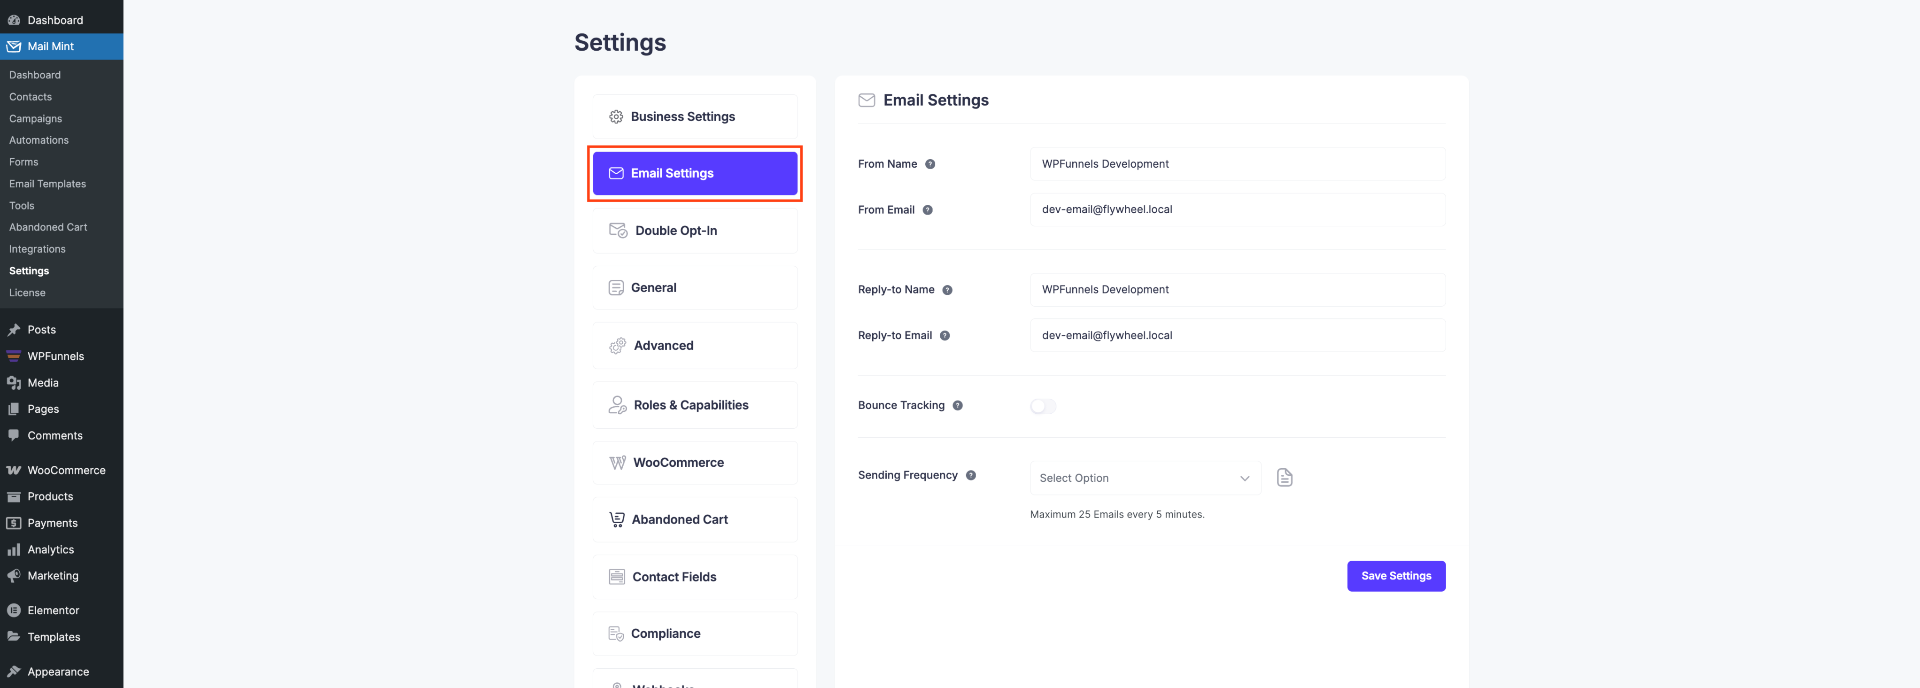
In this Email Settings tab, you can set these for all of your campaigns:
- Sender Name.
- Sender Email.
- Receiver Name.
- Receiver Email.
iii. Double Opt-in Settings:
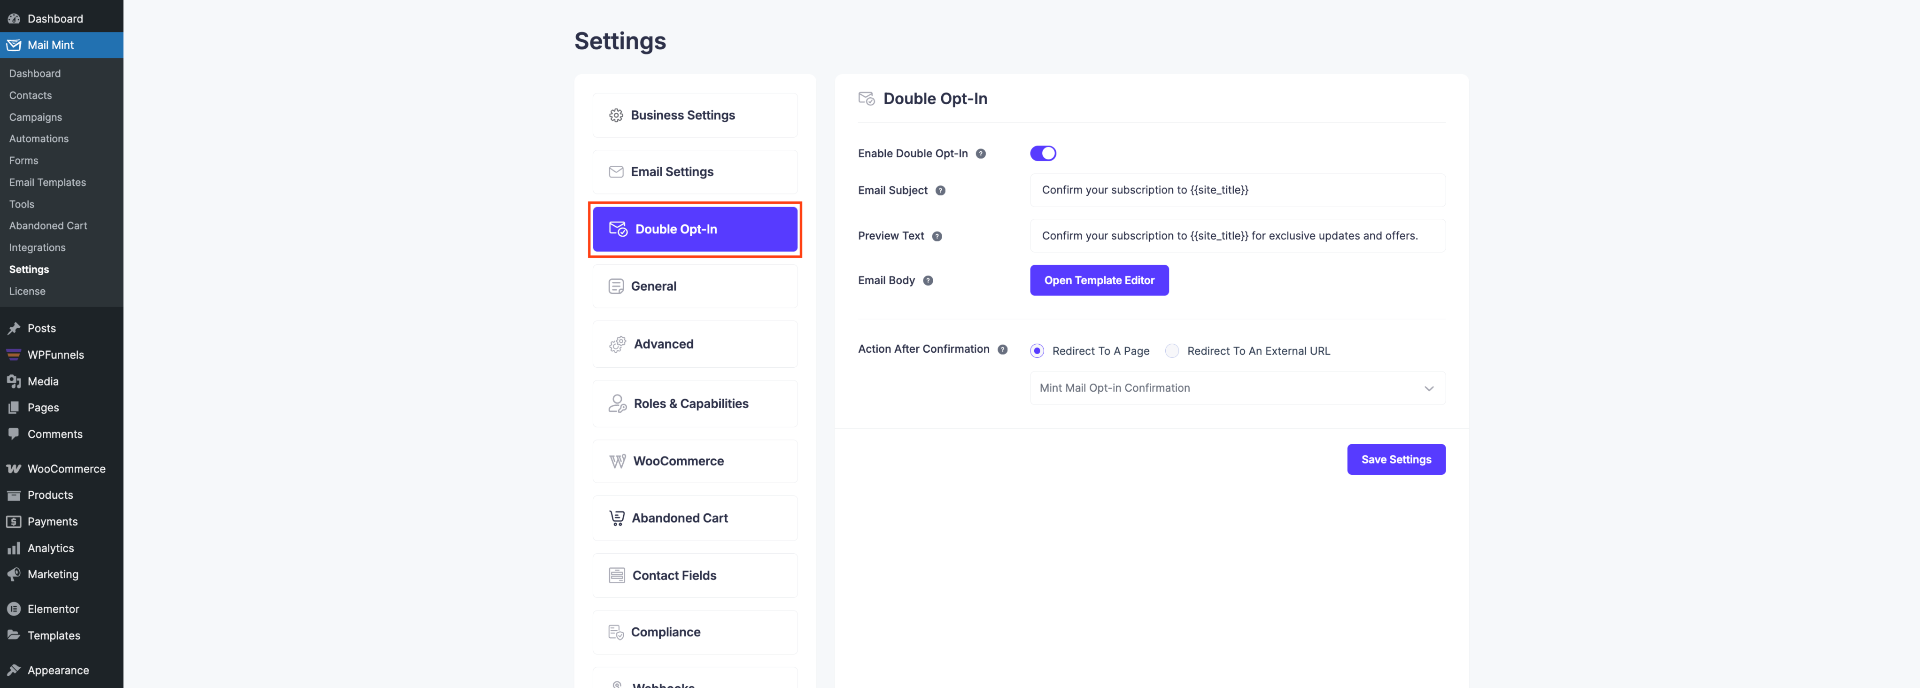
In this section, you can set up a simple confirmation email for your subscribers and take permission of your users to contact them in the future.
For this, you can use:
- Enable Double Opt-in.
- Email Subject.
- Email Body.
- Subscribe, Preference, & Unsubscribe links.
- Confirmation Type.
- Redirect the Page after Confirmation.
iv. General Settings
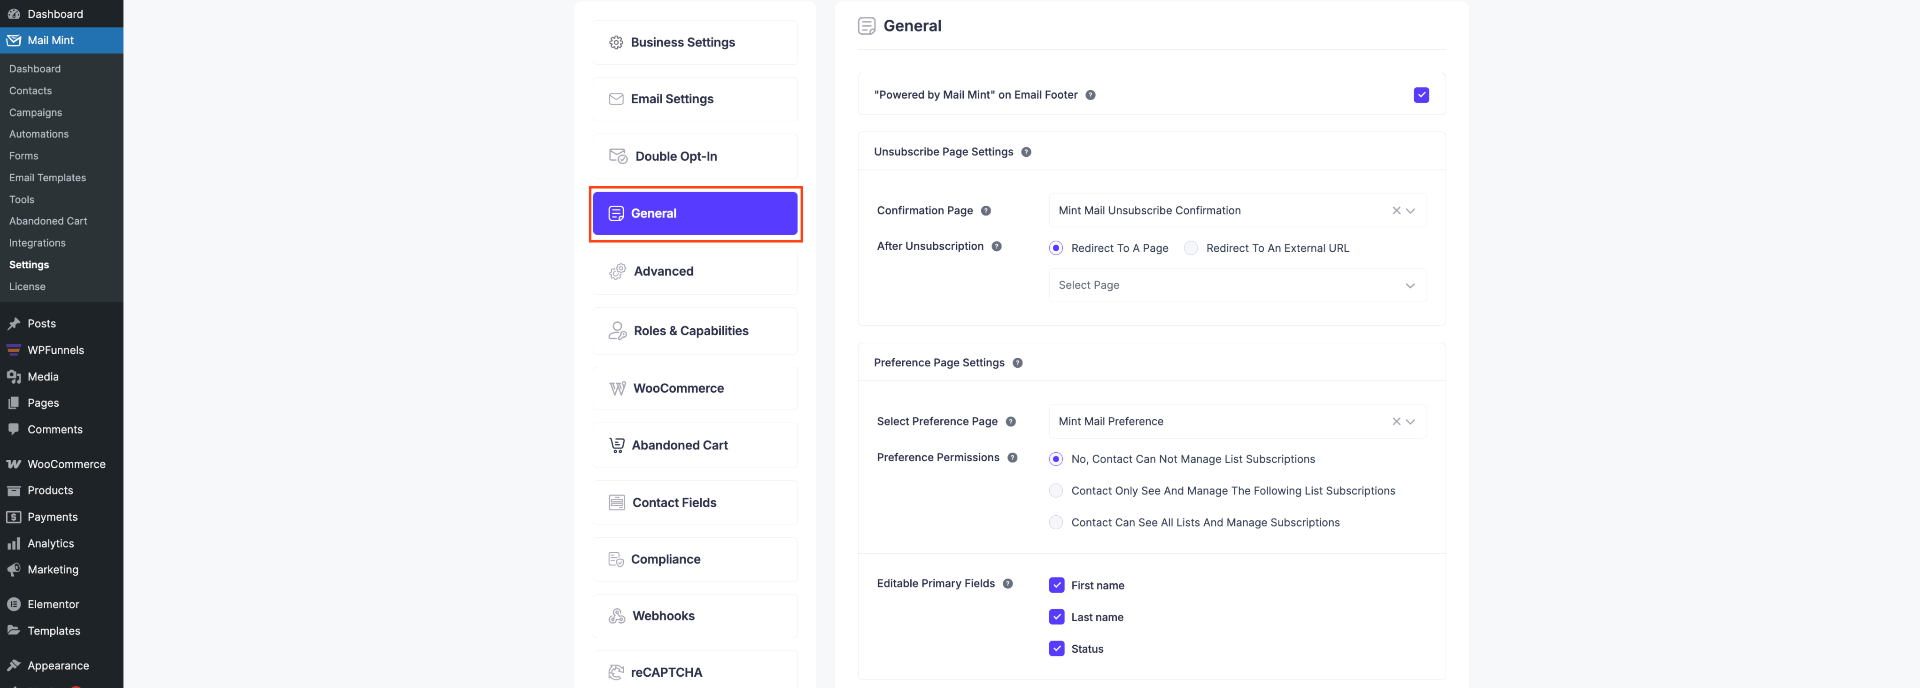
The General Settings tab has all the Advanced Options that you can change & optimize in your favor.
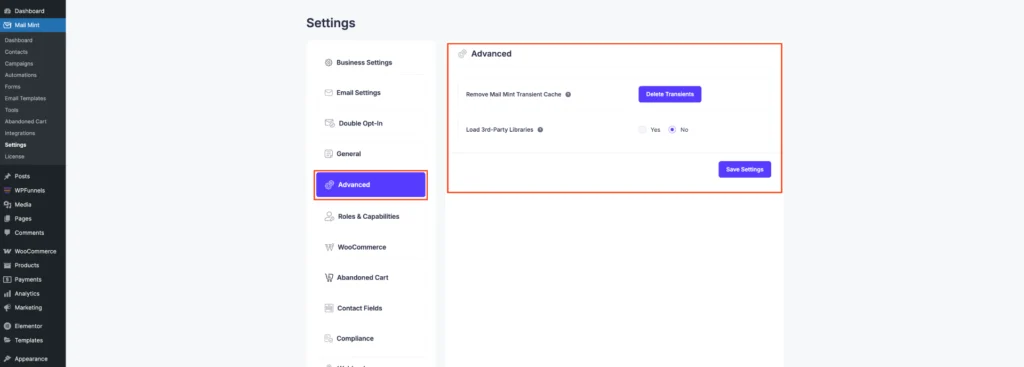
v. Advanced settings
Under the Advanced settings, you can remove Mail Mint’s transient cache to refresh stored data. You can also choose to delete all transients and control whether to load 3rd-party libraries or not. After making changes, click Save Settings to apply them.
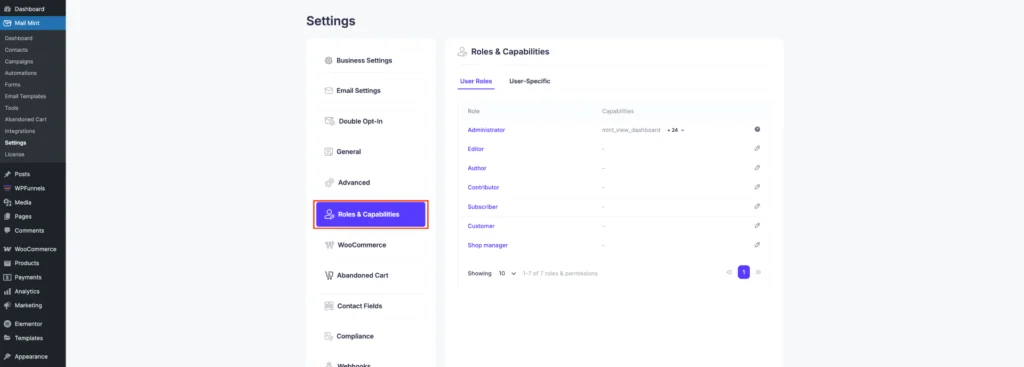
vi. Roles & Capabilities
In the Roles & Capabilities settings, you can manage which user roles have access to specific Mail Mint features. For each role, you can assign or restrict capabilities like viewing the dashboard or managing campaigns. This helps ensure only authorized users can access sensitive email marketing tools.
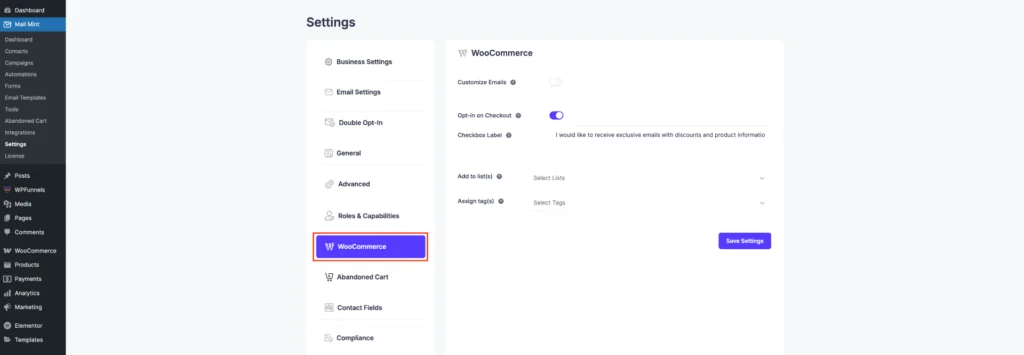
vii. WooCommerce
In the WooCommerce settings, you can enable an opt-in checkbox on the checkout page to collect leads directly from your customers. You can customize the checkbox label, assign subscribers to specific lists, and apply tags automatically for better segmentation.
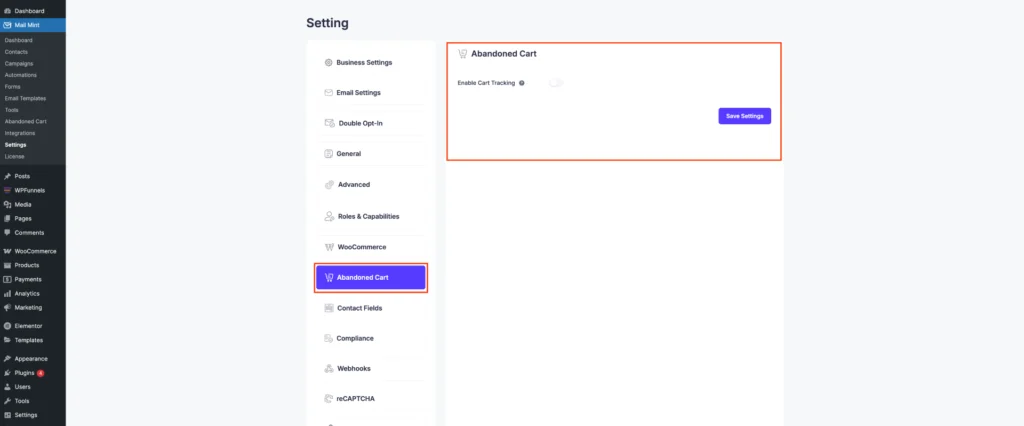
viii. Abandoned Cart
In the Abandoned Cart settings, you can enable cart tracking to capture visitor carts that were left without completing checkout. This helps you recover lost sales through follow-up emails.
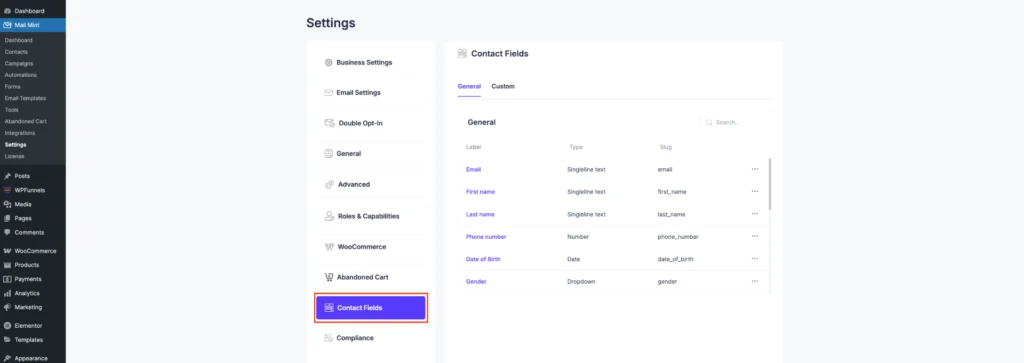
ix. Contact Fields
In the Contact Fields area, you can view and manage both general and custom fields used to collect subscriber information. Default fields include Email, First Name, Last Name, Phone Number, Date of Birth, and Gender, each with its label, type, and unique slug. These fields help personalize and segment your audience for more effective email campaigns.
x. Compliance Settings
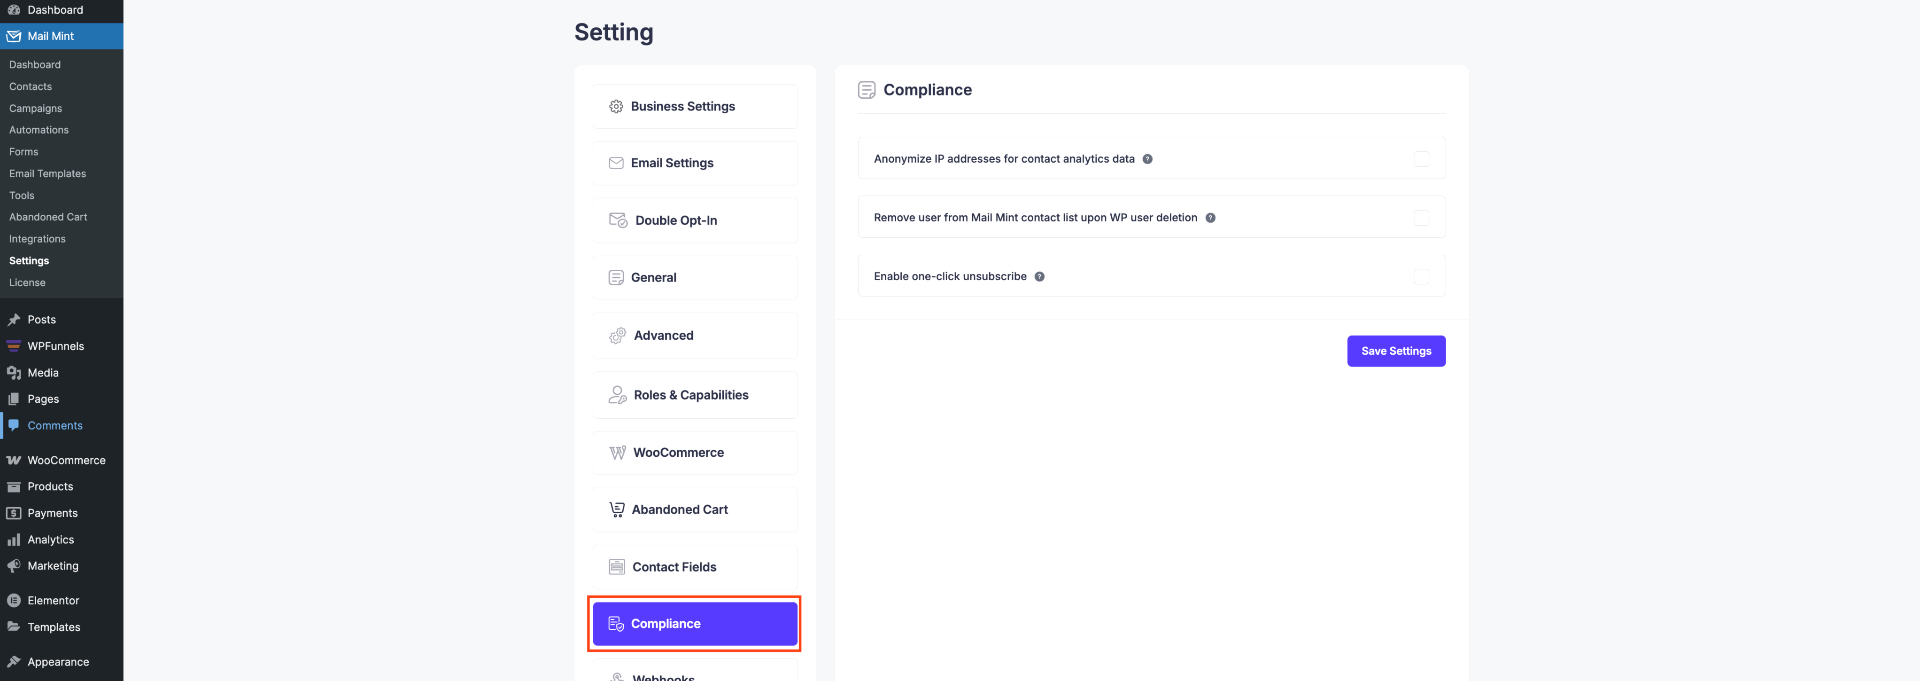
In the Compliance Settings section, you’ll have the option to enable these 2:
- Make the IP data of your contacts anonymous.
- When a WP user is removed, delete their Mail Mint data as well.
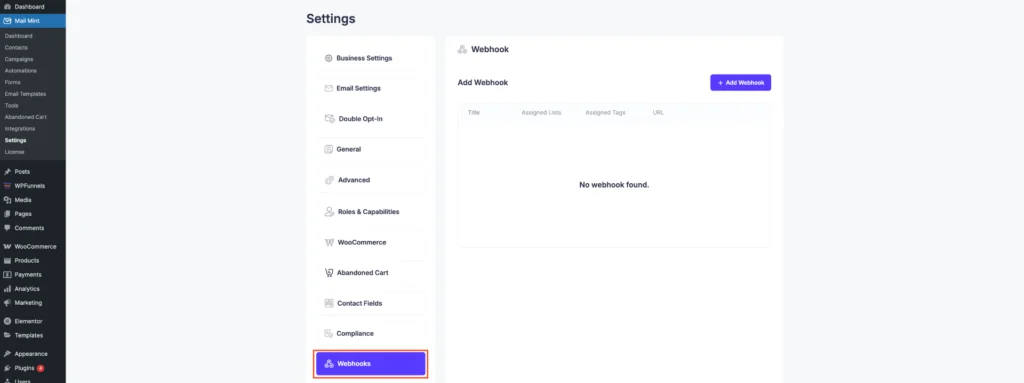
xi. Webhook Settings
In the Webhook settings, you can create new webhooks to send subscriber data to external services in real time. Just add a Title, assign relevant Lists and Tags, and enter the Webhook URL where the data should be sent.
xii. reCAPTCHA Settings
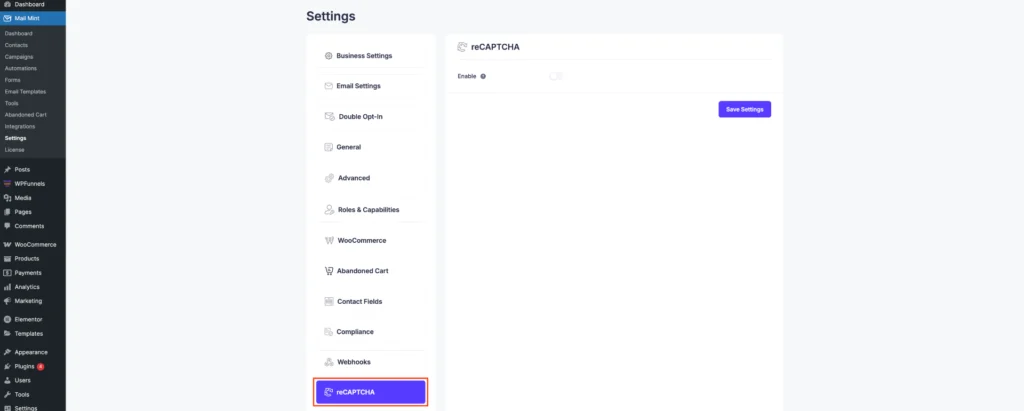
In the reCAPTCHA settings, you can enable Google reCAPTCHA to protect your forms from spam and bot submissions.
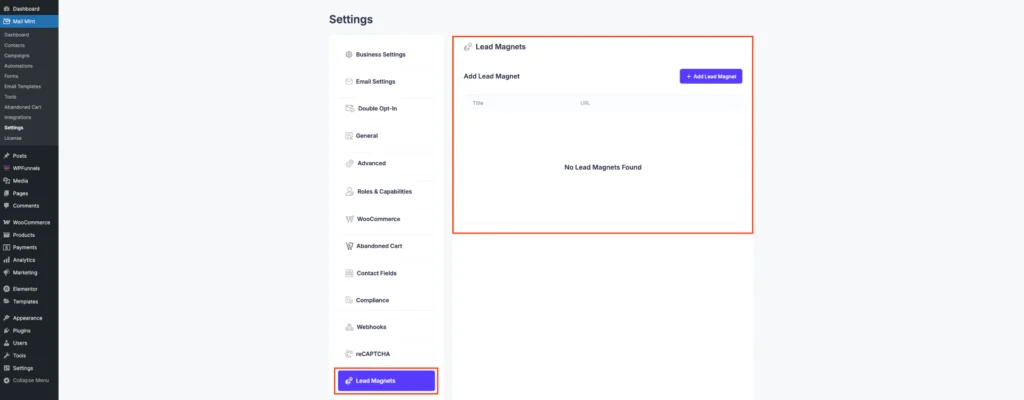
xiii. Lead Magnets
In the Lead Magnets section, you can add downloadable resources (like eBooks, PDFs, or files) to offer in exchange for user sign-ups. Simply provide a Title and the URL of the file you want to deliver, then save it to use in your campaigns or automations.
Mail Mint offers a wide range of powerful features—from lead collection and email automation to advanced segmentation, integrations, and more. Whether you’re running an online store, a course platform, or a service-based site, Mail Mint gives you the tools you need to grow and engage your audience effectively.
There’s so much more to explore—so go ahead and give it a try!
