Creating a community space for a course in Creator LMS allows your students to interact, share ideas, and stay engaged with the course content.
In this guide, we’ll show you how to set up a dedicated space for a course step by step.
Prerequisites:
- Make sure the Community Addon is installed and enabled on your site.
Note: If you haven’t enabled the community addon yet, please check out our guide: How to Enable Community Features in Creator LMS.
Step 1: Go to the Course
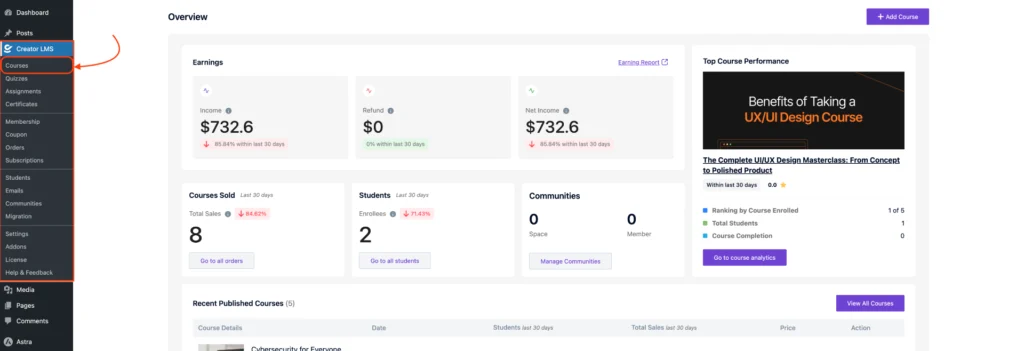
- In your WordPress dashboard, navigate to Creator LMS → Courses. Make sure you already have a course. If no course exists yet, please create a new course first. You can follow this guide: [How to Create a Course in Creator LMS].
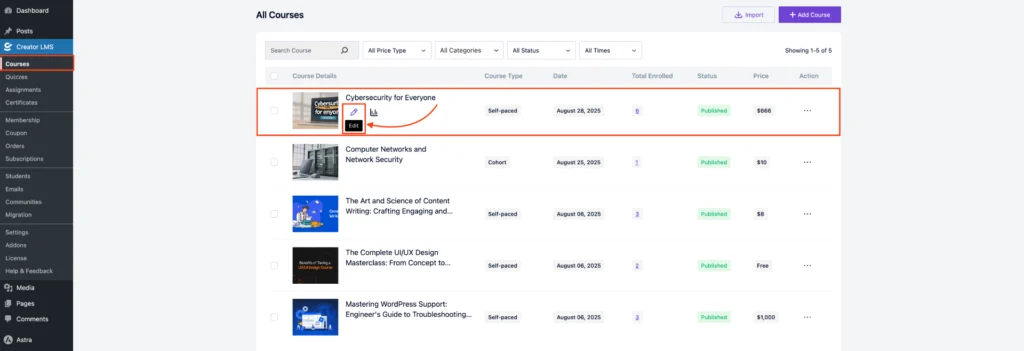
- Click Edit on your desired course to access its course settings section.
Step 2: Enable a Community Space for the Course
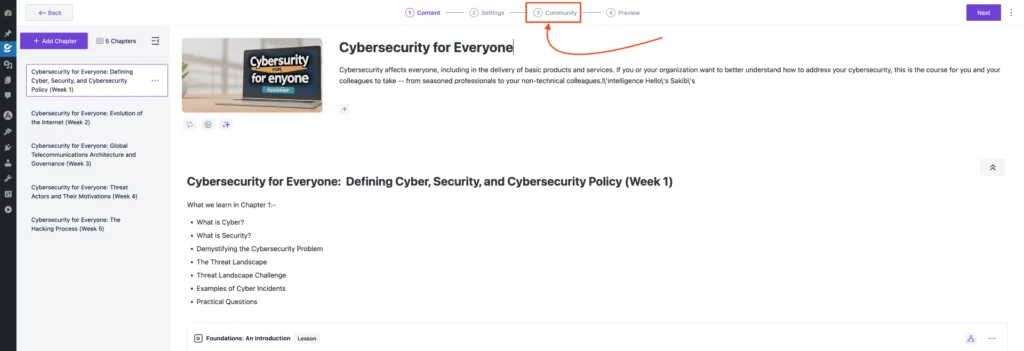
- Within the course editor, select the Community tab.
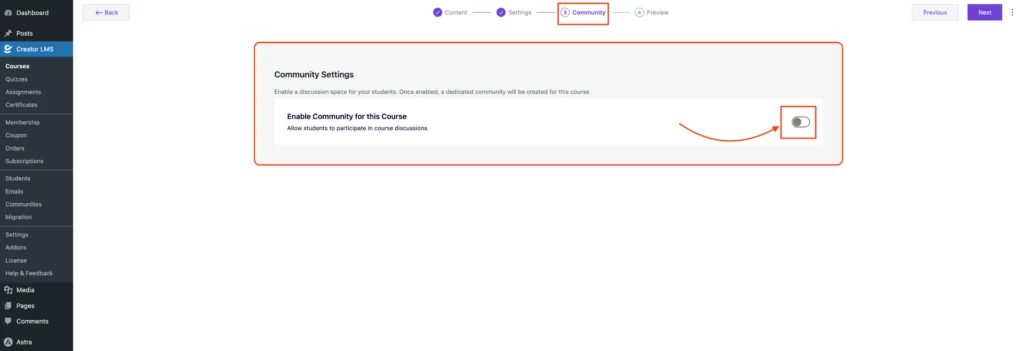
- Toggle the switch to enable a community space for this course.
Step 3: Configure the Space
- Once you enable the community toggle for the course, a new space will be created automatically for that course.
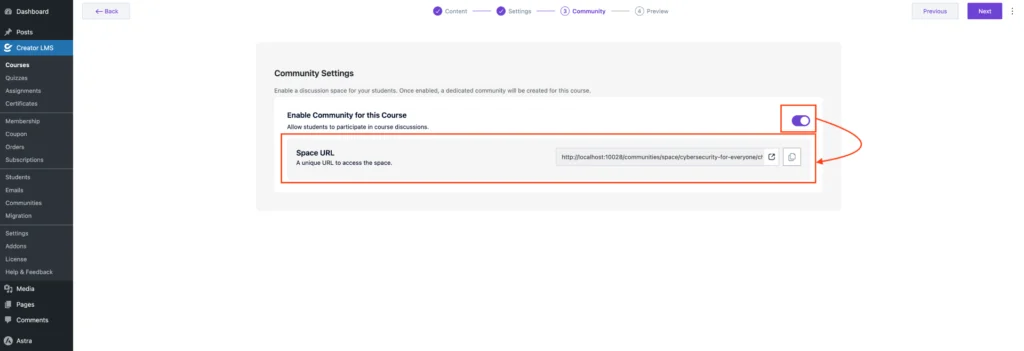
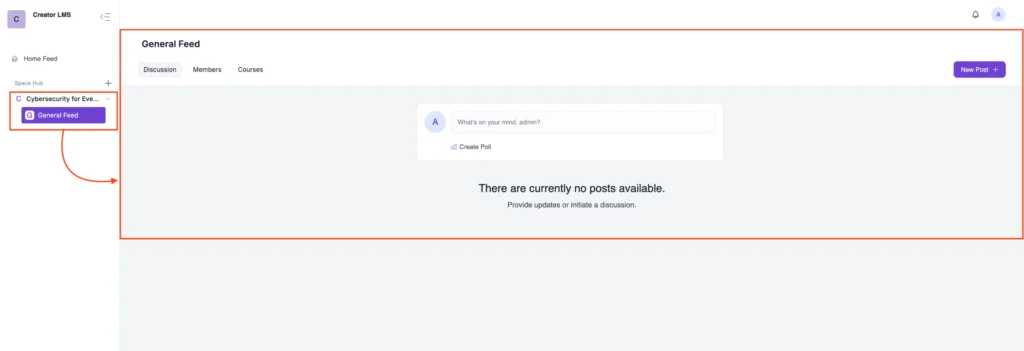
- Click the link to visit the course community space, where you can see all posts, discussions, and participants.
That’s all for this doc! ✅
In the next guide, we will cover how to manage community settings, including moderation, notifications, and privacy options to keep your course communities running smoothly.