Mollie is a popular online payment gateway that allows students to pay securely using credit cards, Klarna, and PayPal. In CreatorLMS, you can quickly integrate Mollie to accept payments directly from your course checkout page.
This guide will walk you through setting up and configuring Mollie for your LMS.
Prerequisites:
- Ensure you have installed the Creator LMS basic version and Creator LMS Pro on your site.
Step 1: Accessing Mollie Payment Settings
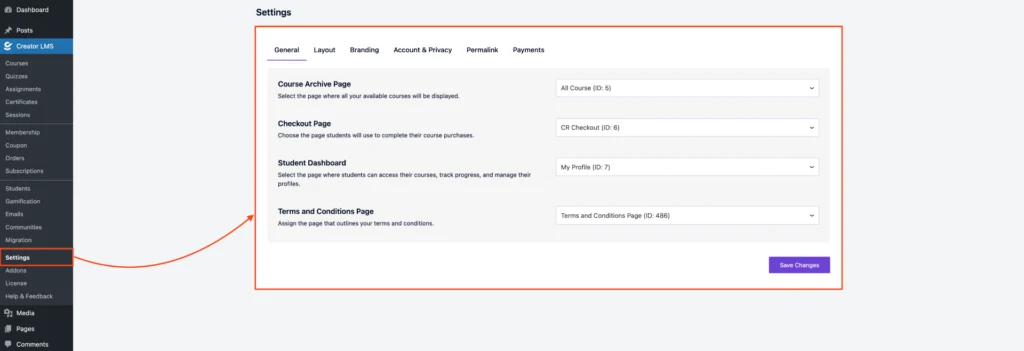
- First, go to Creator LMS → Settings in your WordPress dashboard.
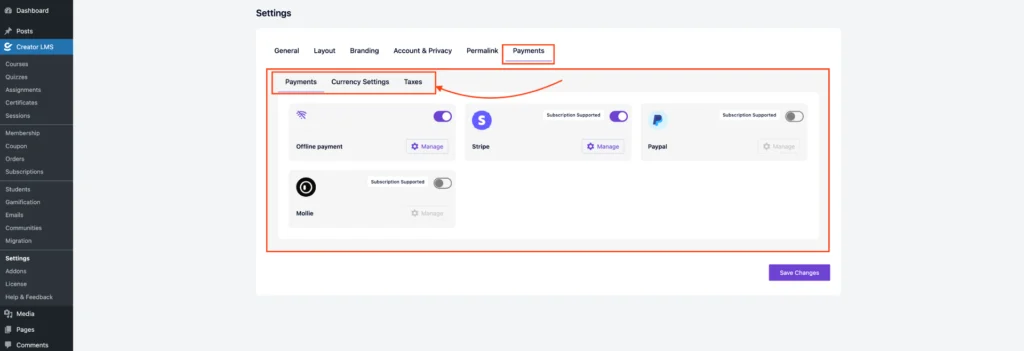
- Next, click on the Payments tab to view all supported payment gateways. And you’ll see three tabs:
- Payments – to set up all payments
- Currency Settings – to choose your currency and format
- Taxes – to configure tax options
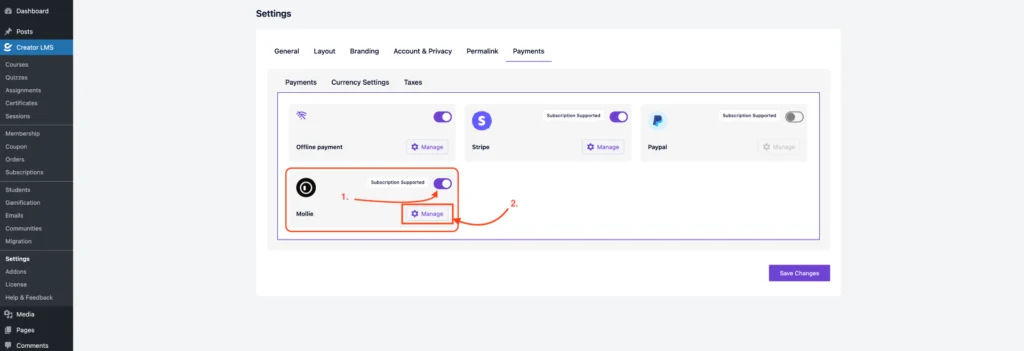
- Find the Mollie Payment option and enable it. Then, click on ‘Manage‘ button.
- After clicking ‘manage‘, it goes to the Mollie Payment settings dashboard.
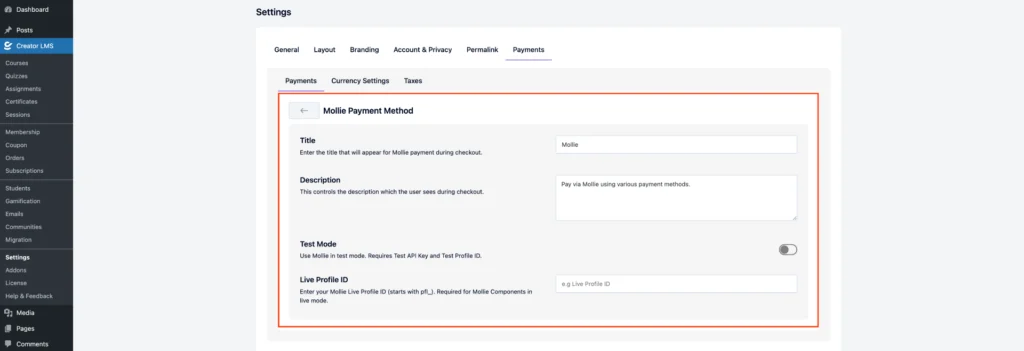
Step 2: Mollie Payment Settings (Payments Tab)
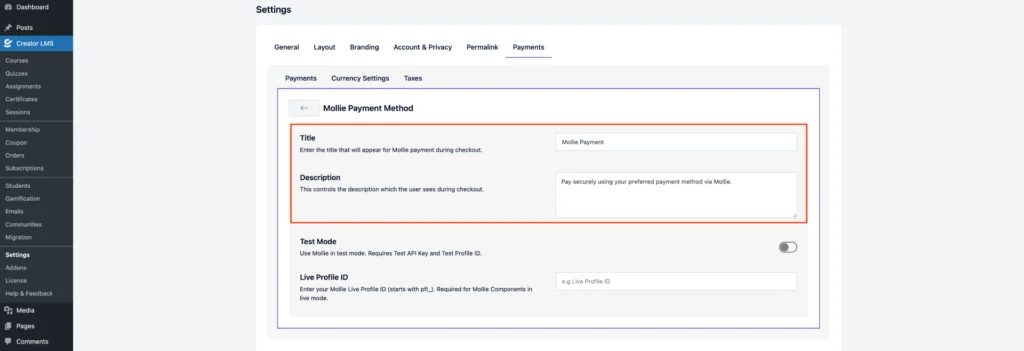
- Enter a clear title, e.g., “Mollie Payment,” and add simple instructions such as:
“Pay securely using your preferred payment method via Mollie.”
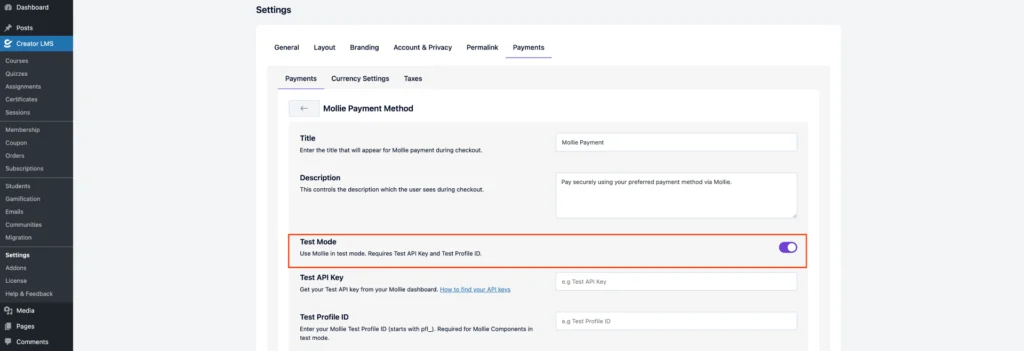
- Enable the Sandbox Mode to test transactions without processing real payments (use your Mollie test credentials for testing).
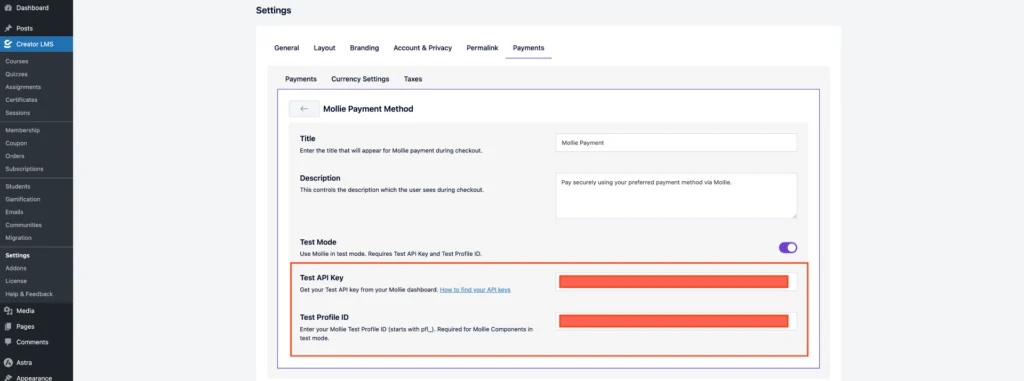
- Enter your Mollie API Key and Test Profile ID (Live Key or Test Key, depending on the mode) from your Mollie Dashboard.
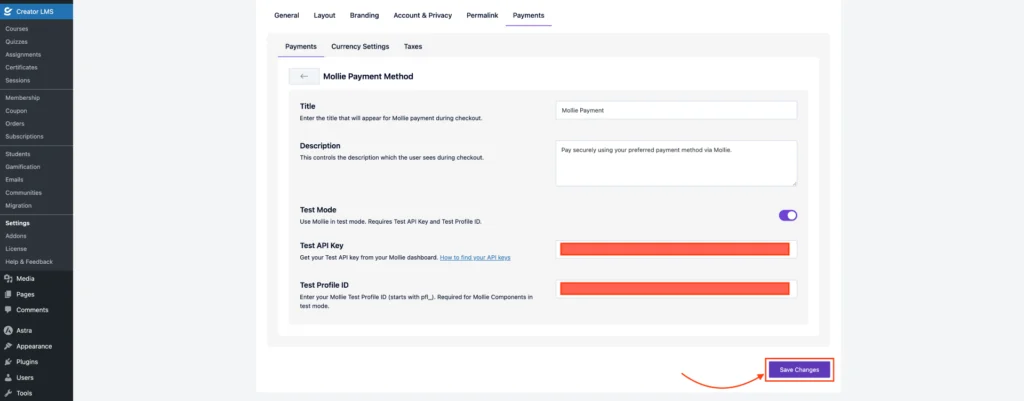
- Click Save Changes to connect Mollie with CreatorLMS.
Step 3: Testing and Using Mollie on the Checkout Page
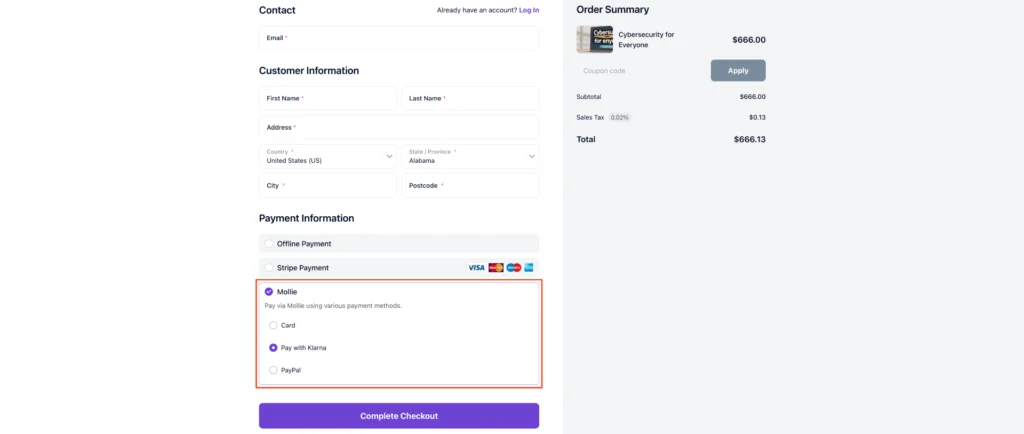
- Once configured, Mollie will appear as a payment option on your course checkout page. Students can select it and complete payments securely.
That’s all about setting up and configuring the Mollie payment gateway in CreatorLMS.