Mail Mint is now fully integrated with WPFunnels to help you create full marketing automation on your WordPress website.
That means you can design the sales funnels for your business and set up automated email campaigns and marketing automation for each of your funnel steps.
To set up marketing automation, you have to choose the triggers and set an action against them.
To make it more simple, think of what your users or customers may do in a step of the sales funnel, and then automate an action that you want to happen to convert that user as soon as possible.
Here’s how you can set up marketing automation using Mail Mint & WPFunnels.
Create Marketing Automation with WPFunnels and Mail Mint
Follow the steps below to step up different types of marketing automation using both Mail Mint & WPFunnels.
First, make sure of these:
- You have the free versions of WPFunnels and Mail Mint installed & activated on your site.
- WPFunnels Pro is installed & the license key is active.
- Mail Mint Pro is installed & the license key is active.
- You have set up some Tags or Lists for your contact list.
- You have at least one automation-type email campaign prepared.
- You have one sale funnel prepared.
Now follow these steps to set marketing automation and email campaign automation with Mail Mint & WPFunnels:
Create A Simple Marketing Automation
1. Make sure you have an email campaign of automation type ready to be used, created using Mail Mint.
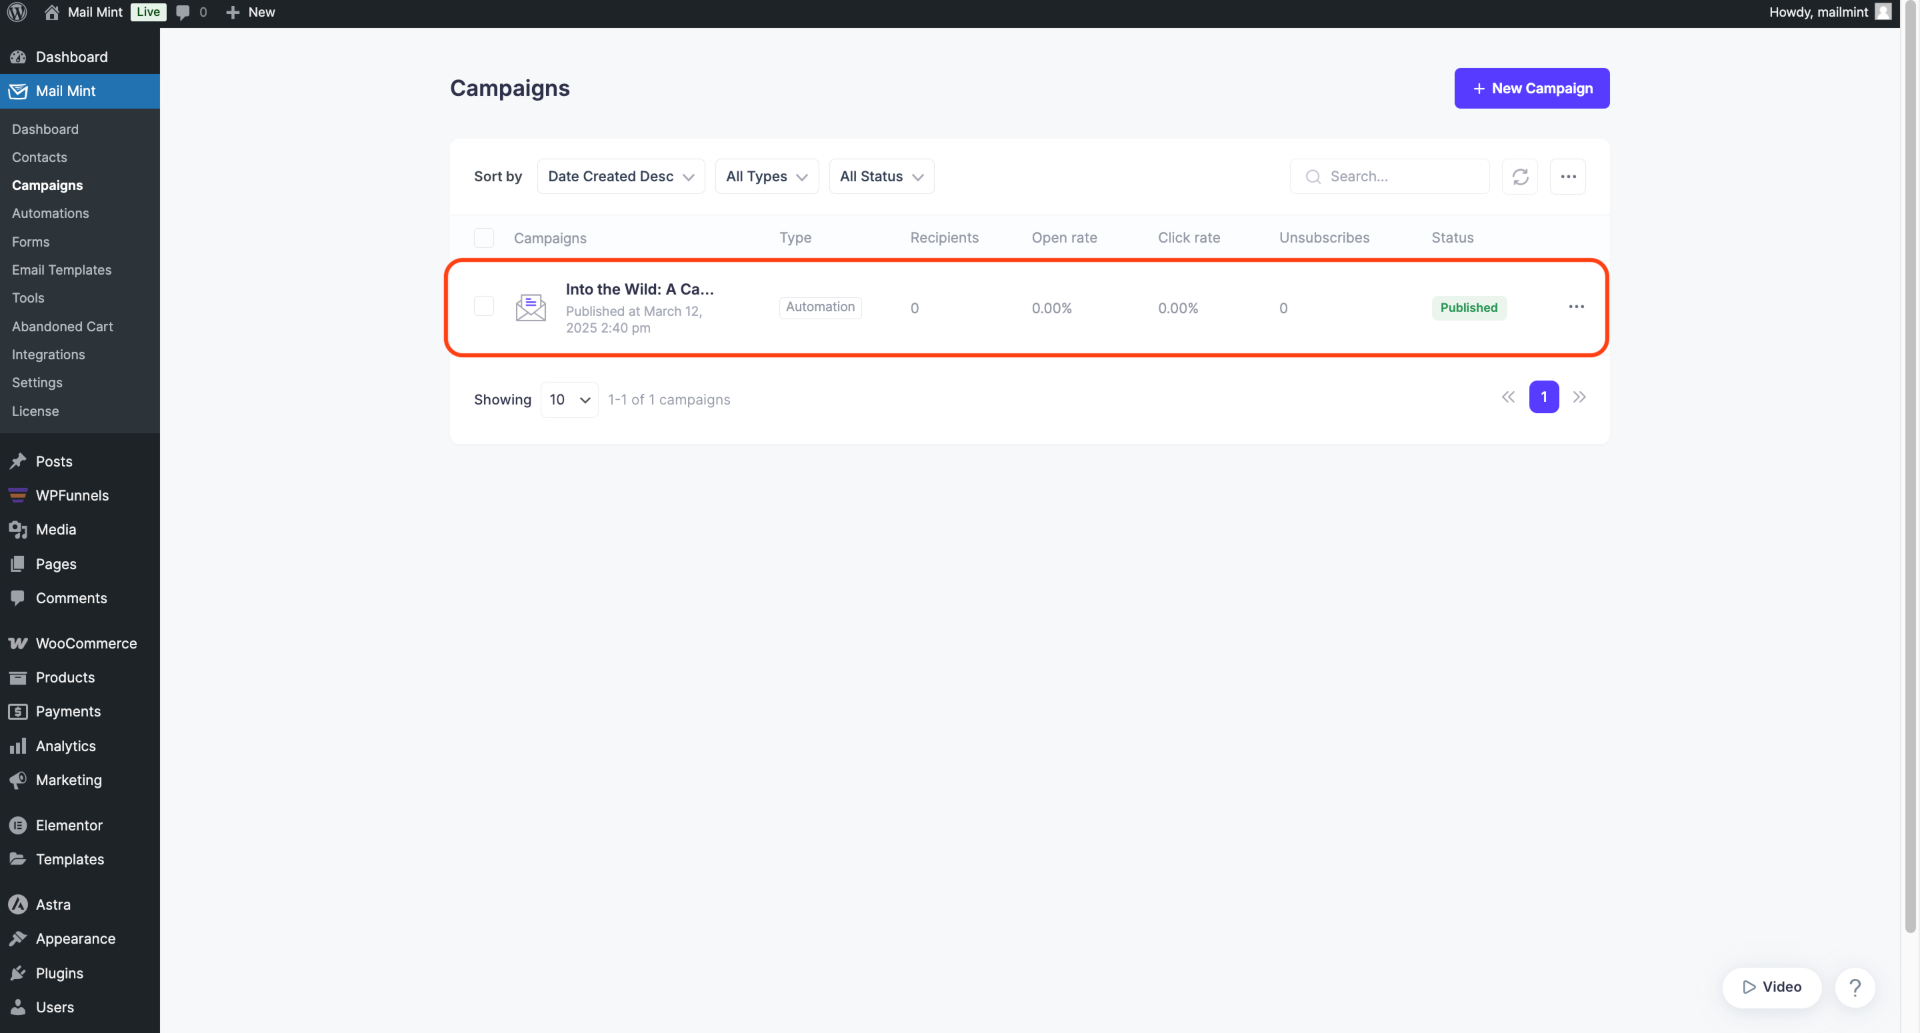
Then create a sales funnel with multiple steps using WPFunnels.
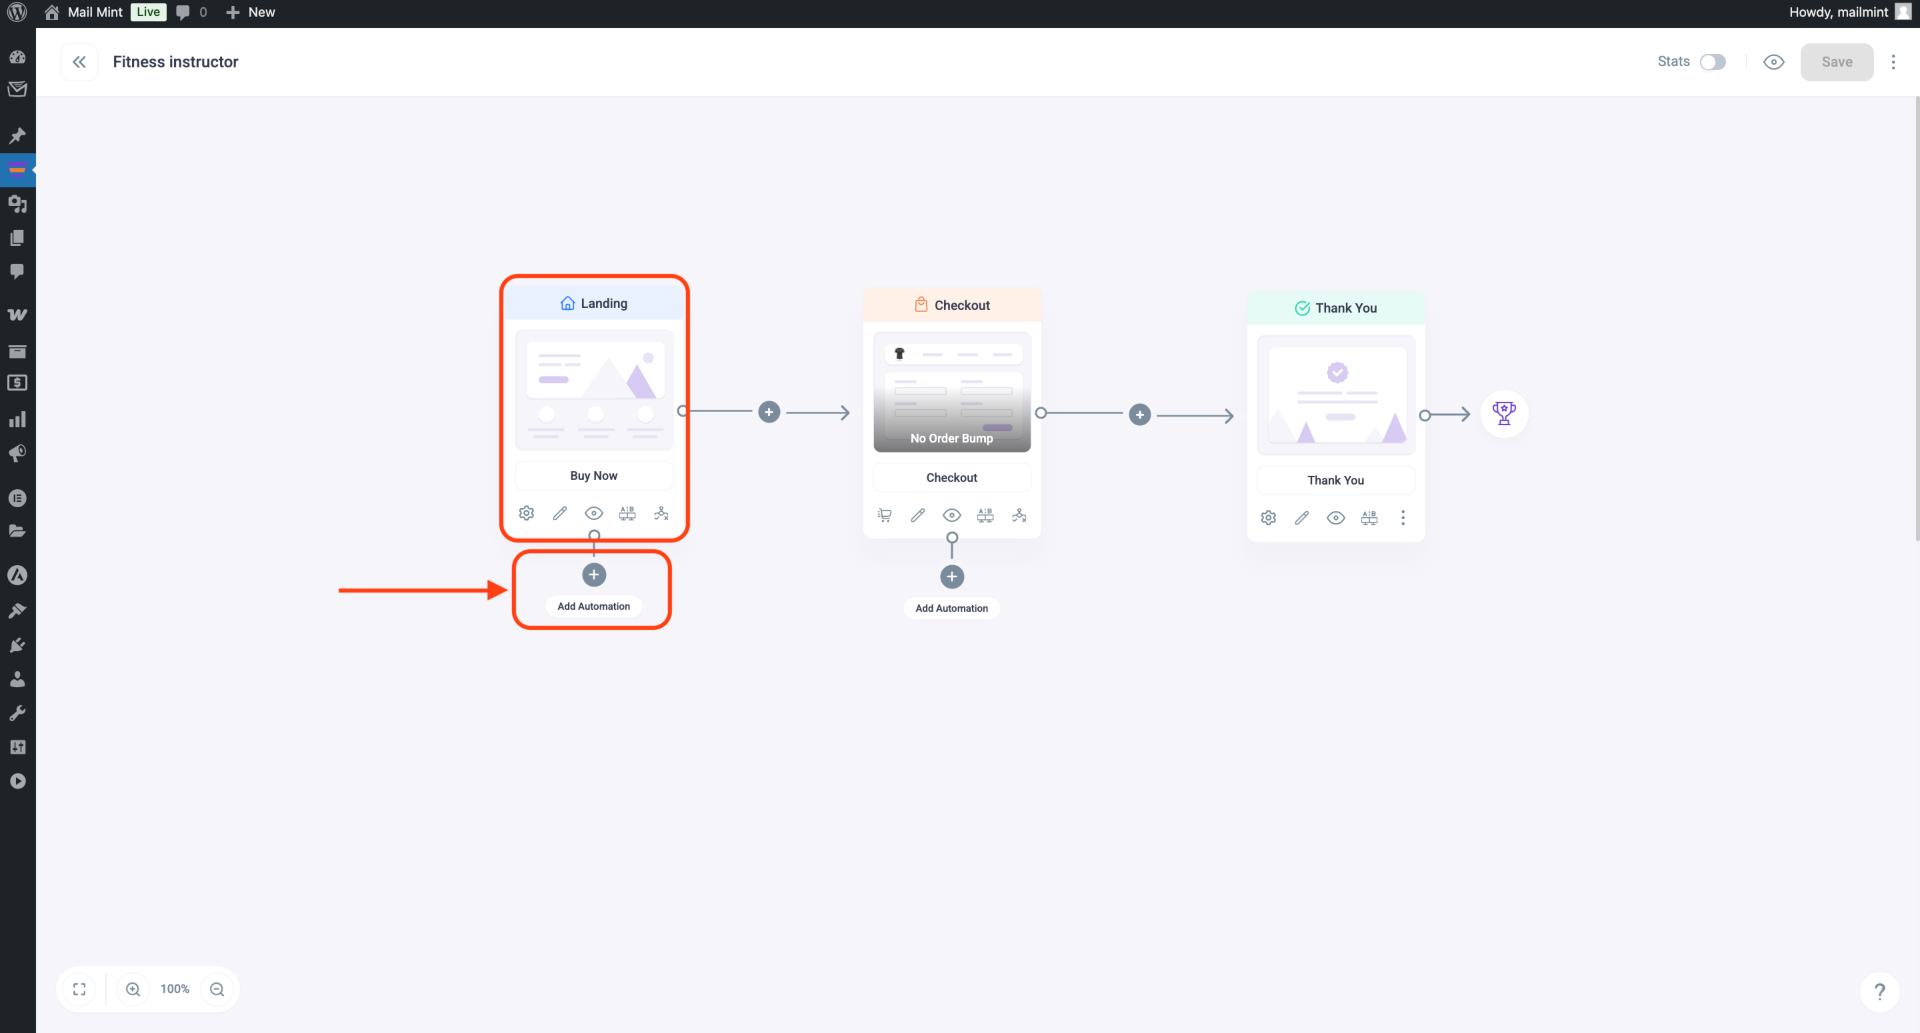
2. Go to WPFunnels and open the specific funnel you want to integrate with automation. Now, click the plus (+) icon below any step in the sales funnel.
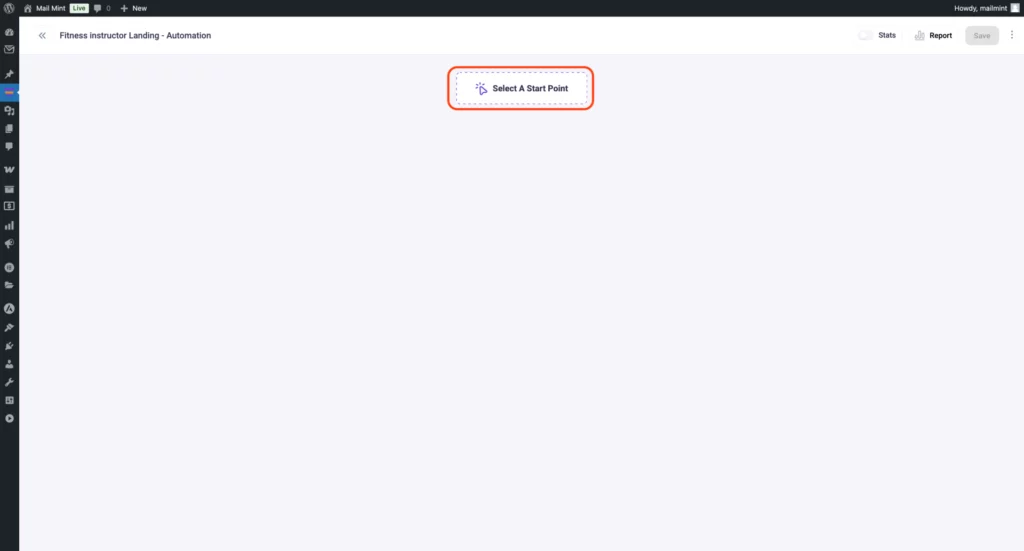
3. After clicking the plus (+) icon, you’ll be taken to a dedicated automation page. Here, you’ll find the “Select A Start Point” option, where you can begin setting up your automation.
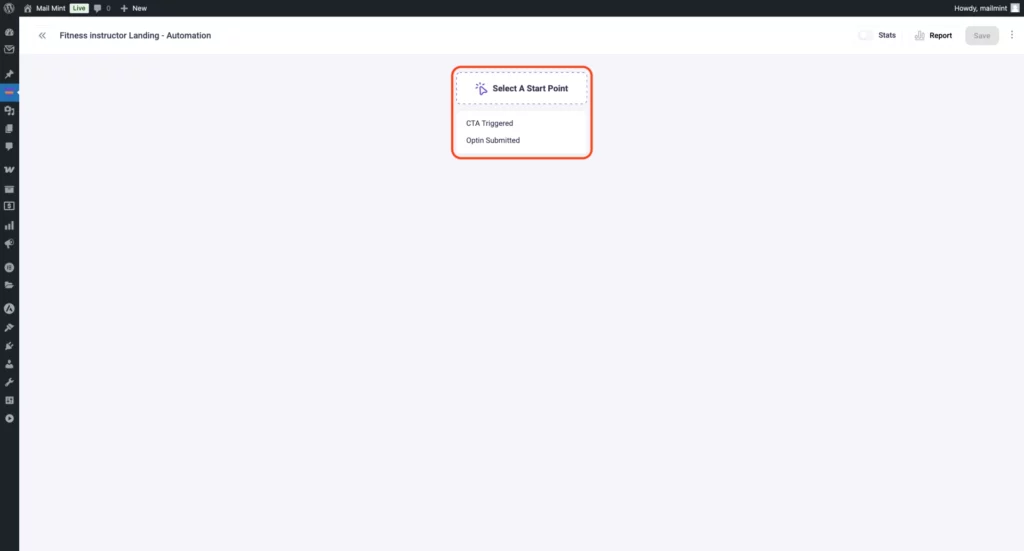
4. After clicking “Select A Start Point,” you will see two options:
- CTA Triggered – Select this if you want the automation to start when someone clicks the purchase button.
- Opt-in Submitted – Choose this if you want the automation to trigger when a user submits an opt-in form.
You can choose the one that fits your automation needs.
5. After selecting a specific trigger, clicking the plus (+) icon again will display several automation options. You can choose from actions like Send An Email, Email Sequence, Assign Tag(s), Add To List(s), Remove Tag(s), Remove List(s), Create Contact, Outgoing Webhook, Stop Automation, Delay, and If/Else Conditional Logic.
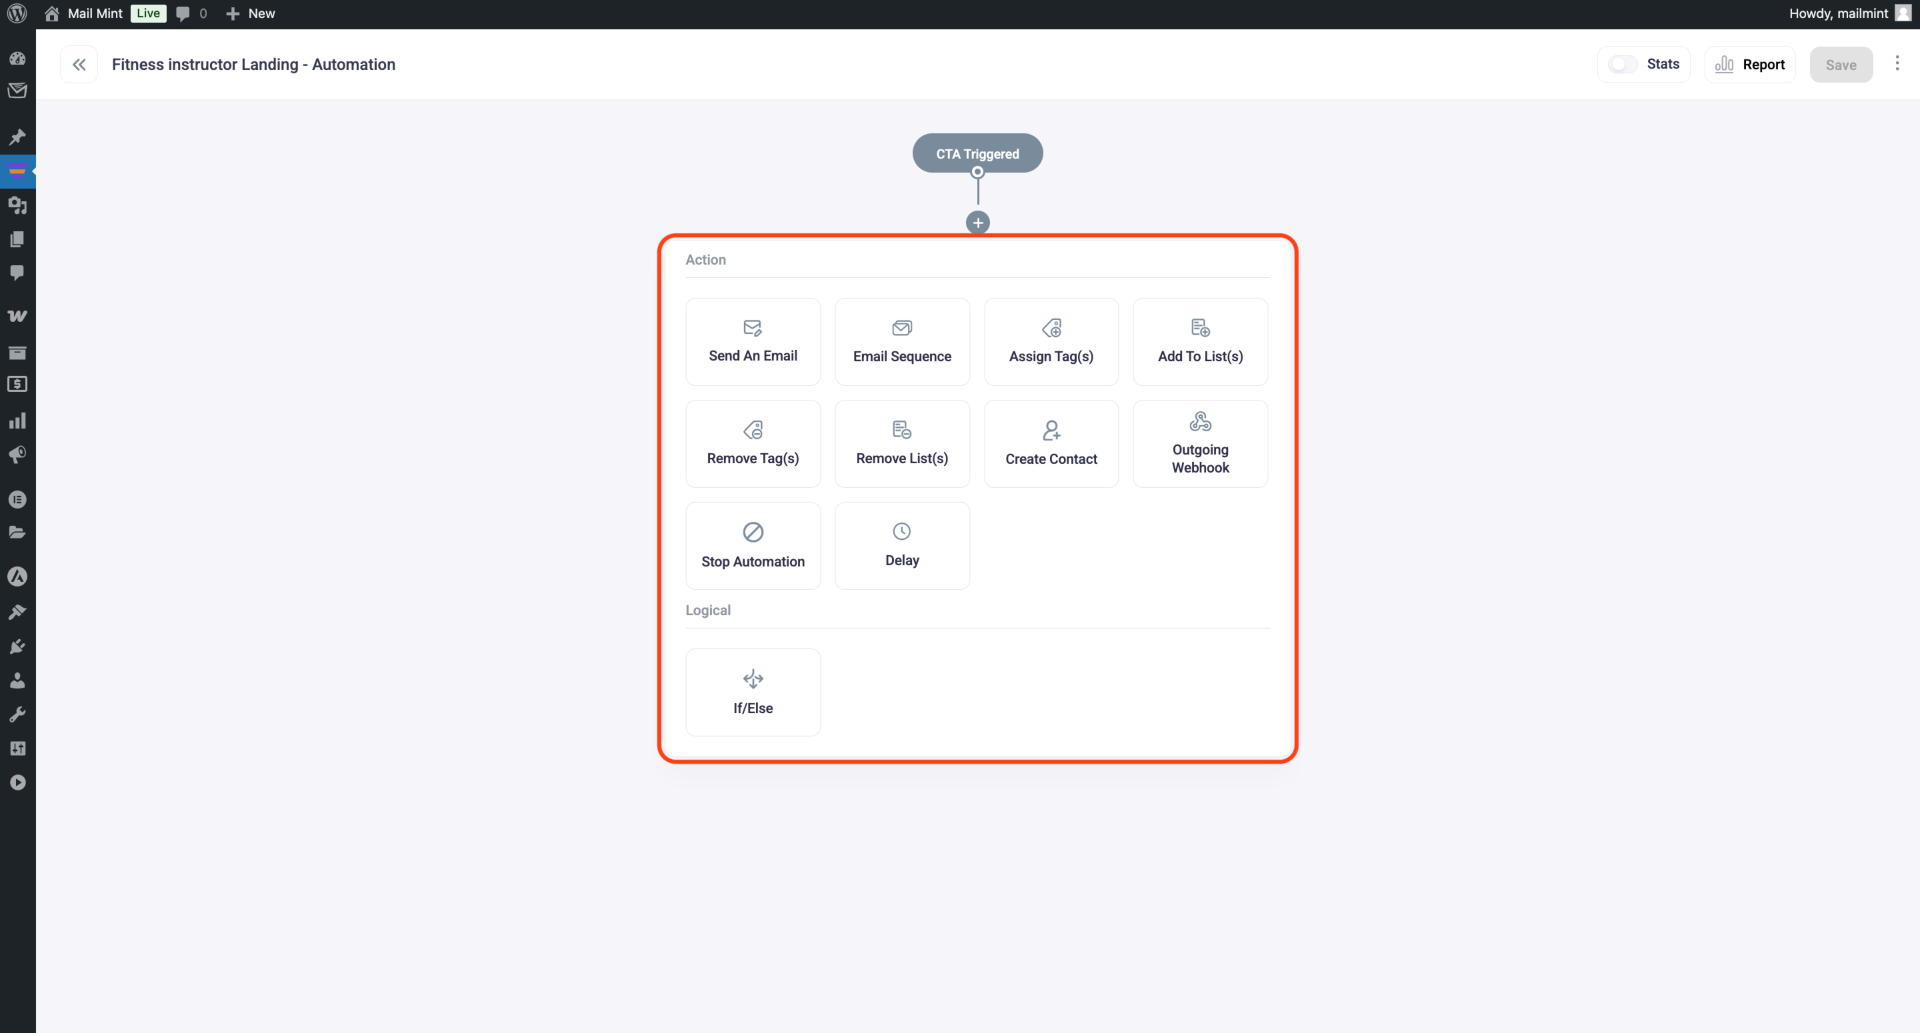
Here, we’ll choose to Assign a Tag.
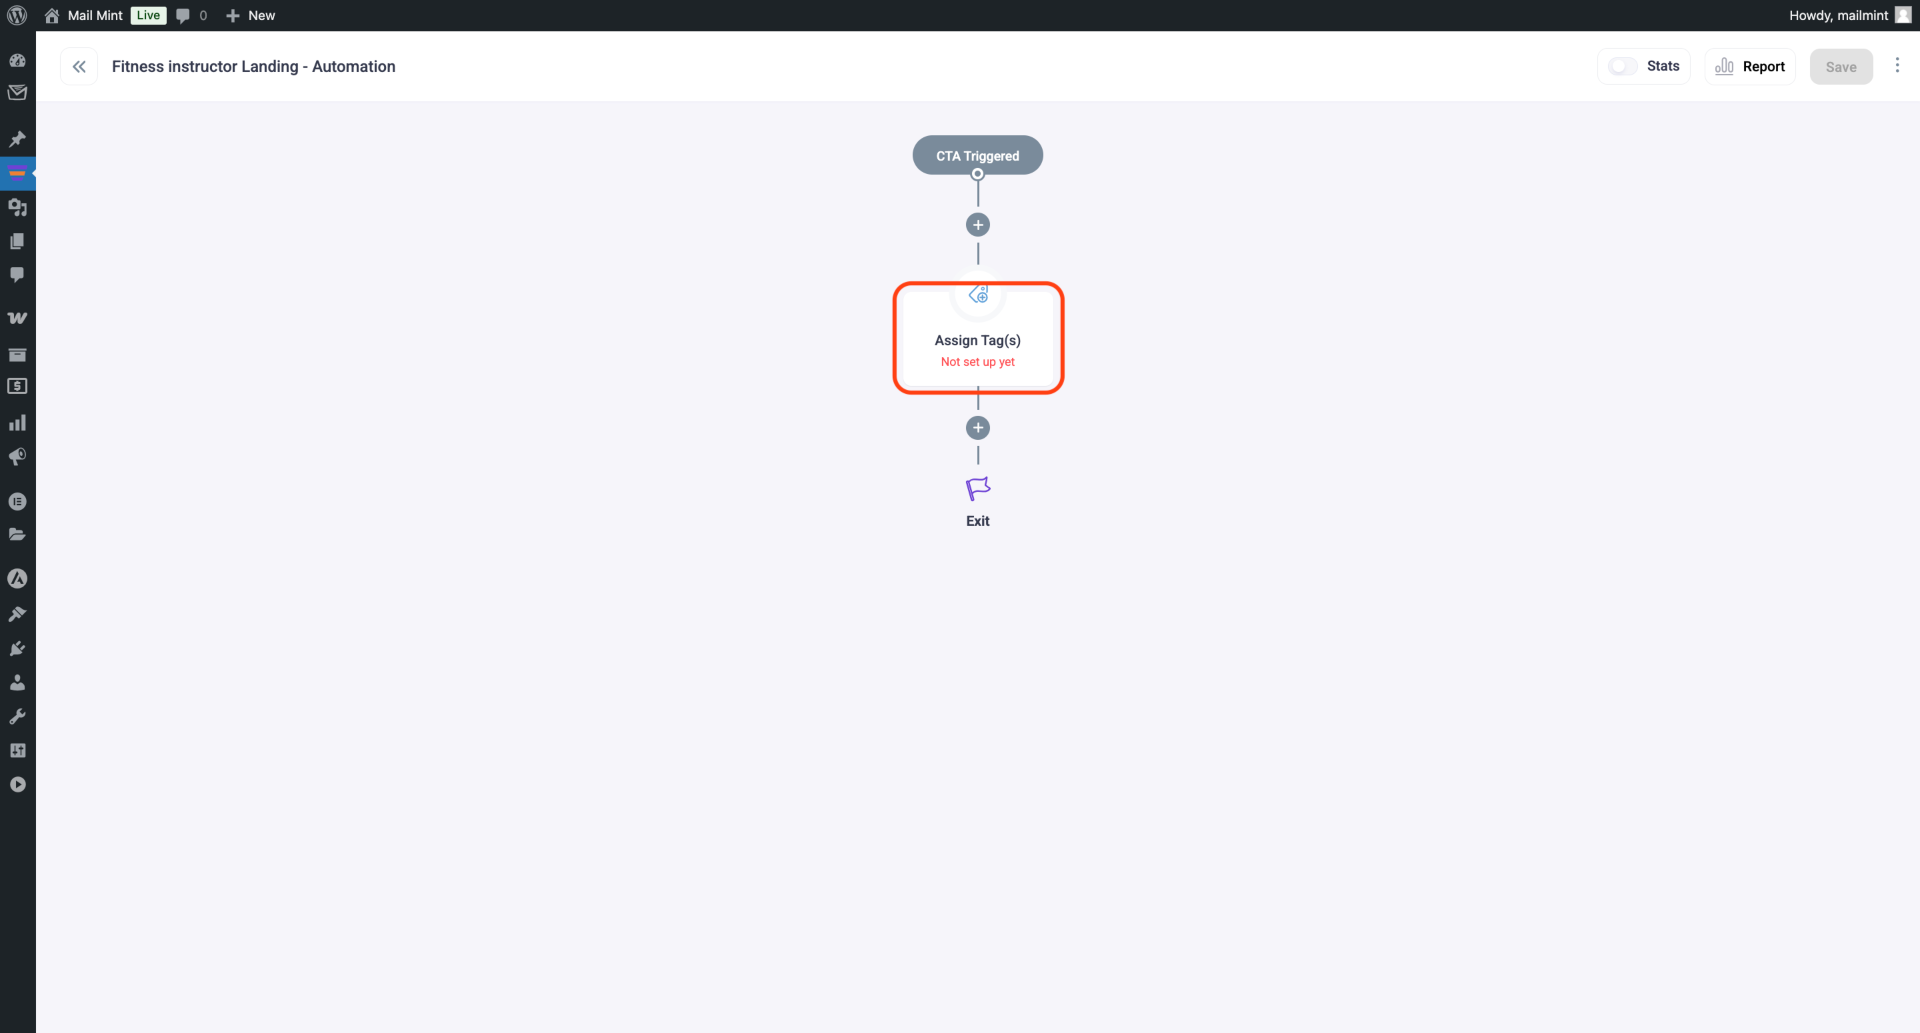
6. Click on the Assign Tag option, and a panel will appear on the right side, allowing you to choose the stage where you want to assign the tag.
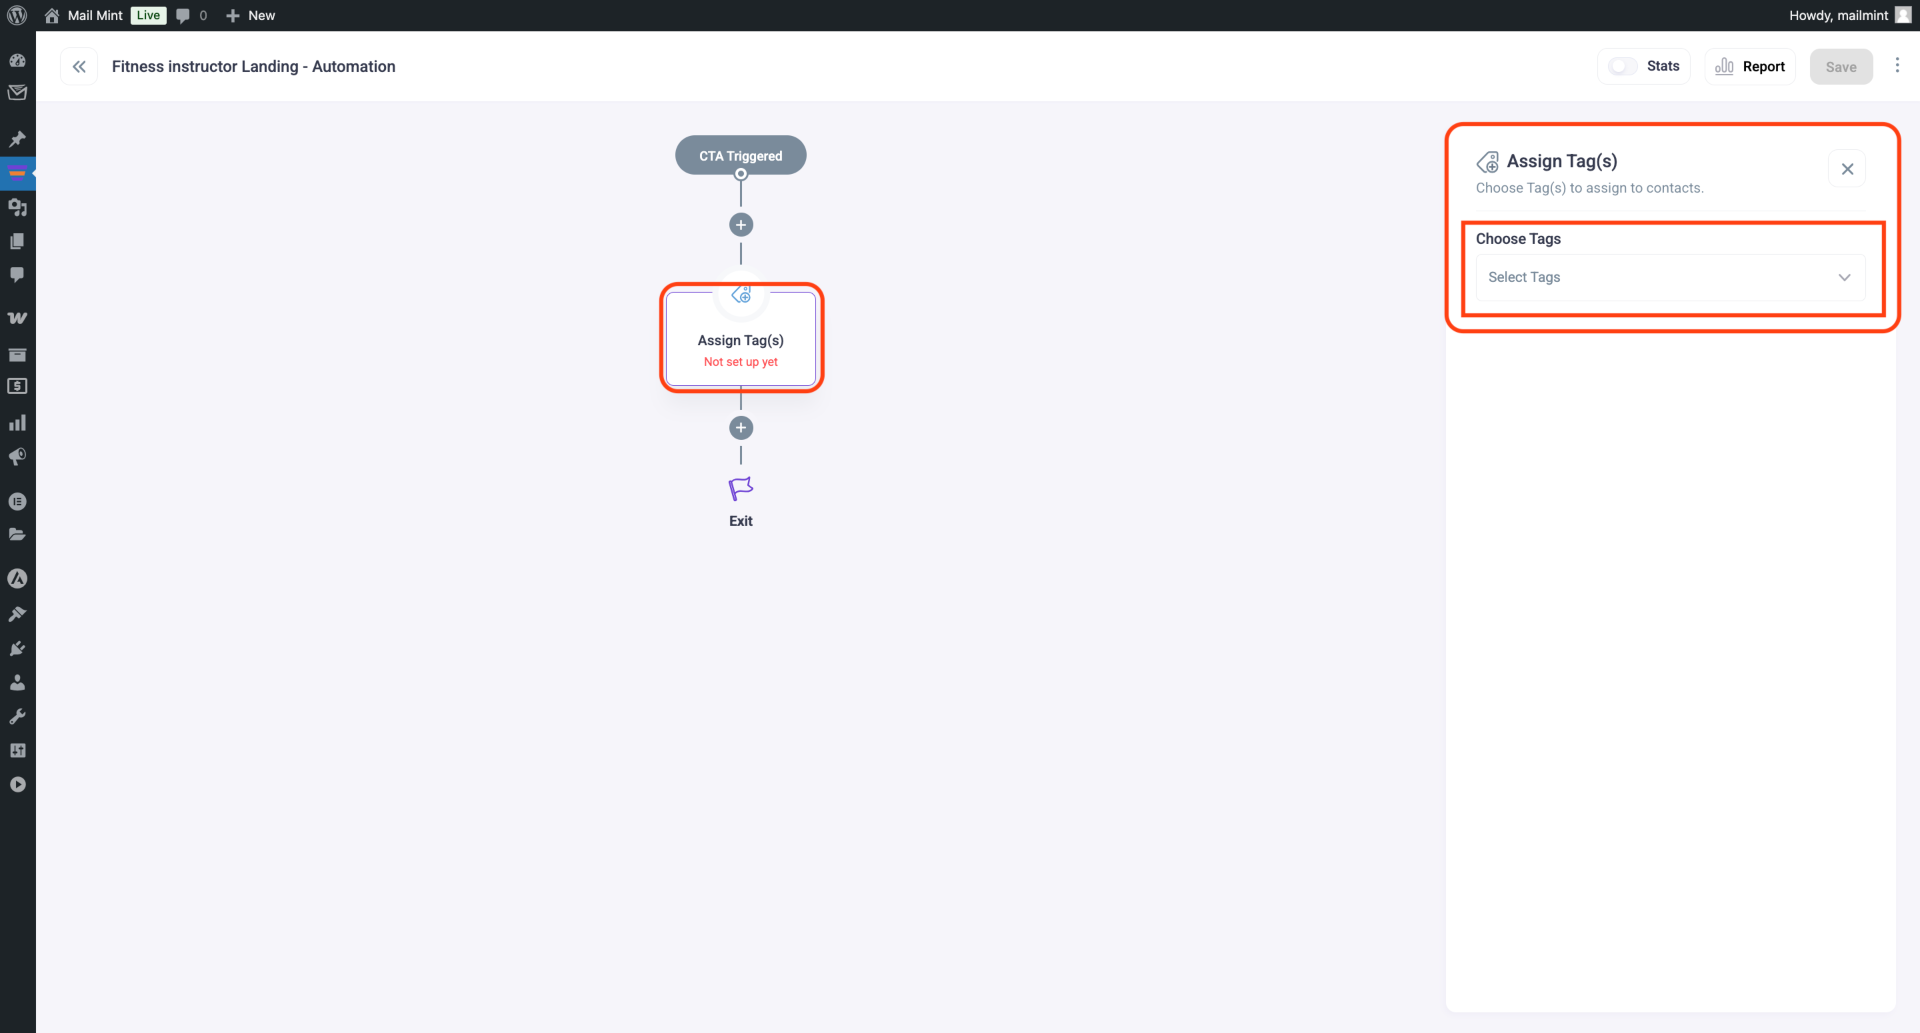
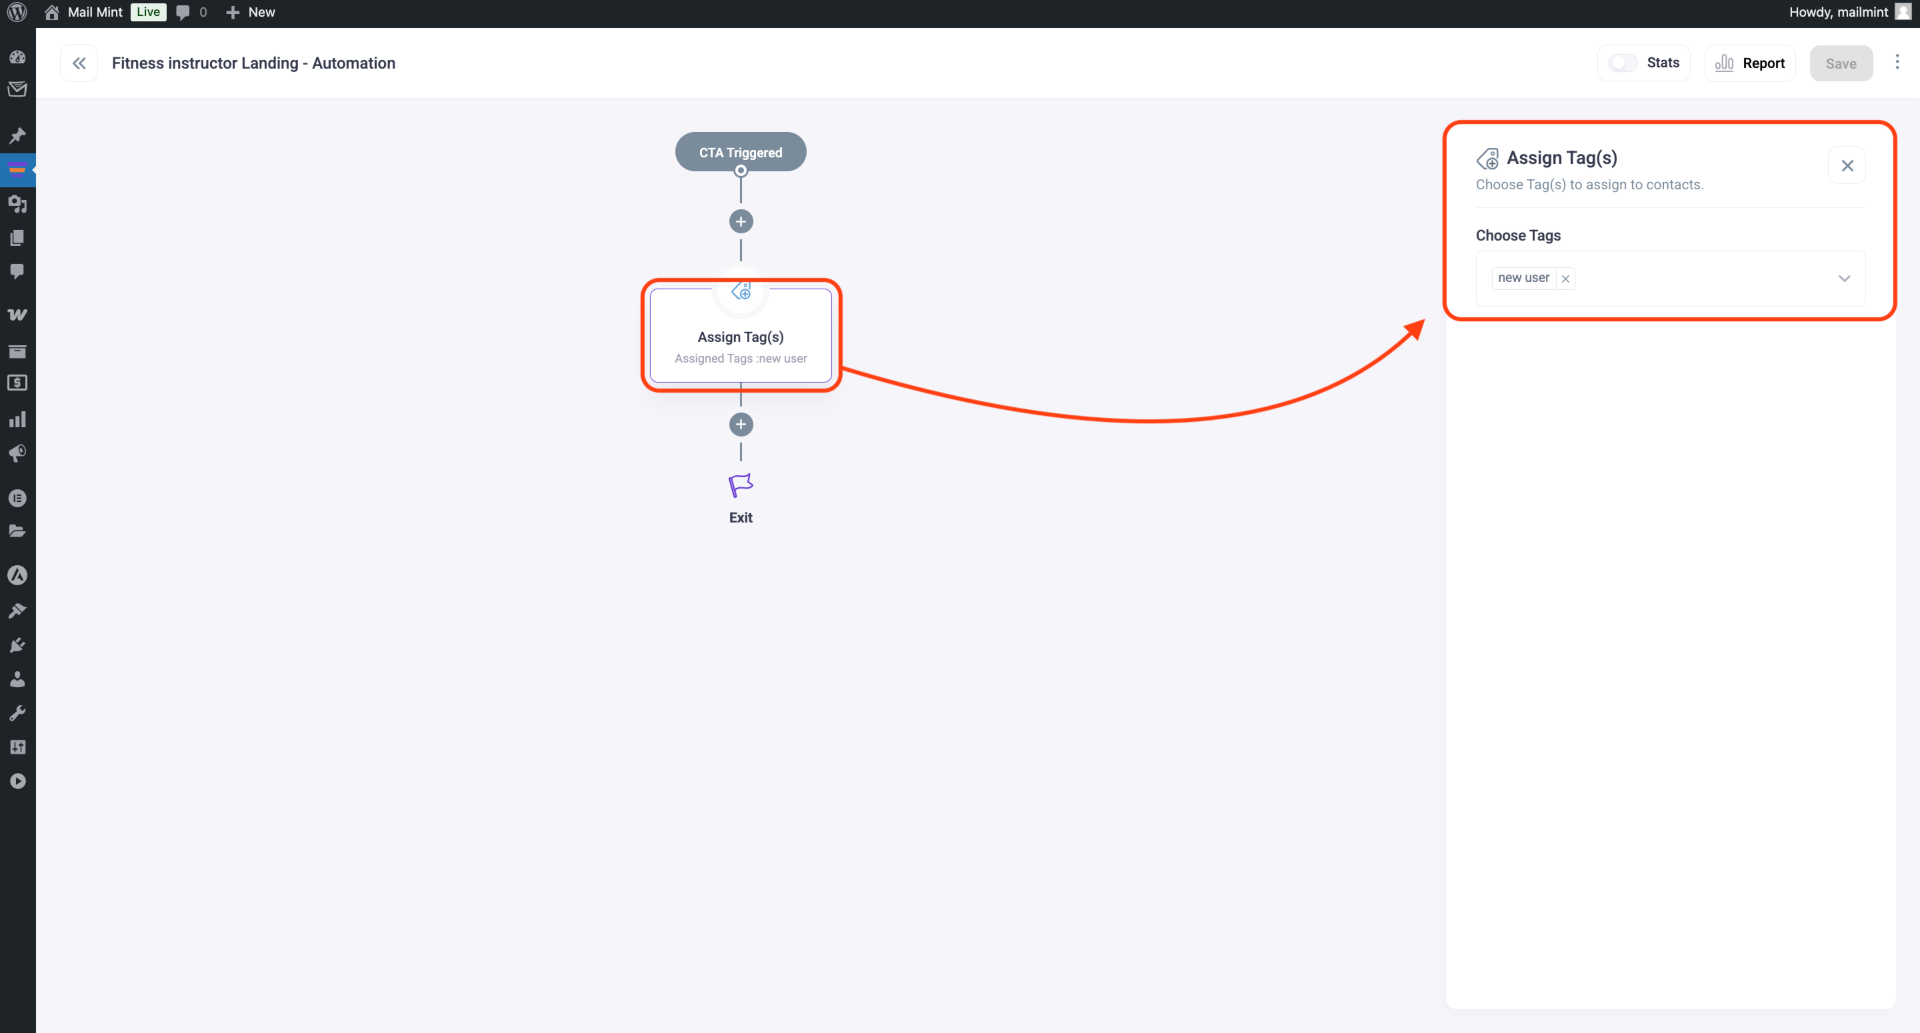
7. If you already have a tag, simply assign it. If you want to create a new one, type the tag name in the search box and click Add Tag to assign it.
Create An Email Marketing Automation:
Now we’ll create an automated email campaign based on your user behavior.
Follow these steps:
1. Now, click the plus (+) icon again and select Email Sequence to set up automated email communication.
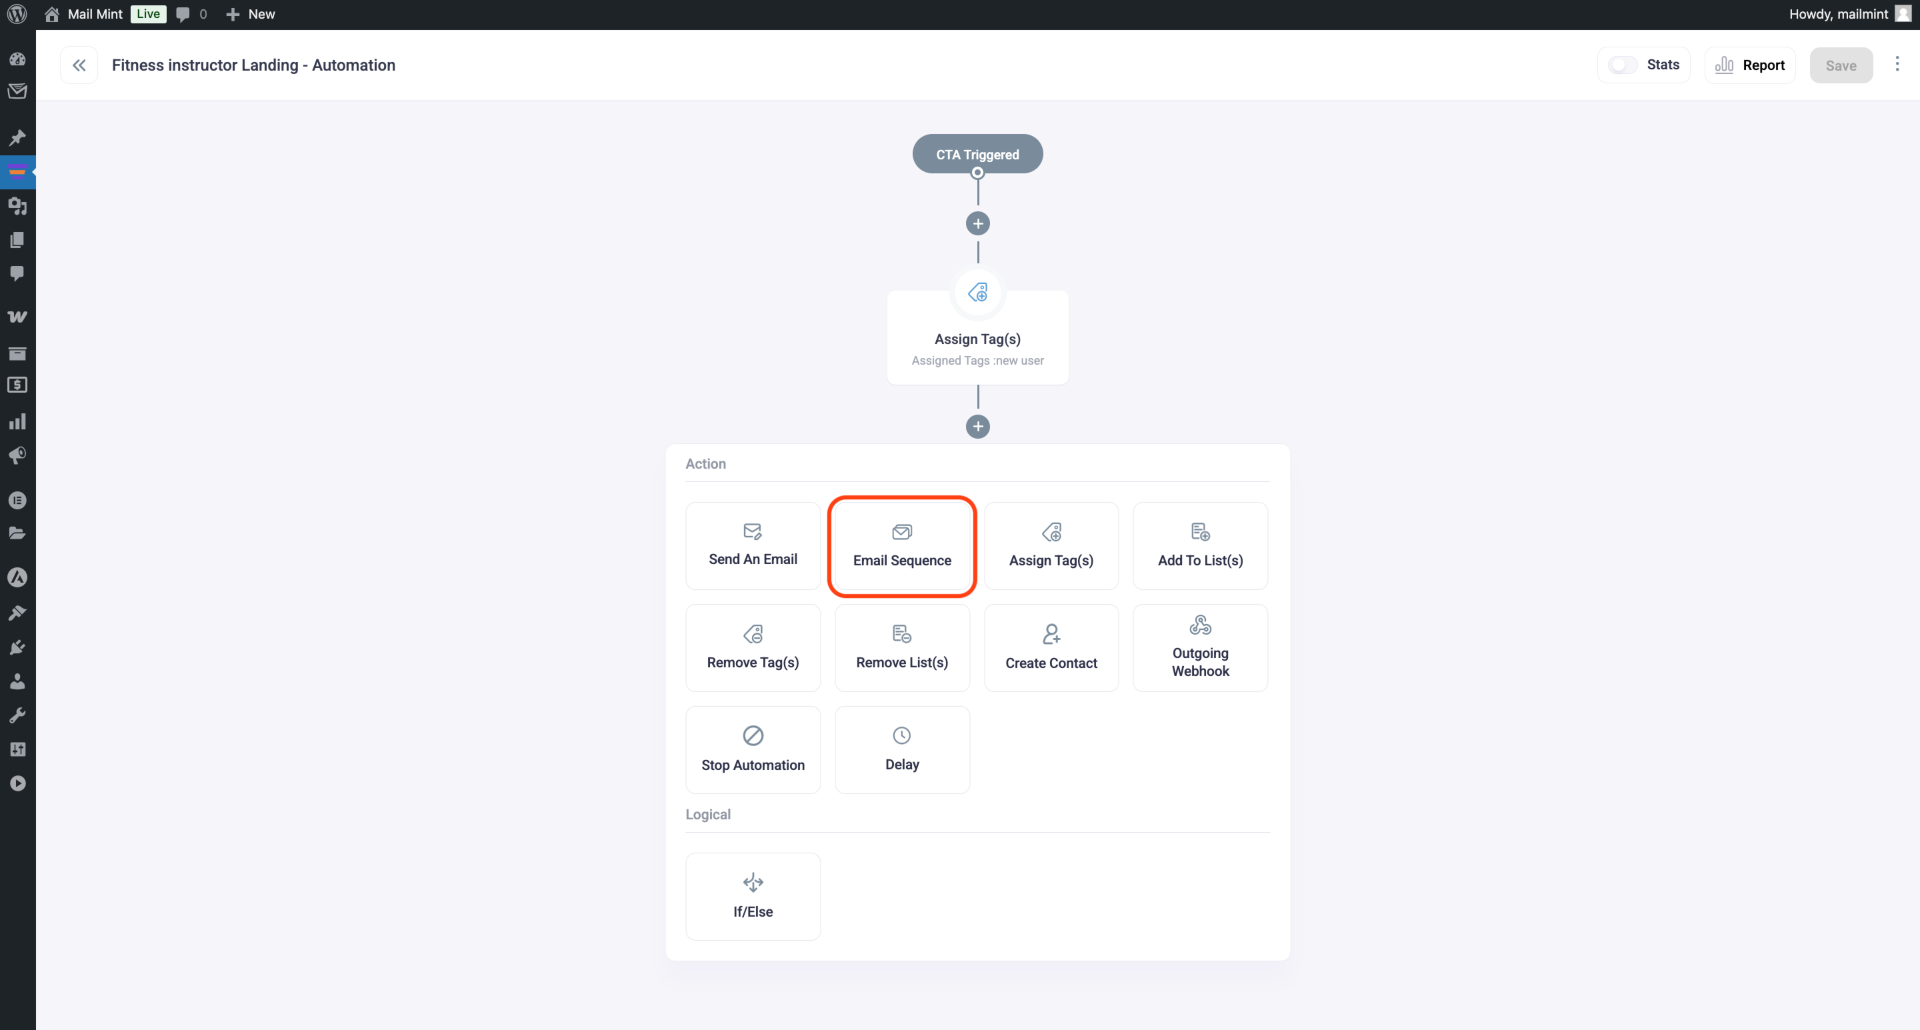
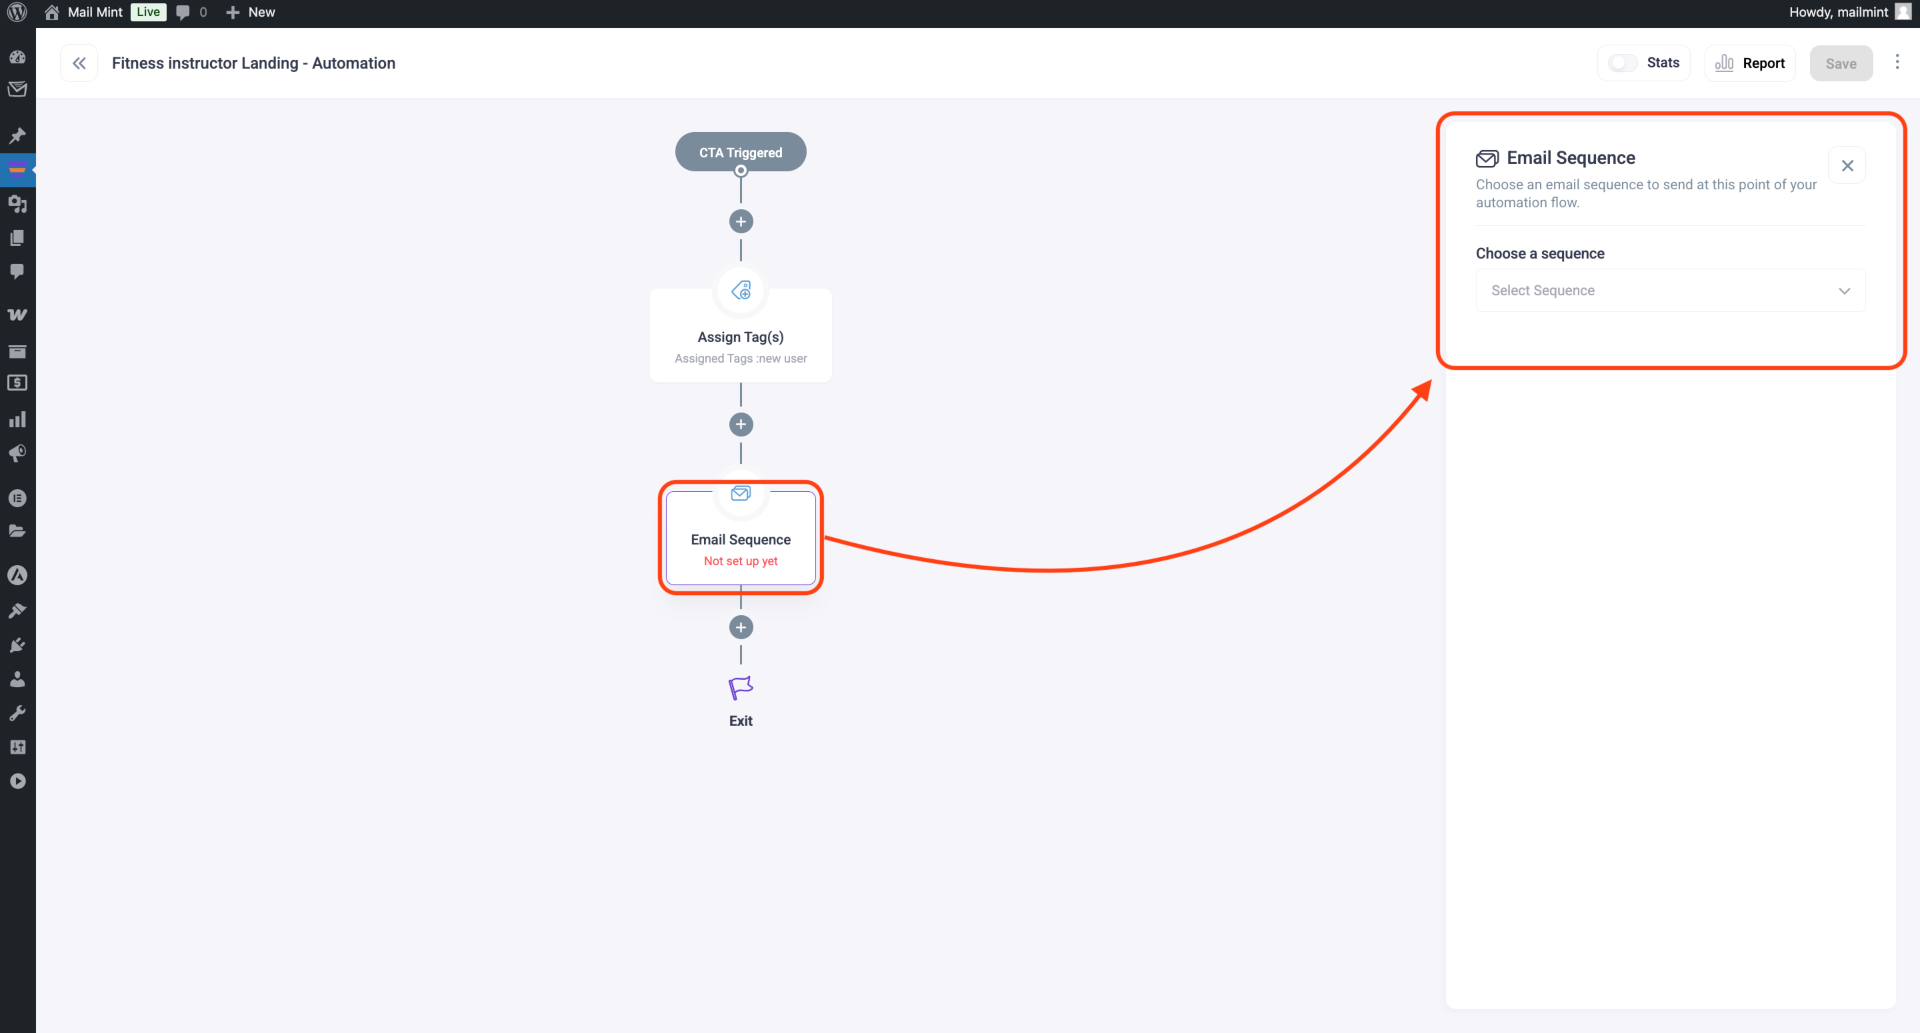
2. Click the ‘Email Sequence’ option, and a panel will appear on the right side with configuration options.
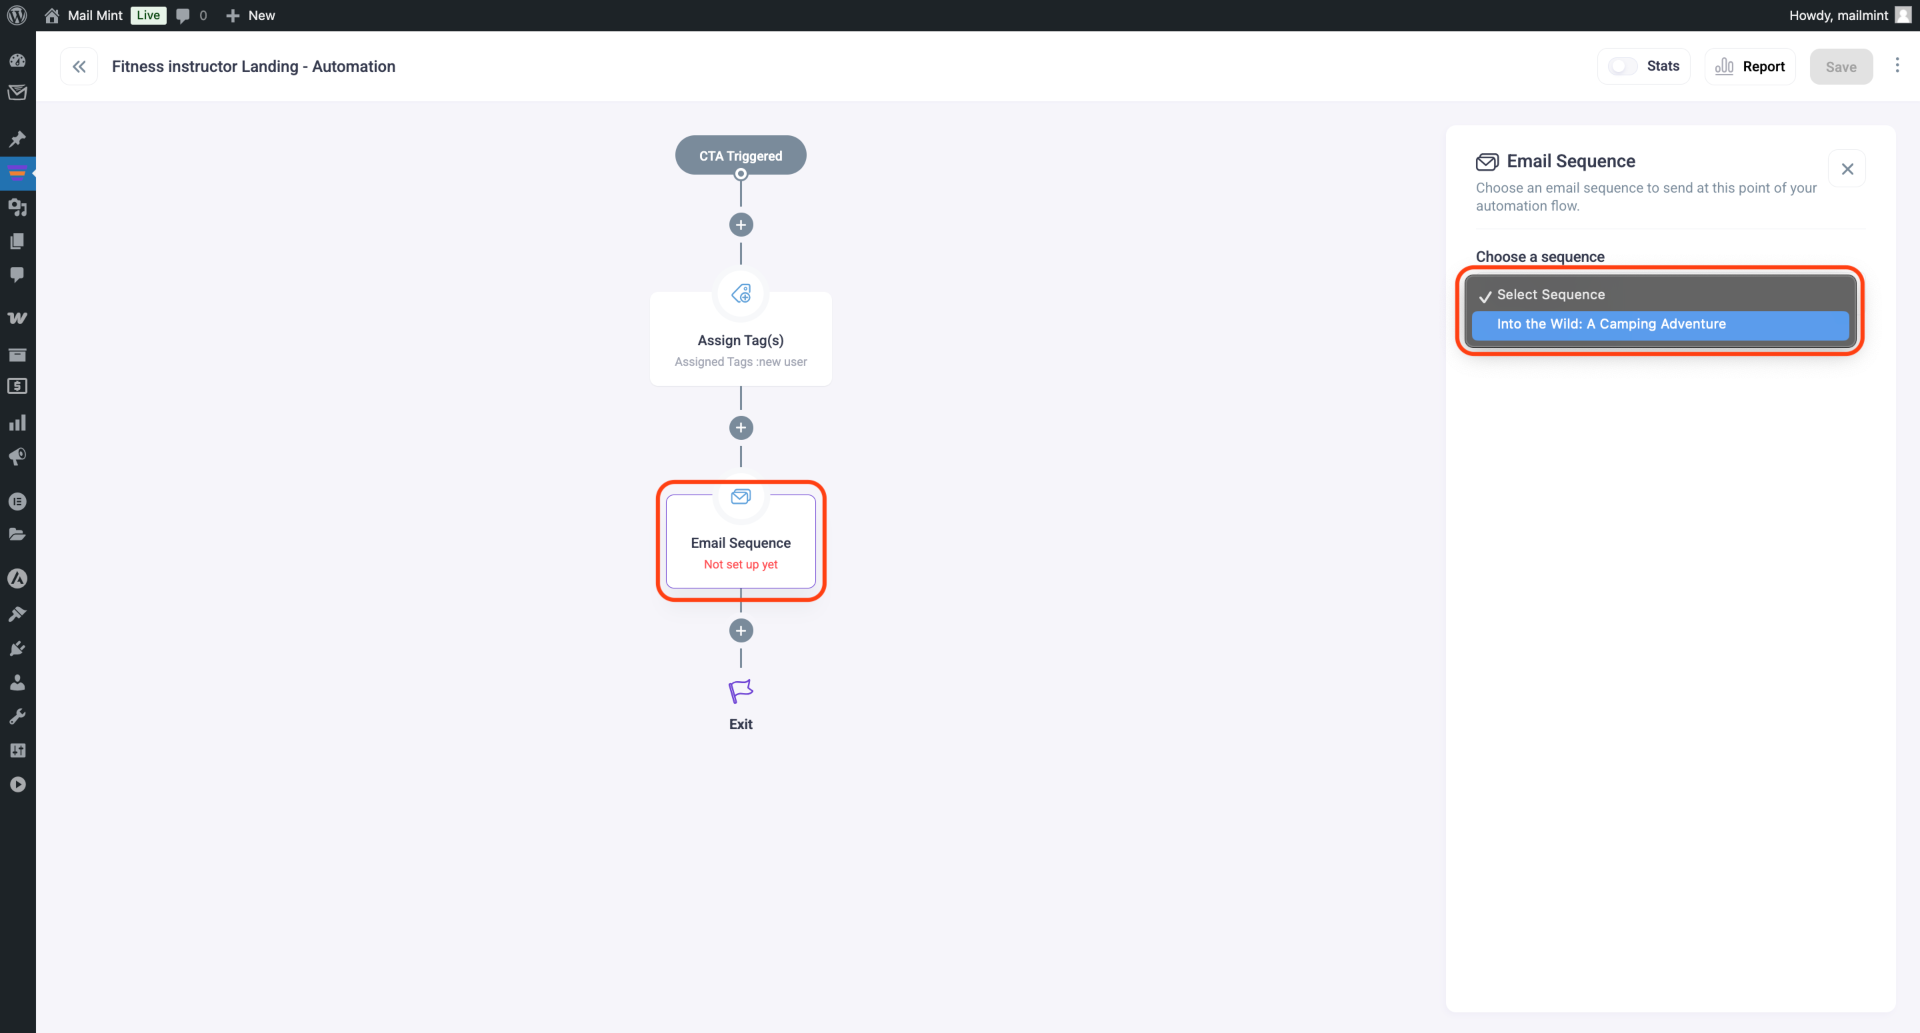
3. Search for the email sequence you created in Mail Mint and select it from the list.
4. After choosing the email sequence, the automation will be saved automatically.
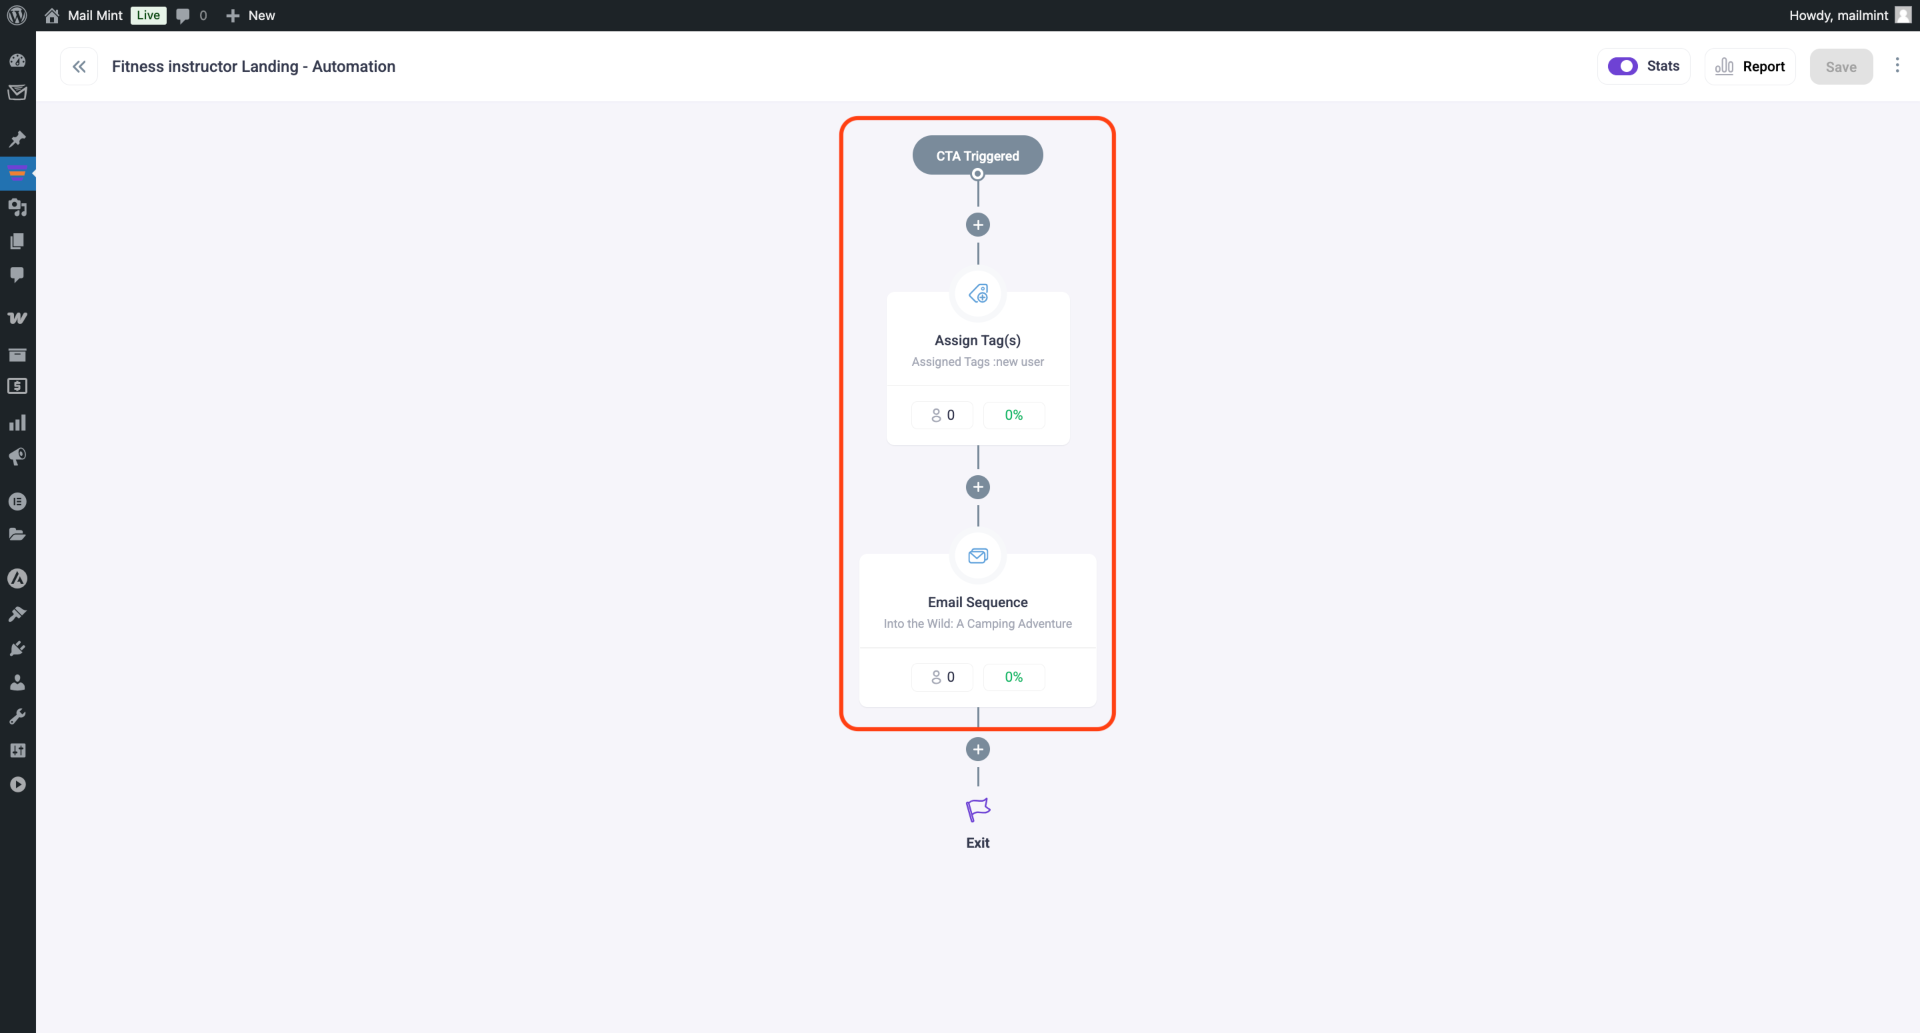
5. That’s it! Now, go to the Funnel Page, and you will see ‘Automation Running’ confirming that your automation is active.
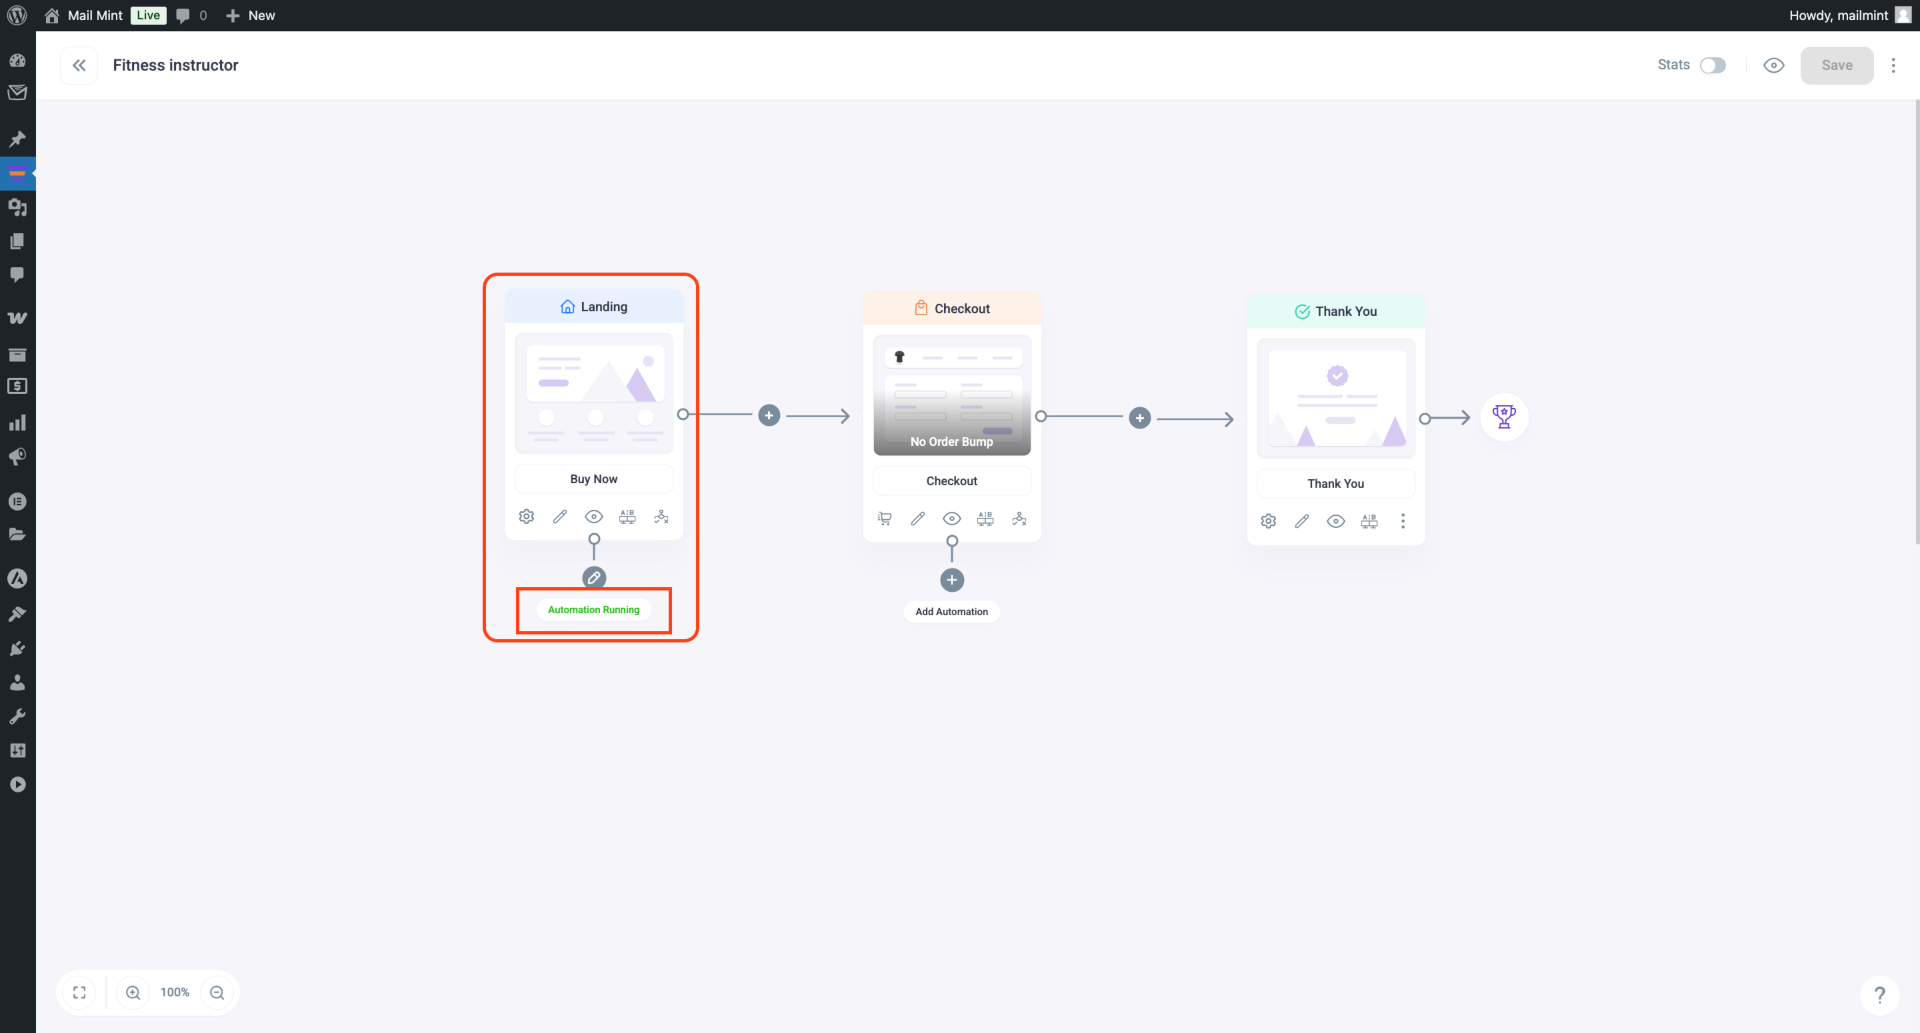
From now on, if a user clicks the ‘Purchase’ button on the landing page, this automation will be triggered and start working.
This is how you can automate your simple marketing tasks & email campaigns using Mail Mint & WPFunnels together.