During checkout, customers often need to enter a lot of details on a single page, making the process feel overwhelming and confusing.
With WPFunnels, you can enable a Multi-step Checkout, which breaks the checkout process into multiple steps. This helps buyers navigate the form more easily, reducing confusion and improving the user experience.
This feature is an effective way to reduce cart abandonment, as long and complex checkout forms often cause customers to leave before completing their purchase.
In this guide, you’ll learn how to set up a Multi-step Checkout for your sales funnel to streamline the buying process and boost conversions.
Let’s get started!
Step 1 – Edit Your Funnel Checkout Page
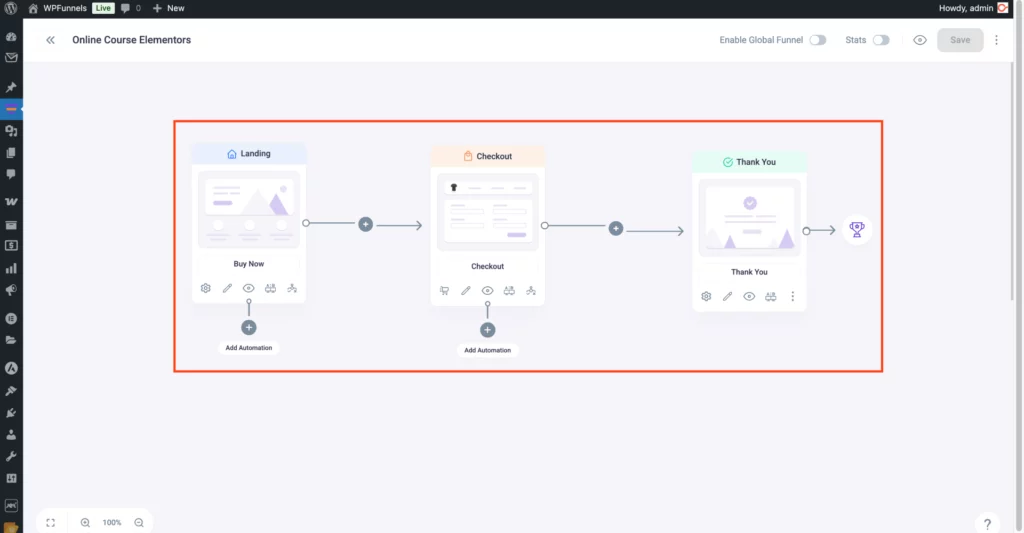
- In the drag-and-drop canvas, you can view all the steps of your funnel. Within the checkout step, you have five key options: Cart, Edit, View, A/B Testing, and Conditional Steps.
- Next, click on the “Edit” icon to customize the checkout page.
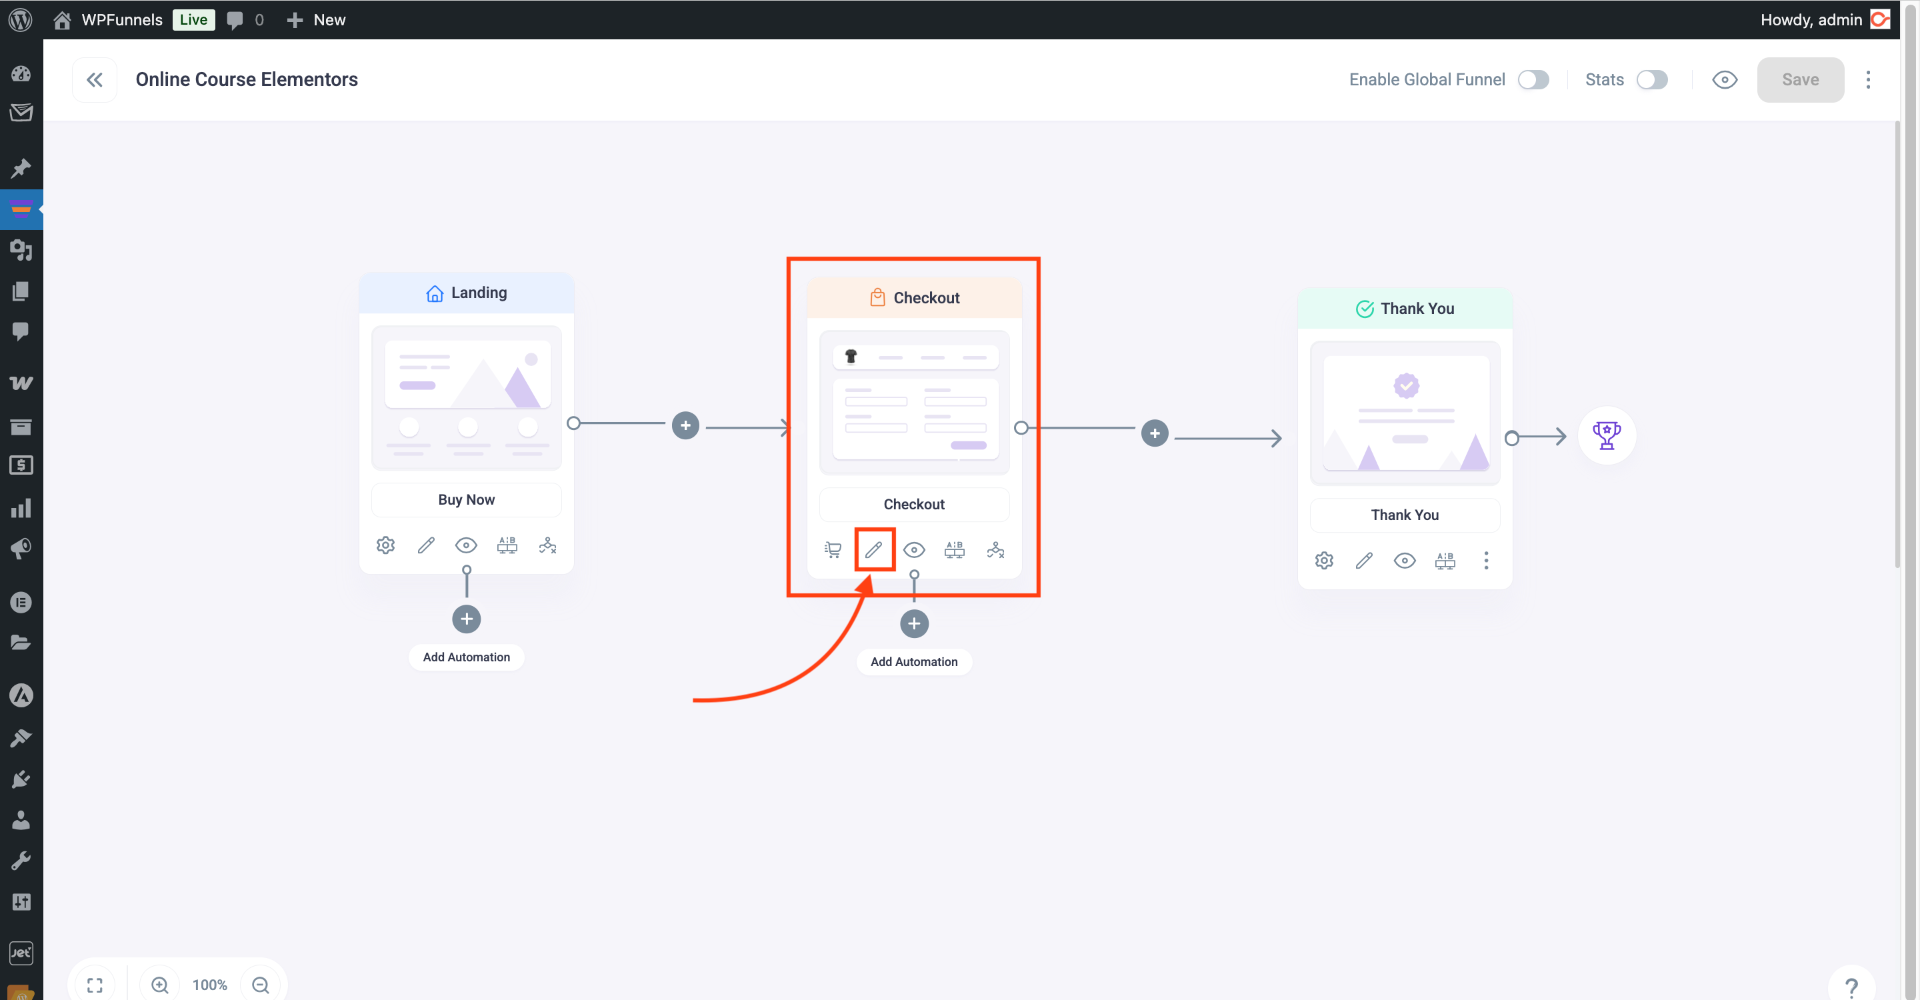
And it will open the checkout page in Elementor edit mode.
Step 2 – Assign The Checkout Form Layout As a Multi-Step
1. On the checkout page, first, add the Checkout widget to your page if you haven’t already. (If you have imported a template, then the form is already added.)
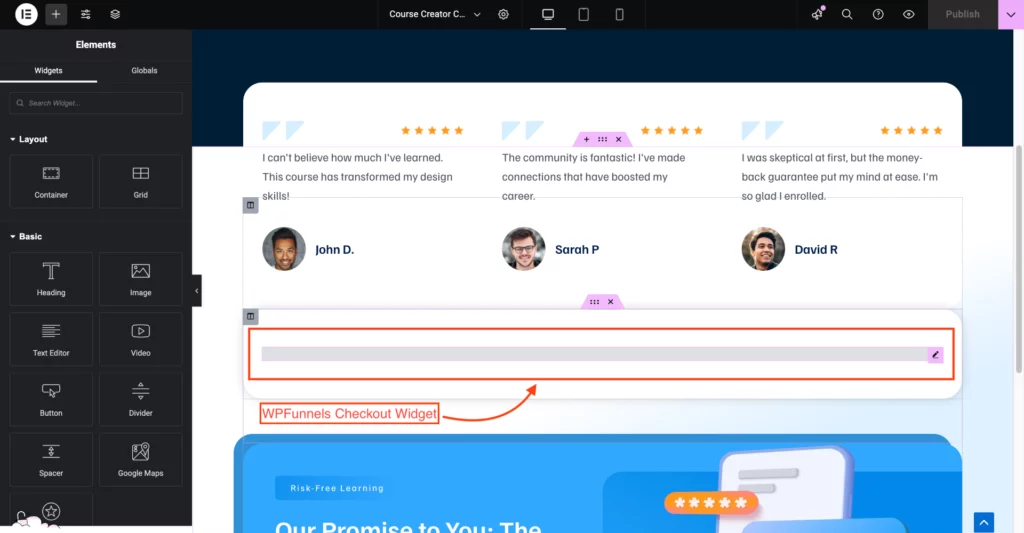
2. Click on the checkout form and you will get its widget options on the left side. ere, look for the option called ‘Select Layout‘.
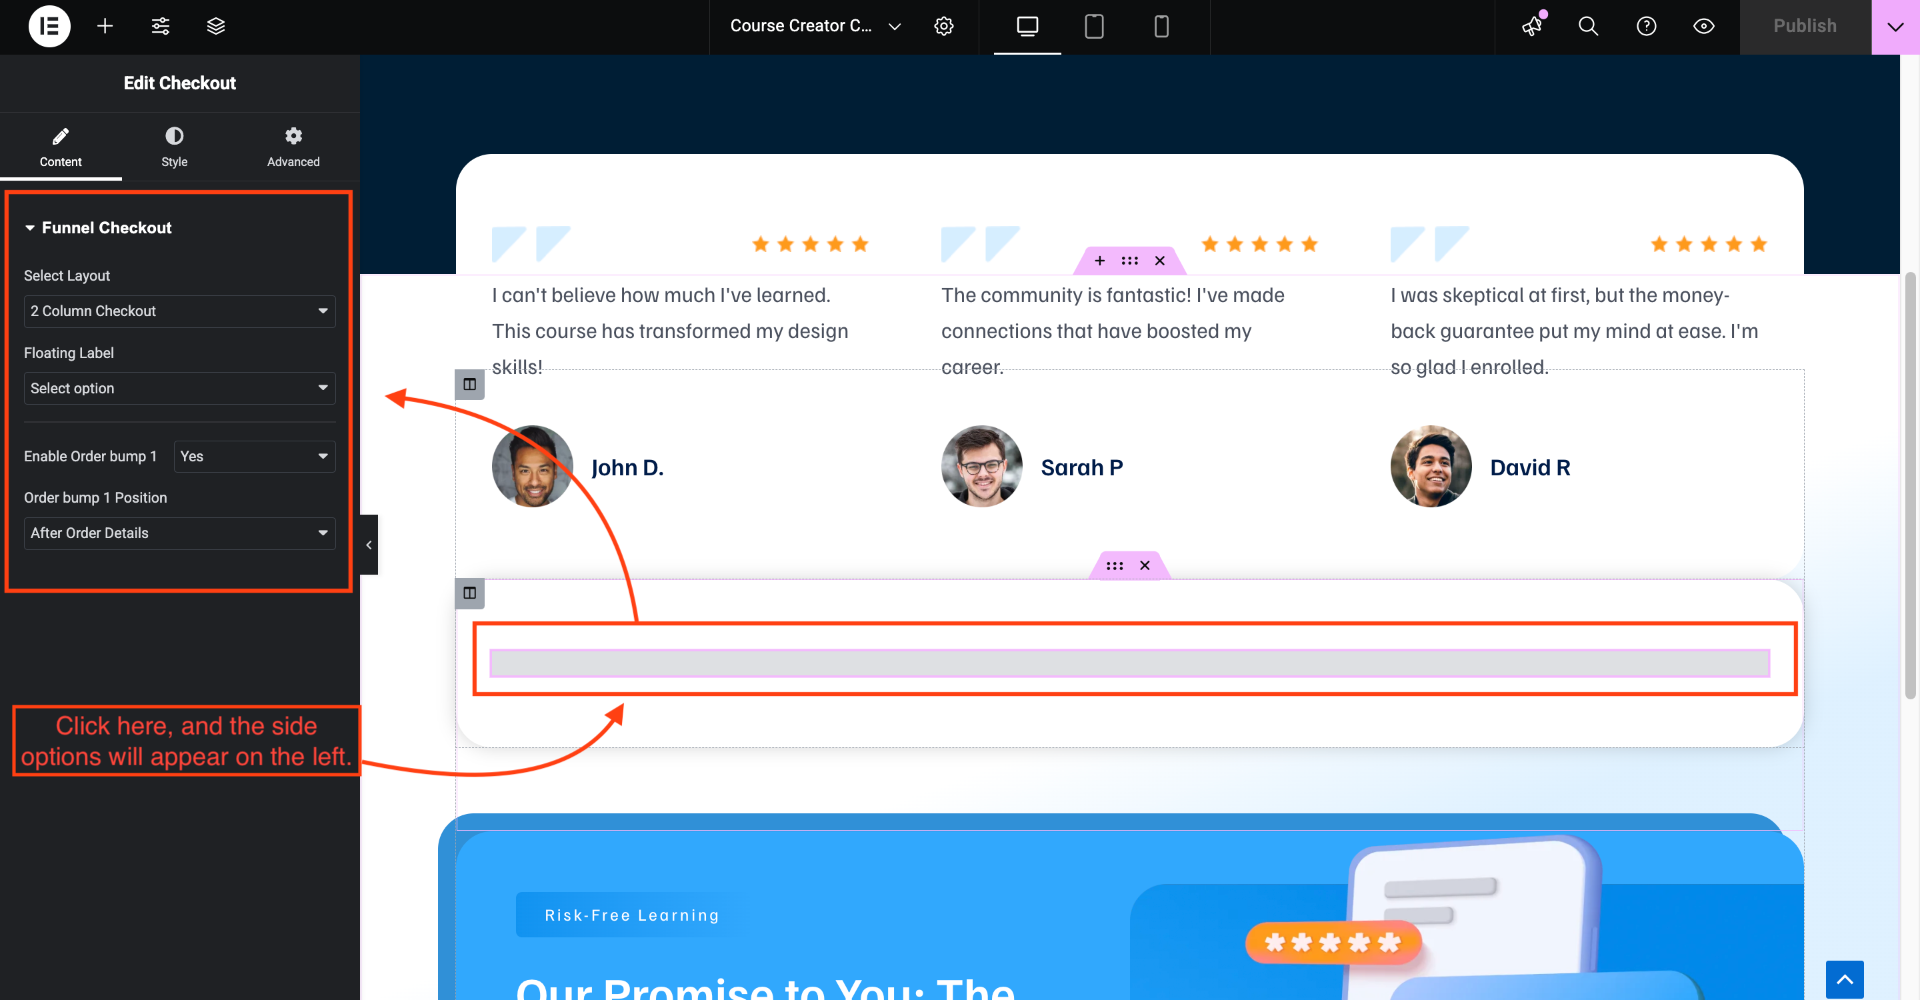
3. Click on its drop-down options and choose Multistep.
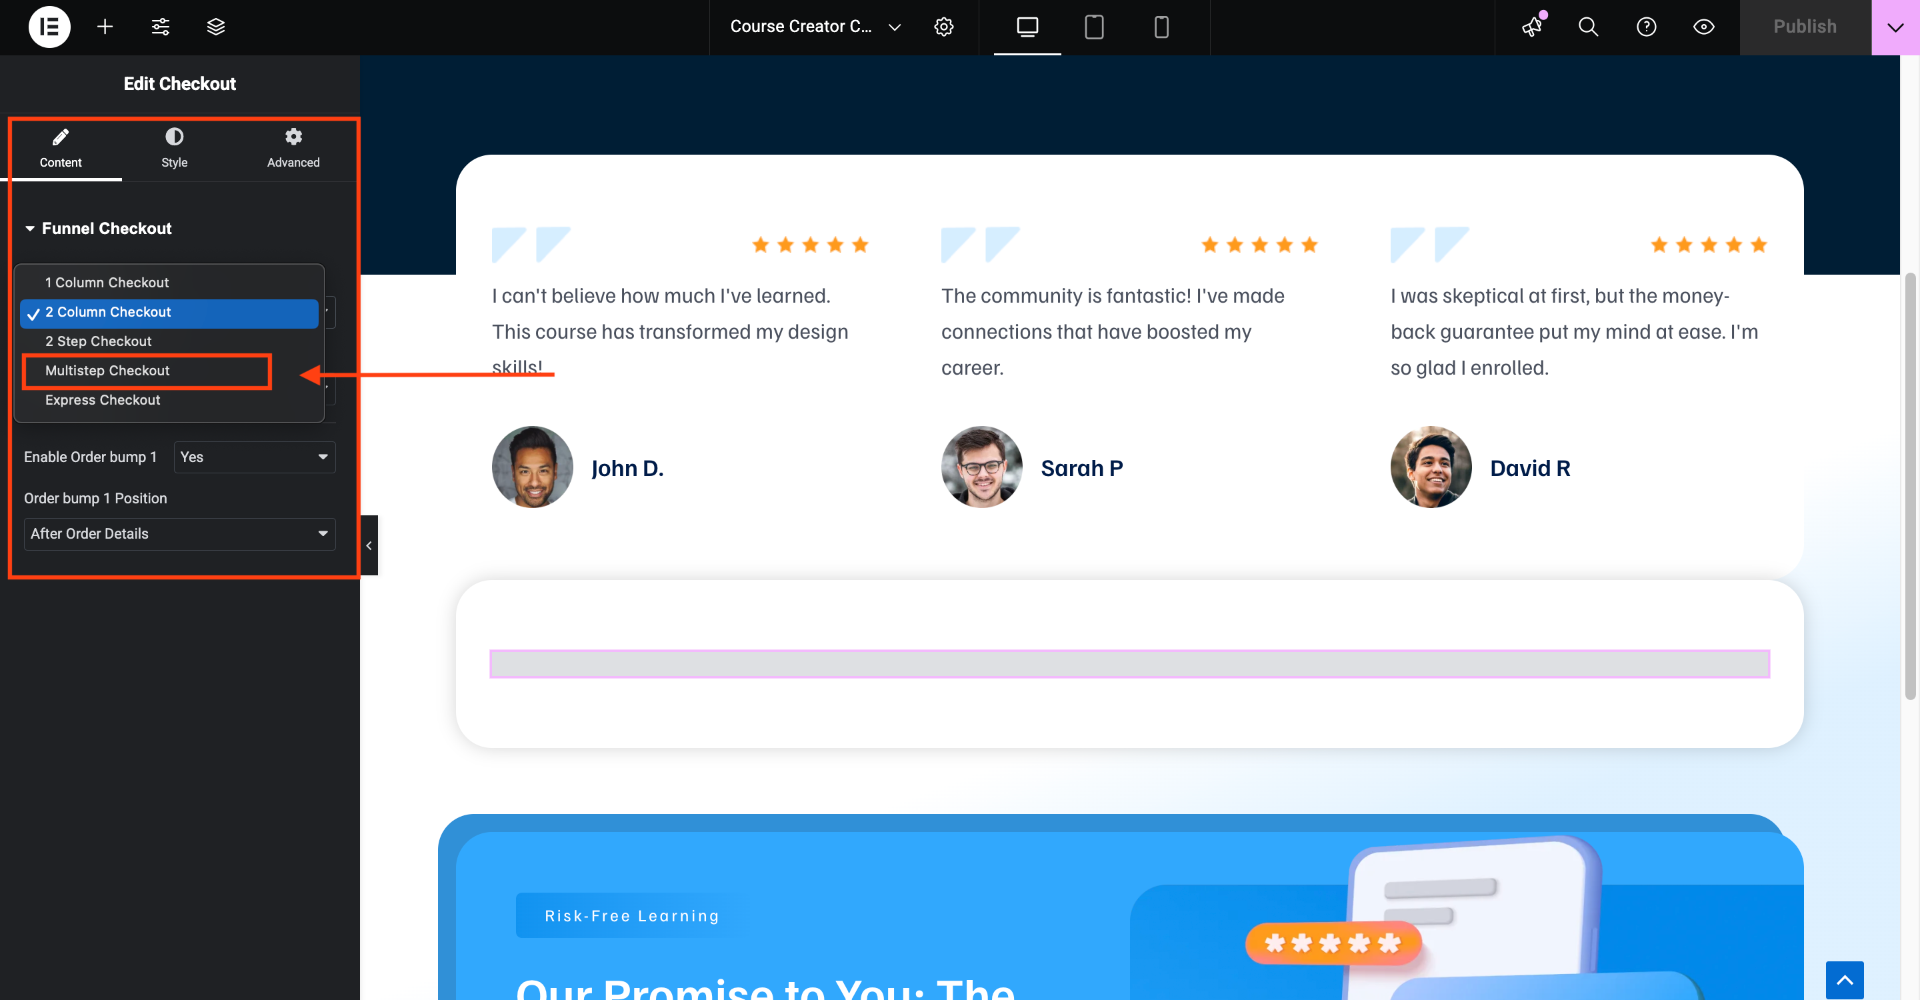
4. You will see that the form layout has changed into a Multi-step format.
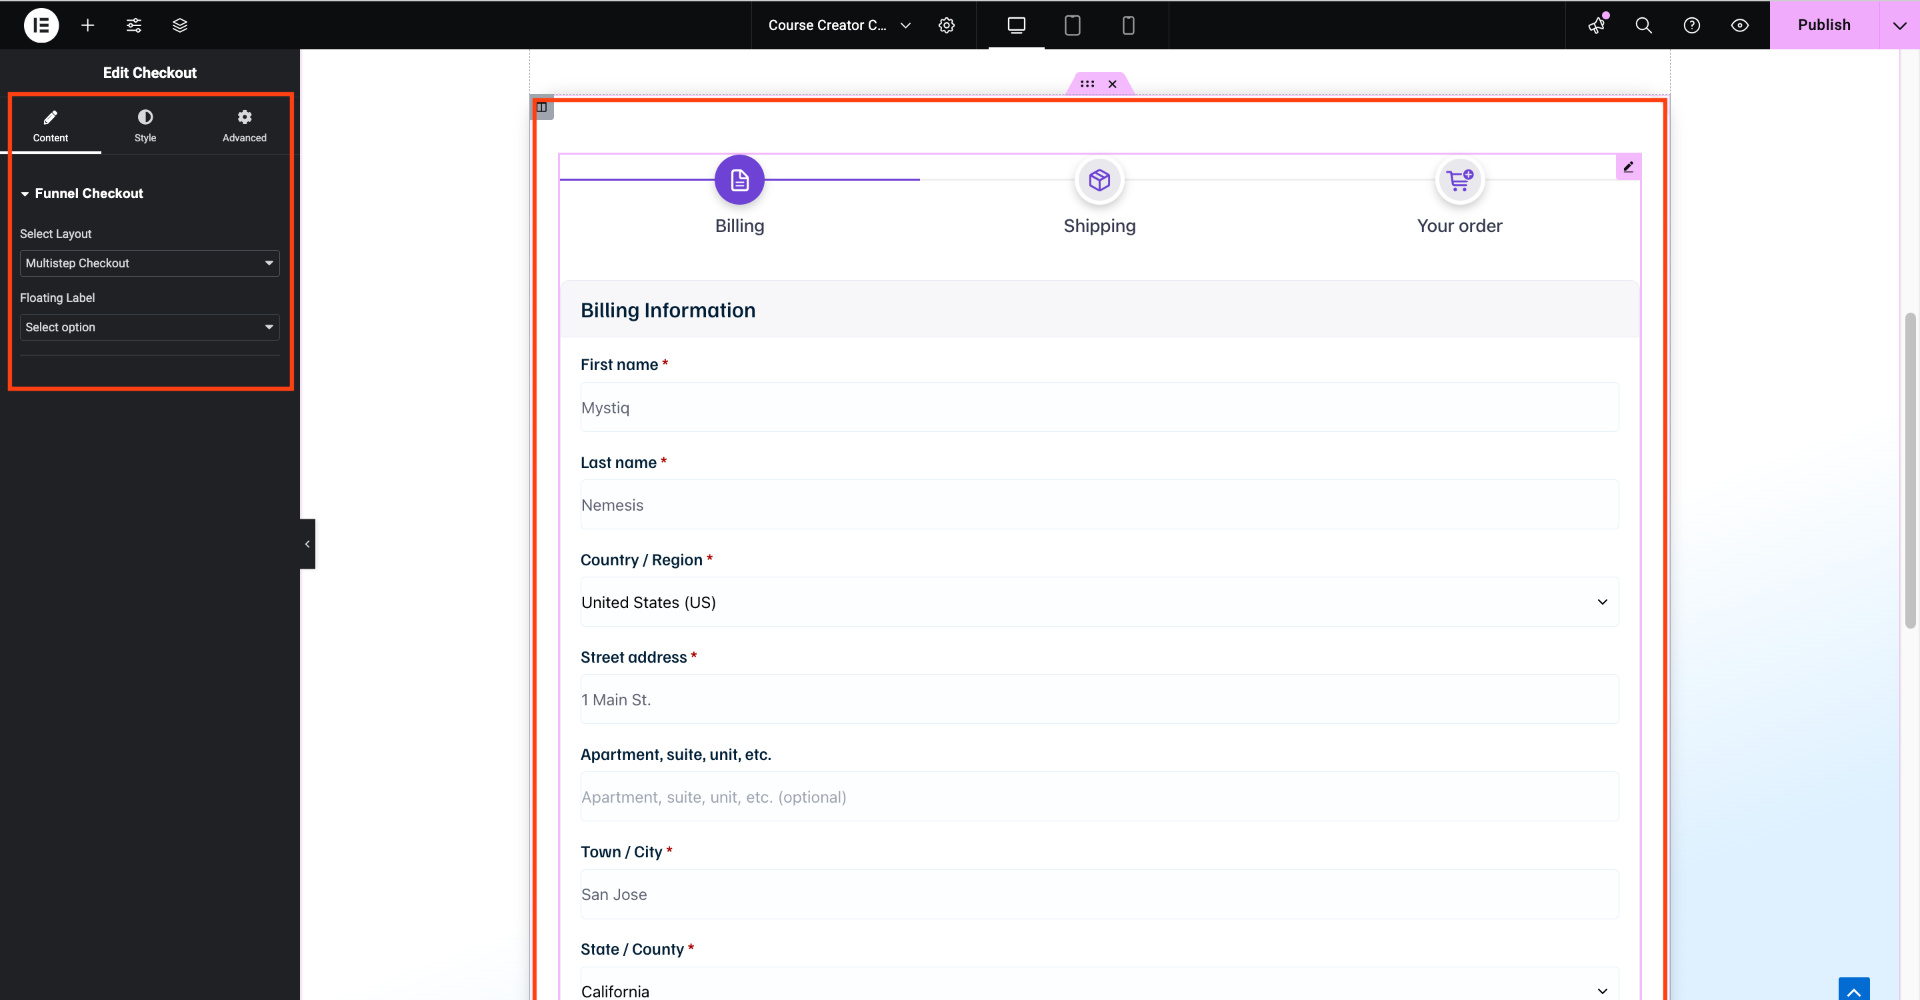
Your form will be broken down into four sections:
- Login/Register (if you allow customers to log in during checkout in WooCommerce > Settings > Accounts & Privacy)
- Billing Information
- Shipping Information
- Order & Purchase Details
That’s it. You have enabled the Multi-step checkout format for your checkout page.
If you want to edit the fields in your Checkout step, you may use the checkout field editor.