Designing a certificate in Creator LMS allows you to provide your learners with a professional and personalized recognition of their achievements. Follow these simple steps to create and customize your certificates effectively.
Before you begin, please ensure that you have installed both the Creator LMS Basic and Pro versions, as certificate design features require these plugins to function properly.
Step 1: Access the Certificate Designer
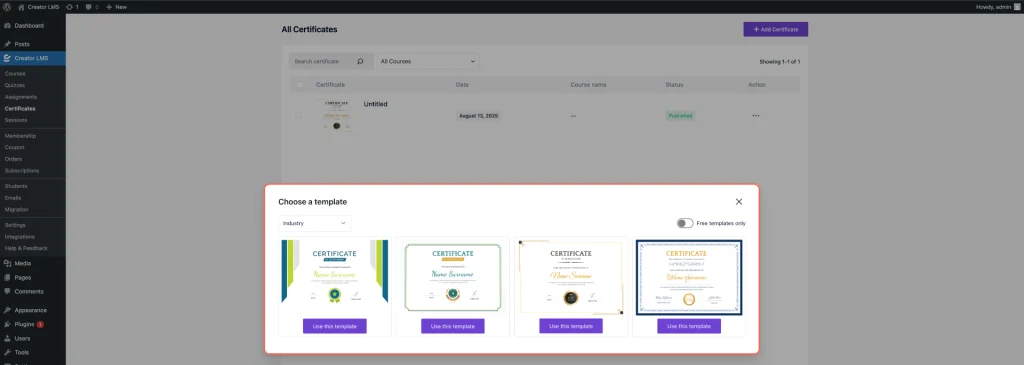
From the Creator LMS dashboard, locate the Sidebar on the left. Click on the Certificates option in the sidebar menu.

Step 2: Choose or Create a Certificate Template
In the Certificates section, you can either select an existing certificate template or create a new one.

Click Add New Certificate to start a fresh design. After clicking Add New Certificate, you will find several custom pre-made templates to choose from.

We are continuously adding more templates to provide you with a wider selection over time.
Step 3: Customize Your Certificate
In the Certificate Editor, you’ll find a variety of customizable elements to design your certificate exactly how you want it:
Title Text: Edit the main certificate heading, such as “Certificate of Appreciation.”
Subtitle Text: Add or modify a subtitle or tagline below the title.
Presented To Text: Customize the phrase that introduces the recipient’s name, like “This certificate is presented to.”
Surname Text / Name Surname: Use these placeholders to dynamically display the learner’s full name.

Also,Recognition Text: Personalize the message recognizing the learner’s achievement. For example: “In recognition of their exceptional dedication and remarkable performance in successfully completing the [course_name]”
Director Signature Label: Edit the label for the signature section, e.g., “DIRECTOR.”
Director Signature: Upload or replace the director’s signature image to add authenticity.

To the left of every text element, you will find a color picker that allows you to change the text color to match your branding or design preference.

After customizing your certificate, rename it appropriately to keep your designs organized, and then save your work by clicking the Save button.
