Stripe is a popular online payment gateway that allows users to pay securely using credit or debit cards. In Creator LMS, you can easily integrate Stripe to accept payments directly from your course checkout page. This guide will walk you through setting up and configuring Stripe for your LMS.
Accessing Stripe Payment Settings
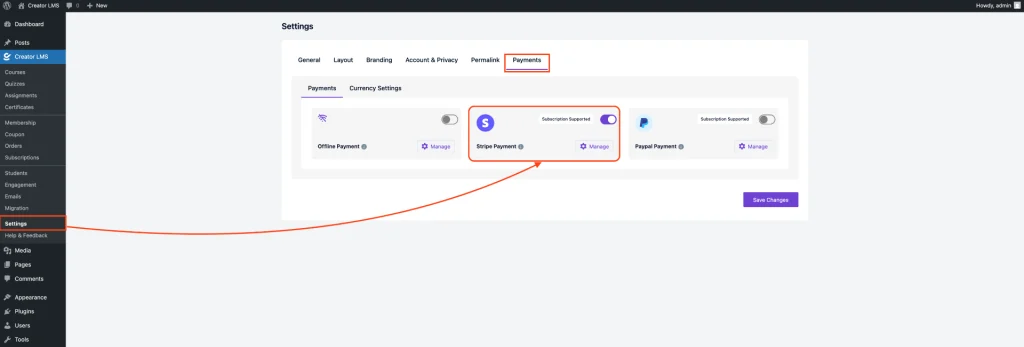
To access the Stripe payment gateway, go to LMS → Settings, then scroll to find the Stripe Payment option.
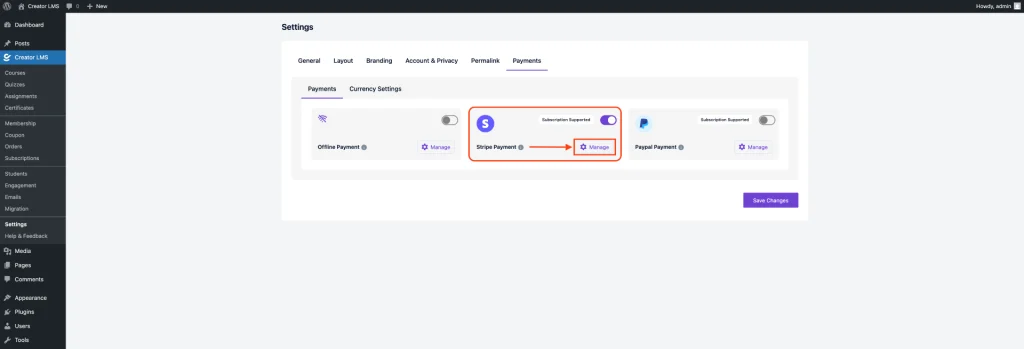
Once you click Manage, you’ll see two tabs – Payments – to configure Stripe details and Currency Settings – to set your preferred currency and formatting.
Stripe Payment Settings (Payments Tab)
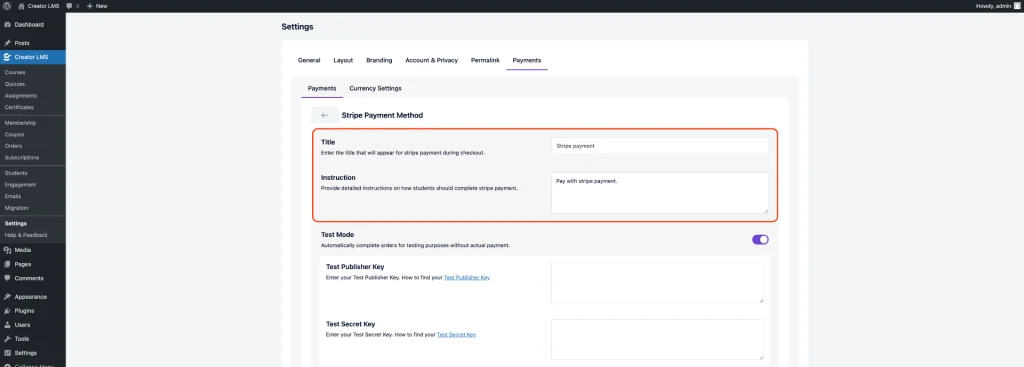
To configure Stripe payment, start by setting a clear title such as “Stripe Payment” which will appear at checkout. Then, provide concise instructions like “Pay securely using your card through Stripe” to guide students. Enable Test Mode if you want to simulate transactions without processing real payments.
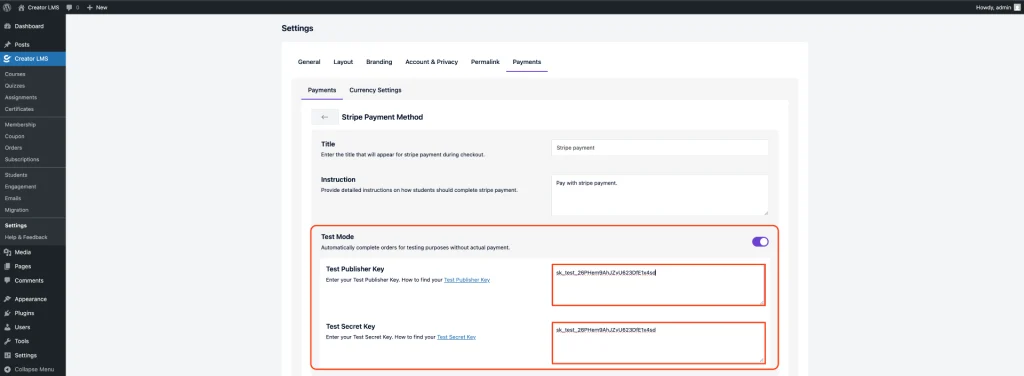
Next, enter your Live Publisher Key and Live Secret Key in the respective fields—these can be found in your Stripe Dashboard and are required to connect your Creator LMS site with your Stripe account securely. If you enable the test mode then put the test api keys from your stripe accounts.
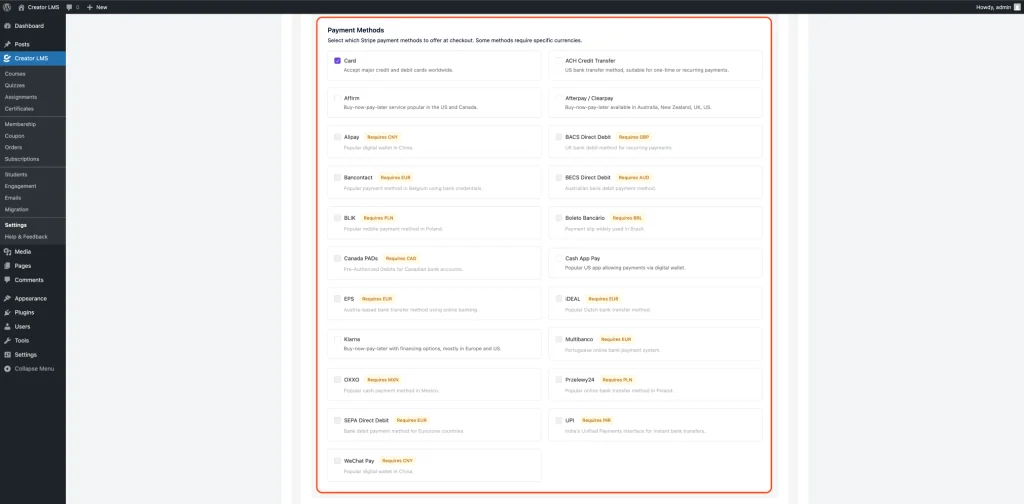
In the Payment Methods section, you can choose which Stripe-supported payment options you’d like to enable at checkout. These methods include popular options like Card (which supports all major debit and credit cards globally), ACH Credit Transfer for US bank payments, and buy-now-pay-later services like Affirm, Afterpay/Clearpay, and Klarna. You can also enable regional methods such as Alipay (CNY, China), BACS Direct Debit (GBP, UK), Bancontact (EUR, Belgium), BECS Direct Debit (AUD, Australia), BLIK (PLN, Poland), Boleto Bancário (BRL, Brazil), Canada PADs (CAD), Cash App Pay (US), EPS (EUR, Austria), iDEAL (EUR, Netherlands), Multibanco (EUR, Portugal), OXXO (MXN, Mexico), Przelewy24 (PLN, Poland), SEPA Direct Debit (EUR, Eurozone), UPI (INR, India), and WeChat Pay (CNY, China). Keep in mind that some methods are only available in specific regions or require certain currencies. Select the ones that best fit your target audience.
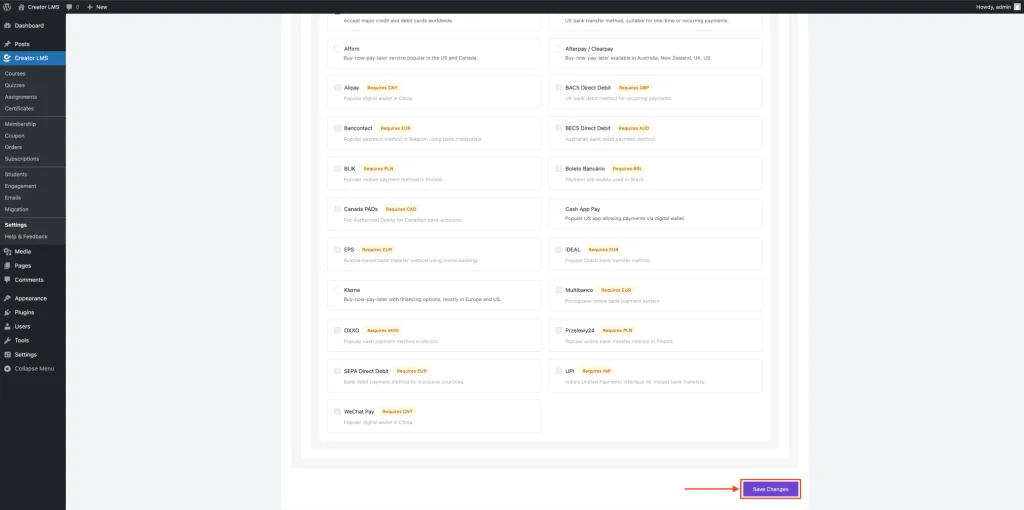
After selecting your desired payment methods, click Save Changes to update and apply all the settings for Stripe on your site.
Currency Settings
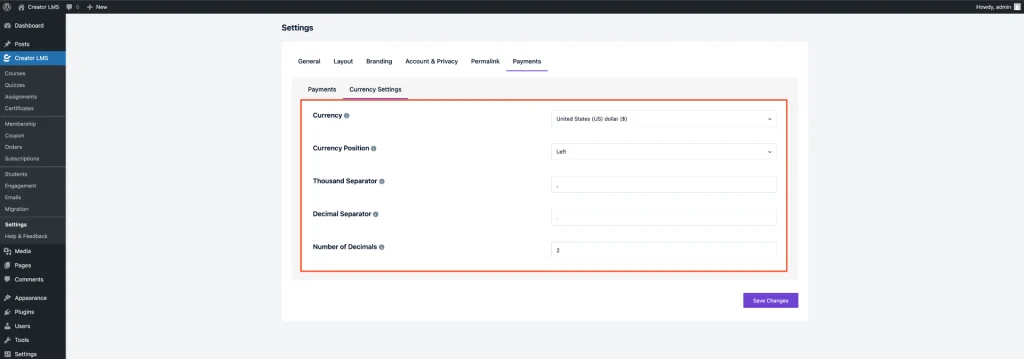
Currency: Select your preferred currency from the dropdown (e.g., USD – United States Dollar).
Currency Position: Choose where the symbol appears (e.g., Left → $50.00, Right → 50.00$).
Thousand Separator: Choose how to separate large numbers (e.g., Comma → 1,000,000).
Decimal Separator: Choose how to separate decimals (e.g., Period → 50.00, Comma → 50,00).
Number of Decimals: Define how many digits to show after the decimal (e.g., 2 → 50.00).
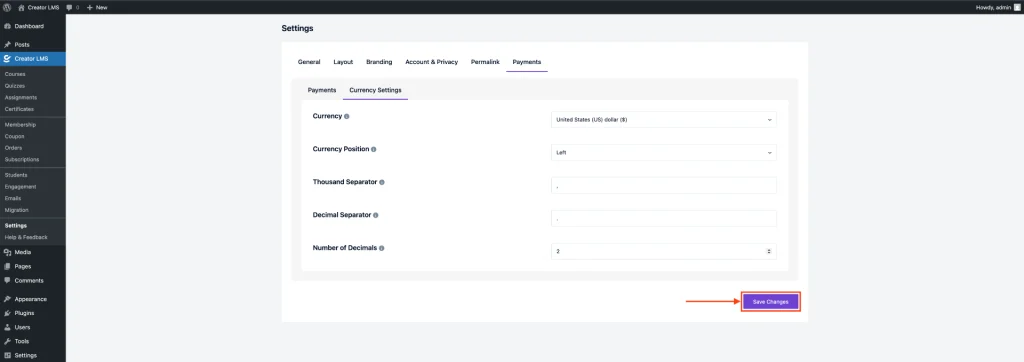
After configuring your currency settings, ensure you click Save Changes at the bottom of the settings page to apply the updates.
That’s it! Your Offline Payment setup is now complete and ready to use.