
Zapier is a powerful automation tool that connects Mail Mint with thousands of other platforms. This integration lets you automate repetitive tasks by moving data seamlessly between Mail Mint and external apps — all built on top of Mail Mint’s own Incoming and Outgoing Webhooks.
With Zapier and Mail Mint, you can:
- Import Data: Automatically bring contacts from other tools into Mail Mint.
- Export Data: Send Mail Mint contact information to external platforms.
Bringing Contacts and Data to Mail Mint (Incoming Webhook)
The incoming webhook helps you bring contacts and data from other platforms into Mail Mint using Zapier. For demonstration, we’ll connect Google Sheets to Mail Mint using Zapier.
Generate Your Webhook URL in Mail Mint
Before connecting to Zapier, you need a webhook URL from Mail Mint:
Go to your Mail Mint Dashboard, navigate to Settings > Webhooks, and click Create Webhook.
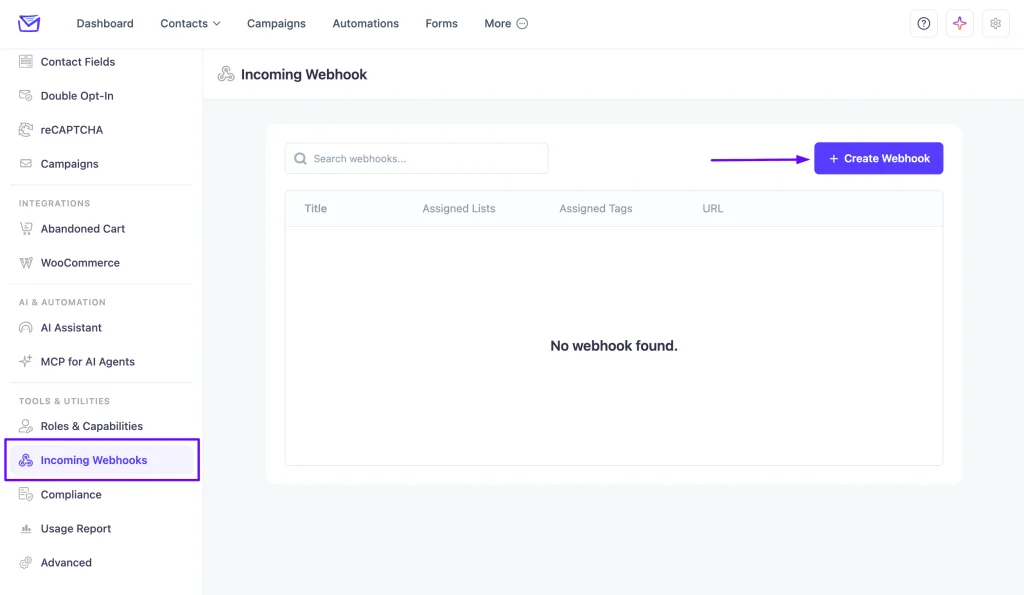
In the popup, add a Name for the webhook, then set the List, Tag, and Contact Status you want new contacts to receive.
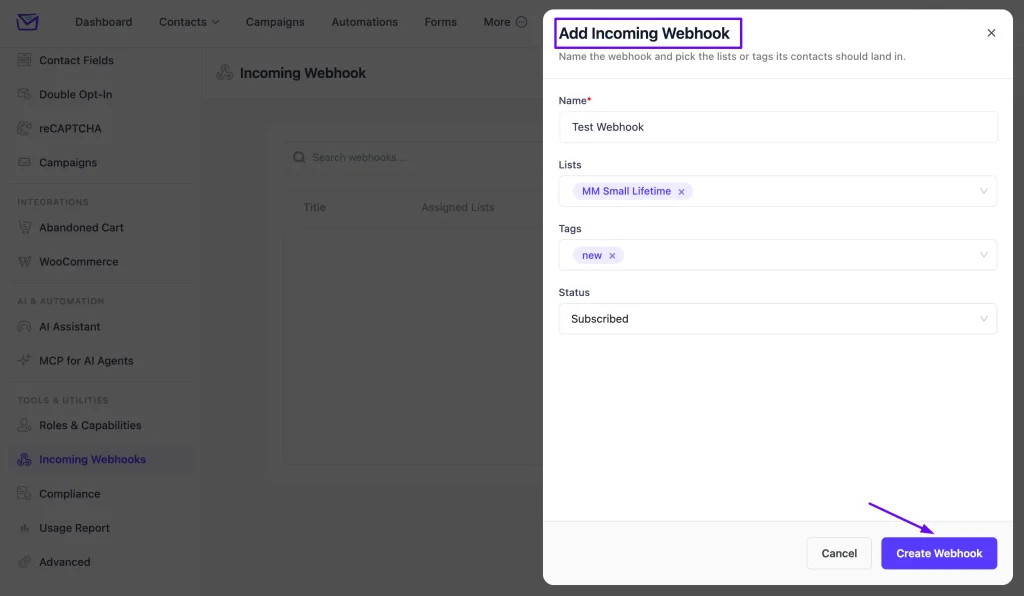
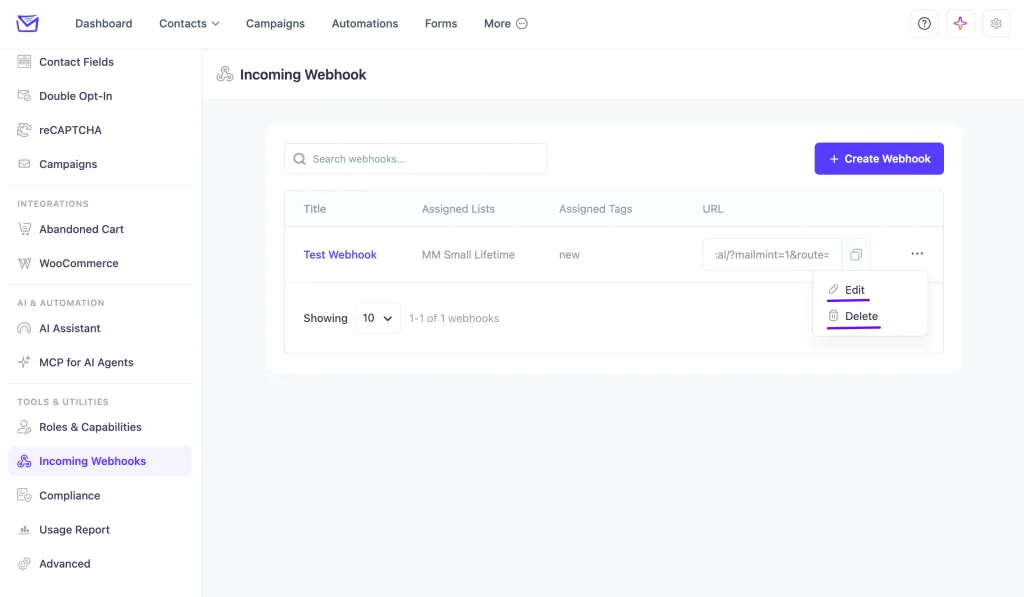
Click Create. Mail Mint will generate a Webhook URL — copy this, you’ll use it in Zapier. You can Edit or Delete the webhook later from the three-dot menu.
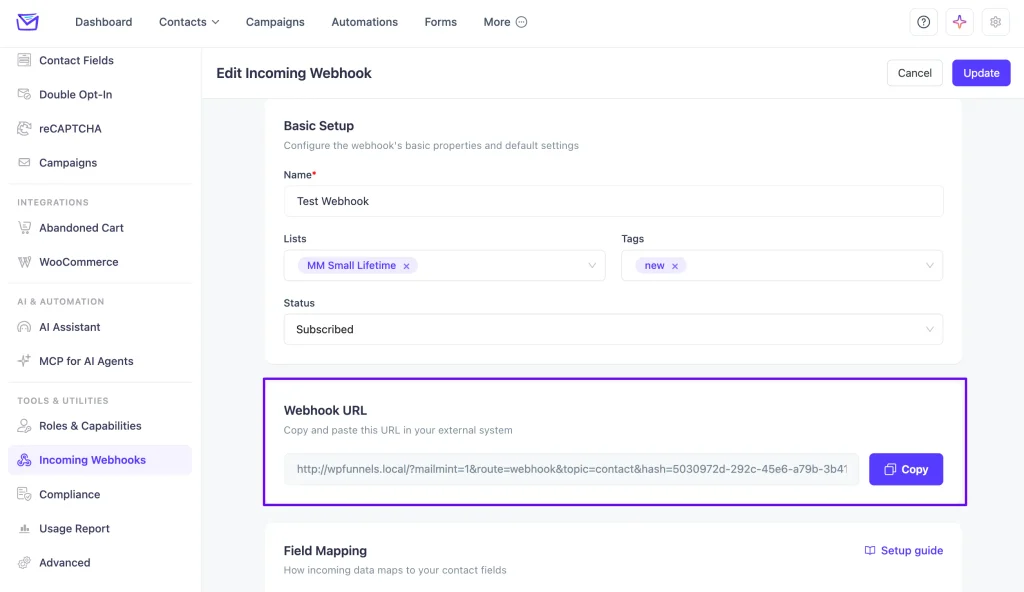
On the Webhook edit page, you will find the URL to copy.
Configure the Trigger in Zapier
Now configure the event on the other platform (Google Sheets, in this example) that should start the automation:
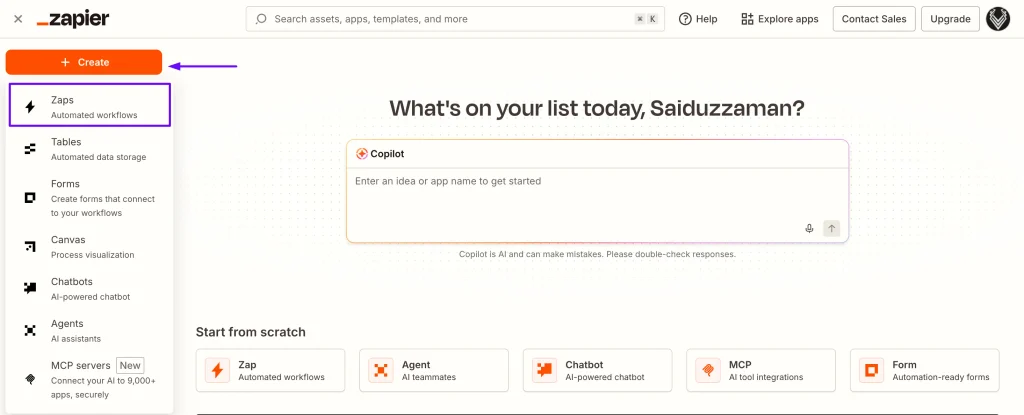
1. Go to the Zapier Dashboard and click Create > Zaps.
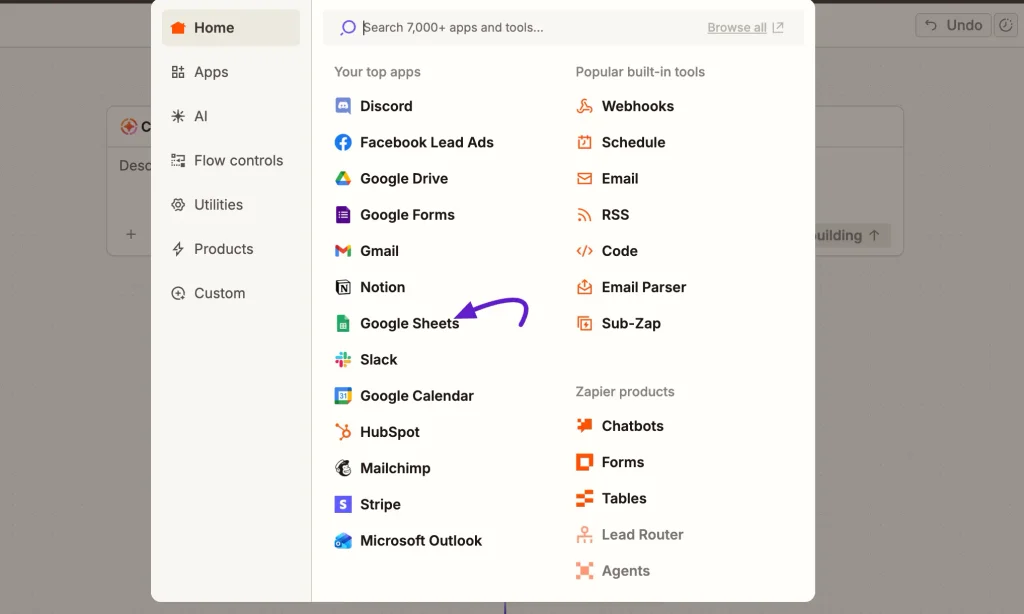
2. You will be redirected to the Trigger page. To set the trigger, choose your data source. In our case, we’re choosing Google Sheets.
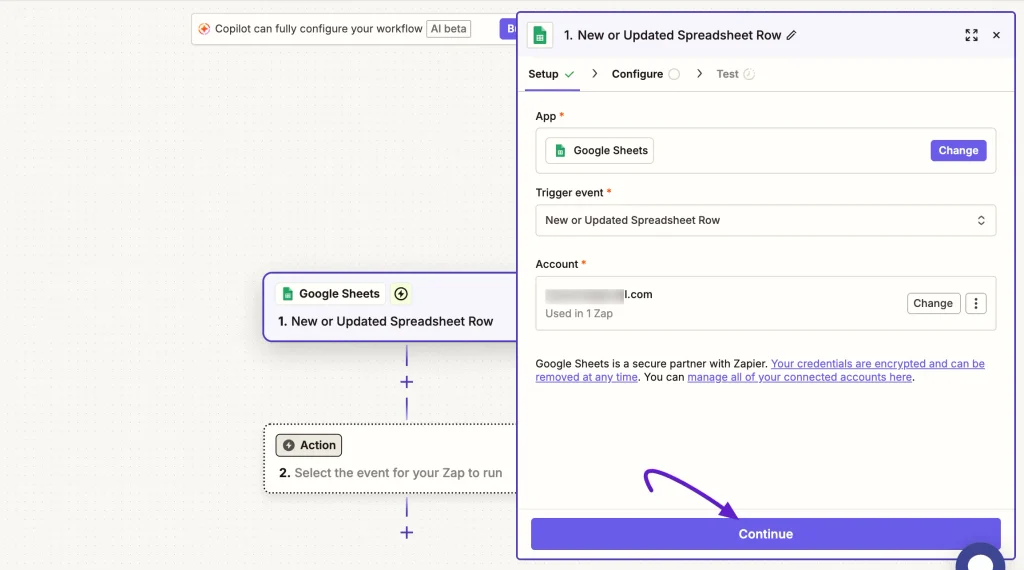
3. After selecting this trigger, you have to define the Event. As the trigger, we will set New or Updated Spreadsheet Row. At this point, You have to choose an Account and click Continue.
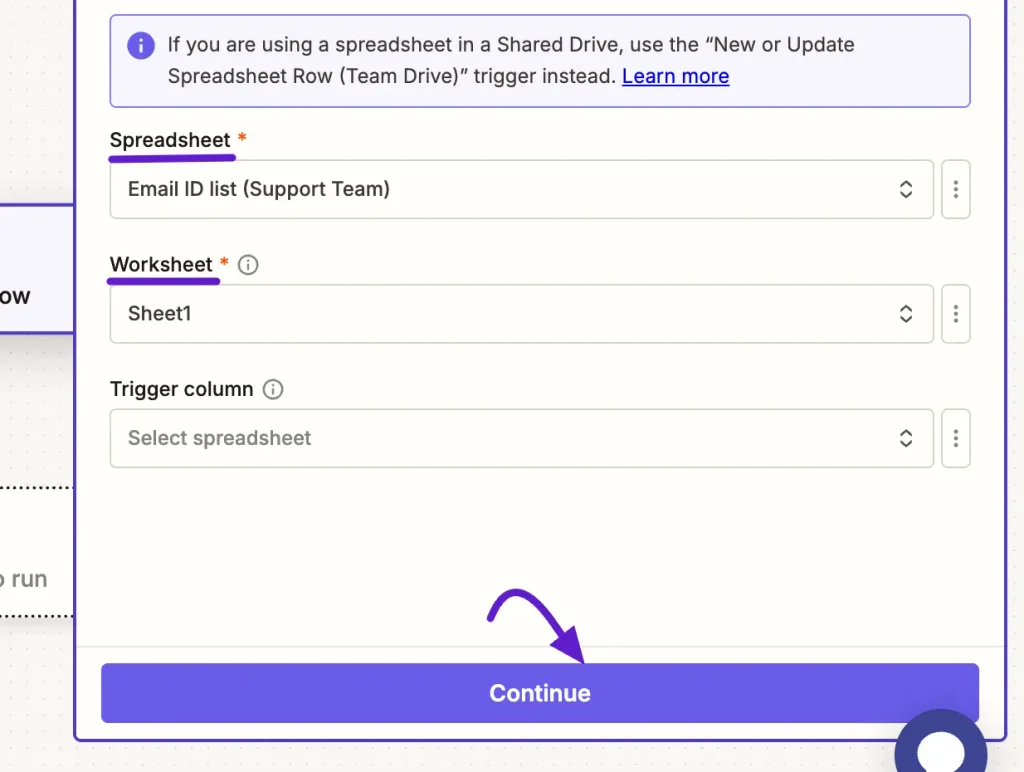
4. After selecting the account, you have to select the spreadsheet you want to import to Mail Mint. Select the field, choose a worksheet you’ve already created, and click Continue.
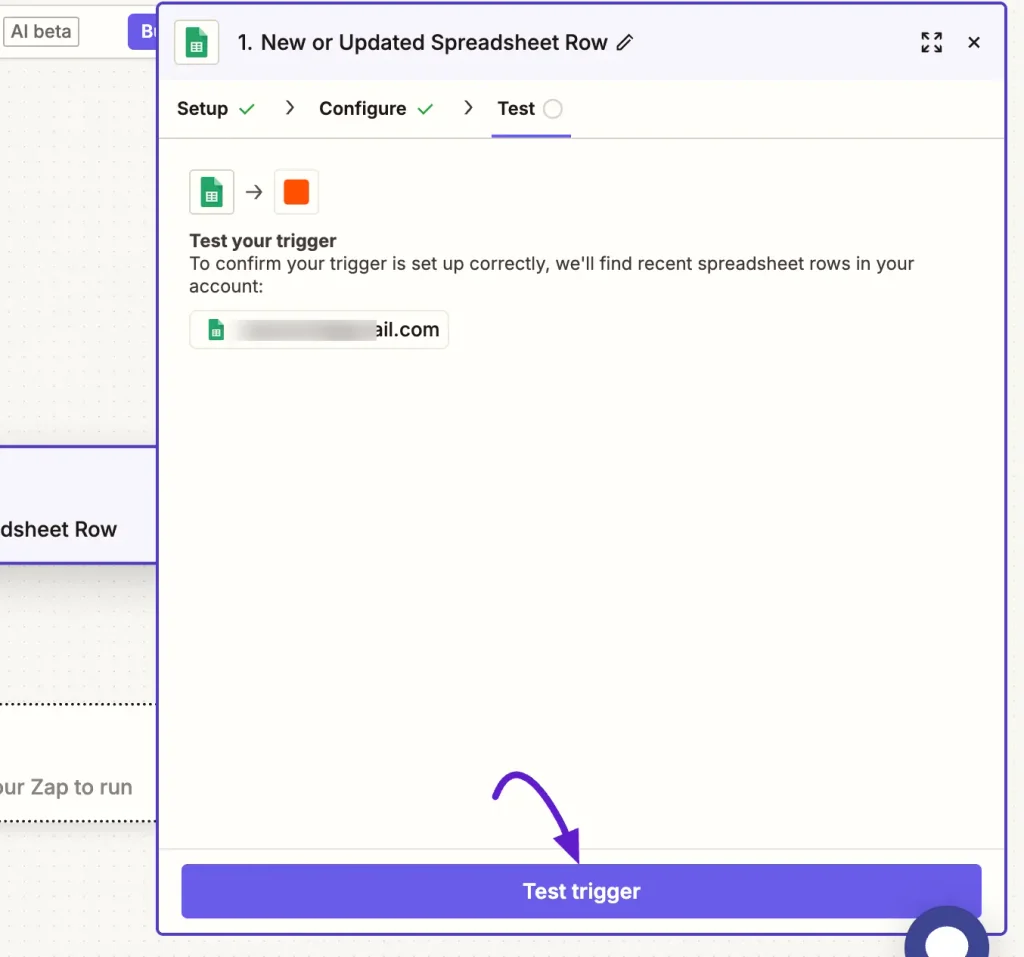
5. Click Test Trigger — if you’ve already added rows, the data should show up here. A success message means the trigger is configured.
Configure the Action in Zapier
Next, configure the action so Zapier sends the data to the webhook URL you created in Mail Mint:
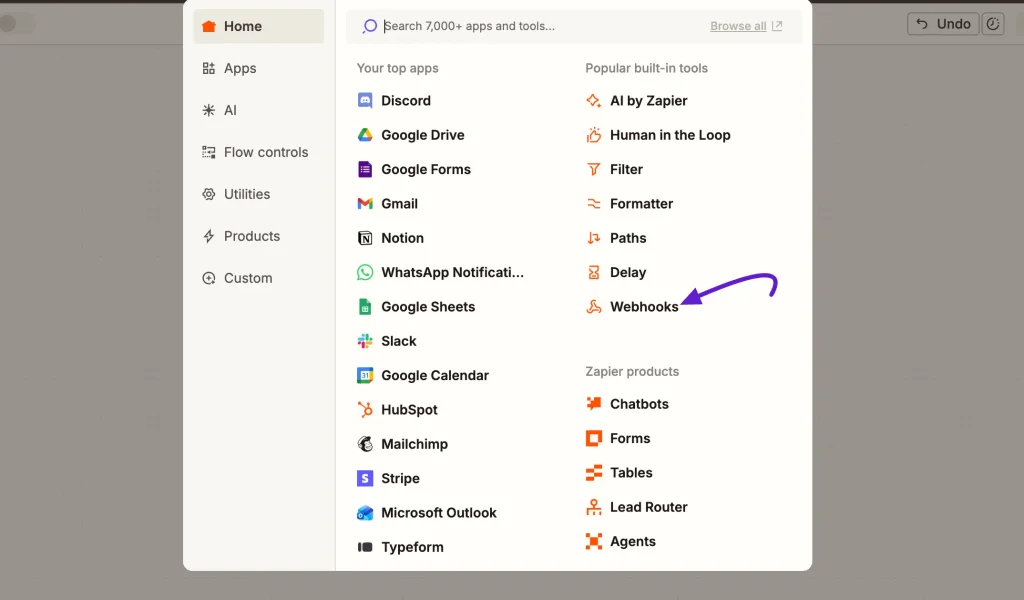
1. Click Action and choose Webhooks by Zapier.
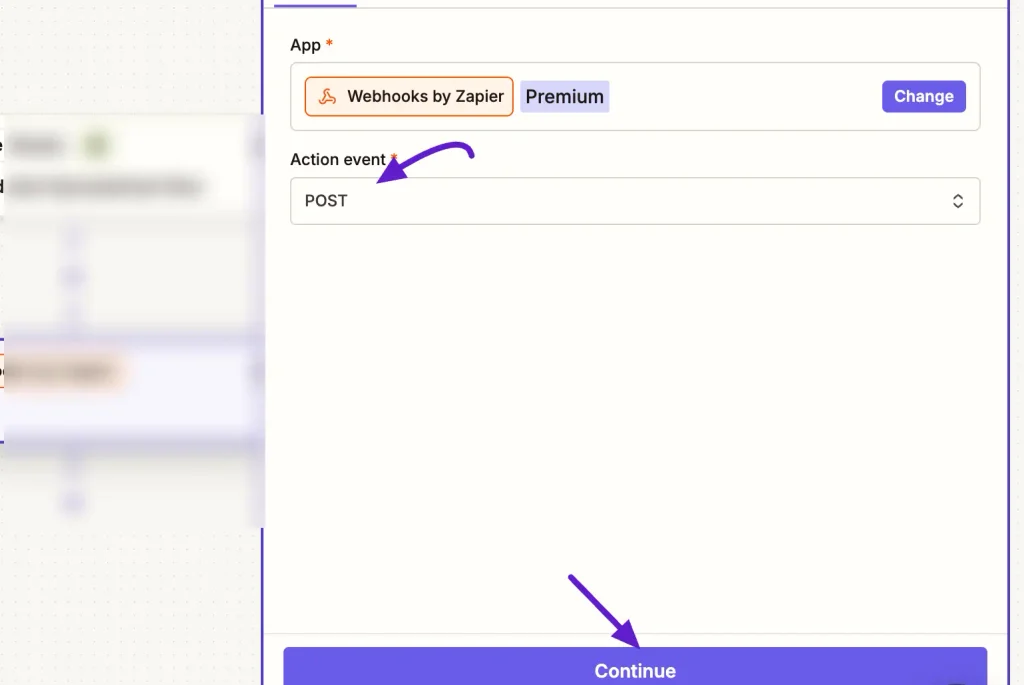
2. Set the action event to POST and click Continue.
3. Fill in the request details:
Data: Map your spreadsheet columns to Mail Mint fields — use Email for the contact’s email address. If you want to set Tags or Lists per row, map those columns to the tags and lists keys using the names of the Tag or List (Mail Mint will create them automatically if they don’t already exist).
URL: Paste the Webhook URL you copied from Mail Mint.
Payload Type: JSON.
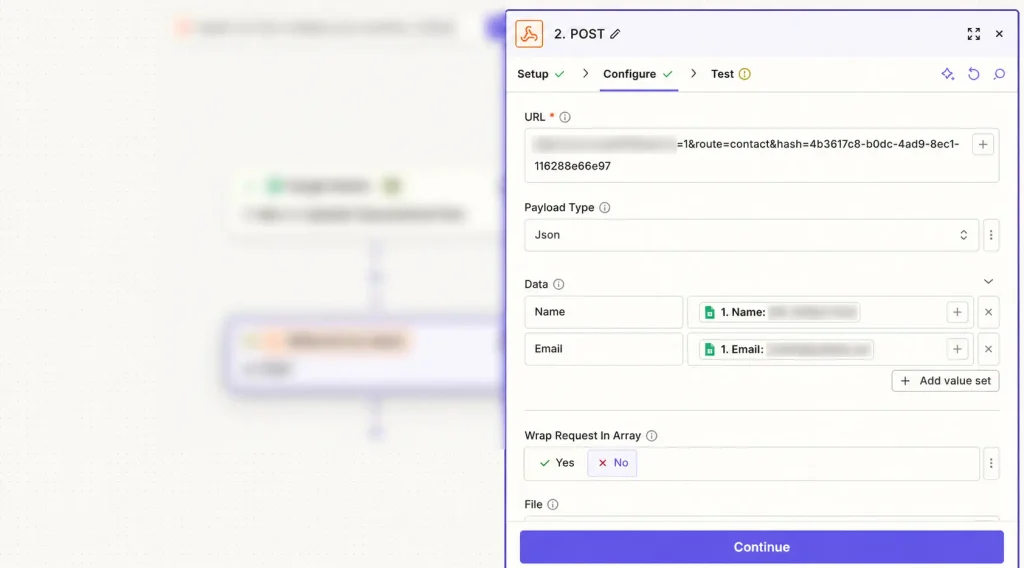
4. Leave the remaining fields as-is and click Continue.
5. Click Test and Continue. A success message means the data reached Mail Mint.
6. Click Publish to start automatically importing contacts whenever a new Google Sheets row is added.
Sending Mail Mint Data to Other Platforms (Outgoing Webhook)
You can also send contact data out of Mail Mint to other platforms via Zapier — useful for keeping an external system in sync with your Mail Mint contacts. For demonstration, we’ll send data to Google Sheets.
Set Up an Incoming Webhook in Zapier
First, get a webhook URL from Zapier to receive the data:
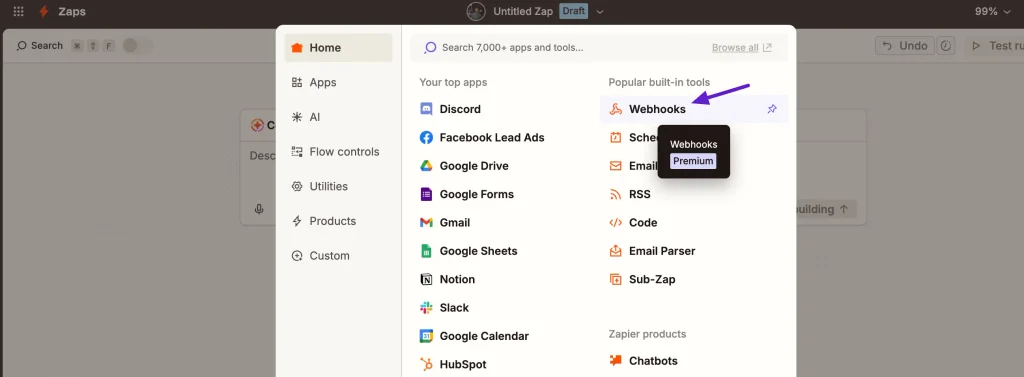
1. Go to Zapier, click Create > Zaps, and select Webhooks by Zapier as the trigger.
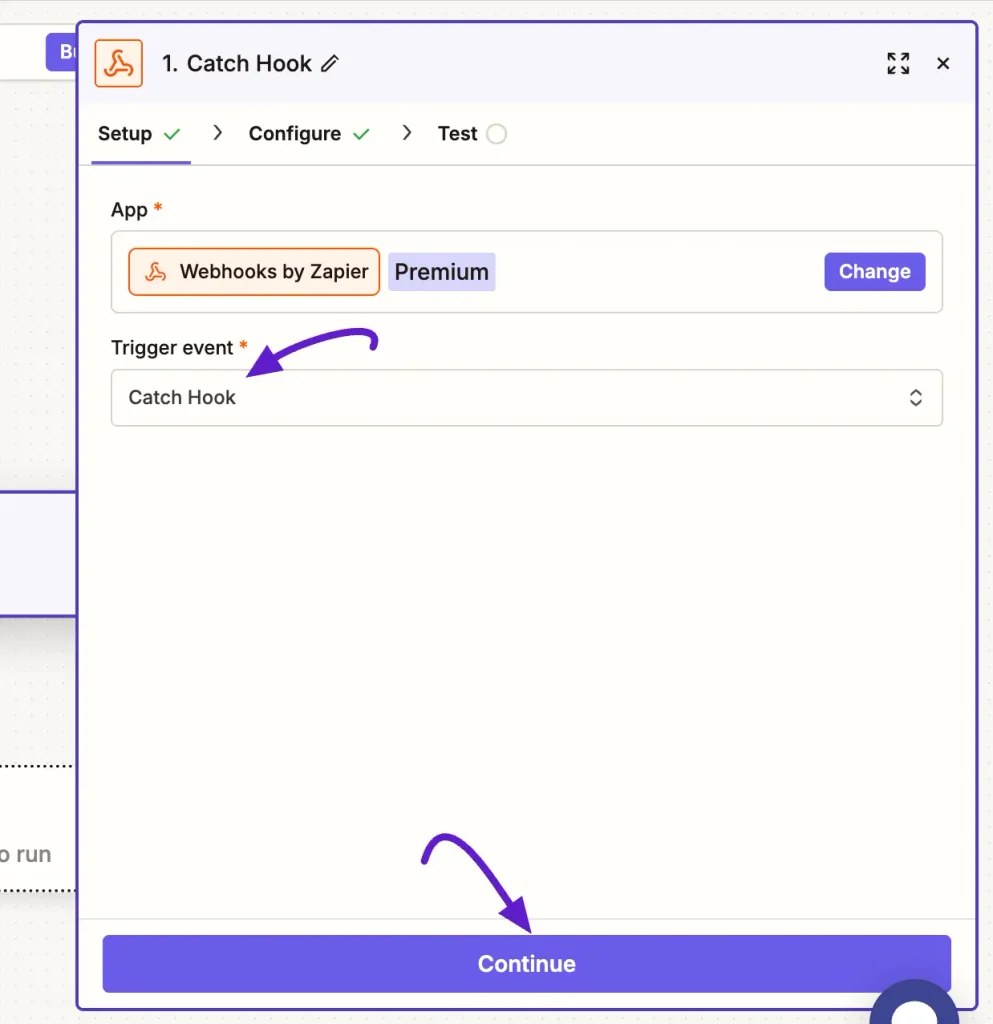
2. For Event, choose Catch Hook and click Continue.
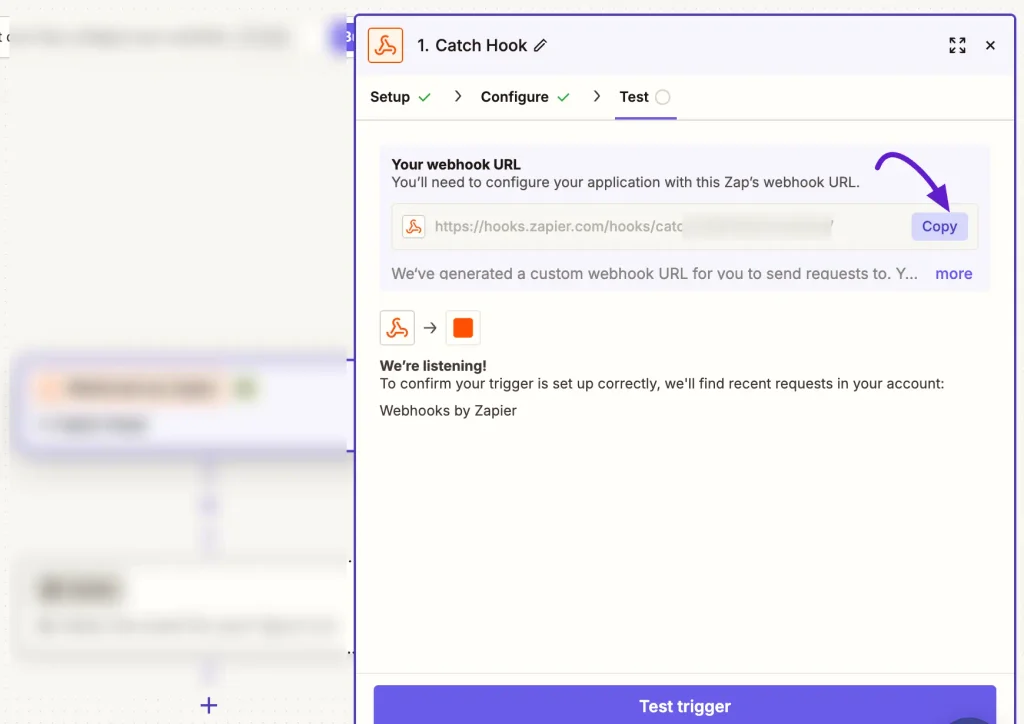
3. You’ll be asked for a Child Key — this is optional, so you can leave it blank and click Continue. Zapier will show you a webhook URL — copy this for the next step.
Create the Automation and Outgoing Webhook in Mail Mint
Outgoing webhooks run as a step inside a Mail Mint automation, so you’ll need one to attach it to:
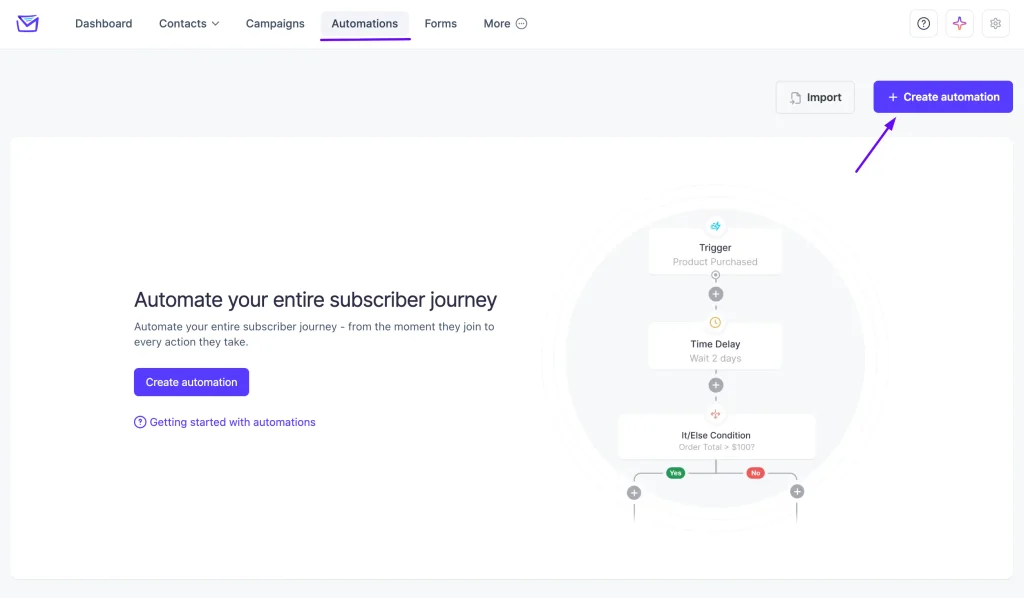
1. Go to Mail Mint > Automations and click + New Automation.
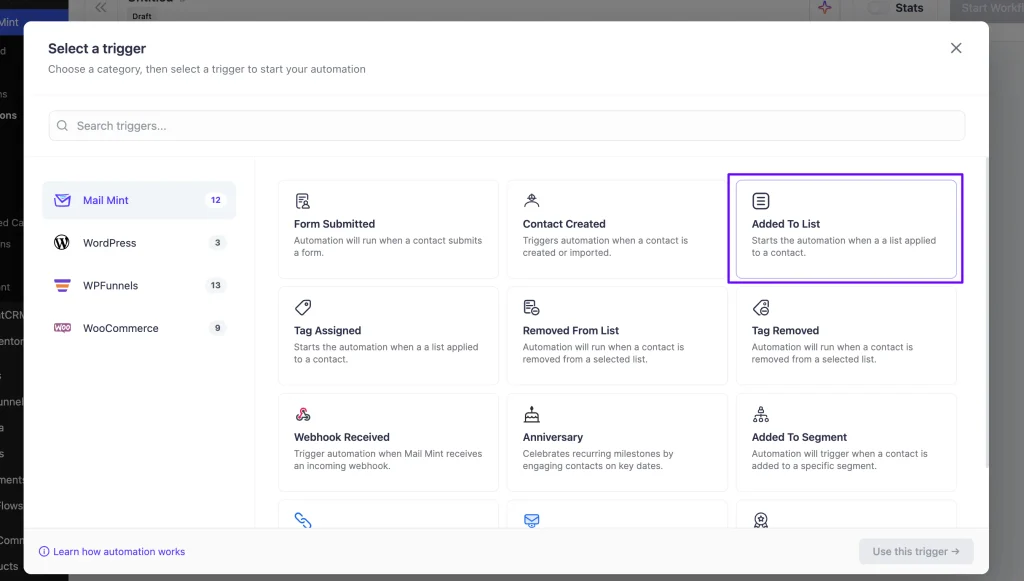
2. Set a trigger — for example, Added To List– and select the relevant Tag. Save the trigger settings.
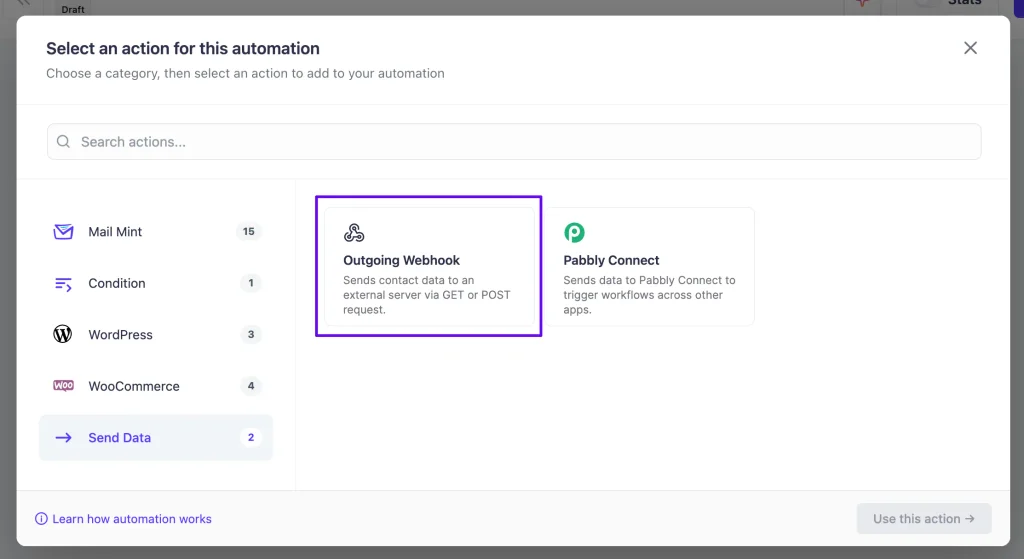
3. With the automation open, click the + icon and choose Outgoing Webhook from the available actions.
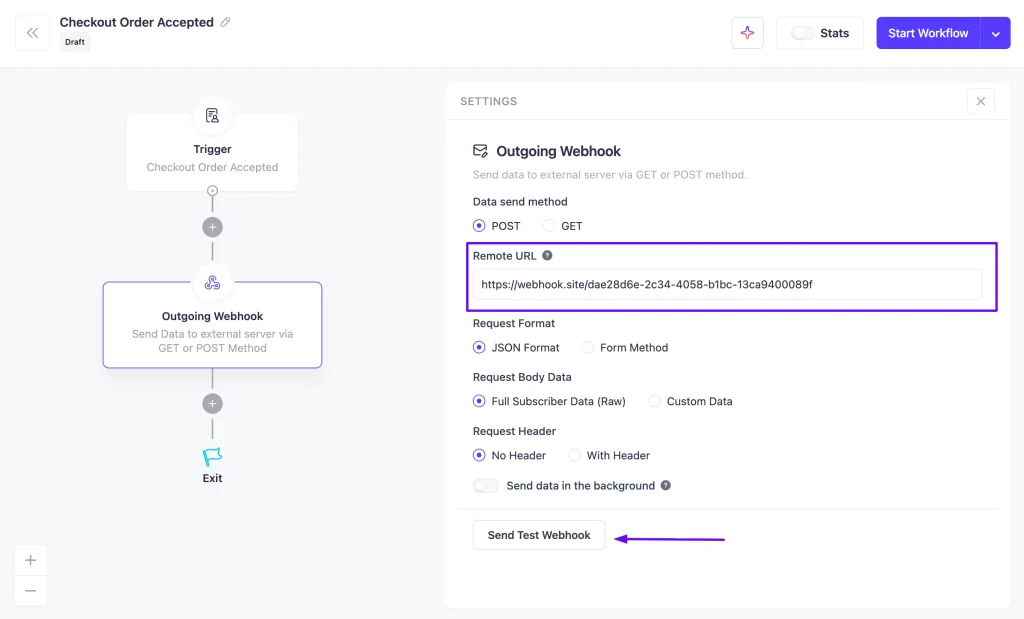
4. Configure the action:
Request Header: Optional — leave blank unless your target platform requires one.
Data Send Method: POST.
Remote URL: The webhook URL you copied from Zapier.
Request Format: JSON.
Request Body: Choose Full Contact Data, or select Custom Data if you only want specific fields sent.
5. Click Save and publish the automation.
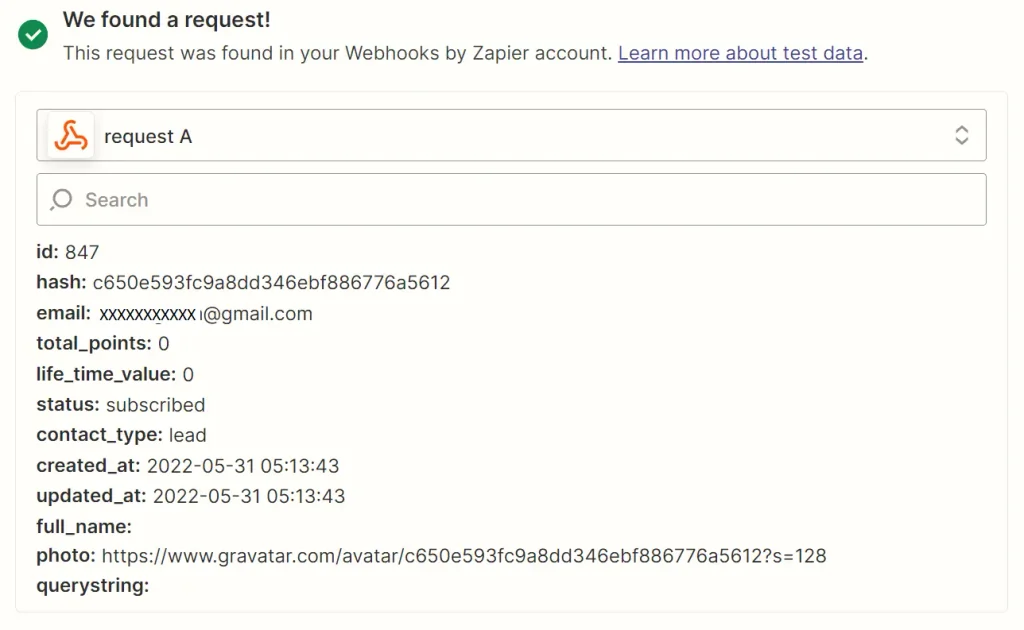
6. Go back to Zapier and click Test Trigger now. If it returns with information, the trigger is configured successfully. Click Continue to save the automation.
Configure the Zapier Action
1. From the Action menu, choose your destination platform — in this example, Google Sheets.
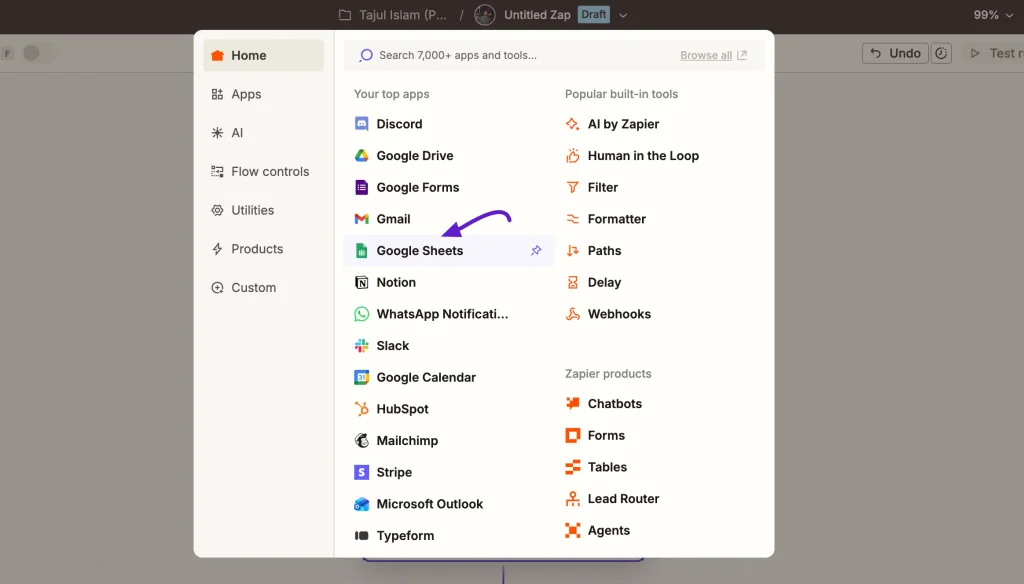
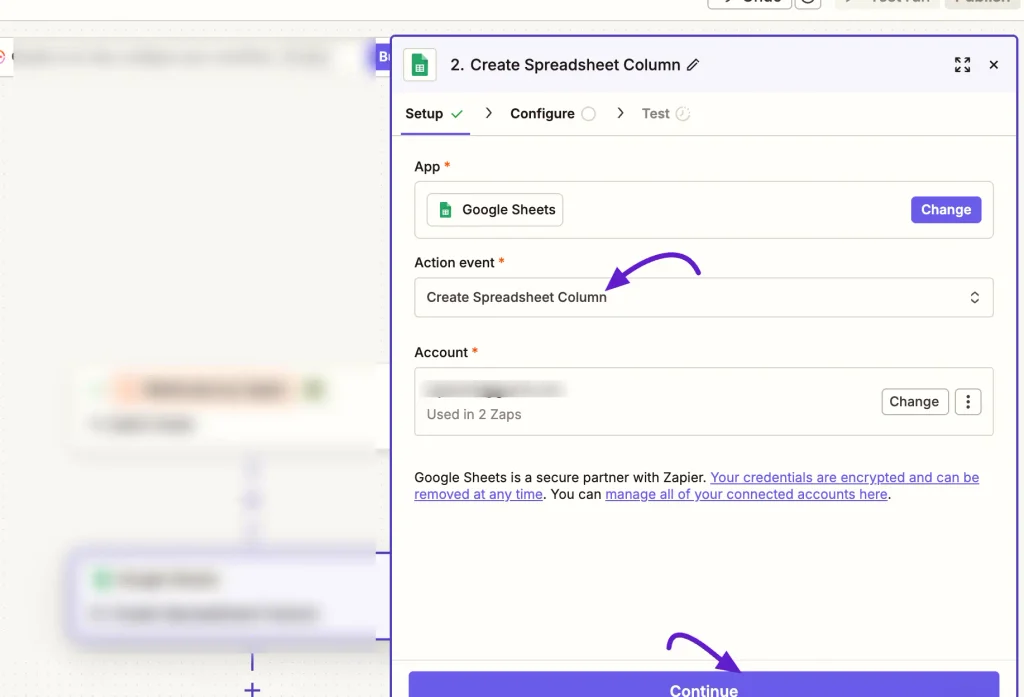
2. Select Create Spreadsheet Row as the action event, choose your account, and click Continue.
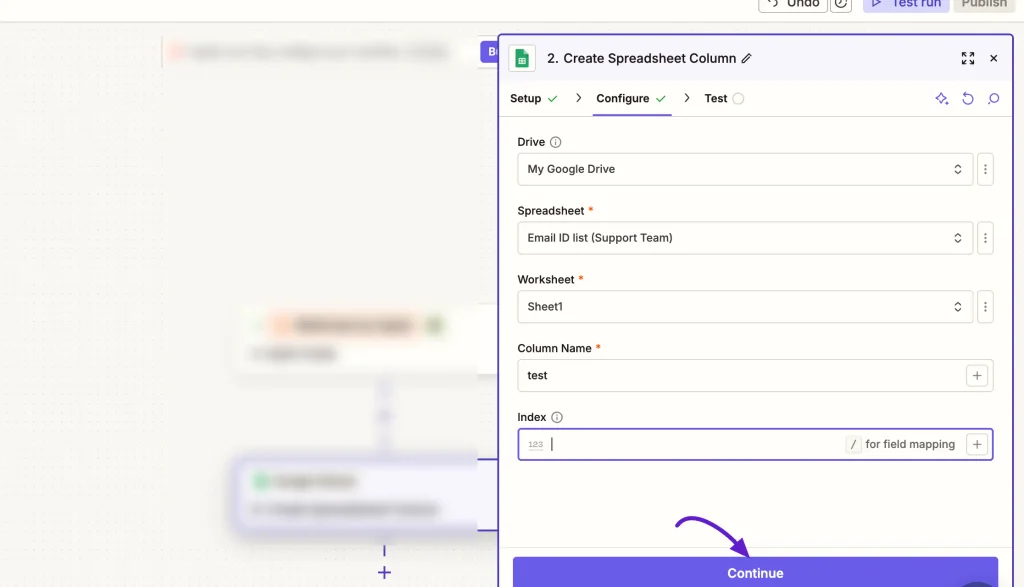
3. Select the Drive, Spreadsheet, Worksheet, and Column to write to, then click Continue.
4. Click Test, and once you get a success message, click Publish Zap.
That completes the Zapier integration — Mail Mint’s Incoming and Outgoing Webhooks do the heavy lifting, while Zapier connects them to whatever platform you need on the other end. For more on the webhook fields themselves, see Webhook Integration with Mail Mint.
