
Webhooks let you send or receive data between Mail Mint and third-party services without any custom coding or server management. Mail Mint supports both Incoming and Outgoing webhooks to help you automate your data flow.
Incoming Webhook
Incoming webhooks let you automatically collect and add contacts to Mail Mint from an external platform or server. Follow these steps to set one up.
Step 1 — Create a New Webhook
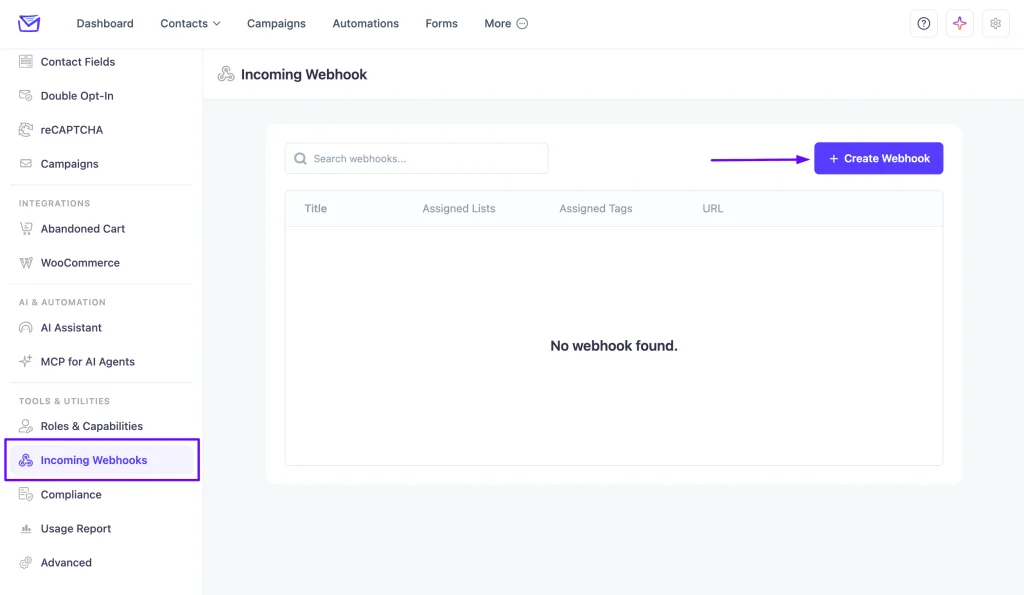
Navigate to Mail Mint > Settings > Webhooks, and click the + Create Webhook button.
Step 2 — Configure Webhook Details
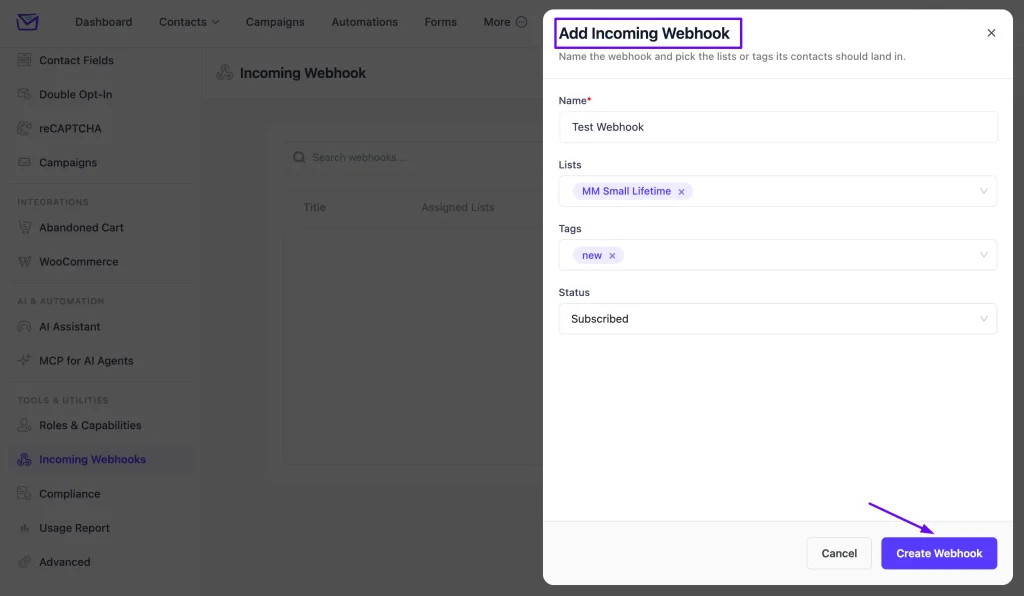
A panel will appear asking for the following:
- Name: A descriptive name so you can identify where this data is coming from.
- List: Select the List new contacts arriving through this webhook should be added to.
- Tag: Select any Tag(s) that should be applied to contacts arriving via this webhook.
- Contact Status: Set the status for these new contacts — Pending (to trigger double opt-in) or Subscribed (added directly, no confirmation needed).
Step 3 — Save and Get Your Webhook URL
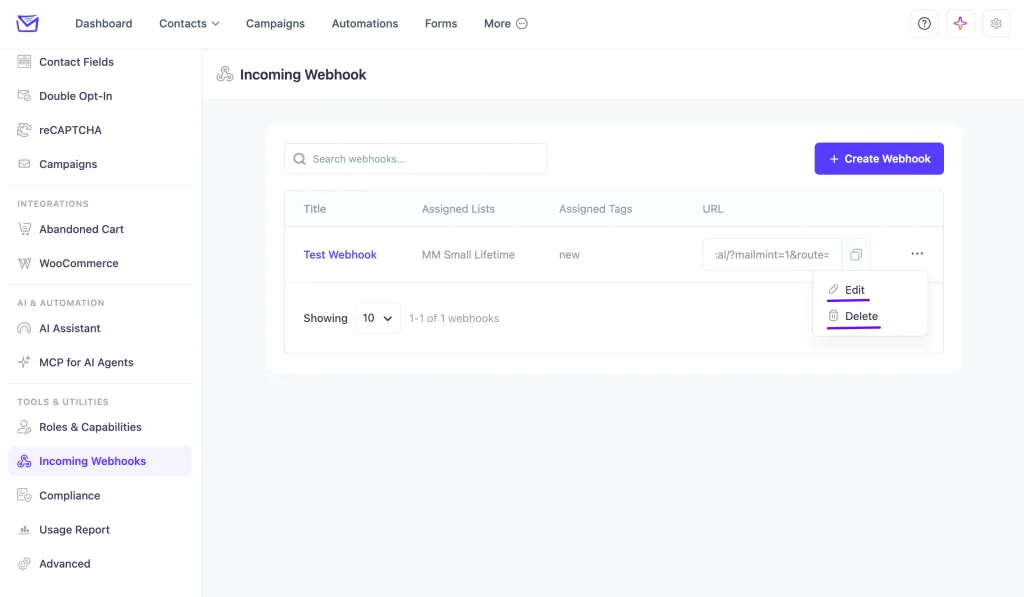
Click Create. Mail Mint will generate a unique Webhook URL. Copy this URL and paste it into your external application to start sending contact data directly into Mail Mint. You can edit or delete the webhook later from the three-dot menu next to it.
Sending Data to the Webhook
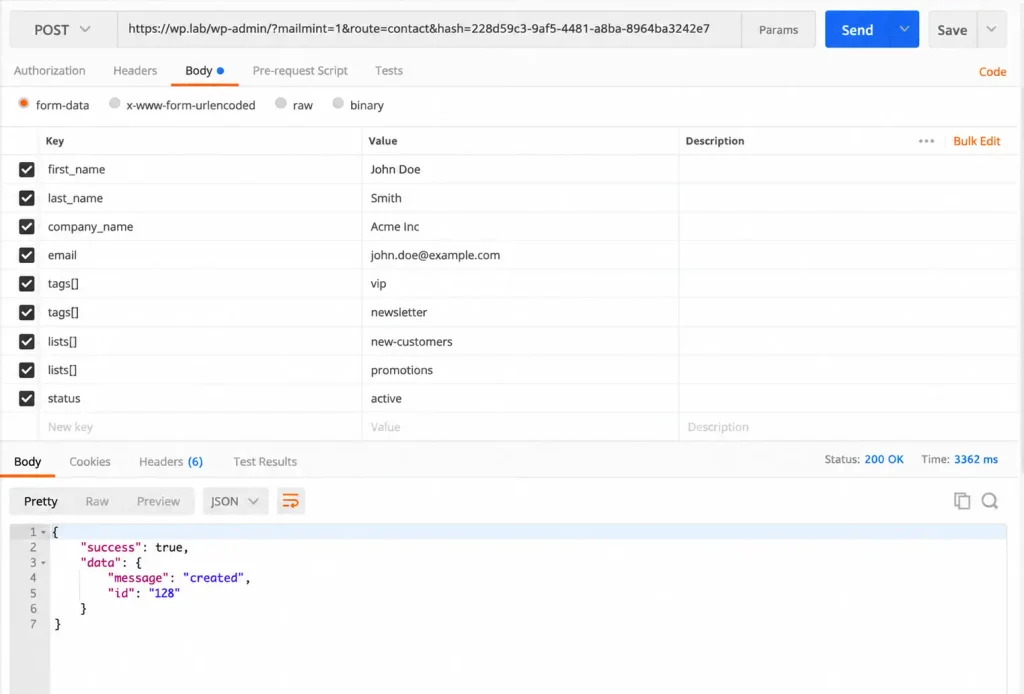
Send a POST request to the generated URL, with the data as form data or a JSON object. You can override the List, Tag, and Contact Status set in Step 2 by including them directly in your request payload:
| Field | Data Key | Data Type |
| Tags | tags | Array of Tag names |
| Lists | lists | Array of List names |
| Subscription Status | status | String — subscribed, pending, or unsubscribed |
Unlike an ID-based system, Mail Mint accepts List and Tag names directly. If a name you send doesn’t match an existing List or Tag, Mail Mint creates it automatically before assigning the contact — so you don’t need to pre-create anything on the Mail Mint side.
Outgoing Webhook
Outgoing webhooks let you send a contact’s data out to an external server or platform as part of a Mail Mint automation.
Step 1 — Add the Webhook Action
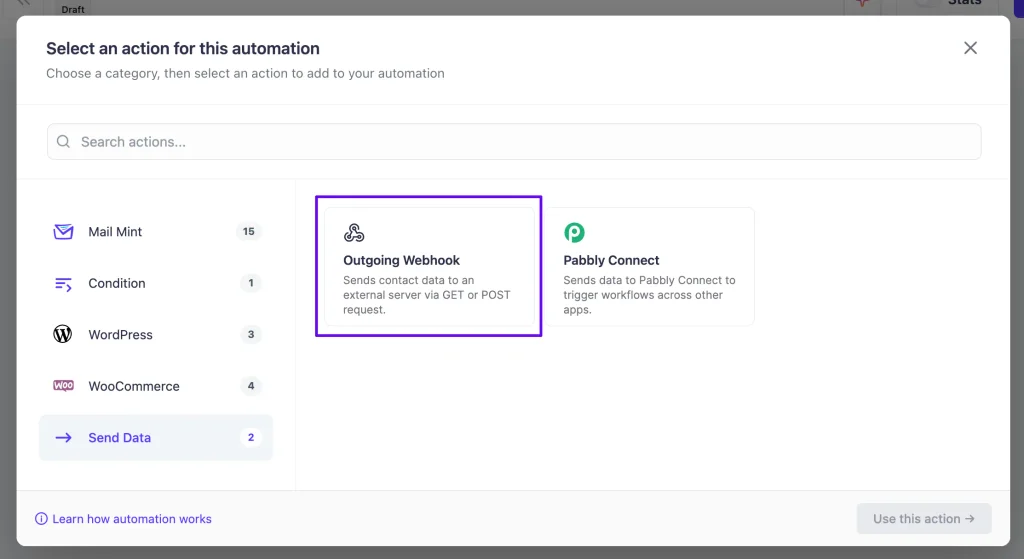
Go to Mail Mint > Automations, open (or create) an automation, and click the + icon to add an action. Select Outgoing Webhook from the list of available actions.
Step 2 — Configure the Request
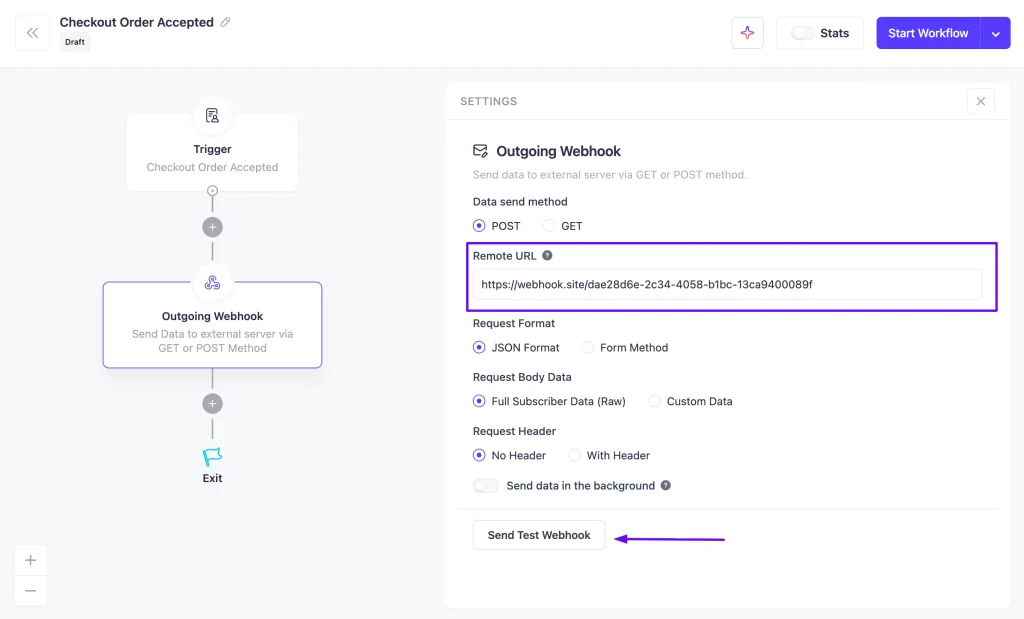
- Data Send Method: Choose GET or POST.
- Webhook URL: The endpoint on the external service that will receive the data.
- Request Format: Choose JSON or Form data.
- Data to Send: Choose whether to send the contact’s Full Data or a Custom selection of fields.
- Request Headers: Optionally add custom headers to the request.
Step 3 — Save Workflow
Click Save Workflow (or Update) on the top panel. Once saved, this step will fire automatically whenever a contact reaches it in the automation.
