To get started, you need to connect an AI provider using your own API key. All AI requests go directly from your site to the provider you choose — no third-party proxy, no data flowing through Mail Mint’s servers.
Where to Find AI Assistant Settings
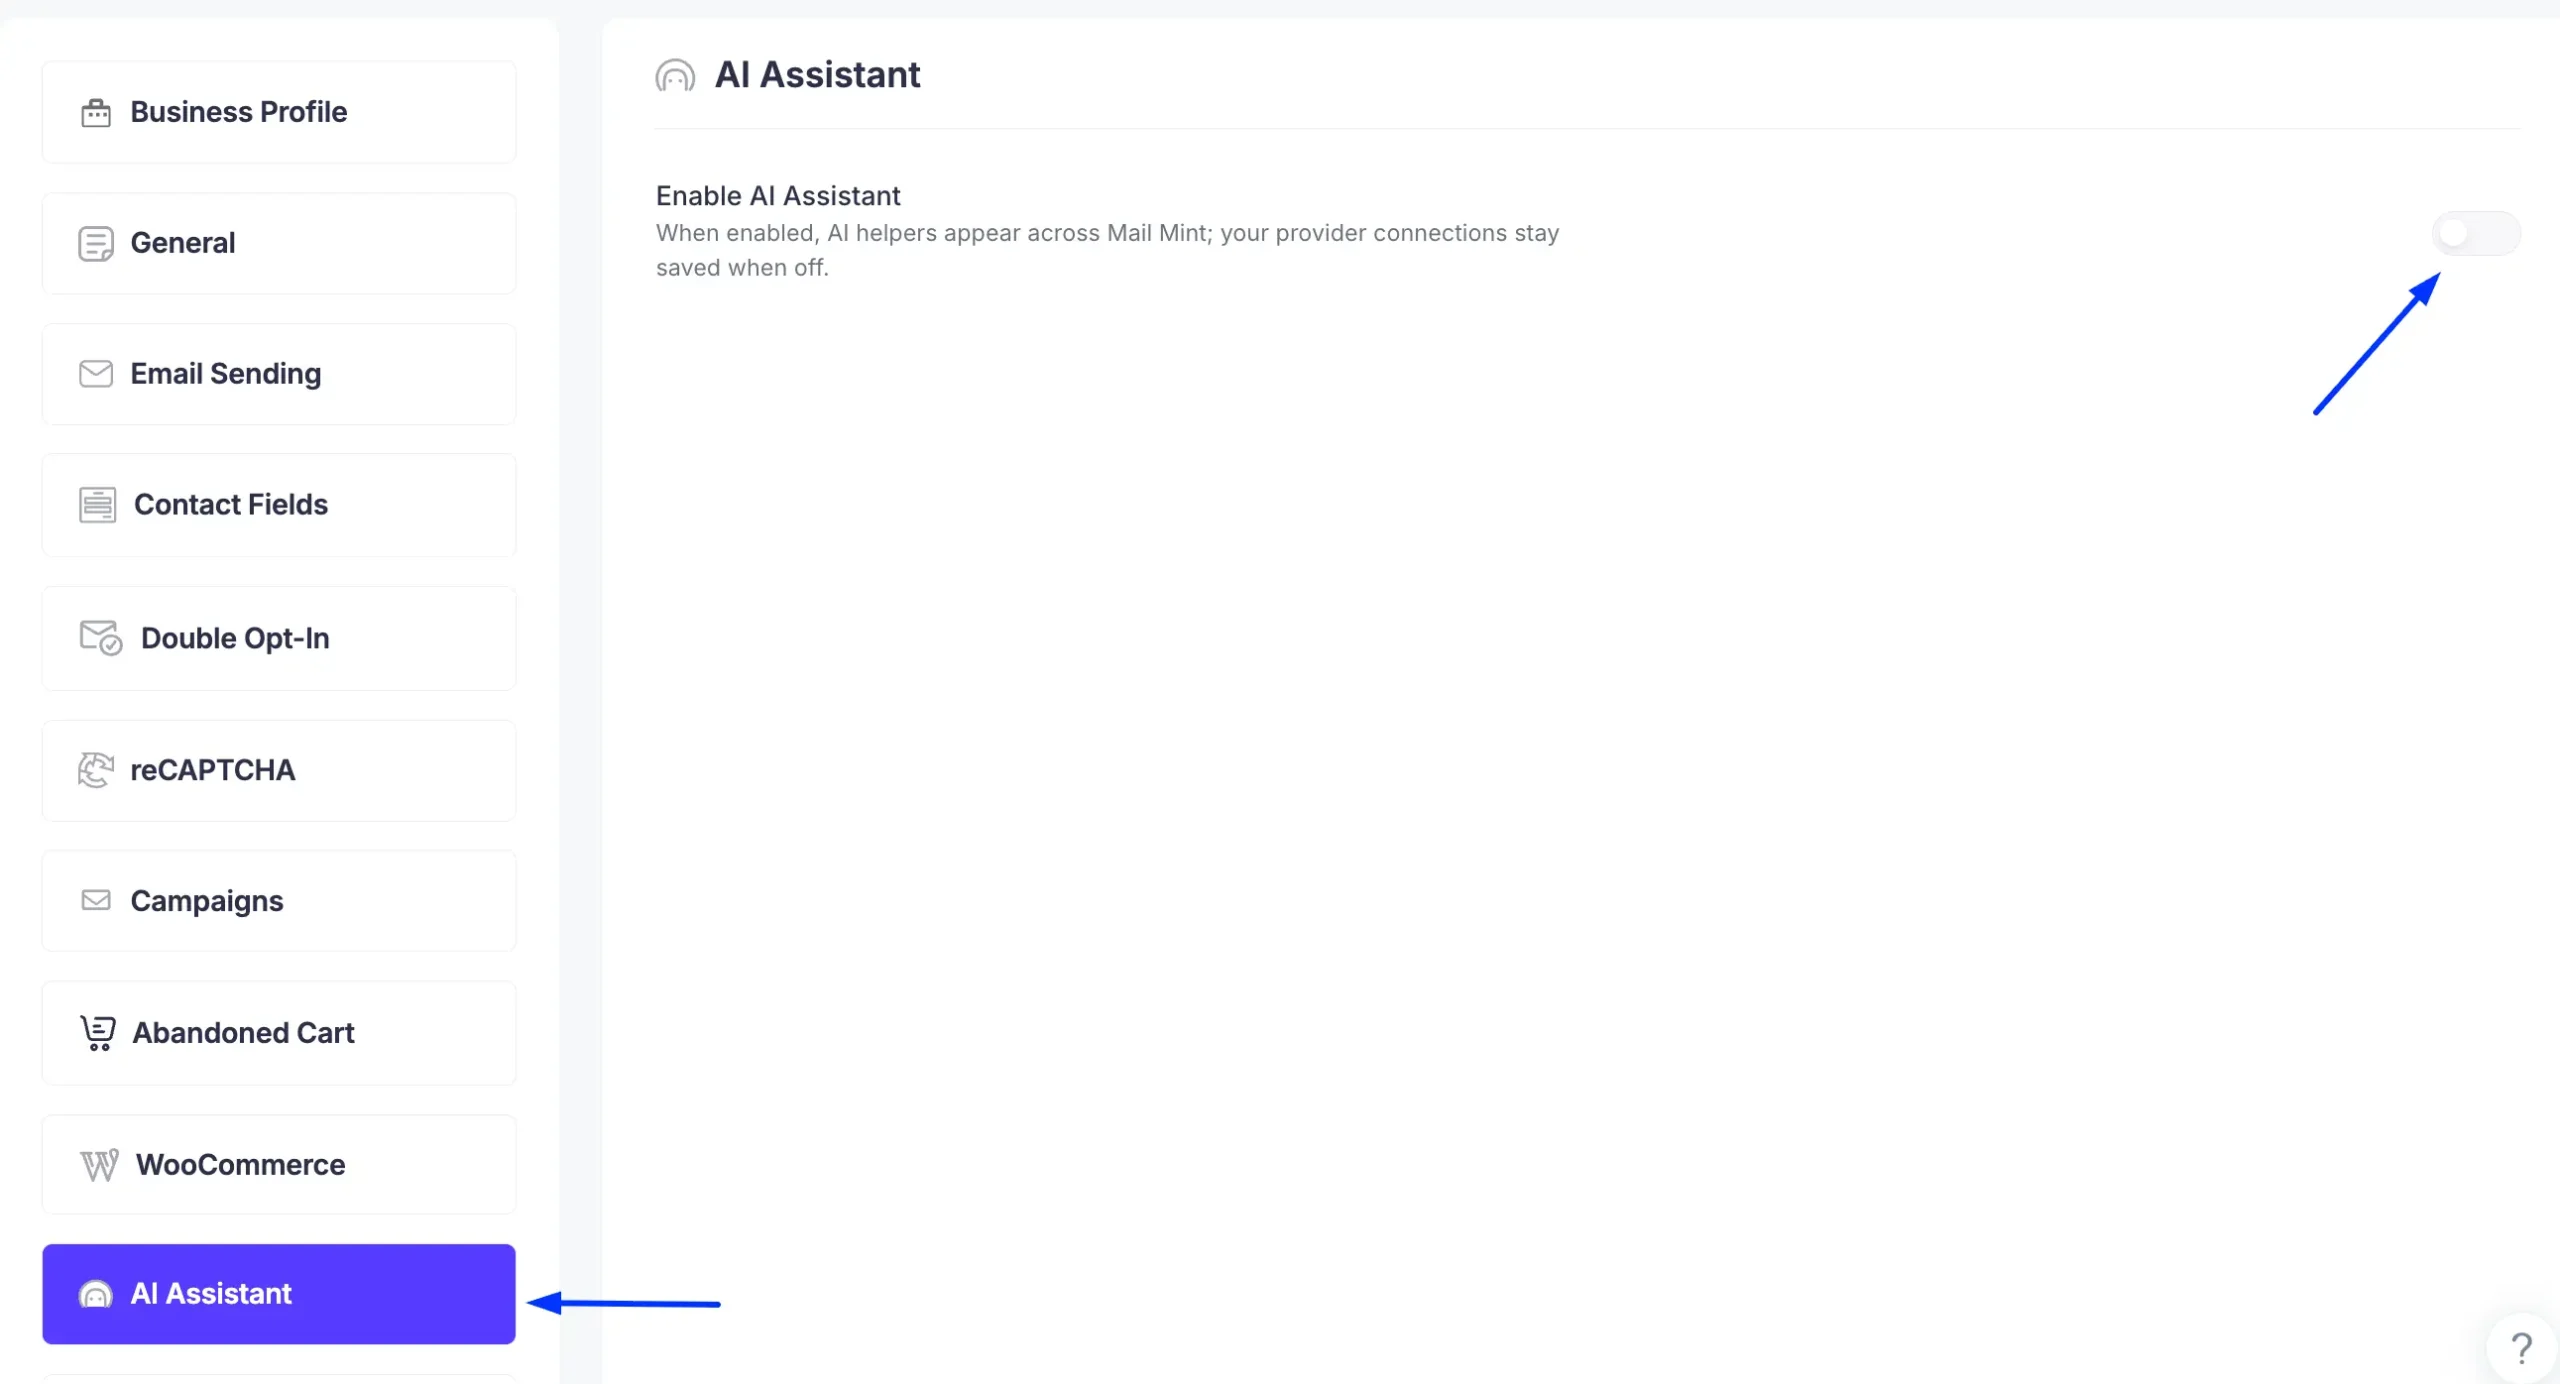
From your WordPress admin, go to Mail Mint → Settings → AI Assistant. This is where you connect your provider, add your API key, and configure how the AI behaves across the plugin.
Step 1: Enable the AI Assistant
At the top of the AI Assistant page, switch on the Enable AI Assistant toggle.
This is the master switch. When it’s off, all AI features stay hidden across the plugin — in the email editor and anywhere else the assistant appears. Turn it on, and the provider configuration fields will appear below.
Step 2: Select a Provider
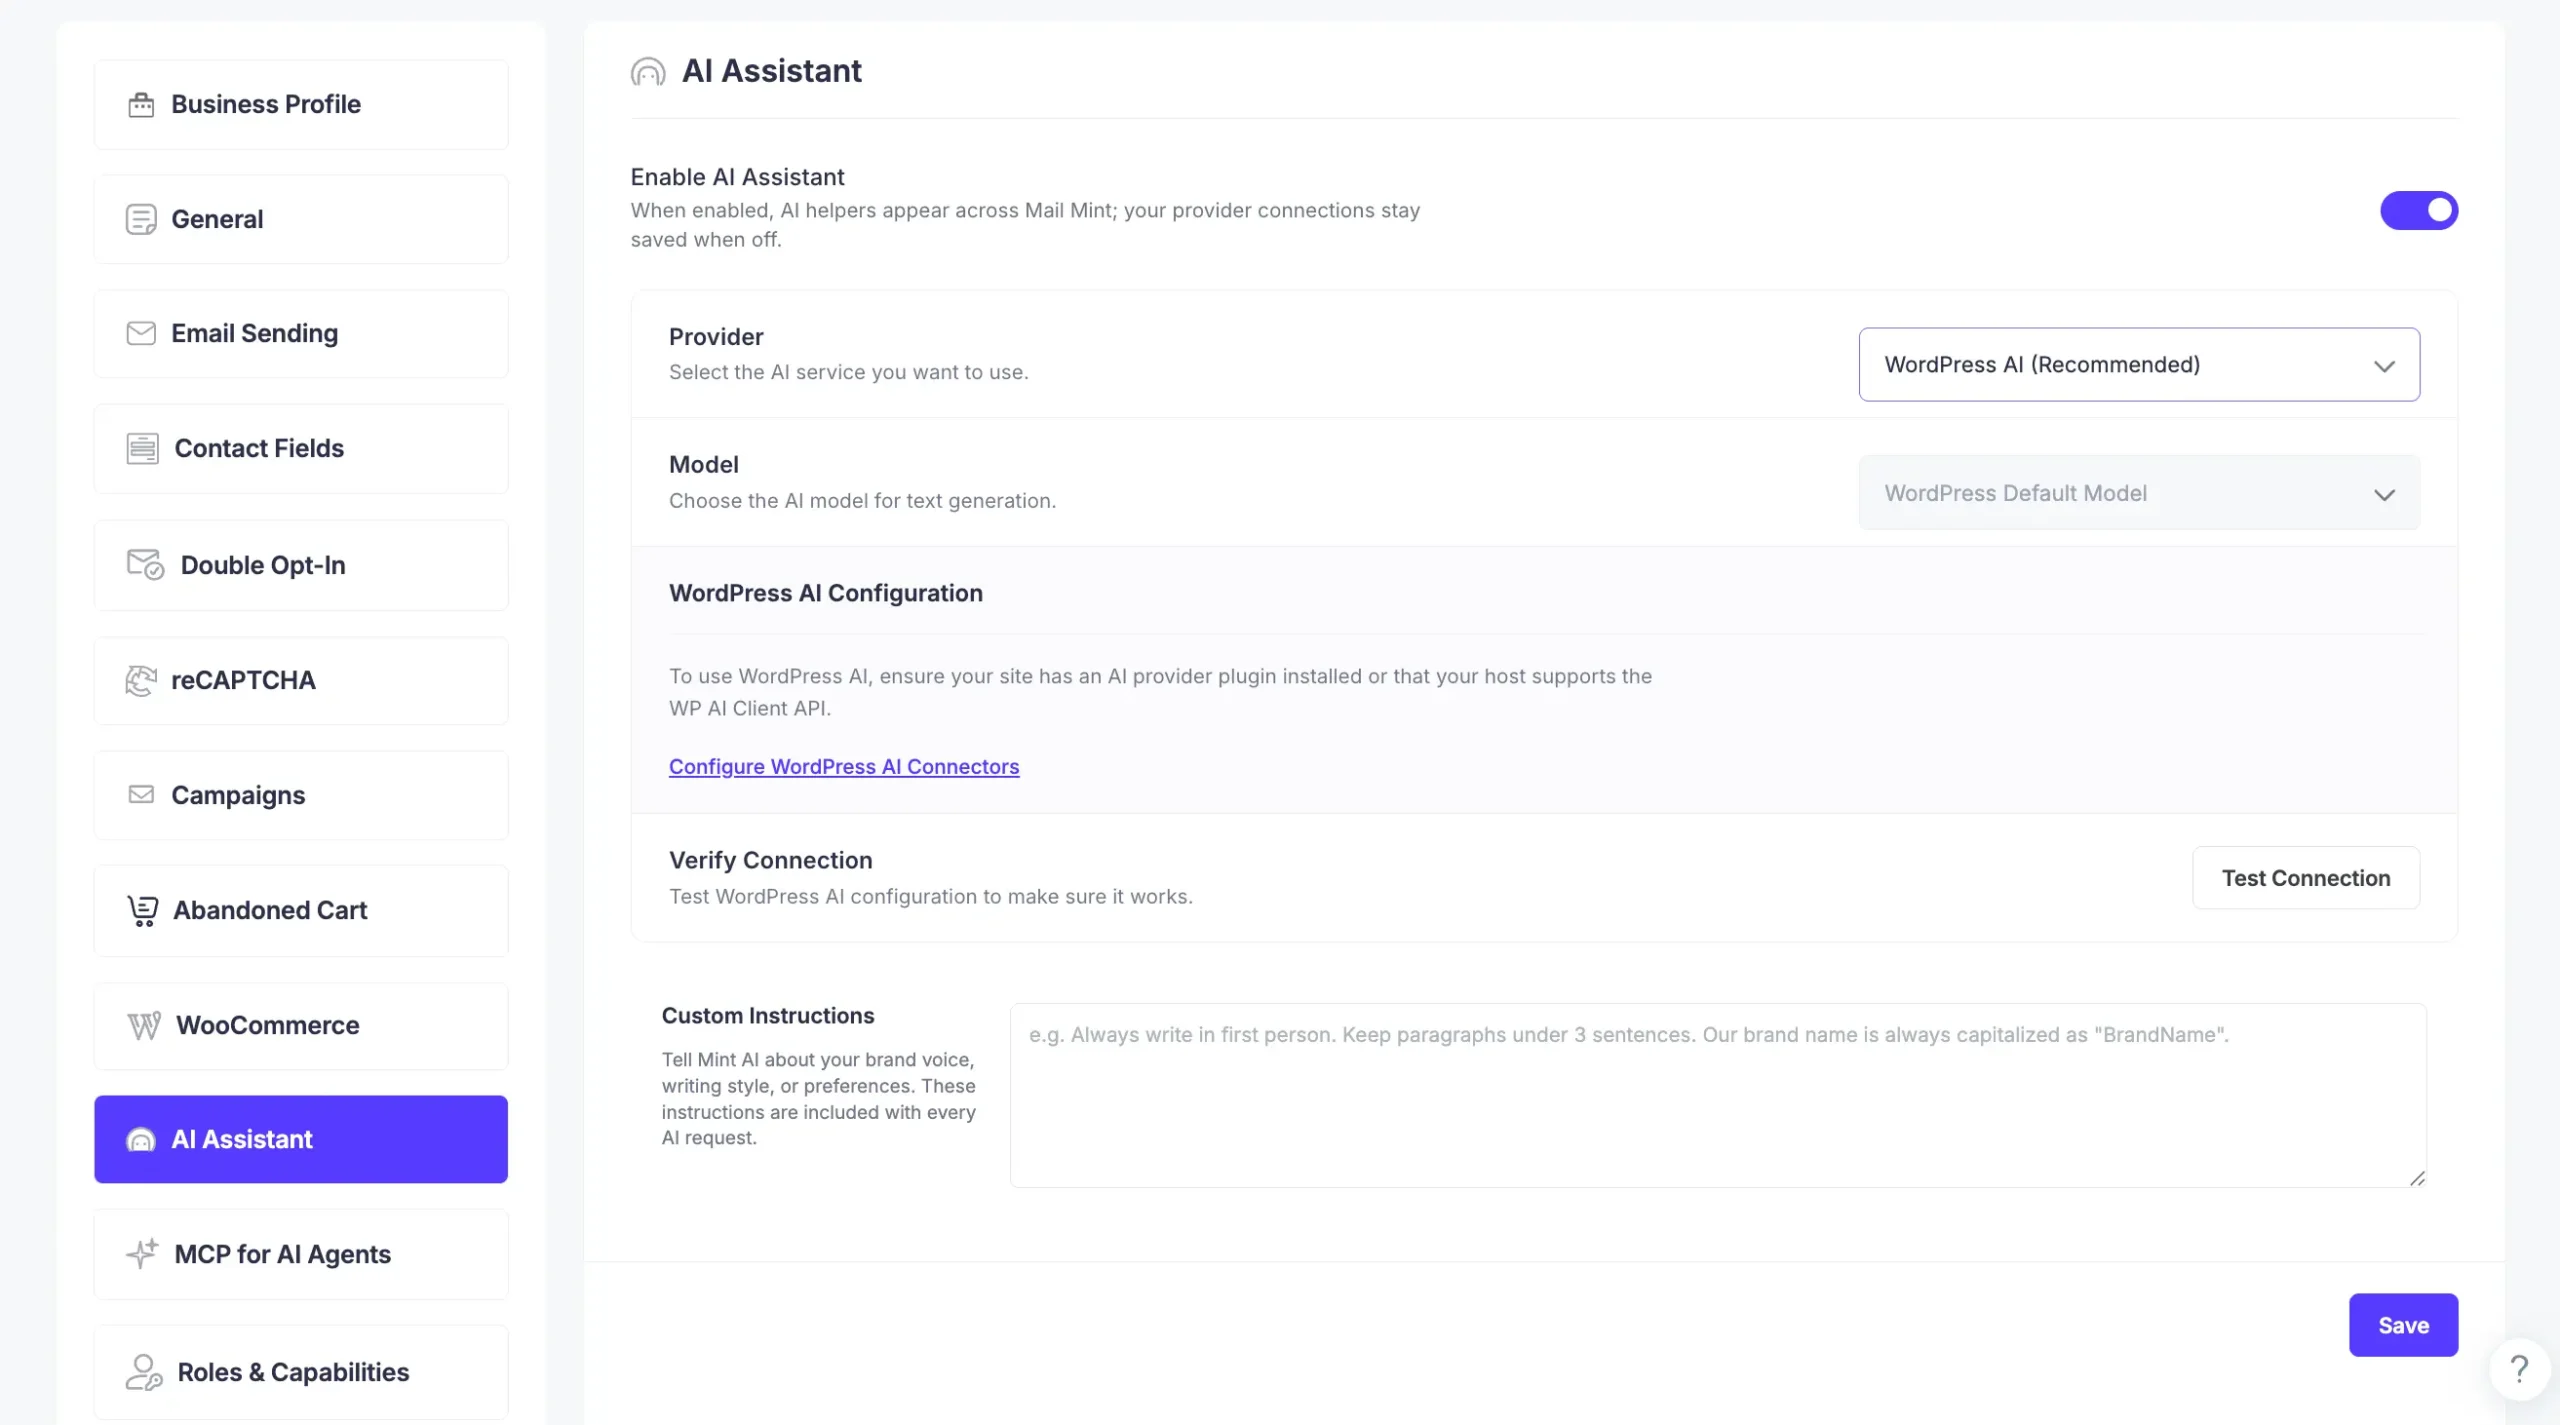
Once the toggle is on, the provider configuration fields appear below.
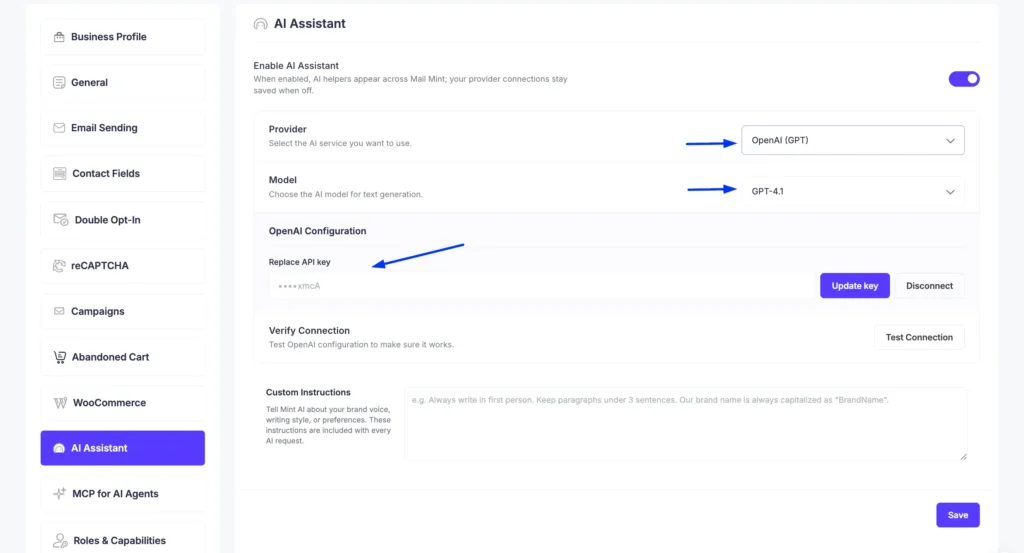
Use the Provider dropdown to select the AI service you want to use. The available options are:
WordPress AI (Recommended) — Uses the AI provider configured in your WordPress environment via the WP AI Client API. No separate API key required if your host or an installed plugin already supports it.
OpenAI — Connect using your own OpenAI API key to use GPT-4o and other ChatGPT-family models.
Anthropic Claude — Connect using your own Anthropic API key to use Claude 3 and other Claude-family models.
Google Gemini — Connect using your own Google Gemini API key, including the free tier option.
Step 3: Choose a Model
After selecting a provider, use the Model dropdown to choose the AI model for text generation.
If you selected WordPress AI, the model will default to WordPress Default Model, which uses whatever model your WordPress AI configuration provides.
For OpenAI or Google Gemini, select the specific model you want to use from the available options.
Once you’ve pasted the API key, simply click on “Save” and you will be all ready to go!
Step 4: Configure Your Provider
Depending on the provider you selected, additional configuration steps may appear.
WordPress AI
If you selected WordPress AI, a WordPress AI Configuration notice will appear:
“To use WordPress AI, ensure your site has an AI provider plugin installed or that your host supports the WP AI Client API.”
Click Configure WordPress AI Connectors to set up or review your WordPress AI connection.
OpenAI or Google Gemini
If you selected OpenAI or Google Gemini, an API Key field will appear. Paste the API key from your provider account. The key is stored securely in your WordPress database and masked after saving.
Google Gemini: Sign in at aistudio.google.com and create one under Get API key.
Tip: Make sure billing is active on your provider account. Most providers reject API requests from accounts without a valid payment method on file, even when the key looks correct.
Step 5: Verify the Connection
Click Test Connection under Verify Connection to confirm your setup is working. Mail Mint sends a small probe to your selected provider and displays a success or error message on screen.
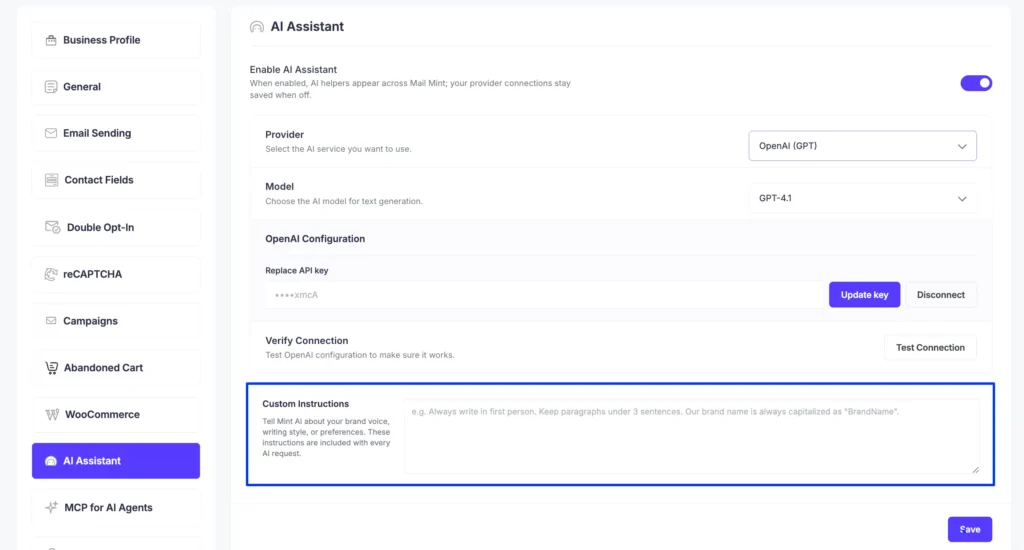
Step 6: Add Custom Instructions (Optional)
The Custom Instructions field lets you tell the AI about your brand voice, writing style, or any specific preferences. Whatever you add here is included with every AI request, helping the assistant produce more on-brand and consistent output.
Click Save in the bottom-right of the page. Your provider, model, API key, and custom instructions are stored together.