

To collect leads from an Elementor Form, you’ll need Elementor Pro and Mail Mint Pro installed and activated on your site.
Just follow this simple guide to learn how to integrate Elementor with Mail Mint.
Step 1 — Create or Edit Your Page
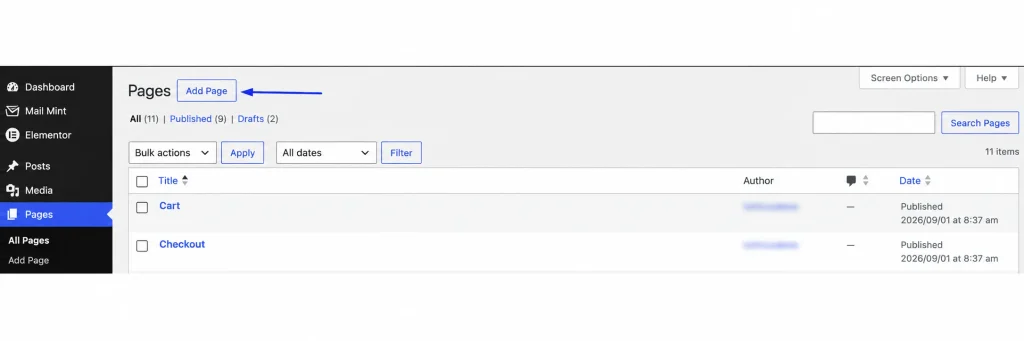
Start by navigating to your WordPress dashboard and selecting Pages. You can either click Add New to create a fresh page or select an existing one, then click Edit with Elementor to launch the editor.
Step 2 — Add the Form Widget
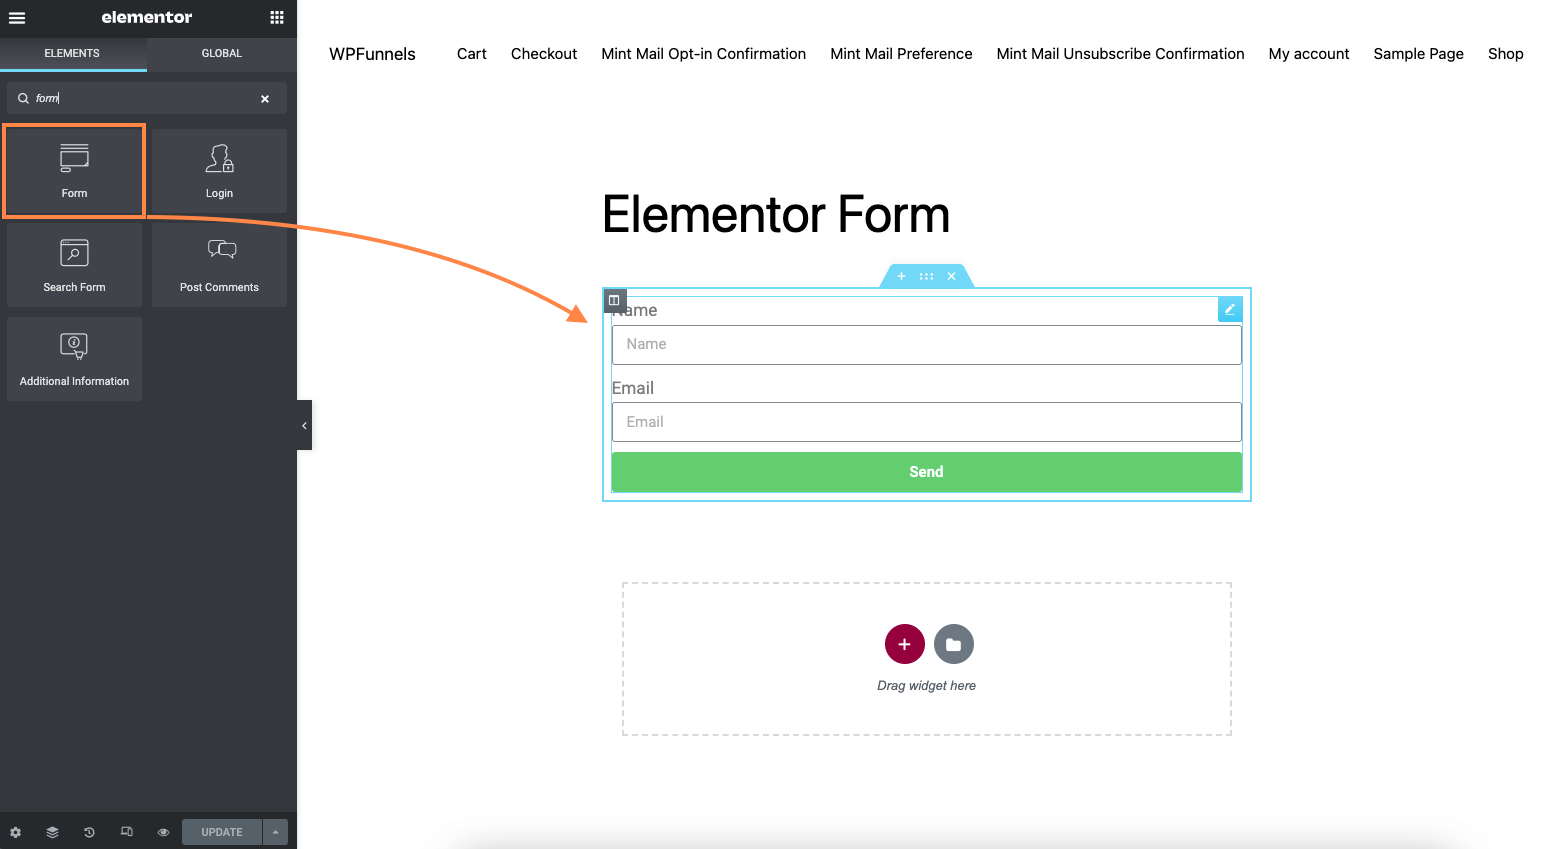
Drag the Form widget onto your page from the Elementor widget panel, or select an existing form widget already on the page. Add the fields you want to capture — at minimum, an Email field.
Step 3 — Configure Actions After Submit
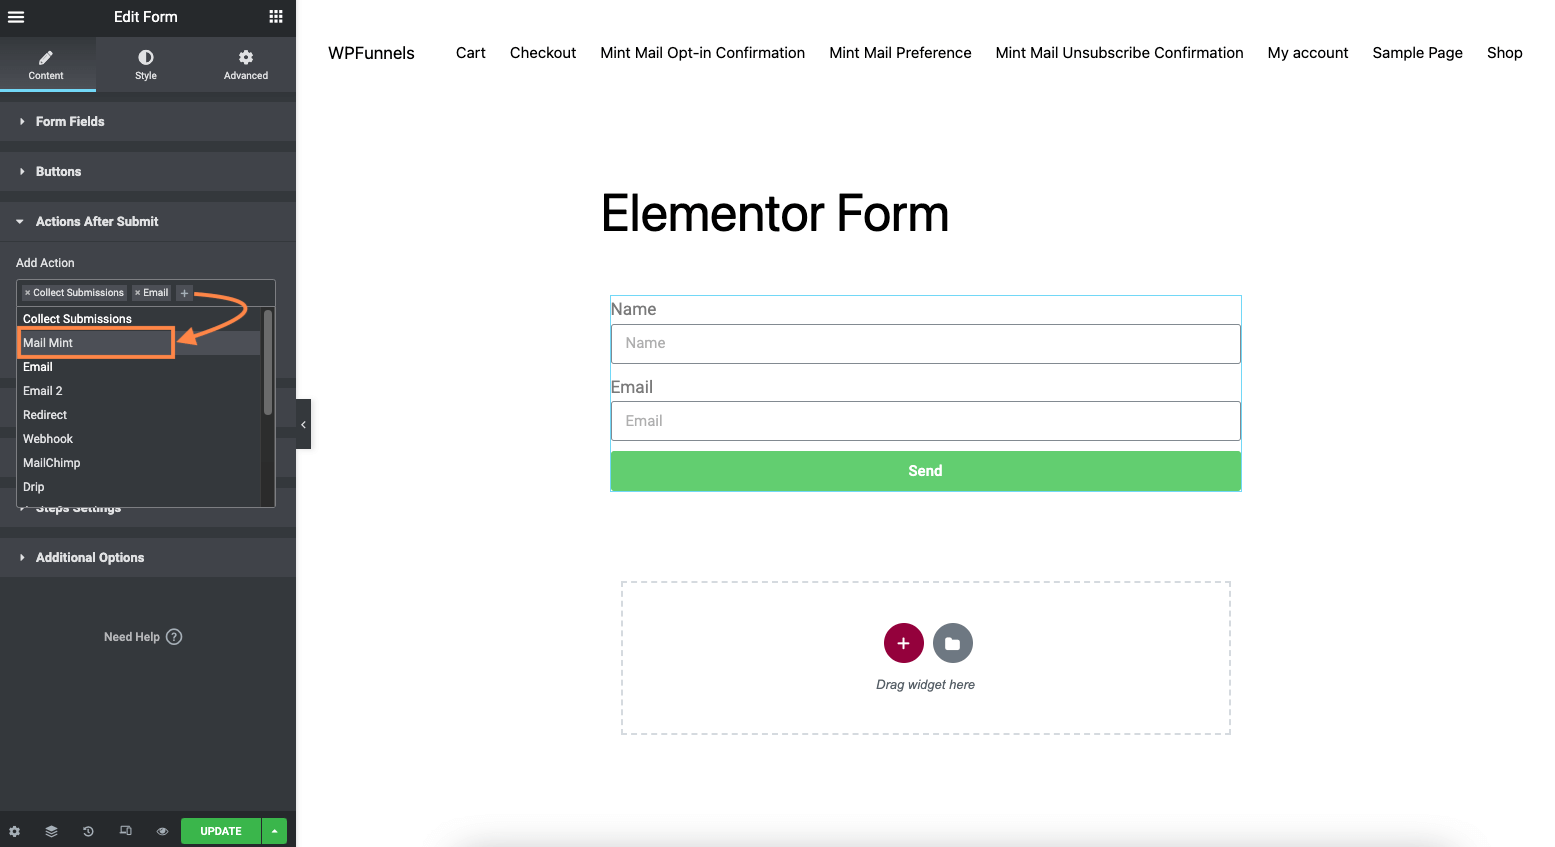
Once your form is designed, look at the settings panel on the left.
Locate the Actions After Submit section. Click the Add Action field (the ‘+’ icon). Select Mail Mint from the dropdown. This tells Elementor to send the form data to Mail Mint.
Step 4 — Map Your Mail Mint Fields
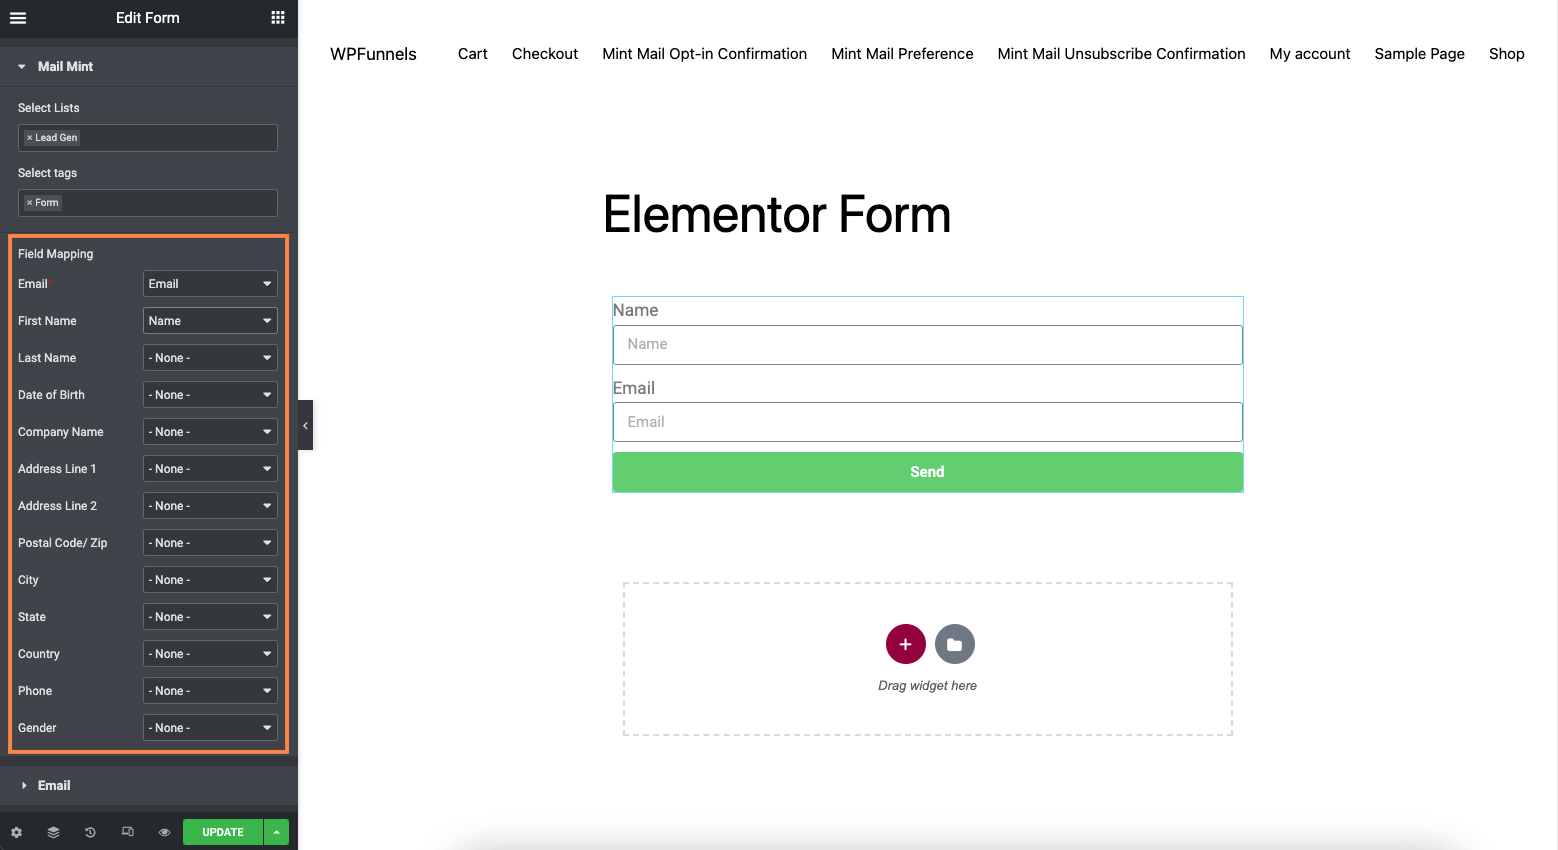
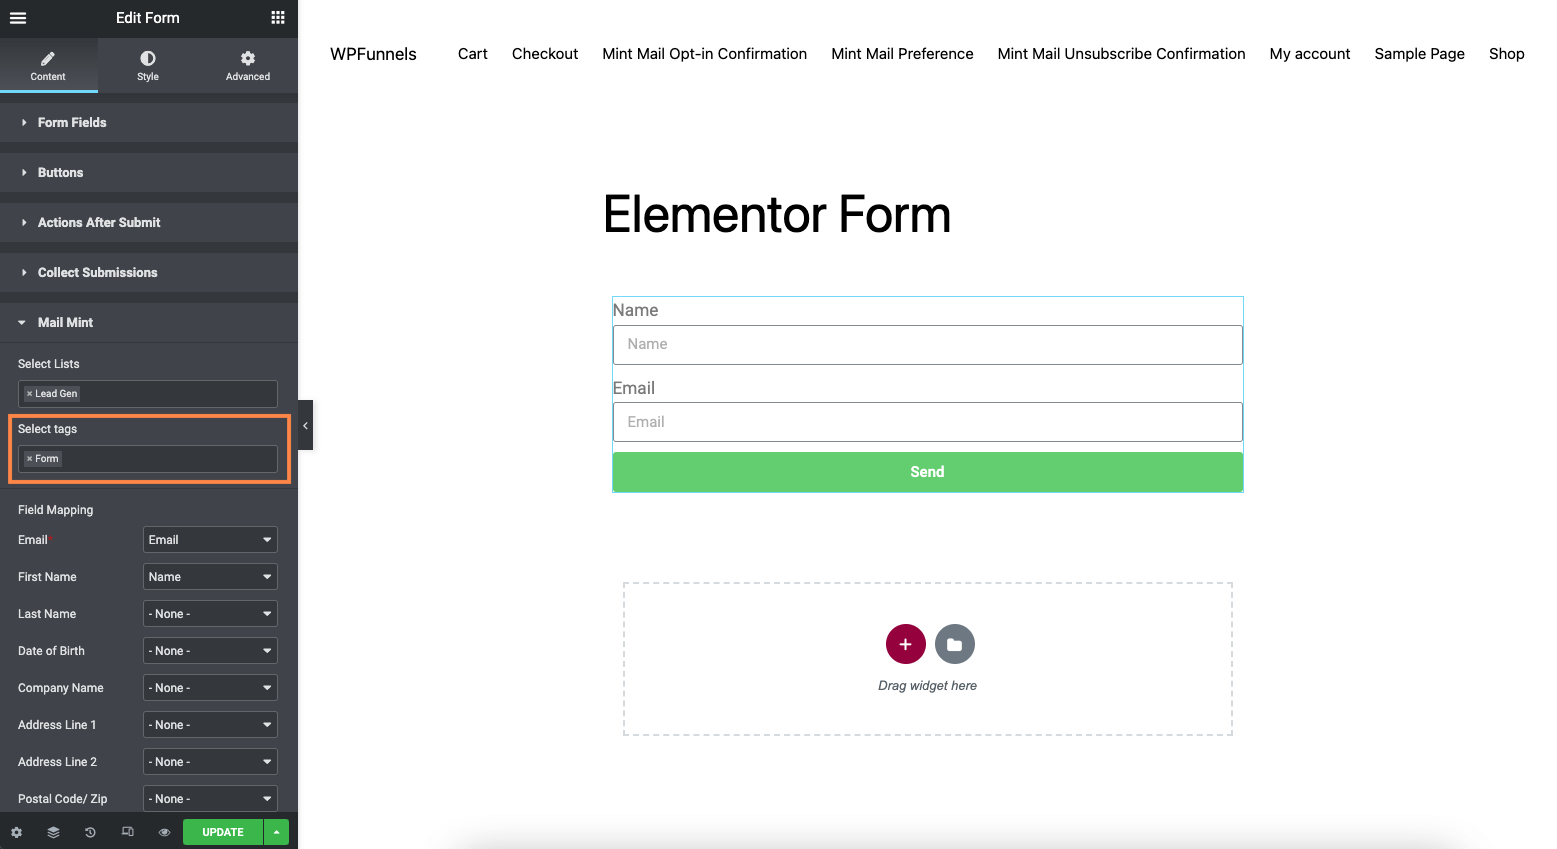
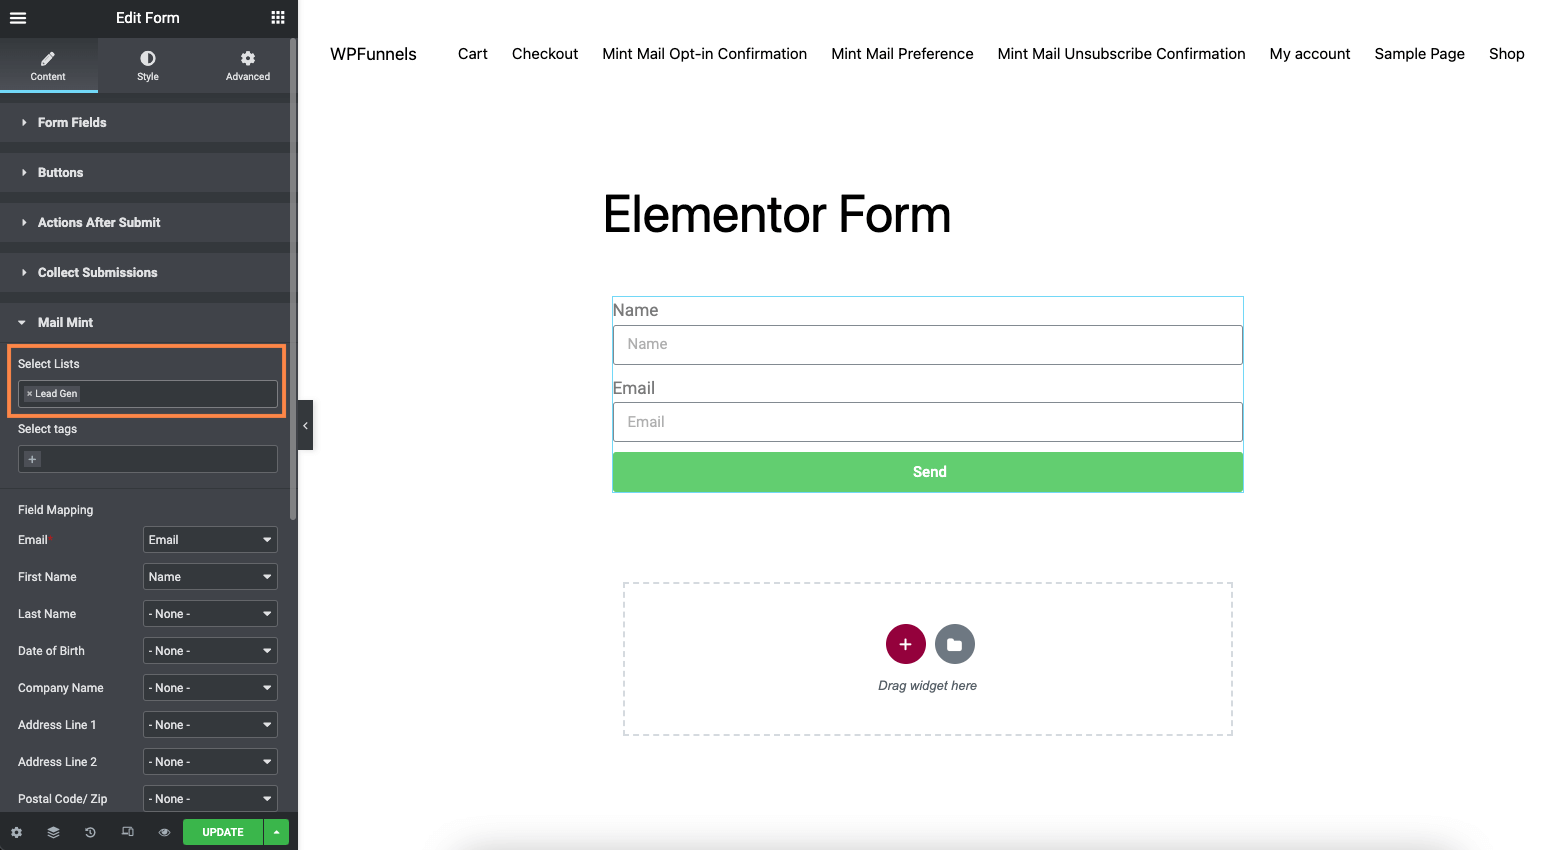
After adding the action, a new Mail Mint section will appear below “Actions After Submit.” Click it to expand it and configure:
- List: Select an existing List in Mail Mint to add the contact to.
- Tag: Select an existing Tag in Mail Mint to apply to the contact.
- Fields Mapping: Match your Elementor form fields to your Mail Mint fields (e.g., map the ‘Email’ form field to the ‘Email’ contact field).
Step 5 — Configure Advanced Options (Optional)
Mail Mint provides additional controls to manage your contact data:
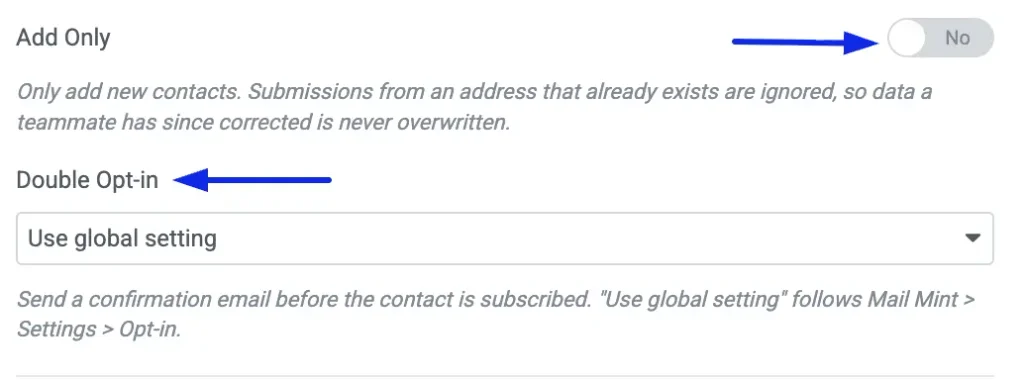
- Add Only: Enable this if you only want to create new contacts and prevent the form from updating existing contact information.
- Contact Status: Choose whether the new contact is added as Pending (to trigger a double opt-in confirmation email) or Subscribed (ready to receive campaigns with no additional confirmation).
Conditional Subscription Rules
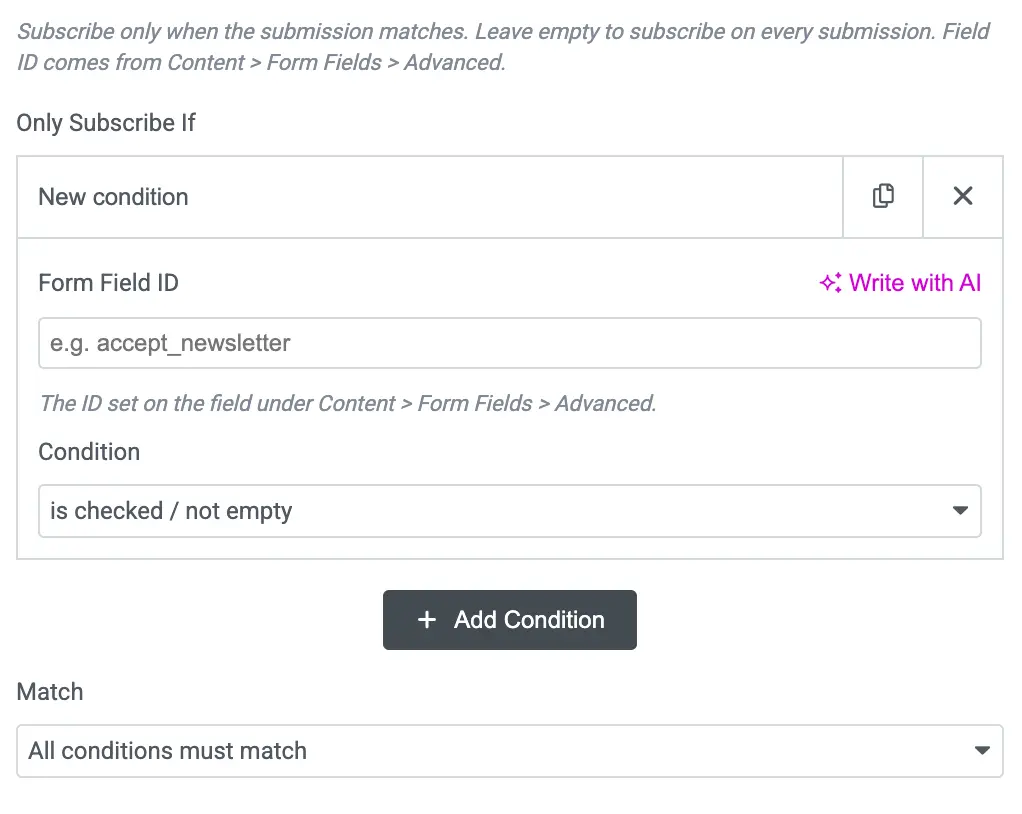
Mail Mint can also subscribe the contact only when the submission meets conditions you set — useful for things like an “accept newsletter” checkbox on a form that also collects other data.
Under Only Subscribe If, click + Add Condition. Leave this empty if you want every submission to subscribe the contact.
For each condition, configure:
- Form Field ID: The field ID set on the form field under Elementor’s Content > Form Fields > Advanced panel (e.g.
accept_newsletter). - Condition: The rule to apply — e.g. is checked / not empty.
Add multiple conditions if needed, then set Match to control how they combine:
- All conditions must match — the contact is only subscribed if every condition is true (AND logic).
Once you’ve mapped the fields and configured your preferences, click Update (or Publish) at the bottom of the Elementor panel to save your settings.
Now go ahead and fill out the Elementor Form for testing. You’ll see the lead added to your Mail Mint contacts.
